Making a magical Harry Potter wand has always fascinated me. I remember the first time I made one at home using a simple DIY Harry Potter wand guide. I gathered basic supplies like sticks, hot glue, and paint. Following easy steps, I transformed an ordinary stick into a magical wand.
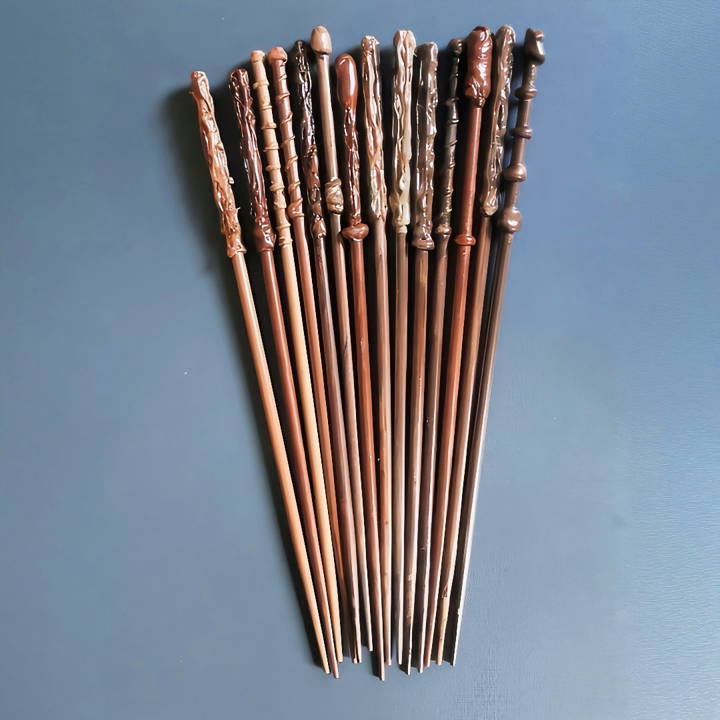
This project was not only fun but also gave me a sense of accomplishment. Each twist of the glue and stroke of paint brought the wand to life. If you enjoy Harry Potter and crafting, this guide will help you make your own wand.
Try it out, and let these steps guide you in making a unique and magical DIY wand today.
Introduction to Wand Lore
Wand lore is a fascinating aspect of the wizarding world, steeped in history and magic. A wand in the Harry Potter series is not just a tool but a complex embodiment of a wizard's personality and abilities. Let's delve into this enchanting subject in a way that's easy to understand and full of helpful insights.
The Essence of a Wand
At its core, a wand is a magical instrument through which a wizard or witch channels their magical powers. It's made of wood and contains a magical substance at its core. The combination of wood type and core material gives each wand its unique properties.
Wood Types
Different woods are used to make wands, each with its own characteristics. For example:
- Oak: Known for strength and reliability.
- Willow: Preferred for its healing properties.
- Hawthorn: Good for spells requiring precision.
Core Materials
The core of a wand holds the essence of its magic. Common core materials include:
- Phoenix Feather: Produces the greatest range of magic.
- Dragon Heartstring: Powerful, with a wide range of spells.
- Unicorn Hair: Consistent magic, hard to turn to the dark arts.
The Wand Chooses the Wizard
This phrase signifies that wands have a will of their own and can ‘choose' their owner. The wand's allegiance is important, as it must resonate with the wizard's magical abilities for optimal performance.
Compatibility
A wand's loyalty can shift, especially if won in a duel. The bond between a wizard and their wand is sacred, often resulting in stronger magic when there's a strong connection.
Understanding wand lore deepens the bond between a wand and its wielder. This knowledge is crucial for wizards and enriches our stories. A wand is a magical partner, not just a tool.
Materials You'll Need and Why:
- Plain Printer Paper: This will serve as the base of your wand, making it easily moldable and accessible.
- Hot Glue Gun & Hot Glue Sticks: Essential for structuring and designing your wand with personalized details.
- Glue Stick: To secure your paper base, ensure the shape of your wand remains intact.
- Wooden Skewers or Pencils: These will be used to reinforce the wand, giving it the necessary structural integrity.
- Scissors: To tailor the length of your wand and adjust its shape as desired.
- Paintbrush & Palette (or a substitute like a paper plate): For the artistic endeavor of painting and detailing your wand.
- Paints (Brown, Black, and Metallic Gold recommended): These colors are suggested for their versatility in making a wand that looks as though it's been conjured straight out of the wizarding world.
Step by Step Instructions
Make your own magical harry potter wand at home with our easy, step-by-step DIY instructions. Perfect for fans and crafters alike!
Step 1: Forming Your Wand's Base
Begin by rolling your piece of printer paper into a cone shape. This will be the foundation of your wand. Tight rolls make for slimmer, longer wands, while looser rolls yield a thicker wand. Once satisfied, secure the shape using a glue stick along the edge.
Step 2: Trim and Tailor
Examine your wand's length and tip. If the tip is too sharp or the length isn't as you desire, now's your chance to adjust with scissors. Remember, your wand, your rules!
Step 3: Reinforce the Structure
Your wand needs a solid core to withstand the dueling and spell-casting it will encounter! Insert wooden skewers or pencils inside the paper tube for rigidity. I often incorporate small notes or symbolic items as the “core” to add a personal, magical touch.
Step 4: Design with Hot Glue
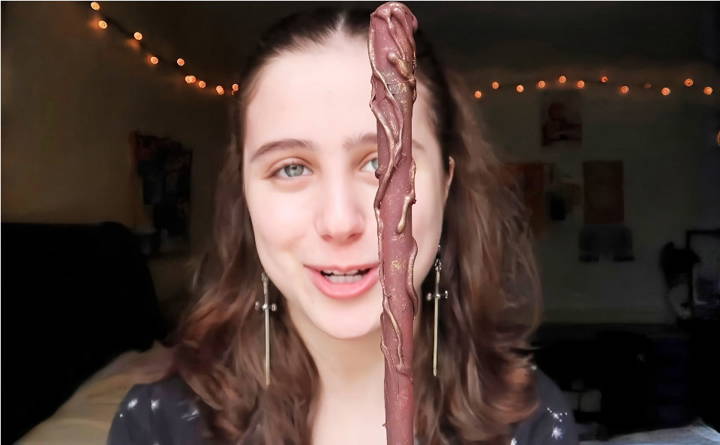
With your wand's base ready, use your hot glue gun to add designs along the wand. This could be anything from vines and symbols to entirely unique patterns. Hot glue not only adds to the visual appeal but also increases the wand's strength.
Step 5: Painting Your Masterpiece
Once the glue has dried, it's time to paint. Start with a base coat, likely in brown or black, then add details such as gold for an enchanted finish. Don't be afraid to experiment with colors and techniques to best reflect your wizarding persona.
Step 6: The Final Touches
After the base paint dries, use dry brushing to highlight details and give your wand a truly magical look. This might include accentuating raised designs with metallic paint or adding a gradient effect.
Tips for a Successful DIY Wand
- Patience Is Key: The drying times for glue and paint are crucial to making a durable and visually stunning wand.
- Personal Touch: Infuse your wand with elements that hold meaning to you. This could be through the colors chosen, the design, or the items used as the core.
- Experiment: No two wands should be the same. Feel free to explore different materials and methods.
Personalization Tips
Making your own Harry Potter wand is not just about replicating what you see on screen; it's about expressing your individuality. Here are some tips to personalize your wand and make it uniquely yours:
- Choose Your Wood Wisely The wood you select for your wand can reflect your personality. Are you brave and bold like oak or wise and flexible like willow? Pick a wood that resonates with you.
- Carve Your Mark Personalize your wand by carving symbols, runes, or initials into the handle. This not only adds a personal touch but also makes your wand one-of-a-kind.
- Select Your Core Just like the wood, the core of your wand should represent you. Whether it's a strand of your own hair, a feather from a bird you admire, or a piece of heartstring from a beloved instrument, choose a core that has personal significance.
- Color It Your Way Stain or paint your wand in colors that you feel drawn to. You can even add patterns or designs that have a special meaning to you.
- Accessorize: Add embellishments to your wand. This could be anything from a leather grip for comfort or crystals for an added mystical look.
- Make It Functional If you're crafty with electronics, consider adding a small LED light to the tip for a luminescent effect or incorporate a sound chip to make your wand interactive.
- Tell Your Story: Your wand can tell a story. Perhaps it's made from a tree you used to climb as a child or contains a core from a place you've visited. Let your wand be a storyteller of your life's adventures.
The beauty of DIY is that there are no rules. Let your creativity flow, and craft a wand that's as unique as you are.
Wand Customization for Different Characters
In the wizarding world, each wand is unique to its user. Whether you're into Harry Potter or Hogwarts Legacy, customizing a wand can be magical. Here's how to match a wand to your favorite characters with simple guidelines.
- Harry Potter's Wand Harry's wand is made of holly, a wood known for its protective properties, and contains a phoenix feather core. To customize a wand like Harry's, choose a dark wood and carve it to a length of about 11 inches. For a personal touch, add a series of small, straight carvings to represent the challenges he's overcome.
- Hermione Granger's Wand Hermione's wand is vine wood with a dragon heartstring core, symbolizing her growth and connection to magical creatures. For Hermione's wand, select a lighter wood and aim for a slightly longer wand, around 15 inches, with vine-like carvings to reflect her intelligent and resourceful nature.
- Ron Weasley's Wand Ron's second wand, which is more attuned to him, is made of willow, good for healing and protection, and has a unicorn hair core. To mimic Ron's wand, choose a wood with a lighter hue and incorporate spiral patterns to signify his journey from insecurity to strength.
- Draco Malfoy's Wand Draco's wand is hawthorn wood with a unicorn hair core, fitting for his complex character. To make a wand like Draco's, opt for a pale wood and a straight, sleek design, about 10 inches long, with a few sharp lines to represent his sharp wit and hidden depth.
- Albus Dumbledore's Wand (The Elder Wand) The Elder Wand, one of the Deathly Hallows, is an exceptionally powerful wand. It's made of elder wood with a thestral tail hair core. To craft a wand inspired by the Elder Wand, use a darker wood and carve it with distinctive knot patterns and an imposing presence befitting the most powerful wand in existence.
Crafting wands inspired by iconic characters pay homage to their stories and add their spirit to your work.
Troubleshooting Common Wand Issues
When crafting and using your DIY Harry Potter wand, you might encounter some issues. Here's a helpful guide to troubleshooting common problems, ensuring your wand is always in top shape.
Wand Tip Not Staying Attached
- Solution: If the tip of your wand keeps falling off, try using a stronger adhesive like epoxy resin. Allow it to cure fully before handling.
Paint or Stain Not Adhering Properly
- Solution: Ensure the wood is sanded smoothly and cleaned of any dust before applying paint or stain. Use a primer if necessary to help the color stick.
Wand Becomes Warped or Bent
- Solution: Store your wand in a cool, dry place away from direct sunlight. If it's already bent, gently heat the wood and reshape it before letting it cool.
Decorative Elements Falling Off
- Solution: Secure any loose decorative elements with a dab of hot glue or super glue. Be careful not to use too much, as it can be visible once dried.
FAQs About DIY Harry Potter Wand
Discover common faqs about DIY harry potter wands, from materials to crafting tips, and make your own magical wand step-by-step!
Start by sanding down one end of the dowel to create a rounded tip. You can taper the wand slightly to resemble those in the movies. If you’re using a stick, make sure it’s straight and sand down any rough edges. For a more detailed design, use a hot glue gun to draw patterns along the wand.
Yes, you can! If you don’t have a hot glue gun, you can wrap tape around the handle area or use clay to form a handle. For the body of the wand, you can use chopsticks or tree bark pencils and decorate them with paint pens or washi tape in colors representing the Hogwarts houses.
After painting your wand with a base color, you can add light and dark streaks to give it texture. You can also use a hot glue gun to make swirly designs or attach gemstones for a magical touch. Feel free to get creative with glitter, paint, and decorative tape to make your wand unique.
To ensure durability, apply several layers of sealer over the paint and any glued areas. This will protect the wand from chipping and wear. If you’ve used clay or tape for the handle, make sure it’s securely attached and covered with a protective layer as well.
To personalize your wand, you can incorporate colors and elements associated with your favorite character or Hogwarts house. For example, if you're a fan of Gryffindor, you might choose a red and gold color scheme. You can add lion-themed charms or house crests using small printouts and mod podge to seal them onto the wand. If you admire Professor Snape, a sleek, black wand with a silver tip could be your choice, symbolizing his mysterious and complex character. Use acrylic paint pens for precise details or washi tape for easy stripes or patterns. Remember, the wand is a reflection of the wizard, so let your imagination guide you!
Conclusion
Making a DIY Harry Potter wand is simpler than you think. Start now and enjoy the magic of making something yourself!


