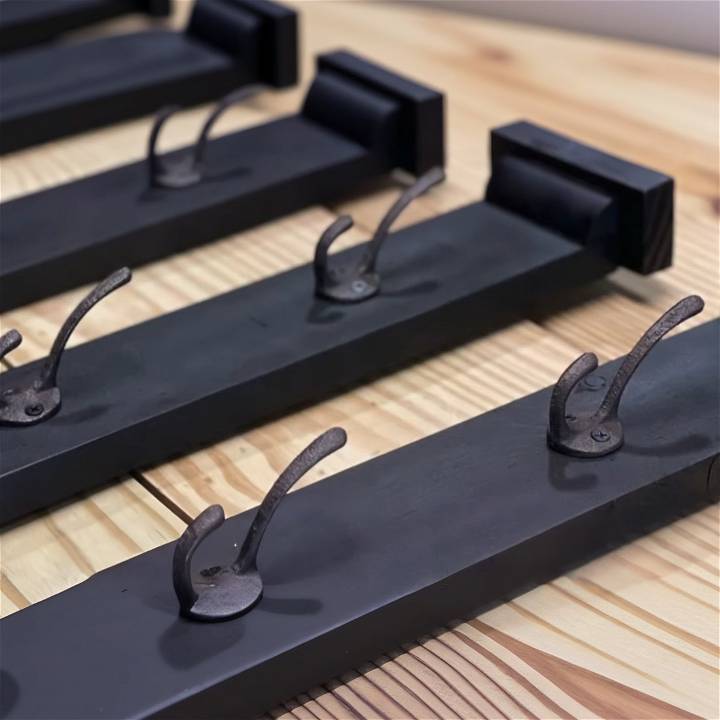
I decided to make a DIY hat rack because my hats were always getting squished in my closet. I found some old wood and hooks at a yard sale. It seemed like a good project for the weekend. With just a few simple tools, I was ready to start. I remember feeling excited to make something useful.
The process was easier than I thought. I measured, cut, and then screwed the hooks onto the wood. Hanging it on the wall was the final step. Seeing my hats neatly organized on the rack I made was really satisfying. It was a small project, but it made a big difference in keeping my room tidy.
I hope sharing this inspires you to try making your own DIY hat rack. It's a simple way to solve a common problem. Plus, you'll feel proud every time you look at it. Start gathering your materials and give it a go!
How to Make a Hat Rack - Step by Step Guide
Learn how to make a hat rack with our step-by-step guide. Easily make a stylish storage solution for your caps at home.
Materials Needed:
- Wood (scrap wood works great)
- Cast iron coat hooks (or any durable hooks)
- Sandpaper
- Wood glue
- Nails
- Paint or urethane (optional for finishing)
- A saw (if wood needs to be cut down to size)
- Respirator mask (for painting)
- Spray paint (optional for hooks and screws)
Step by Step Instructions
Learn how to make a simple hat rack with this easy DIY tutorial below:
1. Gather and Cut Your Wood: Start by collecting the wood you plan to use. If the pieces are not the same size, cut them down so they are uniform in width. This ensures a neat, tidy look for the finished product.
2. Sand the Wood: Once your wood is the right size, sand down the edges and surfaces to remove any rough areas. This not only prepares the wood for painting or staining but also prevents splinters.
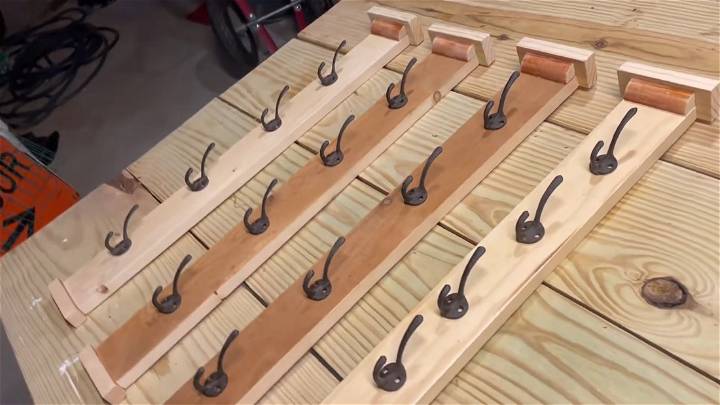
3. Plan Your Design: Think about how many hats you want to hang and how much space you have. Arrange your coat hooks vertically along the wood in a way that maximizes space and access. It's helpful to lay out your design before attaching anything.
4. Attach Hooks: After planning where your hooks will go, it's time to attach them to the wood. Depending on your hooks, you may need to drill small pilot holes. Then, screw the hooks in place firmly.
5. Assemble Your Hat Rack: If you're adding decorative elements like a wood trim or a painted finish, now is the time to add those. Glue and nail any decorative wood pieces in place according to your design plan.
6. Finish the Wood: If desired, paint or apply a urethane finish to your wood. This not only protects the wood but can also add a cohesive look to the hat rack, especially if it's going to be a focal point in your room.
7. Mount the Rack: Decide where you want to place your hat rack. If attaching it to a wall, ensure you use appropriate fixtures for your wall type (drywall screws, wall anchors, etc.). It may be helpful to attach a wire to the back of the rack for easy hanging.
8. Hang Your Hats: Once your hat rack is securely mounted, start organizing your hats. This system allows for easy access while keeping your space tidy and your hats in shape.
Video Tutorial
For a step-by-step visual guide, watch the easy hat rack tutorial on YouTube.
It pairs well with this written guide, offering a practical demonstration of the discussed techniques in an accessible and straightforward manner.
Building your own hat rack is not only practical but also a rewarding DIY project. By following these steps, you can make a unique storage solution tailored to your space and needs.
Customization Ideas
One of the best aspects of a DIY project is the ability to customize it to fit your personal style and needs. Here are some ideas on how you can customize your DIY hat rack:
Choose Your Material
The material you choose can greatly influence the look and feel of your hat rack. For a rustic look, consider using reclaimed wood. For a modern, sleek design, metal or acrylic could be a great choice.
Paint or Stain
Adding a coat of paint or stain can completely transform your hat rack. You could match the color to your room's decor, or use a bold color to make it a statement piece. If you prefer a natural look, a clear varnish can enhance the wood's natural grain.
Add Decorative Elements
Consider adding decorative elements to your hat rack. This could be anything from vintage hooks for a retro feel, to LED lights for a modern touch.
Adjust the Size
Customize the size of your hat rack to fit your space and needs. If you have a large hat collection, consider making a larger rack. If you're short on space, a smaller, more compact design might be best.
The key to a successful DIY project is making it your own. Don't be afraid to get creative and add personal touches to your hat rack.
Troubleshooting Guide
When working on a DIY hat rack, you might encounter some challenges. Here's a guide to help you troubleshoot common issues:
Problem: Wood Splitting
Solution: If the wood splits when you're screwing it together, try pre-drilling the holes. This reduces the pressure on the wood and can help prevent splitting.
Problem: Uneven Hat Rack
Solution: If your hat rack isn't level, check to make sure all of your measurements are accurate. You might need to adjust some pieces. A level tool can be very helpful here.
Problem: Paint or Stain Not Adhering
Solution: If paint or stain isn't adhering well to the wood, it might not have been prepped properly. Make sure the wood is clean, dry, and sanded before applying paint or stain.
Problem: Hat Rack Not Stable
Solution: If your hat rack is wobbly or unstable, double-check all of your connections to make sure they're tight. You might need to add additional support, like brackets or crossbeams.
Patience and problem-solving are part of the DIY process. Don't get discouraged if things don't go perfectly the first time.
Maintenance Tips
Maintaining your DIY hat rack is crucial to ensure its longevity and keep it looking its best. Here are some tips on how to care for and maintain your hat rack:
Regular Cleaning
Dust and dirt can accumulate on your hat rack over time. Use a soft cloth or a duster to gently clean your hat rack regularly. Avoid using harsh chemicals that could damage the material.
Check for Wear and Tear
Regularly inspect your hat rack for any signs of wear and tear. This could include loose screws, chipped paint, or splintering wood. Address these issues promptly to prevent further damage.
Repaint or Restain as Needed
Over time, the paint or stain on your hat rack may start to fade or chip. Consider repainting or restaining your hat rack as needed to keep it looking fresh and new.
Avoid Overloading
While it might be tempting to hang all your hats on your DIY hat rack, avoid overloading it. Too much weight can cause the rack to become unstable or even break.
Regular maintenance can help keep your DIY hat rack in the best possible condition for years to come.
FAQs About DIY Hat Rack
Discover answers to common questions about DIY hat racks. Learn how to make your own hat storage solution with our helpful FAQ guide.
What type of wood is best for a hat rack?
The type of wood you choose depends on your personal preference and the look you're going for. Hardwoods like oak or maple are durable and can support more weight, but softwoods like pine are easier to work with and less expensive.
Can I use reclaimed wood for my hat rack?
Absolutely! Reclaimed wood can add a rustic charm to your hat rack. Just make sure it's clean and free of pests before you start working with it.
What kind of paint or stain should I use?
This depends on the look you're going for. If you want a natural look, consider using a wood stain. If you want a more colorful look, paint could be a better option.
How do I attach the hat rack to the wall?
There are several ways to attach your hat rack to the wall. You could use brackets, wall anchors, or even adhesive strips for lighter racks. Always make sure to attach it to a stud in the wall for maximum stability.
Can I add hooks to my hat rack?
Yes, adding hooks to your hat rack can provide additional storage space. You can find a variety of hooks at your local hardware store.
How many hats can the rack hold?
The number of hats your rack can hold depends on the size and design of your rack. A simple rule of thumb is to allow about 4-5 inches of space per hat.
Can I customize my hat rack?
Absolutely! Your DIY hat rack can be customized to fit your personal style. You can choose different materials, add paint or stain, or even add decorative elements like vintage hooks or LED lights.
What tools do I need to build a hat rack?
Common tools for this project include a saw, drill, screwdriver, hammer, and sandpaper. You may also need a level to make sure your hat rack is straight.
What safety precautions should I take?
Always wear appropriate personal protective equipment, like safety glasses and work gloves. Be careful when using power tools, and keep your workspace clean and organized.
What if my hat rack doesn't turn out as expected?
That's okay! DIY projects are a learning experience. Don't be afraid to make mistakes and try again. Remember, the most important thing is that you're making something with your own two hands.
Conclusion:
In conclusion, making a DIY hat rack is a fun and practical project for your home. By following the steps outlined in this article, you can easily organize and display your hats in a stylish and efficient way.


