Are you tired of paying for cable or streaming services just to watch your favorite local channels? Making a DIY HDTV antenna can help you access free, high-definition television, and it's a practical project that can be done with affordable materials. In this tutorial, you'll learn how to build your own DIY long-range HDTV antenna, covering everything from understanding how antennas work to assembling a design that can pull in channels from far away. By the end of this guide, you'll have a functional, cost-effective HDTV antenna ready for installation.
Understanding How an HDTV Antenna Works
Before jumping into the DIY process, it's helpful to understand how an HDTV antenna works. Essentially, television antennas capture broadcast signals transmitted from television stations and convert these signals into sound and picture for your TV. HDTV antennas are designed specifically for high-definition channels, often operating on VHF (Very High Frequency) and UHF (Ultra High Frequency) bands.
Key Concepts to Know
- Signal Frequency: Television signals are broadcast over the airwaves at specific frequencies. Most HDTV antennas need to capture both VHF and UHF frequencies to receive a broad range of channels.
- Signal Strength and Range: The range of an antenna depends on the signal strength and the quality of the antenna. Buildings, trees, and hills can interfere with signal reception, so positioning is essential.
- Directional vs. Omnidirectional: Antennas can be directional, focusing on signals from a specific direction, or omnidirectional, capturing signals from multiple directions. Long-range antennas are typically directional for stronger signal focus.
- Gain: Measured in decibels (dB), antenna gain indicates the antenna's strength in pulling in a signal. The higher the gain, the better the reception for distant channels.
Why Make Your Own HDTV Antenna?
Making a DIY HDTV antenna offers several benefits:
- Cost Savings: Many HDTV antennas are expensive. By building your own, you save on costs while customizing the design for your needs.
- Personalization: You can adjust the size, materials, and shape to optimize reception.
- Sustainability: DIY antennas often use common, recyclable materials, making them eco-friendly.
Gathering Materials and Tools
For this project, you'll need affordable, readily available materials. Here's what you'll need to get started:
Materials
- Coaxial Cable: Essential for connecting your antenna to the TV. Ensure it has an F-type connector, which is compatible with most televisions.
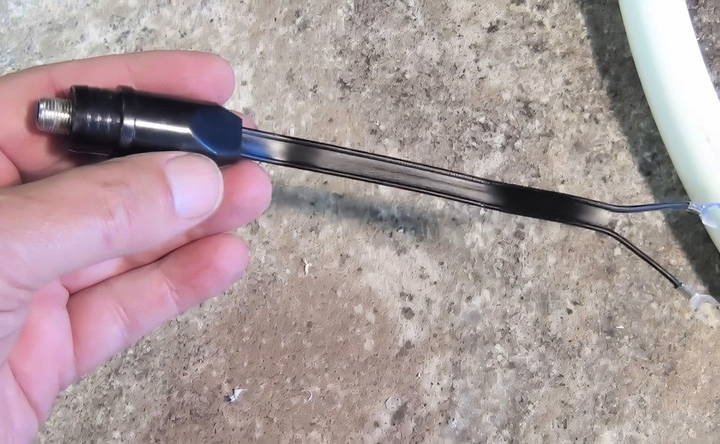
- Balun Transformer (300 to 75 ohm): This small device converts the signal from the antenna's wires to a coaxial cable.
- Copper Wire or Metal Coat Hangers: For the antenna elements, copper wire works best, but metal coat hangers are a practical substitute.
- Wooden Board: Acts as the base for the antenna structure. A board around 1.5 feet long should be enough.
- Screws or Nails: Needed to secure the wire or coat hangers in place on the board.
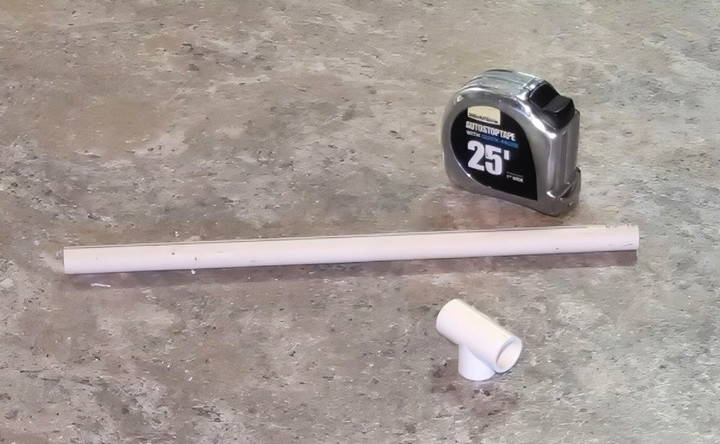
- PVC Pipe: Optional, for building a mounting structure if you plan to install the antenna outdoors.
- Reflector Material (Aluminum Foil or Metal Mesh): Placed behind the antenna to focus the signal and improve range.
Tools
- Drill and Drill Bits: For building holes in the board.
- Wire Cutters/Strippers: For shaping and preparing the copper wire or coat hangers.
- Screwdriver: For tightening screws and assembling the parts.
- Measuring Tape: To ensure accuracy in measurements.
- Electric Tape: For securing connections.
Step by Step Instructions
Learn to build and install a DIY HDTV antenna with our step-by-step guide. Optimize for all areas and troubleshoot common issues effectively.
Step 1: Design and Measurements
Before starting, it's crucial to decide on the design of the antenna. The bowtie or “butterfly” design is popular due to its effectiveness for long-range signals. It involves building several V-shaped elements spaced apart on a central wooden board.
- Determine the Length of Elements: Measure and cut four 12-inch pieces of copper wire or coat hangers. These will form the "V" shapes that capture the signal.
- Plan the Spacing: Space the elements about 5 inches apart on the wooden board to maximize UHF signal capture.
Step 2: Preparing the Elements
- Make the “V” Shape: Bend each 12-inch wire or coat hanger into a "V" shape. Each side should be around 6 inches long.
- Attach to the Board: Drill holes where you plan to attach the "V" elements. Insert screws or nails at each bend of the "V" to secure it to the board.
- Repeat for All Elements: Place each V-shaped element at 5-inch intervals along the board.
Step 3: Adding the Balun Transformer
- Position the Balun: Attach the balun transformer in the center of the antenna. Connect each side of the transformer to the top and bottom “V” elements using the screws.
- Secure Connections: Wrap electrical tape around the connections for insulation and protection from interference.
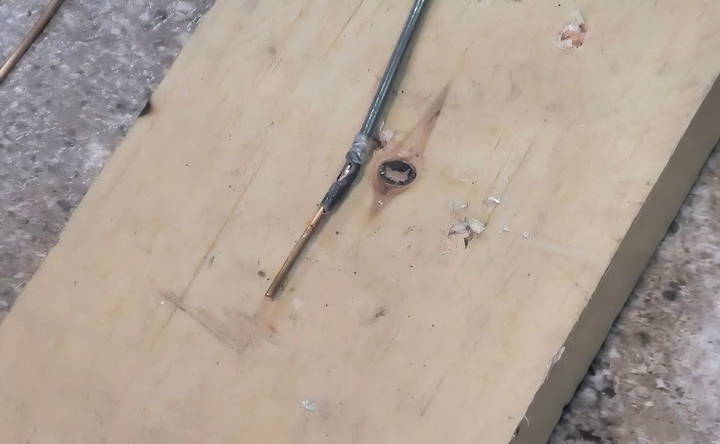
The balun is essential because it ensures that the antenna can properly transmit the signal to your TV through a coaxial cable.
Step 4: Adding the Reflector
A reflector enhances signal reception by focusing incoming waves toward the antenna elements. Reflectors are common in long-range antennas.
- Prepare the Reflector Material: Cut a piece of aluminum foil or metal mesh slightly larger than the dimensions of your antenna.
- Attach to the Back: Position the reflector about 1-2 inches behind the antenna. Use PVC pipes or wooden dowels to build this space and secure the reflector in place.
- Ensure Grounding: If using metal, ensure that the reflector doesn't touch the antenna elements directly. A gap is crucial for preventing signal disruption.
Step 5: Connecting the Coaxial Cable
Once your antenna is assembled, it's time to connect it to the TV.
- Attach the Coaxial Cable: Connect one end of the coaxial cable to the balun transformer and the other end to your TV's antenna input.
- Check for Stability: Ensure all connections are tight and secure to prevent signal loss.
Positioning and Installing the Antenna
Placement is critical to maximizing your DIY antenna's range. Here are some tips for optimal installation:
Indoor Placement Tips
- Elevate the Antenna: Position the antenna as high as possible, preferably near a window. Higher placement increases the likelihood of receiving signals from distant towers.
- Avoid Obstacles: Keep the antenna away from metal objects, which can interfere with signal strength.
- Experiment with Orientation: Rotate the antenna slowly while testing reception to find the best direction for the strongest signal.
Outdoor Installation Tips
For outdoor installations, you'll need to mount the antenna securely, ideally on a mast or using PVC pipes attached to a structure like a roof or wall.
- Mount on a Mast: Secure the antenna to a PVC pipe or similar mounting rod, then install it on your roof or a tall structure.
- Angle Toward Broadcast Towers: Point the antenna in the direction of the nearest broadcast towers. You can use online tools to identify the location of towers relative to your area.
- Weatherproofing: Wrap connections with electrical tape to protect them from moisture, and use a waterproof box for the balun transformer if needed.
Testing and Tuning Your Antenna
Once installed, you'll need to test and potentially fine-tune your antenna to achieve optimal performance.
- Scan for Channels: Go to your TV's settings, navigate to the channel tuning section, and select "Antenna" or "Air" as the source. Start a channel scan.
- Evaluate Channel Quality: Observe the channel list and the quality of each channel received.
- Adjust for Better Reception: If some channels don't come in clearly, try adjusting the antenna's angle or height, rescanning each time you make a change.
Troubleshooting Common Issues
- Weak Signal Strength: Try adding an amplifier to boost signal strength, especially if you live more than 50 miles from the broadcast towers.
- Interference: If you notice channels coming in with static or cutting out, check for large metal objects or electronic devices near the antenna that could be causing interference.
- Missing Channels: Make sure you're scanning the correct band (VHF or UHF). Not all DIY antennas capture both ranges equally, so adjusting the length of your elements or adding more might help.
Advanced Troubleshooting and Optimization Tips
Once you've set up your antenna and done an initial channel scan, you may find that some channels are still weak or missing. Here are some steps to help you fine-tune your setup for optimal reception.
1. Using a Signal Amplifier
If your antenna setup is delivering weak signals, especially on certain channels, a signal amplifier (or booster) can help. Amplifiers work by increasing the signal strength received by your antenna, which is especially useful for long-range antennas or if you're situated in a remote area.
- Installation: Place the amplifier as close to the antenna as possible for the best results. Connect it directly to the antenna's coaxial output, and then run a coaxial cable from the amplifier to your TV.
- Power Source: Most amplifiers require a power source, so make sure you have an outlet nearby or use a battery-powered amplifier for outdoor setups.
2. Adjusting the Reflector Distance
The reflector, typically made of aluminum foil or metal mesh, plays a key role in improving the antenna's range by directing more signal toward the elements. Adjusting the reflector's distance from the antenna elements can optimize signal reception.
- Experiment with Spacing: A gap of about 1-2 inches is usually effective, but try adjusting this gap incrementally to see if it improves signal quality. The ideal distance may vary depending on your location and the materials used.
- Ensuring Proper Alignment: The reflector should be parallel to the antenna elements and positioned symmetrically to avoid any interference.
3. Using Multiple Antennas
In areas with multiple broadcast towers in different directions, combining two or more antennas can enhance your reception.
- Combiner Tool: Use an antenna combiner, which merges the signals from multiple antennas into a single feed. This tool is crucial if you want to avoid signal conflicts.
- Positioning: Place each antenna to face a different set of broadcast towers, or combine one directional antenna with an omnidirectional antenna for best results.
- Signal Interference: When combining multiple antennas, test for any interference issues, as overlapping frequencies may reduce channel quality.
Optimizing for Specific Broadcast Distances
Depending on your distance from broadcast towers, you may need to make specific adjustments to your antenna. Here's a guide to help you optimize your setup based on proximity:
For Urban Areas (within 20 miles of broadcast towers)
In urban areas, where you're typically close to broadcast towers, a basic antenna setup should be enough. However, due to buildings and other obstructions, you might still face challenges.
- Use a Smaller Antenna: Since signals are stronger, a compact design should suffice.
- Indoor Placement: Placing the antenna by a window can help, and adding a reflector might be optional.
- Channel Interference: Urban areas may have overlapping signals, so position the antenna to minimize any reflections or signals bouncing off buildings.
For Suburban Areas (20-50 miles from broadcast towers)
In suburban settings, the signal strength may vary, so a moderately sized antenna with a reflector and possibly an amplifier will usually work well.
- Height is Key: Elevate the antenna to avoid trees, houses, or other structures that can interfere.
- Directional Setup: A directional antenna that's pointed toward the nearest broadcast tower will help you focus the signal.
- Add a Reflector: A reflector can improve the focus of the antenna, making it more effective at capturing signals from a particular direction.
For Rural Areas (50+ miles from broadcast towers)
Rural areas present the biggest challenge for HDTV antennas due to the distance from broadcast towers. In these cases, you'll need a high-gain, long-range antenna, ideally with a powerful amplifier.
- Use a High-Gain Antenna: A high-gain antenna design, often larger with more elements, will capture distant signals more effectively.
- Mount the Antenna Outdoors and High Up: Outdoor installation at the highest point possible (like a roof or tall mast) can make a big difference.
- Powerful Amplifier: To combat weak signals, invest in a high-quality amplifier that can boost reception for long-range channels.
- Consider a Parabolic Reflector: For extreme distances, you may consider using a parabolic reflector, which directs signals more efficiently toward the antenna elements.
Final Thoughts
Building a DIY HDTV antenna is a cost-effective, rewarding project that can give you free access to high-definition television without relying on costly cable services. With the right materials, careful assembly, and thoughtful positioning, you can build an antenna that pulls in channels from miles away. Whether you're a city dweller aiming to cut down on monthly bills or someone in a remote area seeking reliable TV access, a DIY HDTV antenna can be tailored to suit your needs.
Experiment with different designs and modifications to find what works best in your location, and enjoy the satisfaction of watching high-quality TV with an antenna you built yourself!
FAQs About DIY HDTV Antenna Long Range
Discover answers to your DIY HDTV antenna long-range questions! Enhance signal strength and enjoy more channels. Get step-by-step guidance now!
Yes, but performance will vary based on location. Rural areas require stronger antennas with high-gain elements and possibly an amplifier, while urban areas can often rely on a smaller indoor antenna.
This depends on your distance from broadcast towers, the type of antenna you use, and local terrain. Urban setups may receive 50+ channels, while rural setups may get fewer.
Yes, if the broadcast is in 4K, your HDTV antenna can capture it. However, you’ll need a 4K-compatible TV to enjoy the full resolution.
Yes, attic installations work well if the attic is accessible and relatively free from interference sources, such as insulation or metal.
Interference can result from nearby electronics, buildings, or even weather conditions. Try repositioning the antenna, using a signal amplifier, or switching to a higher-quality coaxial cable to mitigate interference.
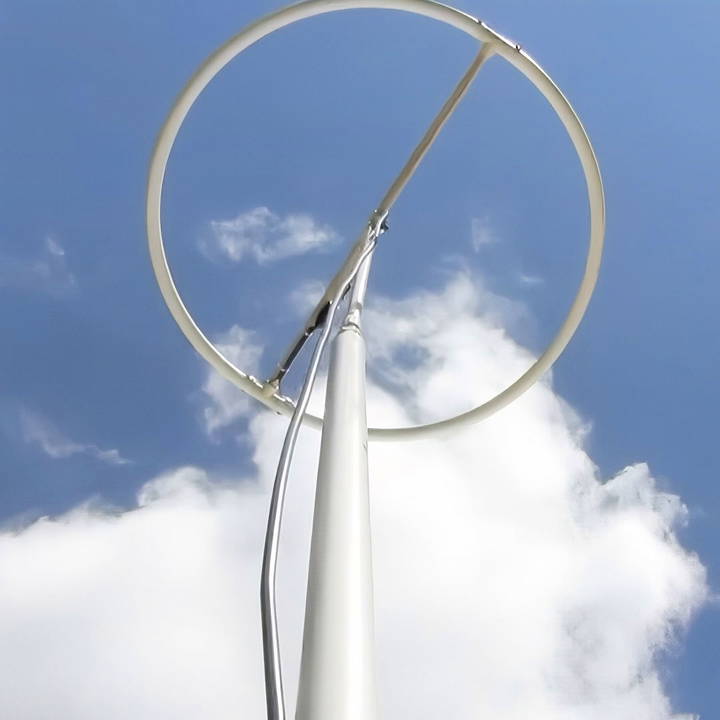
For a loop antenna, materials like copper tubing, solid core wire, or aluminum foil are ideal due to their conductivity and durability. Metal coat hangers can also work for shorter-term indoor antennas, but they may corrode faster if used outdoors.
Yes, stranded wire is effective, but it requires more support since it’s flexible compared to solid core wire. Many DIY builders find solid wire easier to shape and secure, especially for fixed outdoor antennas.
The range of a DIY antenna depends on design and setup. Generally, simple loop or bowtie antennas work well within 30–40 miles, while directional antennas with reflectors can achieve up to 60 miles under optimal conditions. Factors like terrain, weather, and installation height also affect range.
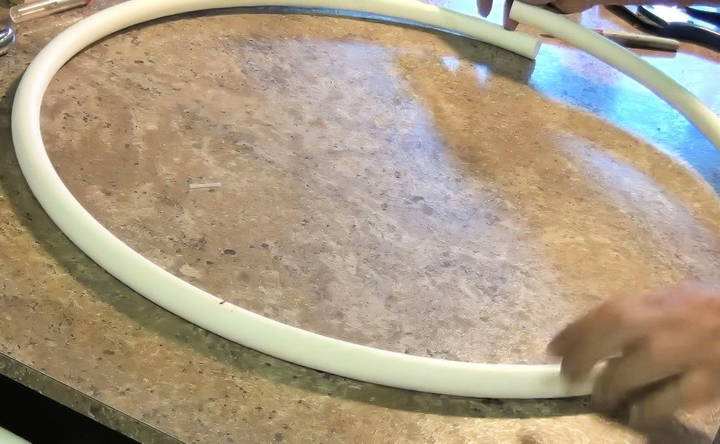
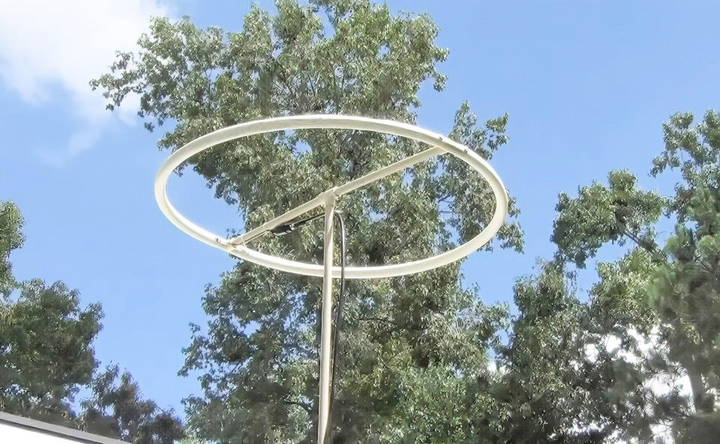
The diameter of the antenna’s loop or elements affects its frequency tuning. For UHF signals (typical for HDTV), a 26-inch loop diameter is often recommended. Altering the size can change the antenna’s reception range and may reduce effectiveness for some channels.
Most HDTV antennas are optimized for UHF frequencies. To receive FM radio, consider adding an FM/VHF element, such as a simple dipole. Alternatively, there are DIY kits for FM/VHF that can be combined with an existing HDTV antenna.
Yes, attic installations are effective for long-range reception, as long as there aren’t major obstructions like dense insulation. Place the antenna flat and, if possible, near an outer wall or window to maximize signal capture.
While a balun is the standard tool to match impedance, you can directly attach a coaxial cable to the elements, though it may reduce efficiency. For optimal performance, especially on long coax runs, the balun is recommended to improve signal quality.
For setups where the antenna is far from the TV, a two-piece amplifier (pre-amp and power supply) is ideal. Place the pre-amp near the antenna and the power supply closer to the TV to boost the signal early, maintaining quality over long distances.
To waterproof an outdoor antenna, cover connections with silicone sealant and apply weatherproof tape to exposed areas. Using UV-resistant paint can prevent degradation of PVC or PEX pipes in direct sunlight, extending the antenna's lifespan.
Yes, you can combine multiple antennas to enhance reception, especially if towers are in different directions. Use an antenna combiner to merge signals from each antenna, aiming each one toward specific broadcast sources.


