DIY headbands are the perfect accessory for adding a touch of creativity to any outfit. Discover 25 creative DIY headband ideas to make your own stylish accessories at home. From choosing the right headband to troubleshooting common issues, we've got you covered with expert styling tips and techniques for all levels of crafters.
Whether you're a beginner or an experienced crafter, there's something here for everyone to explore. Ready to unleash your creativity and elevate your accessory game? Let's delve into the world of DIY headbands and discover how you can make personalized pieces that reflect your unique style and flair.
Join us on this exciting journey of making DIY headbands.
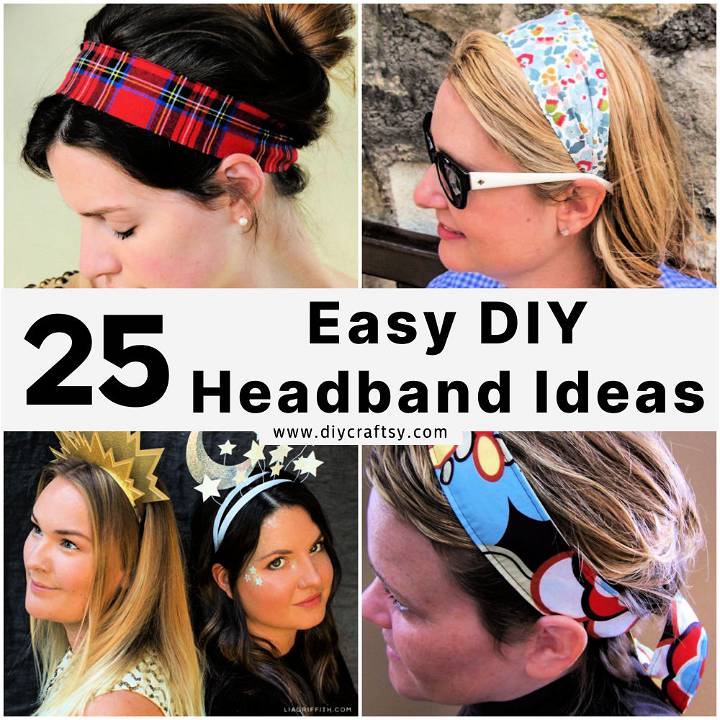
How to Make a Headband - Step by Step Guide
Make a headband from scrap fabric as a fun, eco-friendly way to expand accessories or make customized gifts. Guide helps beginners sew a stylish headband at home.
Supplies Needed
- Scrap fabric (cotton or any soft, non-stretch fabric is ideal)
- Measuring tape
- Scissors
- Sewing machine or needle and thread
- Pins
- Iron and ironing board
Step by Step Instructions
Step 1: Measure and Cut the Fabric
- Measure: Use the measuring tape to measure the circumference of your head where you would like the headband to sit. Add 1 inch to this measurement for the seam allowance.
- Cut the Fabric: Based on your measurement, cut a strip of fabric with the length equal to your head circumference plus 1 inch, and the width to about 6 inches for a standard headband. This will be folded in half, so the final width will be around 3 inches.
Step 2: Folding and Ironing
- Fold the Fabric: Fold the strip of fabric in half lengthwise, with the right sides (the side you want to show) facing each other.
- Iron the Fold: Use an iron to press down on the fold, making it easier to sew. This step ensures your headband has a neat and professional finish.
Step 3: Sewing the Headband
- Pin the Edges: Before sewing, pin the long open edge together to hold the fabric in place while you sew. Leave around a 2-inch gap unsewn; this is where you'll turn the fabric right-side out.
- Sew: Using a sewing machine or a needle and thread, sew along the pinned edge, removing pins as you go. Remember to backstitch at the beginning and end of your sewing to secure the stitch.
- Turning Right-Side Out: Once the sewing is done, use the 2-inch gap to carefully turn the fabric right-side out, so the seam is on the inside.
Step 4: Finishing Touches
- Iron the Headband: Iron the headband flat, ensuring the seams are at the edges and the gap for turning is neatly folded inwards.
- Close the Gap: Using a needle and thread, hand-sew the gap closed with small, discreet stitches.
- Optional – Add Embellishments: Personalize your headband by sewing on buttons, embroidery, or fabric flowers to the outside.
What You've Achieved
Congratulations! You've just made a simple, stylish headband using just scrap fabric and a few sewing essentials. This project not only upcycles leftover materials but also gives you a custom accessory that reflects your personal style.
Video Tutorial
For a step-by-step video guide to making your own DIY headband from scrap fabric, be sure to check out this YouTube video: simple headband for beginners - DIY headband from scrap fabric.
It pairs well with this written guide, offering a complementary visual perspective to the crafting process discussed, curated for an accessible and comprehensive learning experience.
Styling Tips for DIY Headbands
Headbands are a versatile and stylish accessory that can elevate any look. Whether you're going for a casual day out or a formal event, the right headband can add a touch of elegance and personality to your outfit. Here are some styling tips to help you incorporate headbands into your wardrobe.
Choosing the Right Headband
- Consider the occasion: For formal events, opt for headbands with subtle embellishments like pearls or crystals. For everyday wear, simple fabric headbands or those with minimalistic designs work well.
- Match your outfit: Coordinate the color and style of your headband with your outfit. A matching headband can make a cohesive look, while a contrasting one can be a statement piece.
- Comfort is key: Ensure the headband fits well and doesn't pinch behind the ears. Comfortable wear is crucial for all-day use.
Incorporating Headbands into Various Hairstyles
- Open hair: Headbands can push back your hair and keep it off your face, giving a neat appearance. They work well with both straight and curly hair.
- Updos: Adding a headband to an updo can provide an extra flair. It's perfect for weddings or formal gatherings.
- Short hair: Headbands are great for adding volume and style to short hairstyles like pixie cuts or bobs.
- Braids: Weave a thin headband into your braids for a bohemian look.
Trends and Inspiration
According to recent trends, here are some popular headband styles:
- Padded headbands: These are timeless and can range from simple to embellished designs.
- Embellished headbands: Perfect for adding sparkle to your look, especially for evening events.
- Bouclé headbands: A textured fabric that adds a unique touch to any hairstyle.
Troubleshooting Common Issues in DIY Headbands
Making your own headbands can be a rewarding DIY project. However, you might encounter some common issues along the way. Here's how to solve them:
Sizing Problems
Too tight: If your headband is uncomfortably tight, try using a more elastic material or adjust the length before sewing. Too loose: For a loose headband, reduce the length of the fabric or add a small piece of elastic to ensure a snug fit.
Material Fraying
- Prevent fraying: Choose fabrics that are less prone to fraying, such as felt or fleece. Seal the edges: Use a fray check liquid or a simple zigzag stitch along the edges to keep them from unraveling.
Embellishment Issues
Falling off: Make sure to securely attach embellishments with strong adhesive or sew them on tightly. Unbalanced design: Place embellishments while the headband is on a mannequin head to ensure even distribution.
By addressing these common issues, your DIY headbands will not only look great but also feel comfortable to wear.
Advanced Techniques for Experienced Crafters
For those who have mastered the basics, here are some advanced techniques to take your DIY headbands to the next level:
Using Unique Materials
Leather: Add a touch of luxury with leather strips. Remember to use special leather needles for sewing. Recycled materials: Get creative with upcycled fabrics or accessories for an eco-friendly option.
Intricate Designs
Braiding: Experiment with different braiding techniques using multiple fabric strips for a boho-chic look. Beading: Incorporate beadwork into your headbands for intricate and sparkling designs.
Structural Enhancements
Wire inserts: Include flexible wire within the fabric to make adjustable and moldable headbands. Layering: Combine various fabrics and textures by layering them for a unique and dimensional appearance.
Maintenance and Care for DIY Headbands
Ensuring your DIY headbands last long and stay beautiful is all about proper maintenance and care. Here's a straightforward guide to help you keep your headbands in top condition.
Washing Your Headbands
- Handwashing: For most DIY headbands, handwashing is the safest method. Use cool or lukewarm water with a mild detergent, and gently scrub the headband to clean it. Rinse thoroughly and press out the excess water without wringing, which could damage the shape.
- Machine Washing: If your headband is made of sturdy material without delicate embellishments, you can machine wash it inside a mesh bag on a gentle cycle. Use a mild detergent and avoid fabric softeners or bleach.
- Drying: Always air dry your headbands by laying them flat on a towel or hanging them up. Avoid using a dryer as the heat can shrink or warp the fabric.
Storing Your Headbands
- Keep them flat: Store your headbands flat in a drawer or a storage box to maintain their shape. If space allows, rolling them gently can also prevent creases.
- Avoid crushing: Don't pile heavy items on top of your headbands, as this can cause them to deform.
- Use a hanger: For headbands that are prone to losing their shape, hanging them on a hook or a hanger can be a good solution.
FAQs About DIY Headbands
Making your own headbands is a fun and creative way to express your personal style. Here are answers to some frequently asked questions that can help you get started on your DIY headband journey.
What materials do I need to make a DIY headband?
To make a DIY headband, you'll need fabric or a scarf, a plain headband, a glue gun with glue sticks, scissors, and optional embellishments like embroidery thread or beads.
Can I use any fabric for my headband?
Choose fabrics that are not too thick or stiff, as they won't conform well to the shape of the headband. Stretch knit fabric is a good option for a comfortable fit.
How do I ensure my headband fits properly?
Measure your head circumference and cut the fabric accordingly. Make sure the headband and elastic parts are flat and not twisted in the middle.
How can I prevent my headband from slipping off?
Make sure the fabric lays flat on the underside of the headband. If it's still slipping, you can use bobby pins to secure it in place.
What are some easy DIY headband ideas?
You can make a braided headband from old T-shirts, a tie-dye headband, or a no-sew wire headband for a rockabilly look.
How do I attach embellishments to my headband?
Securely attach embellishments with strong adhesive or sew them on tightly to prevent them from falling off.
Can I make a headband without sewing?
Yes, you can make a no-sew wire headband by using a bit of hidden wire and wrapping the fabric around it.
How do I care for my DIY headband?
Handwash your headband with mild detergent and air dry it. Store it flat or hang it on a hook to maintain its shape.
Are there any eco-friendly options for DIY headbands?
Yes, you can use upcycled fabrics or accessories for an eco-friendly headband option.
How can I make my headband stand out?
Experiment with different textures, colors, and patterns. Adding unique embellishments like beads or flowers can also make your headband stand out.
By exploring these FAQs, you can start making headbands that are not only stylish but also a reflection of your creativity and individuality.
25 Unique DIY Headband Ideas
Discover 25 stunning DIY headbands to elevate your style this spring and summer. From floral to boho designs, get ready to accessorize like never before!
1. Easy DIY No Sew Wire Headband
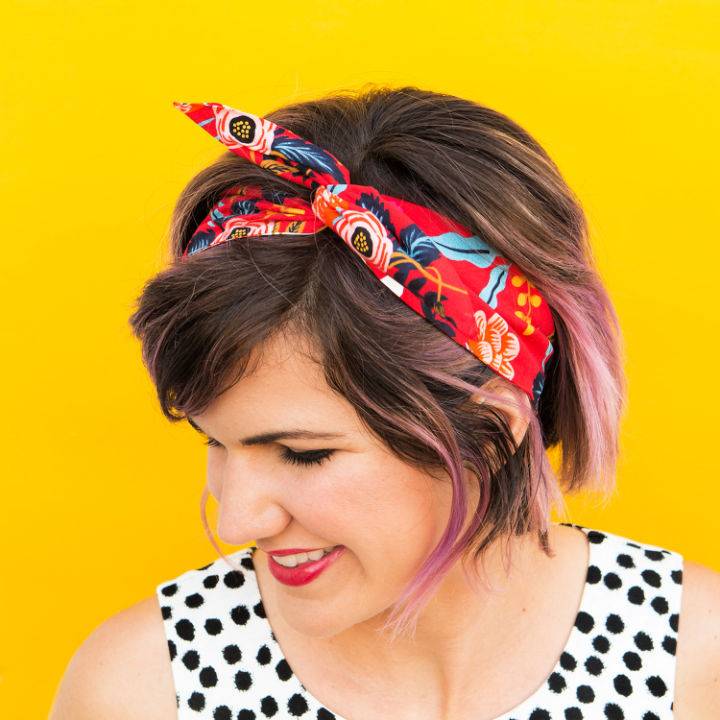
For a quick and stylish solution to tame those unruly hair days, the DIY No-Sew Wire Headband tutorial by Sarah Hearts is a must-try! This crafting guide is perfect for fashion enthusiasts and DIY lovers, offering a simple step-by-step process to make your very own wire headband. The best part? No sewing skills are required!
You'll need some basic supplies, including fabric, wire, and fabric glue, to put together a unique accessory that reflects your personal style. Sarah Khandjian's engaging instructions make it easy to follow along, ensuring a fun and rewarding crafting experience. With the added convenience of using fabric scraps, this eco-friendly project helps you fashion a charming headband that's sure to become a go-to in your collection.
2. Make a Braided Velvet Headband
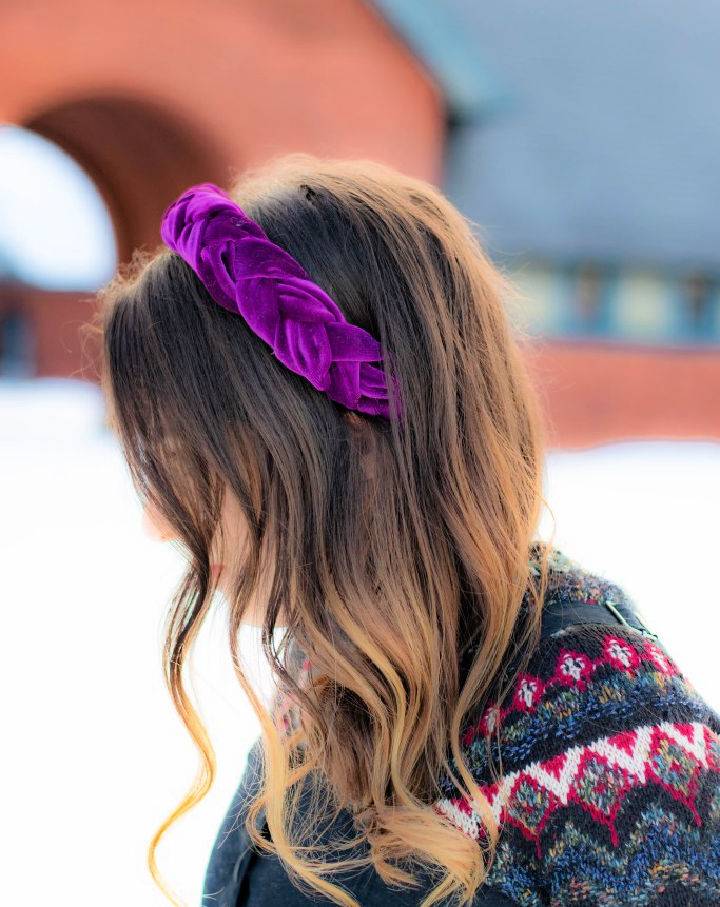
Elevate your accessory game with a chic velvet braided headband, a must-try DIY craft from One CrafDIY Girl. It's a simple and cost-effective project, transforming a piece of luxurious velvet and a plain headband into a stylish statement piece. You'll need stretch velvet, grosgrain ribbon, a plastic headband, a hot glue gun, and basic sewing essentials.
Begin by wrapping the headband with ribbon for a seamless look, then braid your velvet strips, attaching them securely to the headband. This guide offers clear, step-by-step instructions to ensure a polished end product. Perfect for adding a regal touch to any outfit, making your own velvet braided headband is an engaging and rewarding craft that promises professional results.
3. How to Sew a Turban Headband
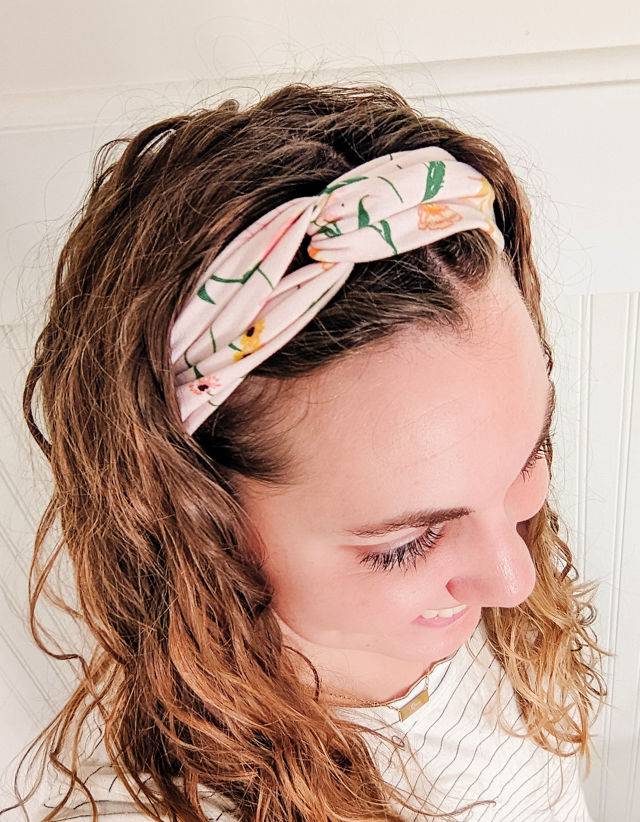
For craft enthusiasts keen on adding a handmade touch to their wardrobe, Heather Handmade offers a step-by-step guide to making a DIY turban headband using knit fabric. This sewing project is ideal for using up fabric scraps and can be a charming gift for friends and family. The tutorial is straightforward, making it suitable for those new to sewing.
You'll need knit fabric, sewing tools, and a machine. With simple cutting, pinning, and sewing, you can craft a stylish accessory that's both functional and fashionable. The process involves making tubes of fabric, turning them right side out, and then artfully twisting and sewing them together. The result is a comfortable and chic headband that's a fun addition to any outfit.
4. Making Your Own Headband
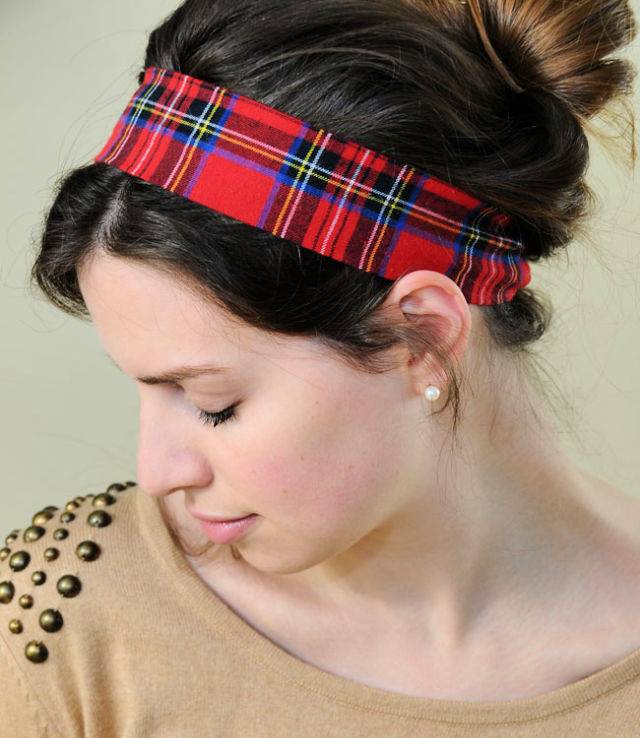
Transform an old flannel shirt into a stylish DIY headband with a simple tutorial from The Miniature Moose. No sewing expertise? No worries. With clear, step-by-step instructions, you'll learn to cut, sew, and flip fabric, making a trendy accessory in minutes. Grab a hair tie, your iron, and some basic sewing tools to repurpose that ripped shirt into a cute headband. Its crafting is made easy and eco-friendly – perfect for a quick fashion fix or a handmade gift. Get ready to add a personal touch to your wardrobe today!
5. How to Make a Statement Headband

Channel your inner poet and make a fashion statement with our DIY Amanda Gorman-inspired headbands. The House That Lars Built provides a step-by-step guide on making three eye-catching designs: a puffy, braided, and knotted headband. Each piece radiates elegance and is perfect for adding a touch of sophistication to any outfit.
Crafted with simple materials like fabric, upholstery foam, and ribbon, these headbands are not only stylish but also a fun and engaging project. Dive into the tutorial and let your creativity shine through a personalized accessory that speaks to your style and inspiration.
6. Simple DIY Pom Pom Headband
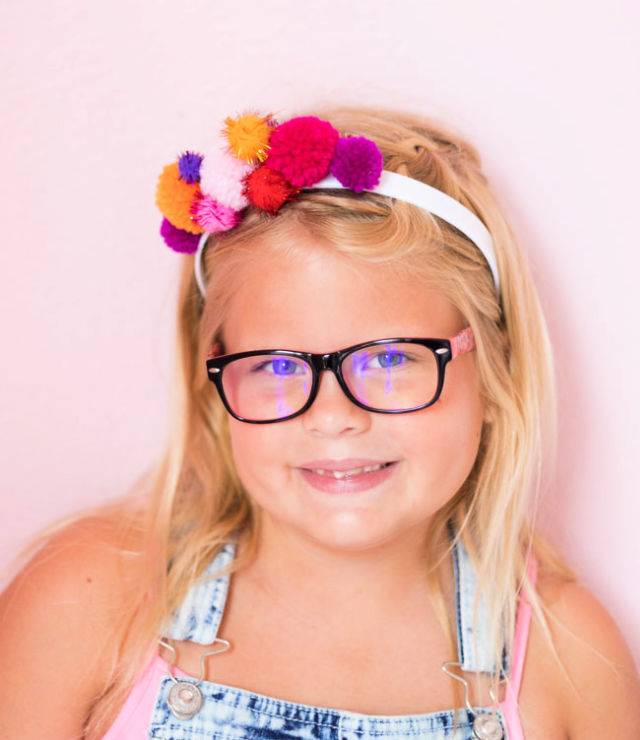
Get crafty with Design Improvised's easy DIY pom-pom headbands, perfect for adding a dash of fun and color to any outfit. With simple supplies like pre-made yarn pom-poms, glitter pom-poms, plastic headbands, and hot glue, you can make unique accessories.
This project is ideal for parties and offers a creative outlet for all ages. Make your own pom-pom filled headband, a floral design, or a regal pom-pom crown by following the straightforward, engaging instructions. Let your creativity flow, and design headbands that showcase your style!
7. DIY Braided Headband at Home
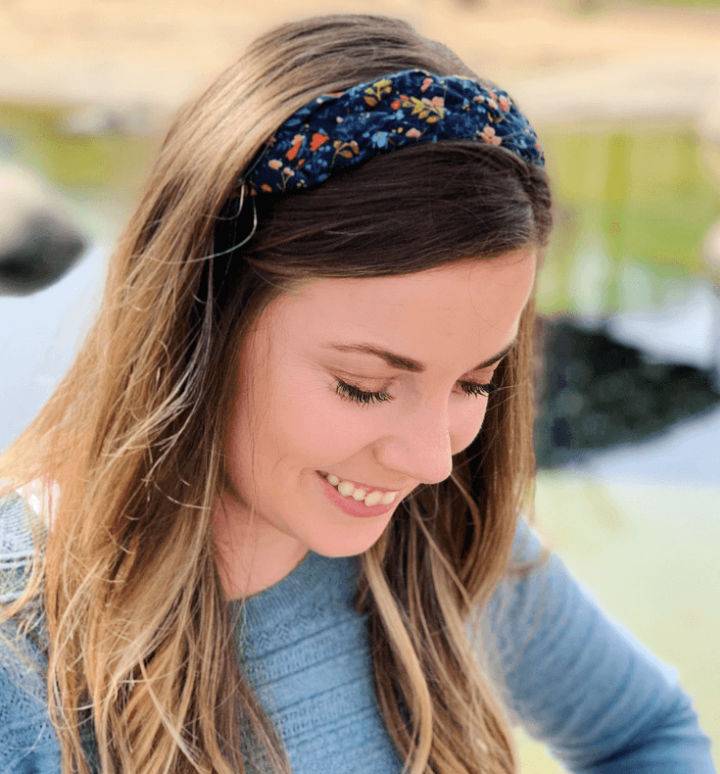
Make a chic and sustainable accessory with Seamlined Living's DIY braided headband tutorial. This guide walks you through the process of transforming fabric scraps into a trendy basket weave headband. Ideal for adding a pop of color and style to any outfit, this project is both eco-friendly and fashionable.
The steps are clear and easy to follow, ensuring a fun crafting experience that yields a unique and handmade hair accessory. Perfect for gifting or personal use, this braided headband tutorial is a delightful way to repurpose leftover materials into something beautiful.
8. DIY Headband - Step by Step Instructions
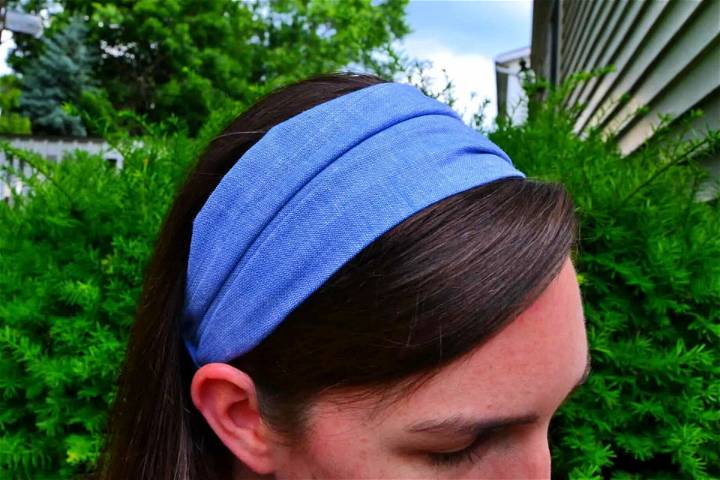
Making a headband is a fun and creative way to add a personal touch to your accessories. Cat from Mary Martha Mama provides a clear and straightforward tutorial that guides you through crafting your very own headband using simple materials like fabric scraps, elastic, and basic sewing supplies.
Perfect for controlling your hair or just as a fashion statement, this DIY headband can be made in a few easy steps, complete with pictures to help you along the way. So grab your sewing machine and get ready to enhance your wardrobe with a handmade headband that's both stylish and practical.
9. Handmade Sun and Moon Headband
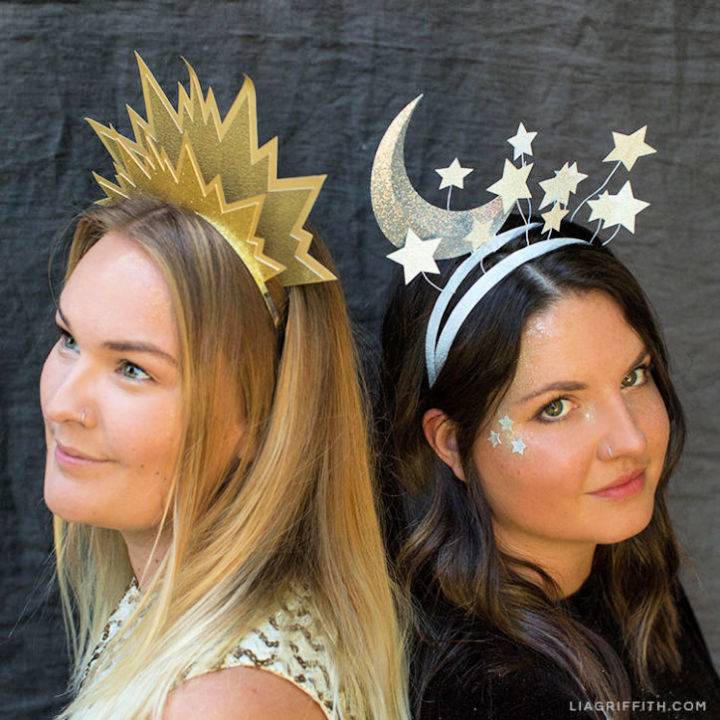
Make enchanting sun and moon headbands with this DIY guide from Lia Griffith. These celestial headbands are not just a hit for Halloween; they can also add sparkle to your New Year's Eve attire. Start by gathering your materials, including glitter cardstock, paper, and headbands. With the use of a cutting machine or scissors, follow the provided template to shape your sun and moon.
An adhesive roller helps secure a wire between two stars, giving structure to your creation. Bend the moon shape along the scored line for a three-dimensional effect. The full tutorial, exclusively available for members, includes step-by-step instructions to ensure your costume accessories shine bright. So get crafting and light up any party with your handmade celestial headbands.
10. How to Make Your Own Padded Headband
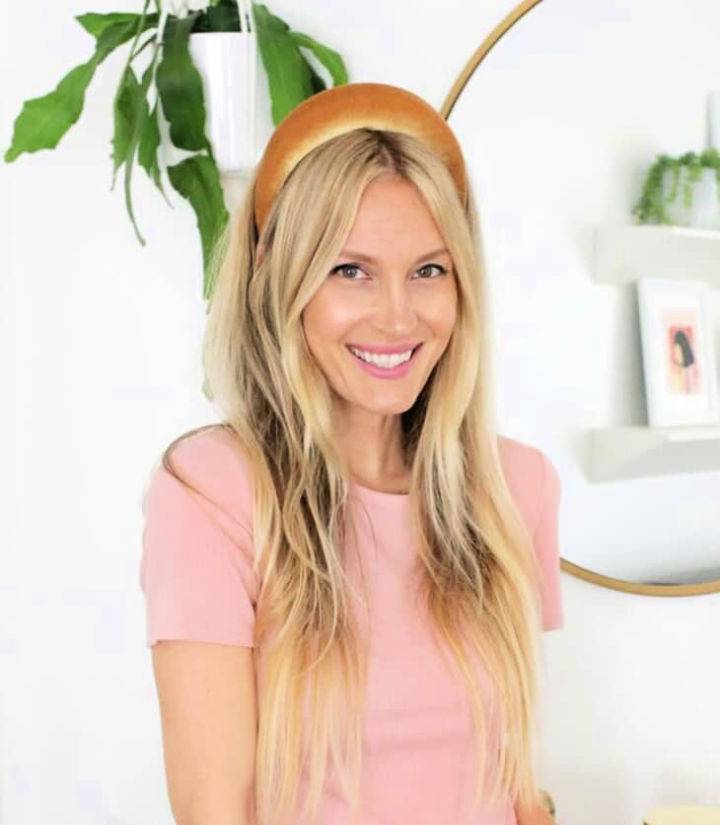
Ready to jump on the padded headband trend? With a simple DIY guide from A Beautiful Mess, you can make your own chic accessory that pairs well with any outfit, from casual to elegant. Gather a quarter yard of stretchy fabric, some upholstery foam, a plastic headband, and a few crafting staples to get started.
Trace and trim the foam, attach it to the headband, then craft a fabric cover following the provided measurements. Adjust the size for a snug fit, sew the final touches, and voilà—a custom padded headband to enhance your style! It's an engaging, easy-to-follow project that adds a personal touch to your wardrobe.
11. Making a Headband Out of Fabric
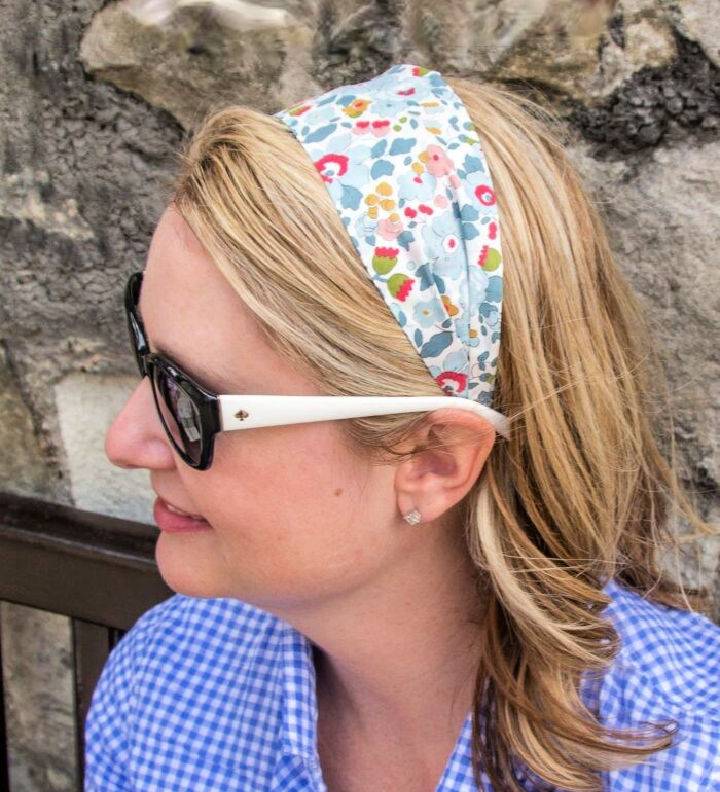
Discover a fun DIY project on The Polka Dot Chair with a free tutorial on how to make fabric headbands without elastic. Perfect for managing hair during vacations or hot days, these headbands combine practicality with style. With a straightforward process involving sewing, turning fabric, and some hot glue action, you can craft your own headbands using your favorite lightweight cotton fabrics.
This guide is designed to help you make an accessory that's not only comfortable to wear but also stays in place. Whether you want to add a personal touch to your wardrobe or handcraft gifts for friends, this tutorial provides an engaging and helpful experience in making charming fabric headbands.
12. Super Simple Knotted Headband
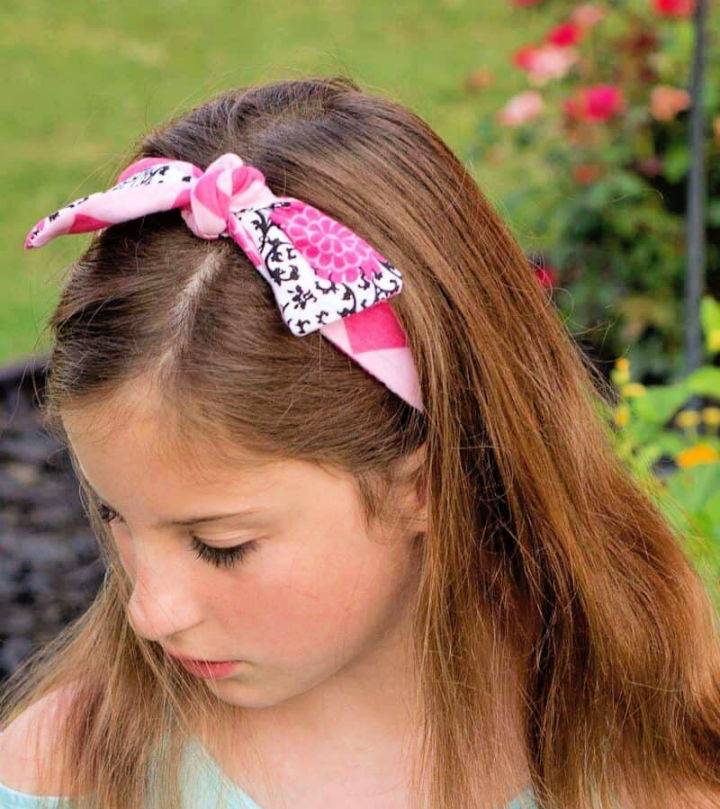
Looking to enhance your sewing skills with a fun project? Jamie Sanders has crafted a Simple Knotted Headband Tutorial at Scattered Thoughts of a Crafty Mom that's perfect for crafters at any skill level. This tutorial guides you through making a stylish and functional headband, ideal for keeping those flyaway hairs in check.
With clear, step-by-step instructions, you'll learn how to sew a headband that's both easy to make and versatile. Sew up a batch in various colors and patterns to match any outfit or to share with friends. Enjoy the process of making something unique and practical for everyday wear!
13. Free Headband Sewing Pattern
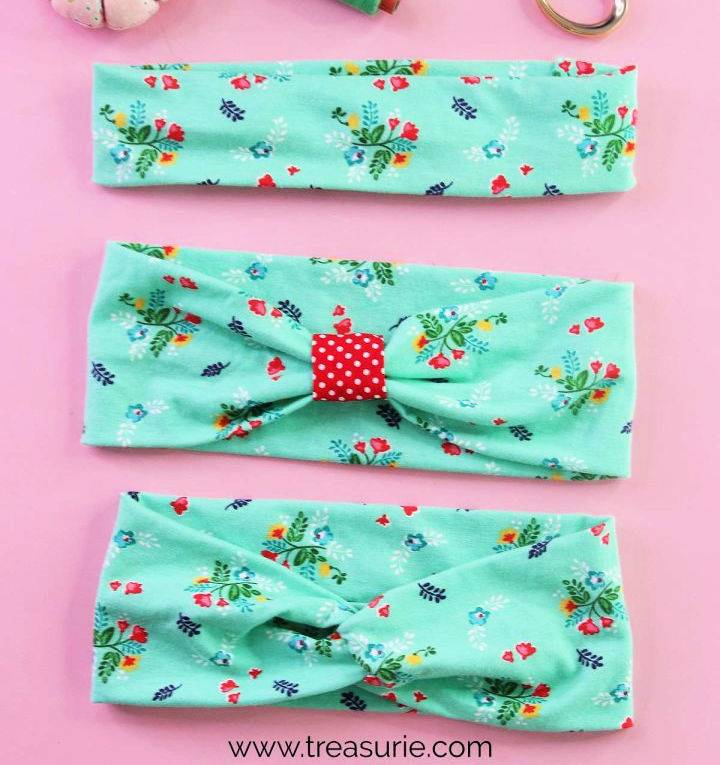
Ready to add a personal touch to your accessory collection? At Treasurie, you'll find a straightforward guide on crafting your own fabric headband in three distinct styles. Ideal for keeping hair tidy or adding a flair to your outfit, these DIY headbands are simple to make with stretch fabric scraps. You'll learn how to measure, cut, and sew using easy-to-follow instructions, ensuring a snug, comfortable fit. Perfect for gifting or a creative pastime, your handmade headband will be a unique and practical addition to any wardrobe.
14. Make a No Sew Headband
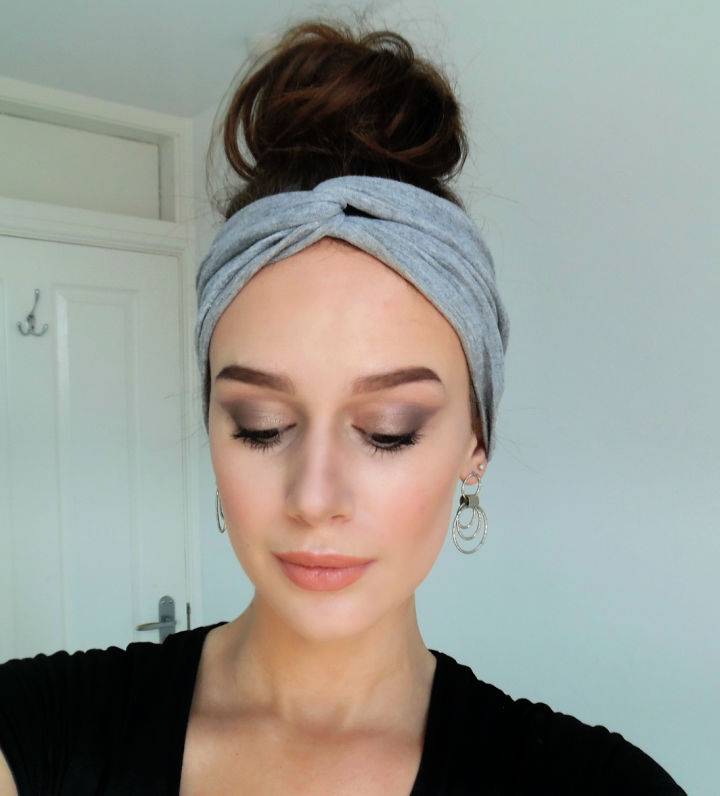
Looking to craft a stylish no-sew headband using just an old t-shirt? "Getting to Nomi" has got you covered with an easy-to-follow DIY guide that transforms your old tees into trendy accessories. Simply cut the bottom of a shirt, twist it into an infinity shape, and fold it to complete your new headband.
Plus, get inspired by the site's featured makeup of the day for a complete look. It's a great way to upcycle and add a personal touch to your wardrobe. Perfect for fashion enthusiasts and DIY lovers, this blog post is a must-visit for creative and sustainable fashion ideas.
15. DIY Velour and Crystal Headband
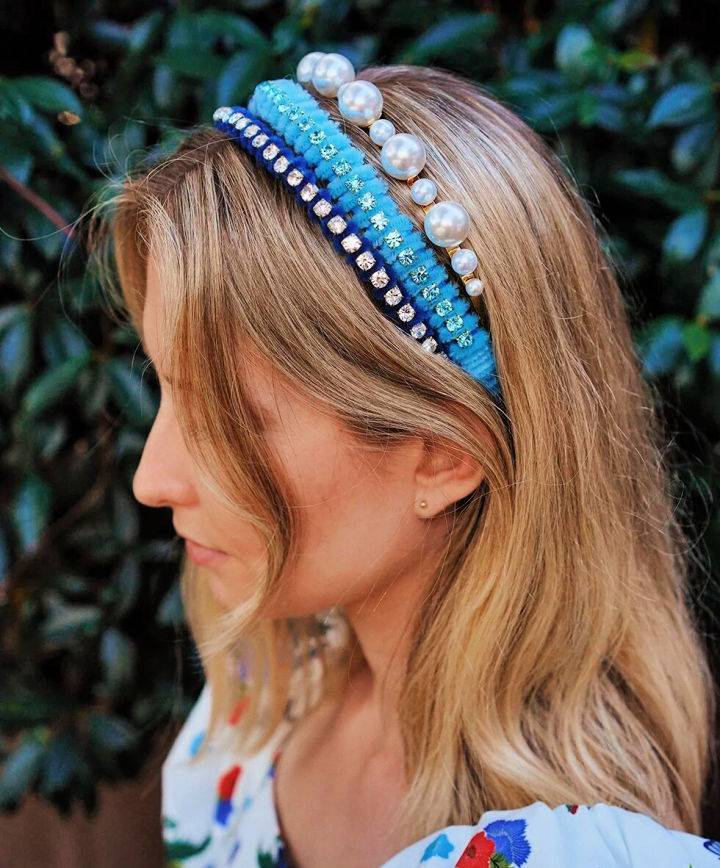
Crafting your own velour and crystal headband is a simple yet rewarding project that instantly elevates your accessory collection. Honestly WTF presents a straightforward DIY guide to help you make a luxurious-looking headband using everyday craft supplies. All you need is a headband of your choice, some pipe cleaners, a rhinestone chain, and a bit of hot glue.
Start by attaching the pipe cleaner with glue and wrap tightly, incorporating the rhinestone chain as you go for that extra sparkle. With each step carefully detailed, you'll find yourself easily making a stylish statement piece that rivals high-end designs. Perfect for adding a touch of glamour to any outfit, your handmade headband will be a chic addition to your wardrobe.
16. Easy Baby Girl Headband Using Nylons
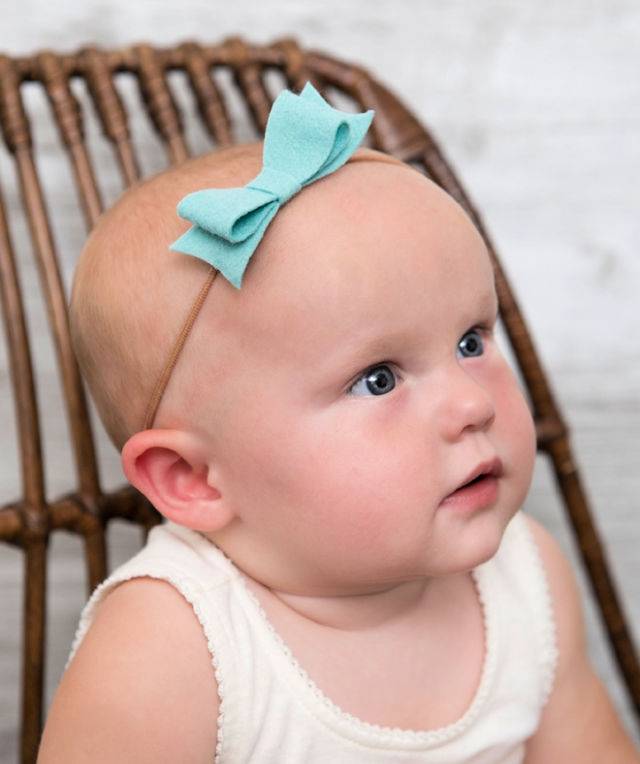
Making adorable baby girl headbands has never been simpler or more affordable than with this DIY method from Something Turquoise. Utilizing nylons, which are soft, stretchy, and perfect for delicate baby heads, you can craft an array of charming headbands. With readily available supplies like ribbons, hot glue, and scissors, you can tailor these accessories to match any outfit.
This step-by-step guide ensures a fun crafting experience, and the added clear nail polish trick keeps those bows looking pristine. Ideal for gifting or personal use, these nylon headbands are a quick, easy, and delightful addition to your baby's wardrobe.
17. Make a No Elastic Headband
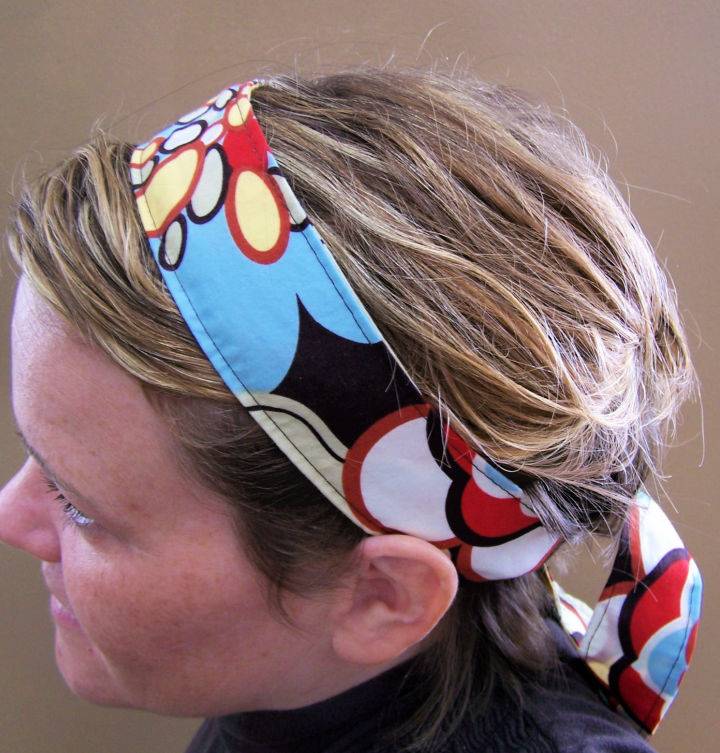
Struggling to find the perfect headband that doesn't rely on elastic? Our step-by-step tutorial simplifies the process of making your own stylish, no-elastic headband. Grab a 36-inch piece of fabric and follow the clear instructions to cut, iron, and sew your way to a comfortable and chic accessory.
Ironing each fold ensures a neat finish, while a basic stitch secures your headband for durability. This easy-to-understand guide helps crafters produce a personalized headband that is perfect for any occasion or outfit. Visit our page, and in just a few steps, you'll have a fun and functional headband to enjoy. Ash by Family Blog
18. How to Do You Make a Scrunchie Headband
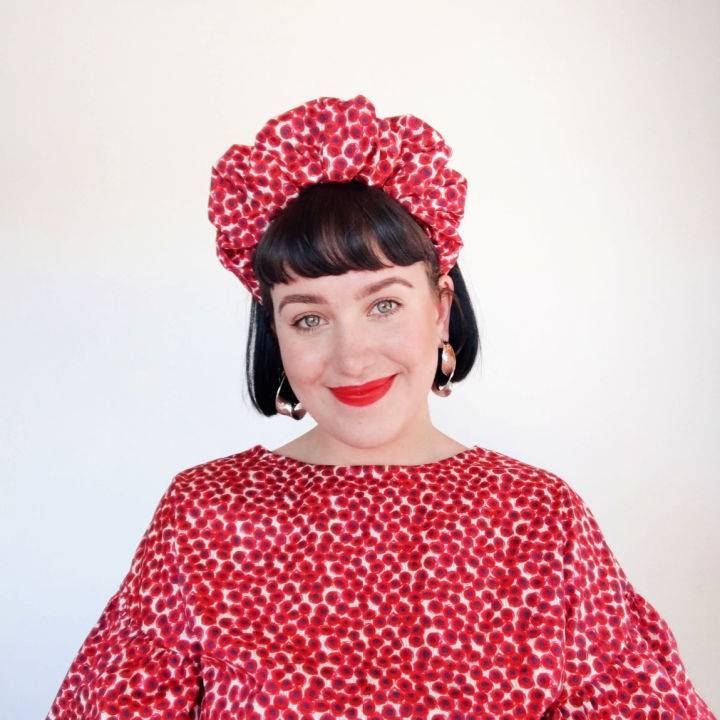
Dive into DIY Daisy's scrunchie headband tutorial for an engaging craft session. Perfect for those who enjoy making their own fashion accessories, this step-by-step guide provides clear instructions on making a stylish scrunchie headband from the comfort of your home.
With simple materials like woven fabric, thread, and a fabric-covered headband, you can transform these components into a chic addition to your wardrobe. The tutorial is crafted to be informative and straightforward, ensuring a smooth and enjoyable DIY experience. With tips on sewing and customizing, this guide helps you make a unique piece that's sure to turn heads.
19. Rainbow Ribbon Flower Headband
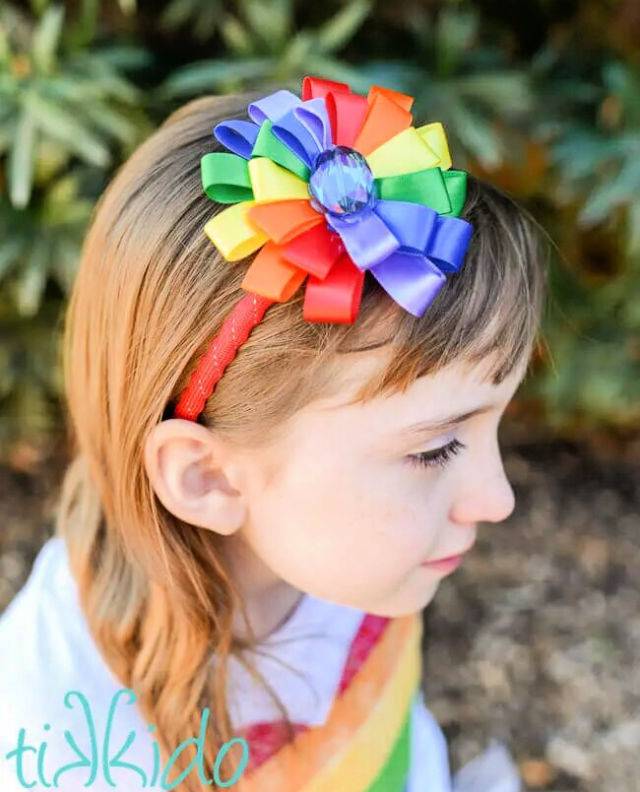
Brighten up your crafting time with a DIY headband featuring a cheerful rainbow ribbon flower, perfect for adding a pop of color to any outfit. Visit Tikkido.com for an instructive guide on making this charming accessory. With simple materials like colorful ribbons, a crystal bead, felt, and a glue gun, you'll craft a delightful headband that's both fun to make and wear. The step-by-step tutorial ensures an easy, engaging experience for crafters who enjoy personalizing their style. Get ready to make your very own rainbow statement piece!
20. Knot Headband With Details Instructions
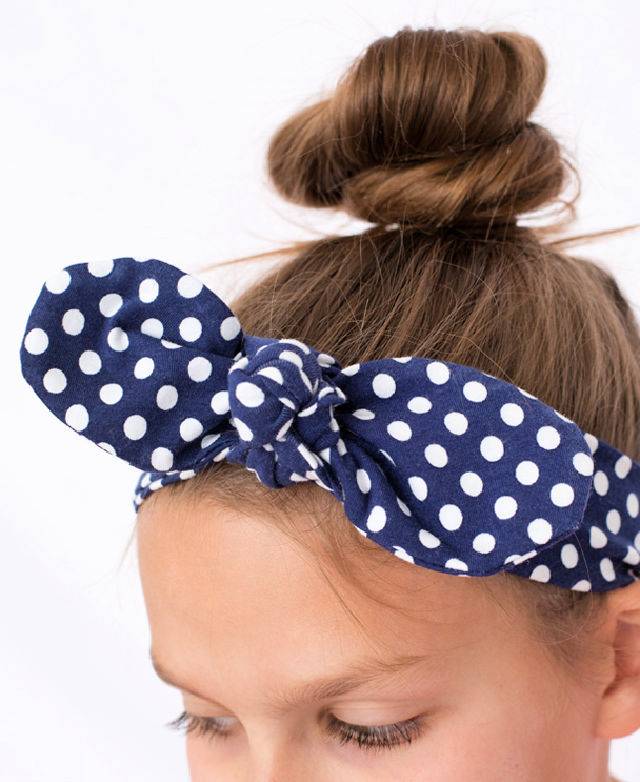
Are you interested in crafting your own stylish knot headband? Simple Simon and Company provides an easy-to-follow DIY tutorial that helps you make a charming accessory for any age. With a clear step-by-step process, you'll transform simple materials into a trendy headband featuring a "fake knot," offering the convenience of easy wear. You'll need a strip of fabric, two end pieces, and a middle tie piece.
The method involves sewing, turning pieces inside out, and assembling the headband with a secure, decorative knot. This engaging project is perfect for adding a personal touch to your wardrobe or making thoughtful handmade gifts. Get creative with colors and prints for a customized look that's all your own!
21. Sew a Headband From Fabric
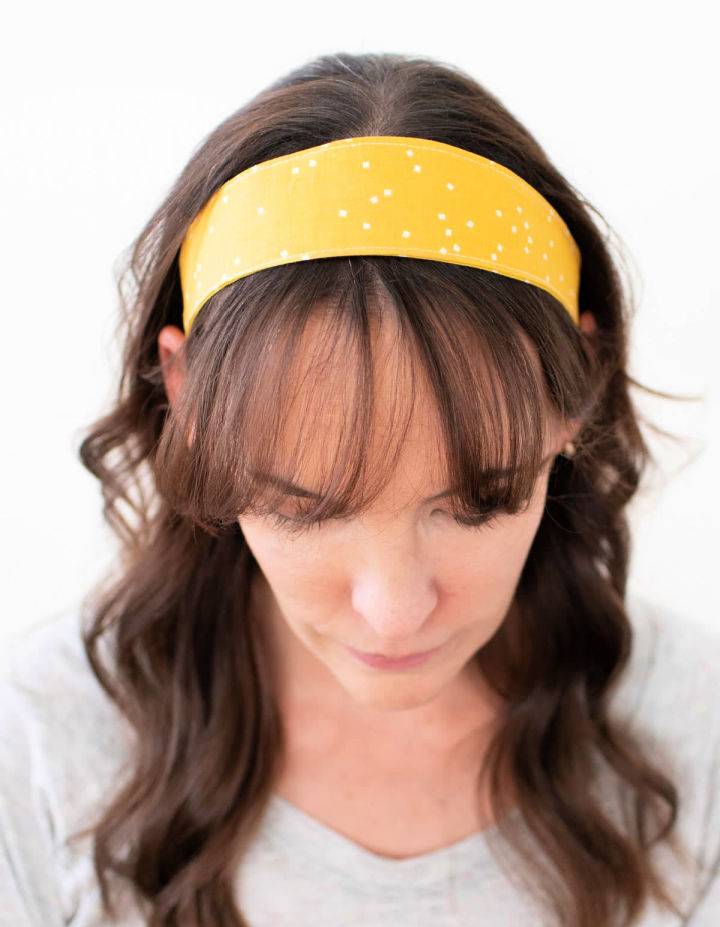
Make your own fabric headband with ease using Melly Sews' step-by-step tutorial. Ideal for sewing novices, this project offers a perfect opportunity to repurpose fabric scraps and craft a stylish hair accessory. With a free downloadable pattern catering to various sizes, the guide ensures you can sew a headband that's both snug and comfortable, thanks to the incorporation of elastic.
The tutorial is complemented by a video for visual learners, making the process as straightforward as possible. Dive into your next creative endeavor with confidence, and add a handmade touch to your wardrobe or give a thoughtful, personalized gift.
22. Red, White, and Blue Bandana Headband
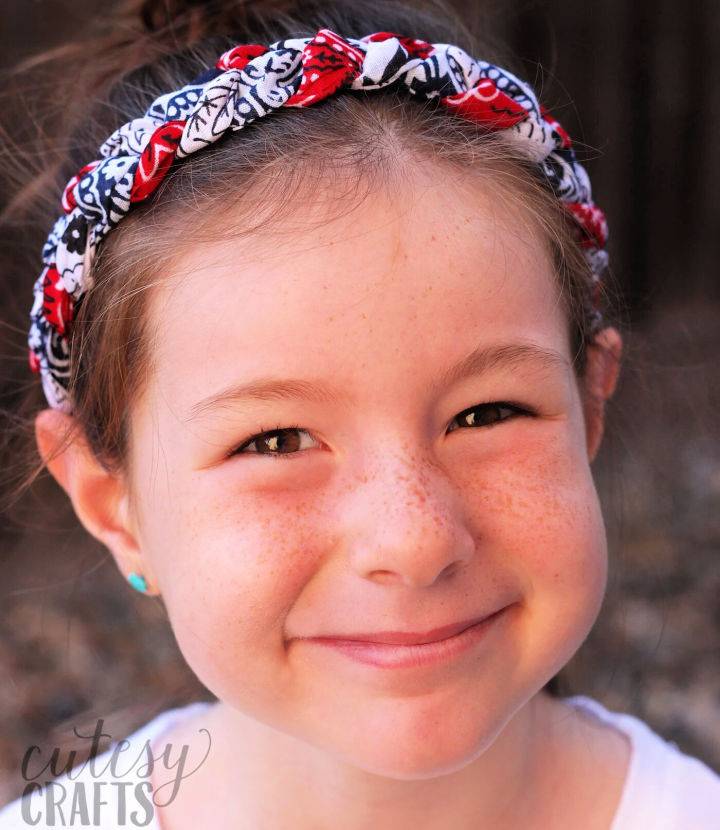
Make charming bandana headbands with ease by following this instructive guide on DIY Candy. Learn to craft these colorful accessories using simple bandanas and elastic—no advanced skills necessary. Perfect for adding a festive touch to your wardrobe, especially for celebrations like the 4th of July, this project is engaging and allows for personal customization.
With the option to sew or use a no-sew method with a hot glue gun, these headbands are a fun activity that yields stylish results. Get ready to enhance your crafting repertoire and make a statement with your very own handcrafted bandana headband.
23. Homemade Fall Headband Using Felt
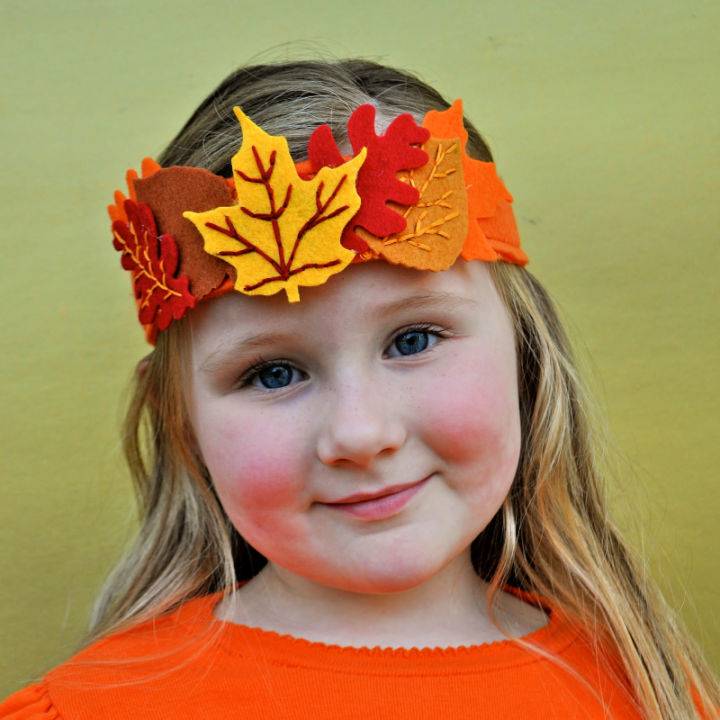
Discover how to craft a charming DIY fall headband with guidance from Make Life Lovely. This tutorial simplifies the process, providing clear, step-by-step instructions to make a festive accessory for children that's perfect for Thanksgiving gatherings. Using pre-cut felt leaves, embroidery floss, and a few other materials, you'll learn how to assemble a headband that's not only adorable but also customizable to your child's preferences.
Ideal for adding a homemade touch to holiday celebrations, this project is engaging and straightforward, offering a rewarding crafting experience with a beautiful outcome. Dive into this fun activity and give your child a unique piece to cherish during the fall festivities.
24. Best DIY Top Knot Headband
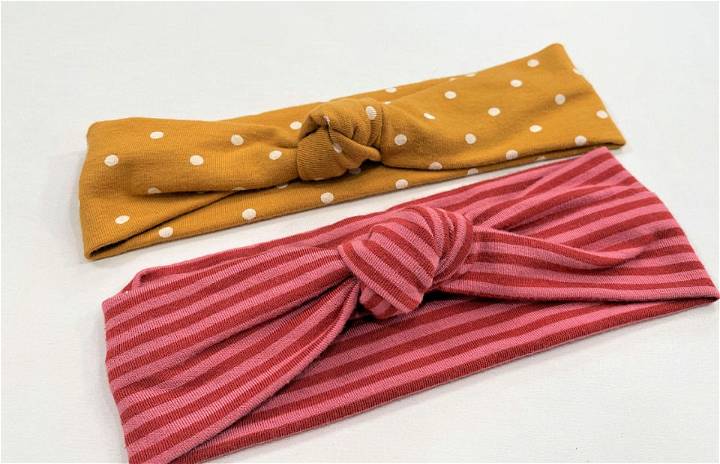
Making a charming top knot headband has never been simpler with this DIY sewing tutorial by Jan Howell. Ideal for a heartwarming baby gift or a stylish accessory for all ages, this project requires just a bit of stretchy knit fabric, which can even be upcycled from an old t-shirt.
Follow the clear instructions to measure, cut, and sew a headband that is not only adorable but also comfortable, thanks to the seamless design at the back. Visit You Make It Simple for an array of creative ideas that cater to your crafting needs, with easy-to-follow guides that ensure a delightful making experience.
25. Make Fancy Headbands for Loved Ones
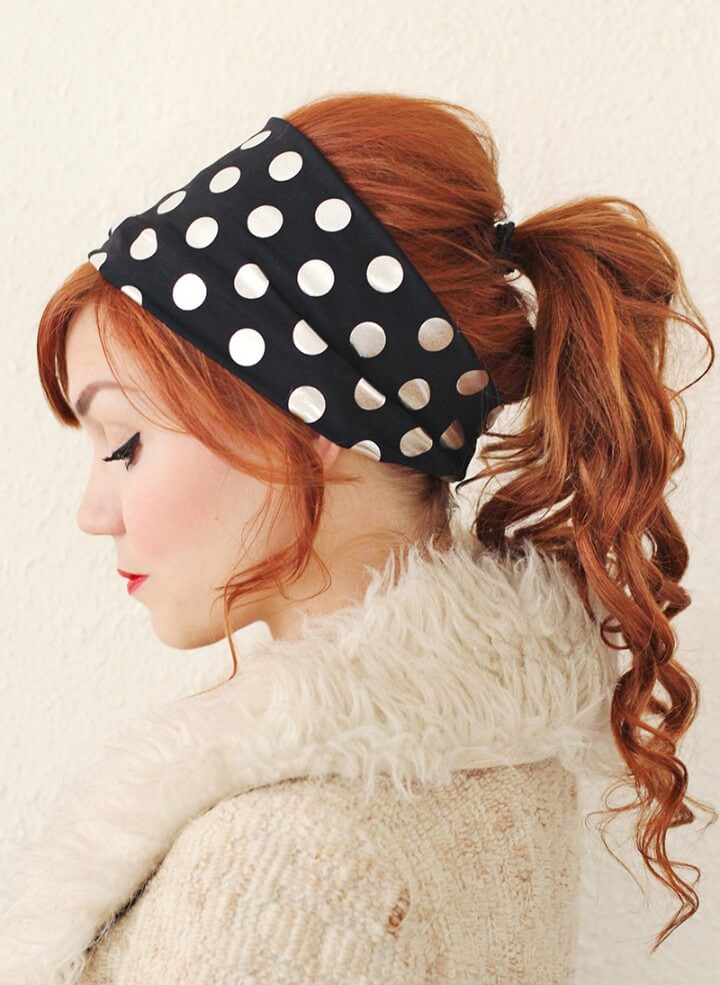
For those who enjoy crafting personalized gifts, making fancy headbands is a thoughtful and unique way to show affection. A Beautiful Mess shares an easy-to-follow guide on making these stylish accessories at home. With a few simple materials like shiny, shimmery stretchy fabric, and basic sewing tools, you can produce a handmade token of friendship or love.
Conclusion:
In conclusion, DIY headbands are the perfect way to add a personal touch to your outfit. Discover 25 easy DIY headbands perfect for spring and summer. From simple designs to intricate embellishments, the possibilities are endless.
By following styling tips, troubleshooting common issues, and exploring advanced techniques, you can craft unique headbands that reflect your personal style. Let your creativity shine with these remarkable DIY headbands.


