Making a DIY heart wreath can be a fun and simple project. One rainy afternoon, I decided to make something special for my front door. I gathered some basic materials like wire, ribbon, and fake flowers. It was quite an adventure, shaping the wire into a heart. I felt a sense of pride seeing it come together.
Making a heart wreath is a wonderful way to add a personal touch to your home decor. I followed a few easy steps, and in no time, I had a beautiful wreath to display. It's amazing how such a small project can brighten up your doorway. I'm sharing this so you can also enjoy crafting your own wreath.
Materials Needed and Why
- Wired Heart-Shaped Wreath Form: The skeleton of our project; it's affordable and gives the perfect shape.
- Chunky Chenille Yarn: For its softness and volume, enhancing the wreath's texture.
- Red Velvet Ribbon: Screams love and Valentine's with its texture and color.
- Decorative Ribbon: Adds an extra touch of Valentine's essence.
- Hot Glue Gun and Sticks: The main adhesive is quick and strong for bonding materials.
- Scissors: For cutting ribbons and yarn to size.
- Pipe Cleaners: To make a hanging mechanism for the wreath.
Step by Step Instructions
Learn how to make a lovely DIY heart wreath with our step-by-step instructions. Perfect for adding a personal touch to your home decor!
Step 1: Wrapping the Wreath Form with Yarn
I started by securing one end of the chunky chenille yarn to the pointy bottom of the heart form using a dab of hot glue. The trick here is to cut a manageable length of yarn to make the wrapping process easier. Remember to pull the yarn taut and wrap it closely to avoid gaps. It was a slow process, but seeing the wire form disappear under the soft, chunky yarn was satisfying.
Step 2: Adding the First Layer of Ribbon
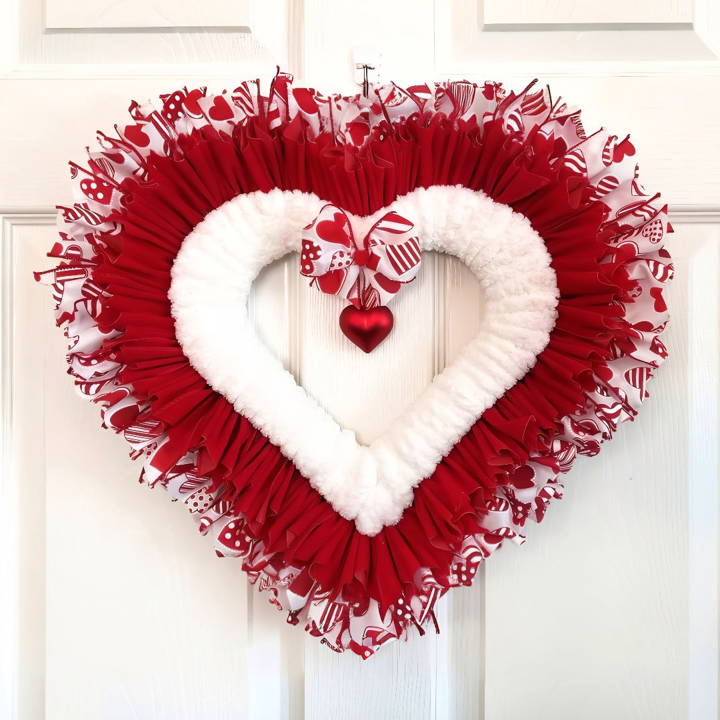
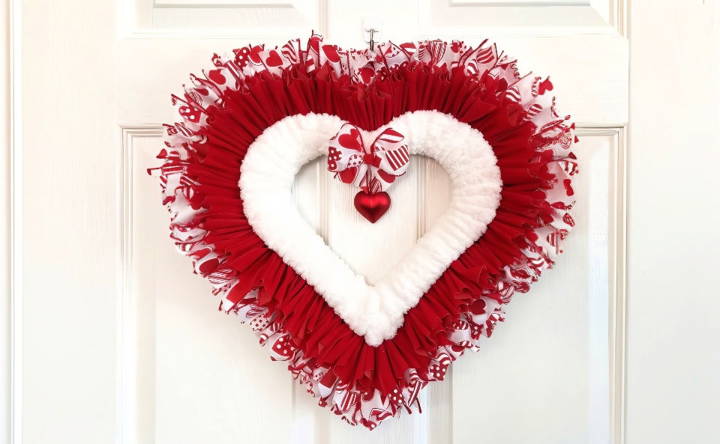
Cutting the red velvet ribbon into 6-inch strips, I folded and dovetailed the ends for a polished look. Then, I pinched each strip in the middle, added a bit of hot glue, and attached them to the back of the wreath form. This maked a lush and vibrant base layer. Ensuring the pretty side of the ribbon faced forward was crucial for the aesthetic.
Step 3: Incorporating Decorative Ribbon
For the second ribbon layer, I chose a delightful patterned ribbon that complemented the red velvet beautifully. Following the same dovetailing and attaching process, I secured these strips around the outer edge of the wreath form, just behind the first layer of red ribbon. It was easier than I anticipated, and the patterned ribbon added a charming contrast.
Step 4: The Final Touches
To hang the wreath, I twisted a pipe cleaner around the top arches of the heart form for stability and aesthetics. Then, I added a lovely bow and a small heart ornament in the center of the bow for that special Valentine's touch. The ornament was a gentle nod to the season of love.
Reflections on the Craft
This DIY project taught me the value of patience and the beauty of layering different materials to make something unique and personal. The combination of soft yarn, plush velvet ribbon, and a touch of whimsical patterned ribbon resulted in a Valentine's Day wreath that brought warmth and love to my home decor.
Quick Tips for Success
- Measure Twice, Cut Once: Ensuring your ribbon strips are uniform in size makes for a neater, more professional-looking wreath.
- Layering Is Key: Don't hesitate to layer different textures and colors; it adds depth and interest.
- Patience Pays Off: This project isn't quick, but the results are well worth the effort. Take your time to place each piece thoughtfully.
Customization Ideas
Making a DIY heart wreath is not just about crafting something beautiful; it's about infusing it with your personality and making it unique. Here are some customization ideas to help you make a heart wreath that truly reflects your style:
- Choose a Theme: Decide on a theme that resonates with you. It could be romantic, rustic, modern, or even whimsical. Let this theme guide your choice of materials and colors.
- Color Palette: Select a color palette that matches your home decor or the occasion you're making the wreath for. Whether it's soft pastels for a gentle look or bold reds and pinks for Valentine's Day, the colors you choose will set the tone.
- Add Textures: Mix and match different textures for a rich, tactile experience. Combine smooth ribbons, rough burlap, delicate feathers, or shiny beads to add depth to your wreath.
- Personal Touches: Incorporate elements that have personal significance. This could be a family heirloom, a favorite brooch, or initials crafted from wire or wood.
- Seasonal Flair: Reflect the current season in your wreath. Use fresh spring flowers, autumn leaves, summer seashells, or winter evergreens to make your wreath timely and relevant.
- Light It Up: For a magical touch, weave in some fairy lights. This works especially well for evening events or as a festive holiday decoration.
- Repurpose with Purpose: Look around your home for items you can repurpose. An old necklace could become part of the wreath's decor, or a piece of fabric might be transformed into a bow.
- Interactive Elements: Make your wreath interactive by adding elements that move or make noise, like small bells or charms that catch the wind.
- Fragrance: Add a sensory dimension by including fragrant herbs or scented oils. Lavender, rosemary, or eucalyptus can provide a soothing aroma.
- Layering: Don't be afraid to layer elements. Place flowers over leaves or ribbons over lace. Layering adds complexity and visual interest to your wreath.
The key to a great DIY project is personalizing it. Have fun experimenting, and don't be afraid to try new things. Your heart wreath should reflect your creativity!
Common Mistakes to Avoid
When crafting a DIY heart wreath, it's easy to get caught up in the excitement of making something beautiful. However, there are common pitfalls that can turn your crafting experience into a frustrating one. To help you avoid these, here are some mistakes to steer clear of:
- Not Planning Your Design: Before you start, have a clear idea of what you want your wreath to look like. This includes choosing a color scheme, deciding on materials, and knowing the size and shape you're aiming for.
- Using the Wrong Materials: Select materials that are flexible and durable. For example, using brittle materials for the base can lead to breakage, and choosing non-flexible decorations can make them difficult to attach.
- Overcrowding Your Wreath: While it's tempting to use all the decorations you have, too many elements can make your wreath look cluttered. Aim for a balanced design.
- Ignoring the Wreath's Back: The back of your wreath is just as important as the front, especially if it's going to be seen from a window. Make sure it's neat and tidy.
- Forgetting to Secure Decorations: Ensure all decorations are firmly attached. Loose decorations can fall off and ruin the look of your wreath.
- Neglecting the Wreath Form: The form is the foundation of your wreath. If it's not shaped correctly or is too flimsy, your wreath won't have the desired heart shape and might not hang properly.
- Not Testing the Hanging Method: Before you declare your wreath finished, test how it hangs. Adjust the decorations if the wreath tilts or doesn't hang evenly.
By avoiding these common mistakes, you'll be on your way to making a heart wreath that's not only beautiful but also well-crafted and durable.
Maintenance Tips
Taking care of your DIY heart wreath will ensure it remains beautiful and lasts for many seasons. Here are some maintenance tips to keep your wreath looking its best:
- Regular Dusting: Gently dust your wreath with a soft cloth or a feather duster to prevent buildup. For a deeper clean, you can use a hairdryer on a cool, low setting to blow away any dust particles.
- Avoid Direct Sunlight: To prevent fading, especially for wreaths made with colored materials or artificial flowers, keep your wreath out of direct sunlight.
- Proper Storage: When not in use, store your wreath in a cool, dry place. A wreath storage bag or box is ideal to prevent dust accumulation and protect it from being crushed.
- Handling with Care: Always handle your wreath gently. When attaching or removing decorations, be careful not to pull or tug too hard, which could distort the shape or damage the materials.
- Refresh Decorations: Over time, some decorations may lose their luster or become dated. Feel free to refresh your wreath with new decorations to keep it looking current and vibrant.
- Check for Damage: Periodically check your wreath for any signs of wear or damage. Repair any loose parts or replace damaged elements promptly to maintain its appearance.
- Avoid Moisture: If your wreath includes elements that are prone to damage from moisture, such as paper or certain fabrics, keep it in a dry environment and away from humidity.
By following these simple maintenance tips, your DIY heart wreath will continue to be a charming and welcoming addition to your home décor for a long time.
FAQs About DIY Heart Wreath
Discover answers to your FAQs about DIY heart wreaths, including tips, materials, and step-by-step guidance to craft the perfect heart-shaped wreath.
Begin by securing the end of the ribbon to the back of the wreath form using floral wire or pins. Then, wrap the ribbon tightly around the form, making sure to overlap each layer slightly to cover the form completely. When you reach the end, secure the ribbon again at the back.
Absolutely! You can personalize your wreath by adding faux flowers, greenery, bows, or any other decorative elements. Attach these with floral wire or hot glue to ensure they stay in place.
To hang your wreath, you can use a T-pin or floral pin inserted at the top back of the wreath. Alternatively, you can attach a ribbon loop or fishing line for a more invisible look. Ensure it’s secure before displaying.
For a fuller look, use more ribbon or fabric and make sure to fluff out the loops and layers. If using faux flowers, distribute them evenly around the wreath and consider varying the sizes for added depth and interest.
To maintain the shape of your heart wreath, especially if you're using a wire form, it's important to:
Use materials that hold their shape well, like wired ribbon or sturdy fabric.
Securely attach all elements to the form, using floral wire, pins, or hot glue.
Store the wreath in a cool, dry place when not in use to prevent materials from warping or fading.
Consider applying a protective spray if you're using natural elements to preserve their color and integrity.
Wrapping It Up
I hope my story inspires you to make your own DIY heart wreath. It's a great way to spend an afternoon and add some charm to your home. Follow the guide below, and you'll find it incredibly rewarding. Let your creativity take flight, and have fun making your heart wreath as unique as your home.


