Making your own rice heating pad is a simple, satisfying project that not only introduces you to the joys of DIY crafts but also ends in a wonderfully useful product you can enjoy every day or gift to someone special. Here's how I ventured into building my very own no-sew rice heating pad, following the footsteps of the inspiring tutorial from Fun Sock Creations.
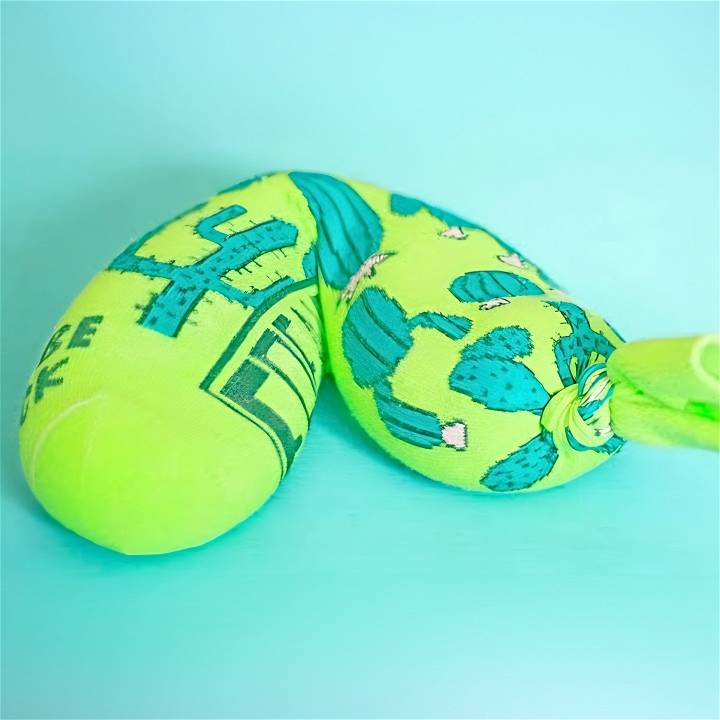
Materials You'll Need:
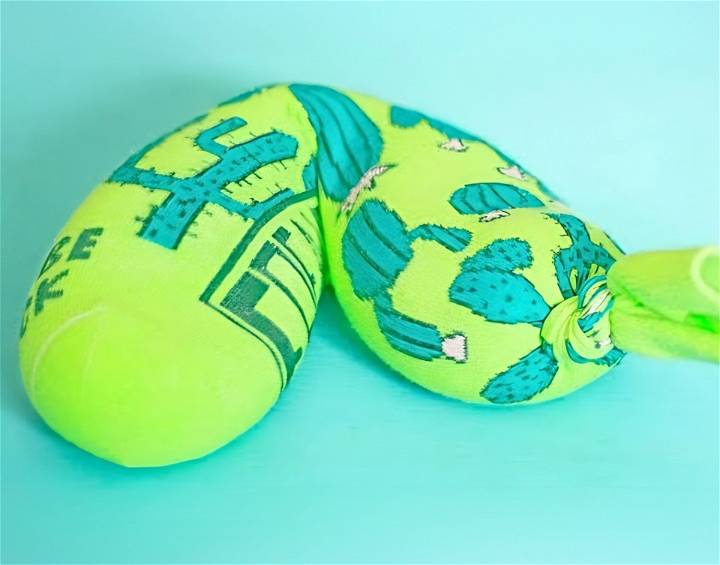
- A Sock: Choose a fun, colorful one to brighten your day. The sock acts as the container for the rice, so it's essential it's clean and without holes.
- Rice: This will be your heating element. Rice is ideal because it retains heat well and is readily available.
- A Funnel: This makes the process less messy and far more efficient.
- Microwave: To warm up your finished heating pad.
Why These Materials?
The sock is essential as it's your heating pad's "body." I learned that fun patterns or colors make the heating pad not only functional but also personal and vibrant. The rice is a must-have because it's cheap, non-toxic, and holds heat well. The funnel, while not necessary, really speeds up the process and prevents rice from spilling everywhere. Lastly, you'll need a microwave to heat your pad before use.
Step-By-Step Guide
Learn how to make your own heating pad with this comprehensive DIY guide. Easy steps for filling, securing, and heating. Includes personal tips and final thoughts.
Filling the Sock:
- Open your chosen sock and position the funnel at its opening. This step was particularly fun for me as I chose a vibrant, funky patterned sock that reflected my personality.
- Pour rice into the funnel. This step was a bit meditative, watching the grains flow smoothly into the sock. You'd need to occasionally tap or shake the funnel to keep the rice moving. The amount of rice depends on the size of your sock and personal preference for fullness. I aimed for a medium fullness because I wanted my pad flexible yet substantial.
Securing the End:
- Remove the funnel and give the sock a gentle shake to settle the rice. This ensures even distribution within the sock.
- Tie a knot at the open end of the sock. Ensure it's tight to prevent any rice from escaping. I found making a double knot gave me extra peace of mind.
Heating:
- Place the rice-filled sock in the microwave. I started with one-minute intervals because microwave strengths vary. It's crucial not to overheat as it could scorch the rice.
- Check the warmth and adjust heating time accordingly. After heating, I usually give the pad a good shake to distribute the warmth evenly.
Personal Experience:
Making this rice heating pad was not just about the end product; it was a journey that brought a sense of achievement and warmth (quite literally). The first time I heated my DIY pad and felt its comforting warmth, I knew I had maked something special. It's perfect for sore muscles, cold nights, or just a bit of relaxation.
Moreover, as someone deeply conscious about sustainability, I believe this project aligns with my values. It's a fantastic way to repurpose a solitary sock (we all have them, don't we?) and utilize a basic staple like rice for something other than cooking.
Material Alternatives for DIY Heating Pads
When building a DIY heating pad, the choice of materials is crucial for both effectiveness and safety. Here are some alternative materials you can consider:
Natural Fillers
- Rice: It's the most common filler for DIY heating pads. It's inexpensive and retains heat well. For a pleasant aroma, you can mix in some dried lavender or chamomile.
- Wheat: Similar to rice, wheat grains also retain heat well and have a comfortable weight.
- Cherry Pits: They have excellent heat retention and emit a soothing fragrance when warmed.
- Corn: Dried corn kernels are another great option, but ensure they are not the popping kind!
Fabric Choices
- Cotton: It's breathable and can withstand high temperatures, making it ideal for the outer layer of your heating pad.
- Flannel: Soft and insulating, flannel is a cozy option for a heating pad cover.
- Denim: For a more durable option, repurpose old denim. It's thick and can handle repeated heating cycles.
Aromatic Additions
- Essential Oils: A drop or two of your favorite essential oil can provide aromatherapy benefits. Lavender, eucalyptus, and peppermint are popular choices.
- Dried Herbs: If you prefer a more subtle scent, mix in dried herbs like rosemary or mint with your filler.
Eco-Friendly and Hypoallergenic Options
- Buckwheat Hulls: They are natural, hypoallergenic, and environmentally friendly.
- Bamboo Fibers: Bamboo is sustainable and has natural antibacterial properties.
Safety Tips
- Do not overheat: Follow the heating instructions carefully to prevent burns or fire hazards.
- Check for allergies: If you're using herbs or essential oils, make sure you're not allergic to them.
- Regular Inspection: Always check the heating pad for any signs of wear and tear before use.
By considering these materials, you can make a heating pad that suits your preferences and needs while being mindful of safety and sustainability. Remember to always test your heating pad after assembly to ensure it's working correctly and safely.
Scientific Backing for the Benefits of Heat Therapy
Heat therapy, also known as thermotherapy, has been a staple in pain management and rehabilitation for many years. Recent studies have continued to support its effectiveness, providing a scientific basis for its widespread use. Here's how heat therapy can be beneficial:
Pain Relief and Muscle Relaxation
Applying heat to an area of the body increases blood flow and oxygen uptake, which can help soothe and relax sore muscles. The warmth encourages blood vessels to expand, allowing more oxygen and nutrients to reach damaged tissues, thus accelerating the healing process. This is particularly beneficial for chronic conditions like lower back pain.
Reduced Inflammation and Edema
Heat therapy contributes to a reduction in inflammation and swelling. By improving circulation, it helps to flush out the byproducts of inflammation, thereby reducing edema and discomfort.
Enhanced Flexibility
Warmth from heat therapy can make the muscles more pliable, increasing flexibility and range of motion. This is especially helpful before stretching or engaging in physical activity to prevent injury.
Psychological Comfort
The application of heat can trigger the release of endorphins, the body's natural painkillers, building a sense of comfort and relaxation. This psychological aspect can be just as important as the physical benefits when it comes to overall well-being.
Immune System Activation
Regular use of heat therapy, such as sauna sessions, can activate the immune system. This includes the activation of monocytes, which are crucial for the body's defense mechanisms and help in the healing process.
Decrease in Inflammatory Markers
Studies have shown that frequent heat therapy can lead to lower levels of inflammatory markers in the blood, such as C-reactive protein, which is often associated with various health conditions.
FAQs About DIY Heating Pads
Making your own heating pad at home can be a rewarding project. It's a simple way to provide comfort and relief from aches and pains. Here are some frequently asked questions to help you get started on making your own heating pad.
How do I heat my DIY heating pad?
Most DIY heating pads can be heated in the microwave. Typically, you'll heat it for 1-3 minutes, but always start with less time and add more as needed. It's important to test the heating pad on the inside of your arm before applying it to the desired area to avoid burns.
Can I add a scent to my heating pad?
Yes, you can add a relaxing scent to your heating pad by mixing in dried herbs like lavender or chamomile with the filler. Alternatively, a drop or two of essential oil can be added after the pad is heated.
How long will the heat last in my DIY heating pad?
The heat duration depends on the type of filler used and how well the pad is insulated. Generally, a homemade heating pad can retain heat for about 20-30 minutes.
Is it safe to use a DIY heating pad?
Yes, it's safe if used correctly. Always ensure the heating pad is not too hot before applying it to your skin. Do not use it on bare skin, and never fall asleep while using it. Regularly inspect your heating pad for any signs of wear and tear.
How should I care for my DIY heating pad?
After each use, allow your heating pad to cool completely before storing it. Keep it in a dry place to prevent mold growth. If your heating pad has a removable cover, wash the cover regularly. The inner pouch containing the filler should not get wet.
By following these guidelines, you can make a safe and effective heating pad right at home. Remember, if you have persistent pain, it's important to consult with a healthcare professional.
Final Thoughts and A Warm Farewell:
As I wrap up this guide, inspired by Fun Sock Creations, I reflect on the simplicity and beauty of building something with your hands that brings comfort and warmth. This project is a testament to the idea that joy can be found in the smallest of creations.
And as Fun Sock Creations goes through its own transition, introducing Nora to continue the legacy of creativity and inspiration, I too feel inspired to embark on new DIY projects, sharing my journey and hopefully inspiring others along the way.
Making a no-sew rice heating pad was an enlightening project, full of fun and warmth. Whether you're new to DIY or a seasoned crafter, I encourage you to try this simple, gratifying project.


