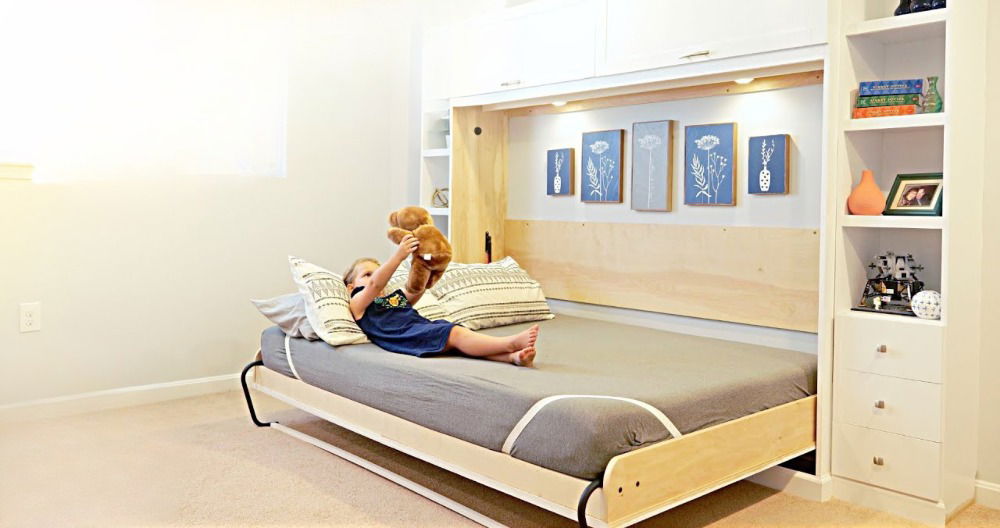
When I embarked on the journey of transforming my guest room into a multifunctional space, the idea of incorporating a Murphy bed seemed both innovative and practical. My objective was straightforward: construct a horizontal Murphy bed without breaking the bank, utilizing the most cost-effective materials I could source from Amazon. This undertaking wasn't just a DIY project; it was a leap of faith into uncharted waters, guided by optimism and a pinch of ingenuity.
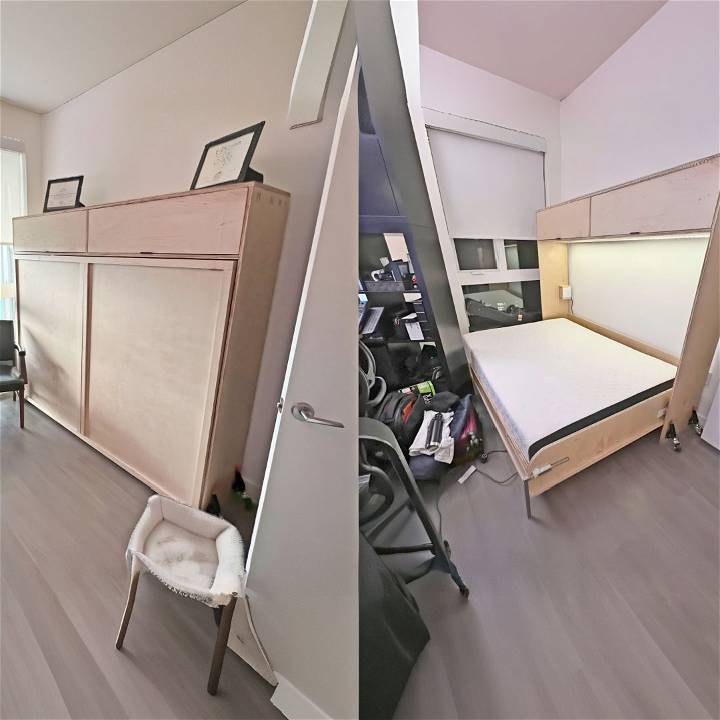
Why a Horizontal Murphy Bed?
The choice to build a horizontal rather than a vertical Murphy bed was dictated by space constraints and the challenge of finding hardware designed to handle the load sideways. Vertical Murphy beds are more common, but the horizontal design was a perfect fit for my room's layout, providing an ample sleeping area without consuming valuable floor space when not in use.
The Materials: A Rundown
- Amazon Spring System: This pivotal component was the backbone of the project. Opting for a spring mechanism over a gas strut system was a budget-friendly choice. Despite its affordability, the spring system posed a significant challenge – it came with no instructions or diagrams, a puzzle I was determined to solve.
- Wood Panels and Frame Construction Supplies: Essential for building the Murphy bed's frame. The choice of wood affected not only the bed's aesthetics but its durability as well.
- Screws and Hardware for Assembly: Ensuring the structure's integrity meant selecting the right fasteners. Each piece played a crucial role in assembling a sturdy and safe bed.
- Tools: From saws to drills, the right tools were non-negotiable for precise cuts and assembly.
Each material was selected for its cost-effectiveness, functionality, and suitability for my project's specific needs.
Step by Step Instructions
Learn how to build a DIY horizontal Murphy bed with these detailed step-by-step instructions. Save space and add functionality to your home today!
Making the Frame
Learn how to build the frame for a DIY horizontal Murphy bed with step-by-step instructions in this comprehensive guide.
Conceptualization
Sketching the design was my first step in turning the vision into reality. But soon, I realized that paper sketches wouldn't suffice, prompting me to model the design using 3D software. This approach allowed me to visualize the dimensions accurately and adjust the design to accommodate the spring system effectively.
Frame Construction
Building a sturdy frame to house the bed mechanism was paramount. I focused on crafting a solid outer frame that provided enough space for the bed and the spring system, ensuring everything fit snugly within. To reduce the overall weight, I opted for a design that combined thick panels for stability with strategically placed braces, rather than a solid back panel.
Fitting the Spring System
The Amazon spring system, despite its lack of instructions, was crucial. Through trial and error, I positioned the system to ensure smooth operation, allowing the bed to pivot without hitting the frame or the wall. It was a game of measurements and adjustments, demanding patience and precision.
Overcoming Challenges
- Lack of Instructions: The most daunting challenge was the absence of a manual for the spring system. I relied on intuition and mechanical reasoning, testing various configurations until I found the optimal placement.
- Exact Measurements: Precision was non-negotiable. A single miscalculation could result in the bed malfunctioning. I measured, re-measured, and adjusted the plans as needed, ensuring every component aligned perfectly.
- Structural Integrity: Ensuring the bed was safe to use was paramount. This meant selecting the right materials for the frame and securing the spring system firmly in place.
Lessons Learned and Tips for DIY Enthusiasts
- Research Thoroughly: Understand the mechanics of Murphy beds. Even without a manual, familiarizing yourself with how they work can guide your project.
- Measure Twice, Cut Once: Accuracy in your measurements is crucial. Ensure your dimensions are precise to avoid any issues in assembly.
- Patience is Key: Anticipate challenges and be prepared to troubleshoot without clear instructions. Patience and persistence will be your greatest assets.
- Safety First: When choosing materials and assembling your bed, prioritize safety. Ensure the bed is securely mounted and that all components are sturdy.
Customization Options for Your DIY Horizontal Murphy Bed
When it comes to making a customized and functional horizontal murphy bed, there are plenty of exciting options to explore. Whether you're a seasoned DIY enthusiast or a beginner, these customization ideas will help you make your murphy bed truly unique. Let's dive in!
Choose Your Finish and Color Palette
Before you start assembling your murphy bed, consider the overall aesthetic of your room. Here are some customization tips:
- Wood Stains and Paints: If you're using wood for your bed frame, experiment with different stains or paints. Opt for a classic wood finish, a rustic distressed look, or a sleek modern color.
- Bold Colors: Want your murphy bed to stand out? Paint it in a bold color that complements your room decor. Think deep navy, vibrant teal, or even a sunny yellow.
- Chalkboard or Magnetic Paint: Turn the front panel of your murphy bed into a functional surface. Apply chalkboard paint for notes and doodles, or magnetic paint for attaching photos and reminders.
Add Decorative Hardware
Small details can make a big difference. Consider the following hardware options:
- Handles and Pulls: Choose stylish handles or pulls for the bed's cabinet doors. Sleek metal handles work well for a modern look, while vintage-style pulls add charm.
- Decorative Hinges: Instead of standard hinges, opt for decorative ones. They can enhance the overall design and give your murphy bed a polished appearance.
Integrated Lighting
Make your murphy bed both practical and cozy with integrated lighting:
- LED Strips: Install LED strips along the underside of the bed frame. These provide soft ambient lighting and make it easier to read or relax in bed.
- Reading Lights: Attach adjustable reading lights to the sides of the bed. They're perfect for late-night reading or working on your laptop.
Fold-Out Desk or Workspace
If your murphy bed is in a home office or guest room, consider adding a fold-out desk:
- Drop-Down Desk: Install a hinged desk panel that folds down when the bed is up. It's ideal for writing, working, or even crafting.
- Hidden Storage: Build compartments within the desk for storing office supplies, stationery, or laptop accessories.
Built-In Shelves and Cabinets
Maximize storage space by incorporating shelves and cabinets:
- Bookshelves: Add bookshelves on either side of the murphy bed. They're perfect for displaying books, decorative items, or family photos.
- Hidden Storage Cabinets: Install cabinets beneath the bed frame. Use them for storing bedding, pillows, or seasonal clothing.
Whether you're aiming for elegance, functionality, or a mix of both, these customization options will elevate your DIY horizontal Murphy bed project.
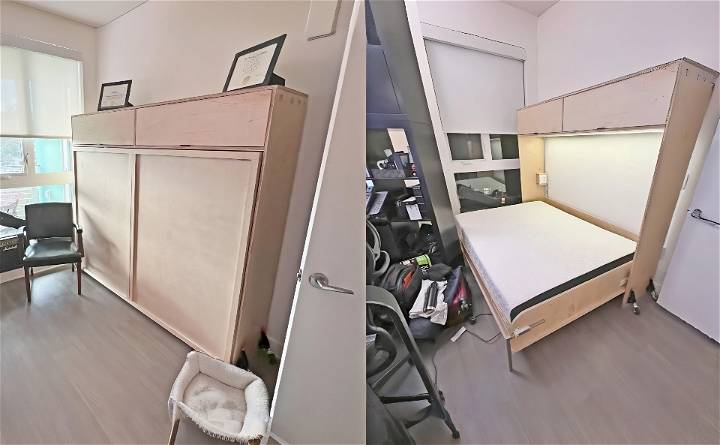
Space Optimization Strategies for Your DIY Horizontal Murphy Bed
Building a functional and efficient space with your DIY horizontal murphy bed involves more than just the bed itself. Let's explore some smart strategies to maximize your room's potential while keeping it organized and clutter-free.
1. Multi-Functional Furniture
- Foldable Desks: Consider integrating a fold-out desk into your murphy bed design. When the bed is up, the desk can serve as a workspace or a vanity. It's perfect for small home offices or guest rooms.
- Wall-Mounted Shelves: Install shelves above or around the murphy bed area. Use them for books, decorative items, or even small potted plants. Wall-mounted shelves free up floor space and add visual interest.
2. Hidden Storage Compartments
- Under-Bed Storage: Utilize the space beneath the murphy bed. Build storage compartments or drawers to store extra bedding, pillows, or seasonal clothing. These hidden compartments keep your room tidy and organized.
- Side Cabinets: If your murphy bed has side panels, consider adding cabinets. These can hold essentials like alarm clocks, reading glasses, or charging cables. Opt for sleek handles or push-to-open mechanisms for a seamless look.
3. Vertical Space Utilization
- Vertical Bookshelves: Extend your storage upward by installing tall bookshelves alongside the murphy bed. Arrange books, decorative boxes, or framed photos. Vertical bookshelves build an illusion of height and make the room feel more spacious.
- Hooks and Pegs: Mount hooks or pegs on the wall near the murphy bed. Hang items like hats, scarves, or bags. These small additions prevent clutter on chairs or other furniture.
4. Mirrors and Illusion
- Mirrored Panels: Attach mirrored panels to the front of the murphy bed. Mirrors reflect light and build an illusion of depth, making the room appear larger. Plus, they serve as functional mirrors when the bed is down.
- Light-Colored Walls: Opt for light-colored paint or wallpaper on the walls surrounding the murphy bed. Light hues visually expand the space and enhance brightness.
5. Foldable Tables and Seating
- Drop-Leaf Tables: Install a drop-leaf table near the murphy bed. When needed, unfold it for dining, working, or crafting. Fold it back up when not in use.
- Foldable Chairs or Stools: Choose lightweight, foldable seating options. These can be stored away when the murphy bed is down, allowing you to reclaim floor space.
Assess your room's layout, lifestyle, and storage needs, and tailor these strategies to fit your unique space. With a well-designed Murphy bed and clever organization, your room will feel more open and inviting.
FAQs About DIY Horizontal Murphy Bed
Get answers to all your DIY horizontal Murphy Bed questions in one place! Learn how to build, install, and customize your own space-saving bed easily.
How does a horizontal murphy bed work?
A horizontal murphy bed, also known as a wall bed or fold-down bed, operates on a simple yet ingenious mechanism. When not in use, it remains concealed within a cabinet or wall unit. When you need a bed, you unlock the latch, gently pull it down, and voilà—a comfortable sleeping space! The horizontal orientation means it opens sideways, making it ideal for rooms with low ceilings or limited floor space.
Is building a murphy bed difficult?
Not necessarily! With the right tools, materials, and a good set of instructions, building a DIY horizontal murphy bed can be a rewarding project. Many people successfully build their own murphy beds using online plans or kits. Take your time, follow safety precautions, and enjoy the process.
What are the advantages of a horizontal murphy bed?
- Space-Saving: Unlike traditional beds, murphy beds don't take up permanent space. Fold them up during the day to reclaim floor area.
- Versatility: Use the room for other purposes when the bed is up—home office, playroom, or workout space.
- Guest Accommodation: Perfect for guest rooms or studio apartments where space is at a premium.
- Customization: You can personalize the design, color, and hardware to match your decor.
Can I customize my murphy bed?
Absolutely! Here are some customization ideas:
- Finish and Color: Choose wood stains, paints, or bold colors.
- Decorative Hardware: Select stylish handles and hinges.
- Integrated Lighting: Add LED strips or reading lights.
- Fold-Out Desk: Install a drop-down desk for added functionality.
- Shelves and Cabinets: Incorporate bookshelves or hidden storage.
How do I ensure safety when installing a murphy bed?
Safety first! Follow these tips:
- Secure Mounting: Attach the bed frame securely to the wall studs.
- Gas Springs: Handle hydraulic lift mechanisms (gas springs) with care during assembly.
- Test Stability: After installation, test the bed's stability and functionality.
Can I build a murphy bed on a budget?
Definitely! Consider cost-effective alternatives:
- Basic Design: Skip specialized hardware and build a simpler murphy bed.
- Materials: Opt for budget-friendly wood or plywood.
- DIY Hardware: Make your own handles or hinges.
Remember, a well-constructed murphy bed enhances both your living space and your DIY skills!
Final Thoughts
Building a horizontal Murphy bed with budget-friendly Amazon finds was an enriching experience that combined problem-solving with creativity. Along the way, I learned the importance of thorough planning, precision, and patience. The project, which began as a space-saving solution, evolved into a testament to the joys and challenges of DIY endeavors. For anyone considering a similar project, I hope my journey inspires you to take the leap, armed with the knowledge that with dedication and perseverance, you can build a functional and aesthetically pleasing addition to your home.


