Making a DIY hot air balloon is an exciting and rewarding project. It's a simple way to learn about basic physics while having fun making something unique. First, you'll need some basic materials like lightweight paper, glue, and a heat source. You'll be crafting a mini balloon that can rise into the air using hot air. With patience and attention to detail, you'll see your project take off!
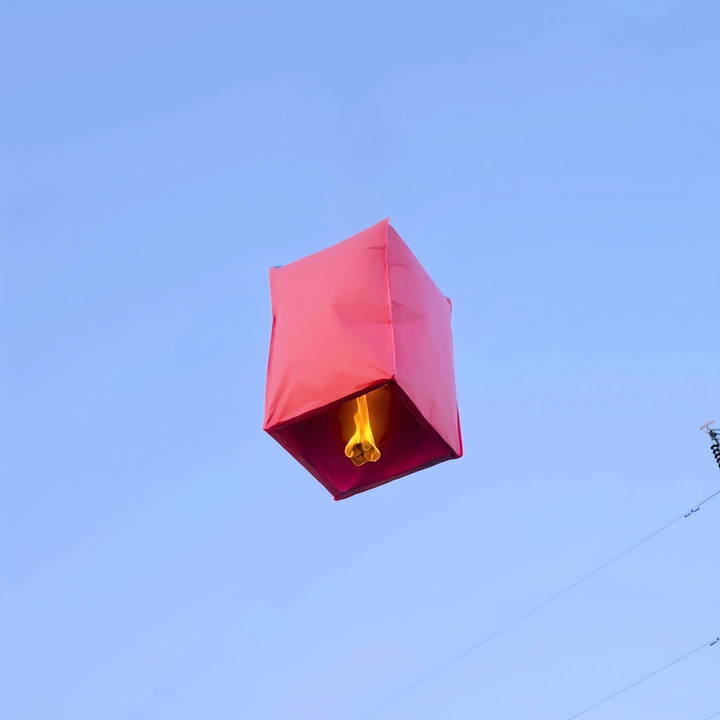
I've laid out the steps clearly so you can easily follow along. This guide will help you from start to finish, ensuring that your balloon will lift with ease. Get ready to dive into a hands-on activity that you can enjoy alone or with others. I'm helping with this guide so you can confidently make your very own DIY hot air balloon.
By the end of this, you'll feel accomplished and have a working hot air balloon you made yourself. Now, let's get started and build your balloon step by step!
Historical Context of Hot Air Ballooning
Hot air ballooning, with a history over two centuries old, showcases human ingenuity and daring. Let's explore key moments in its evolution.
- The Birth of Ballooning: The first untethered, manned hot air balloon flight took place in Paris, France, on November 21, 1783. The balloon was maked by the Montgolfier brothers, Joseph and Etienne, who were inspired by the concept of an airborne lantern. This historic flight, which carried Jean-François Pilâtre de Rozier and François Laurent d'Arlandes, lasted for about 20 minutes and marked the beginning of human flight.
- Crossing Boundaries: In 1785, Jean Pierre Blanchard and John Jeffries achieved the first flight across the English Channel in a hydrogen balloon. This remarkable feat demonstrated the potential for long-distance travel in the skies.
- Advancements and Setbacks: While hot air ballooning was initially popular, it was soon overshadowed by gas ballooning due to the latter's ability to provide longer and more controlled flights. However, the dream of hot air flight was kept alive by enthusiasts and inventors.
- Modern Era: The modern age of hot air ballooning began with Ed Yost in the 1950s. He developed a new balloon design with a nylon envelope and a propane burner system, which allowed for longer flights and better maneuverability. His innovations laid the groundwork for the hot air balloons we see today.
- Cultural Impact: Today, hot air ballooning is not just about exploration but also about culture and celebration. Events like the Albuquerque International Balloon Fiesta started in 1972, showcase the beauty and community spirit of ballooning.
Understanding hot air ballooning's history reveals the passion and progress lifting this flight to new heights, showcasing human curiosity and the desire to soar.
Materials Needed and Their Purpose
Before diving into the creation process, let's talk about the materials you will need and why each one is crucial for your DIY sky lantern.
- Kite Paper / Coloured Tissue Paper: This is the main body of your lantern. I chose kite paper because it's lightweight and comes in vibrant colors, making the lantern look beautiful when it catches the light.
- Fevicol / Paper Glue: Essential for sticking your paper pieces together. Opt for a strong adhesive over a glue stick, as the latter might come undone under the heat.
- Cardboard Sheet: This provides a sturdy base for your lantern. It needs to be light yet firm enough to hold the structure.
- Cutter Knife and Scissors: For cutting the paper and cardboard to the required measurements. Always handle with care.
- Metal Wire: This will form the frame that holds the base of the lantern open.
- Candle Wax: A crucial component that will fuel the flight of your lantern.
Measurements Are Key
Before you start cutting and gluing, make sure to get your measurements right. For the paper, you'll need five sheets, each 70cm in length and 44cm in width. The cardboard should be cut to a length of 42cm and a width of 2cm. Remember, the cardboard length is slightly less than the paper width to ensure a snug fit.
Step by Step Instructions
Learn how to make a hot air balloon with our step-by-step guide! From cutting materials to launch, follow these easy instructions for a fun DIY project.
1. Prepare Your Workspace
Lay all your materials out on a clean, flat surface. Have your measurements and tools within easy reach to streamline the process.
2. Cutting the Paper and Cardboard
Using the cutter knife and scissors, cut the kite paper according to the measurements provided. Do the same with the cardboard, ensuring each piece is precisely measured for a perfect fit later on.
3. Building the Base
Take the metal wire and mold it into a circle that matches the diameter of your lantern base (use the cardboard length as a guide). This will serve as the skeleton of your lantern's base. Attach the cardboard pieces around this wire circle using your paper glue. This circular base will hold your candle wax later, providing the heat to lift the lantern.
4. Assembling the Lantern
Now comes the delicate part. Carefully glue the edges of your kite paper sheets together, making a large balloon shape that will gather around the base you've just made. Ensure each joint is securely glued to avoid any accidents once the lantern is airborne.
5. Adding the Candle Wax
Place a small amount of candle wax in the center of your cardboard base. This will serve as the fuel. Remember, safety first – ensure the structure is sturdy enough to hold the candle wax and that it's well-balanced.
6. The Launch
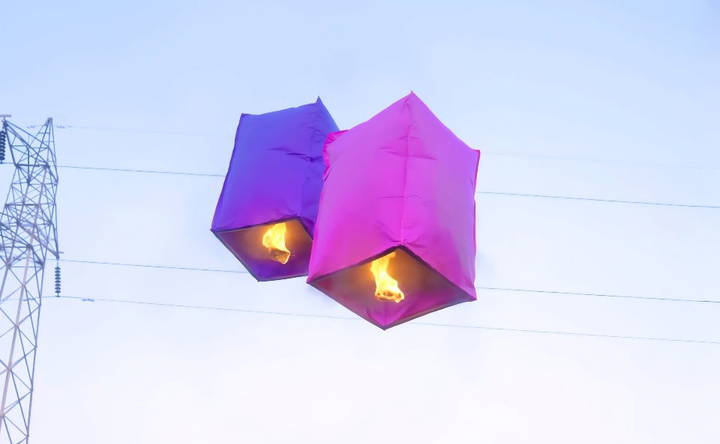
Choose a calm, clear evening for your launch. Light the wax, and as it begins to melt, it will heat the air inside the lantern, causing it to rise gently into the sky. It's a breathtaking moment to see your creation take flight, softly glowing against the night sky.
A Few Safety Tips
- Always launch your sky lantern in a clear, open area to avoid it getting caught in trees or power lines.
- Ensure the lantern is well-made and secure. Double-check all your joints and the stability of your base.
- Never leave the launching area until you're sure the lantern has been extinguished. Safety should always be your top priority.
Scientific Principles of Hot Air Ballooning
Understanding the scientific principles behind hot air ballooning is both fascinating and essential for anyone interested in this activity. It's all about how hot air interacts with cooler air, and here's a simple explanation of how it works.
Why Hot Air Rises
Hot air balloons float because hot air is lighter than cool air. The reason for this is quite straightforward: hot air has less mass per unit of volume. To put it simply, when you heat air, it expands and becomes less dense. This is because the molecules in the air move faster and spread out more when they are heated.
The Role of Temperature
A cubic foot of air at room temperature weighs about 28 grams. If you heat that same amount of air by 100 degrees Fahrenheit, it weighs around 7 grams less. This might not seem like much, but when you scale it up to the size of a hot air balloon, it makes a big difference.
Buoyancy Explained
Buoyancy is the force that makes hot air balloons rise. It works similarly to how a boat floats on water. A boat floats because it's supported by the water beneath it, balancing its weight with the upward pressure of the water. In the case of a hot air balloon, the warmer, lighter air inside the balloon is pushed up by the cooler, denser air outside.
The Balloon's Components
A hot air balloon has three main parts:
- The Burner: This heats the air inside the balloon.
- The Envelope: The large fabric bag that holds the hot air.
- The Basket: Where the passengers stand.
Heating the Air
Modern hot air balloons use propane burners to heat the air. Propane is stored in liquid form and is converted into gas as it's heated by the burner. This hot air causes the balloon to rise.
Controlling Altitude
To control the balloon's altitude, the pilot can adjust the temperature of the air in the envelope. Heating the air makes the balloon rise while allowing it to cool makes the balloon descend.
Understanding these principles reveals how hot air ballooning balances temperature, air density, and buoyancy, showcasing science in action for a serene yet exhilarating experience.
Advanced Techniques in Hot Air Ballooning
Elevate your hot air ballooning skills with advanced techniques for better control and enjoyment. Here are strategies to become a skilled balloonist.
- Precision in Altitude Control: Advanced balloonists learn to read the subtle signs of the atmosphere to control their altitude better. By understanding temperature inversions and thermal layers, you can find the perfect altitude for your flight path.
- Speed and Direction Management: While balloons primarily move with the wind, skilled pilots can find different wind currents at various altitudes to change direction and speed. This requires a deep understanding of weather patterns and the ability to anticipate changes.
- Fuel Efficiency: Maximizing fuel efficiency is crucial for longer flights. This involves careful monitoring of burner usage and knowing when to heat the air inside the balloon for optimal lift without wasting propane.
- Emergency Preparedness: Being prepared for unexpected situations is a mark of an advanced balloonist. This includes having a thorough pre-flight checklist, understanding emergency landing procedures, and being able to make quick decisions in the air.
- Balloon Maintenance: Regular maintenance is key to ensuring the longevity and safety of your balloon. Advanced techniques include understanding the wear and tear on the fabric, detecting leaks, and knowing when parts need to be replaced.
- Navigating Airspace: As you fly higher and further, you'll need to be aware of controlled airspace and how to communicate with air traffic control. This is essential for maintaining safety and following aviation regulations.
Master these techniques for a safer, more efficient, and more rewarding hot air ballooning experience.
Safety Precautions in Hot Air Ballooning
For a thrilling hot air balloon adventure, prioritize safety. Here's a guide to essential precautions for a safe and enjoyable experience.
- Understand the Basics: Before you take to the skies, it's crucial to have a solid understanding of how hot air balloons work. Knowledge of the basic principles, such as how to control the balloon's altitude and direction, is fundamental.
- Weather Awareness: Always check the weather forecast before a flight. High winds, rain, or storms can turn a flight dangerous. Ballooning is best done in calm, clear conditions, especially at sunrise or before sunset.
- Pre-Flight Inspection: Conduct a thorough inspection of the balloon equipment. Check the envelope for tears, the basket for stability, and ensure that the burner is functioning correctly.
- Safety Briefing: If you're flying with others, provide a safety briefing. Discuss what to do in an emergency, how to communicate effectively, and the importance of staying calm.
- Emergency Equipment: Equip your balloon with necessary emergency supplies, including a first-aid kit, a fire extinguisher, and a means of communication, such as a radio or a mobile phone.
- Pilot Training: Only fly with a trained and certified pilot. If you're interested in piloting a balloon, seek proper training from a reputable school and log enough flight hours to become proficient.
- Landing Protocol: Know how to perform a safe landing. This includes finding a suitable landing spot, approaching the ground at the correct speed, and knowing how to manage the balloon after touchdown.
- Respect Altitude Limits: Be aware of the altitude limits for your area and avoid flying too high, which can lead to hypoxia (oxygen deficiency) for the passengers.
By following these safety precautions, you can enjoy the beauty of hot air ballooning with peace of mind, knowing that you're prepared for a safe flight.
FAQs About Making a Hot Air Balloon
Discover answers to frequently asked questions about making a hot air balloon, from materials needed to safety tips and construction steps.
Construct a frame using straws or thin wooden dowels. Make a cross shape for stability and attach it to the open end of the plastic bag. This will hold the bag open and provide a structure for the heat source to be attached below.
Hot air balloons rise because hot air is lighter than cool air. By lighting a candle beneath the open end of the balloon, the air inside the bag heats up and causes the balloon to rise as the warmer air inside becomes less dense than the air outside.
Yes, you can decorate your hot air balloon with paint or colored markers. Be creative! Just make sure the decorations do not add too much weight or cover the opening at the bottom.
Safety is paramount. Homemade hot air balloons should only be flown in open areas away from flammable materials and under adult supervision if done by children. It's important to always keep safety in mind and not attempt to fly in windy or unsuitable conditions.
Controlling the altitude of your hot air balloon involves managing the temperature inside the envelope. To make the balloon rise, increase the heat using the burner, which will warm the air and cause the balloon to ascend. To descend, reduce the heat, allowing the air to cool and the balloon to gently lower. Always ensure you have a way to safely manage the heat source and never leave it unattended.
The Joy of Creation
Making a DIY hot air balloon can be a fun and educational experience. As you finish your project, you'll see how simple materials come together to create something that really works. It feels amazing to watch your balloon lift off, knowing you made it yourself. Now that you've completed this guide, you’re ready to try even more creative projects. This guide helps you explore hands-on learning, so why not start building today?


