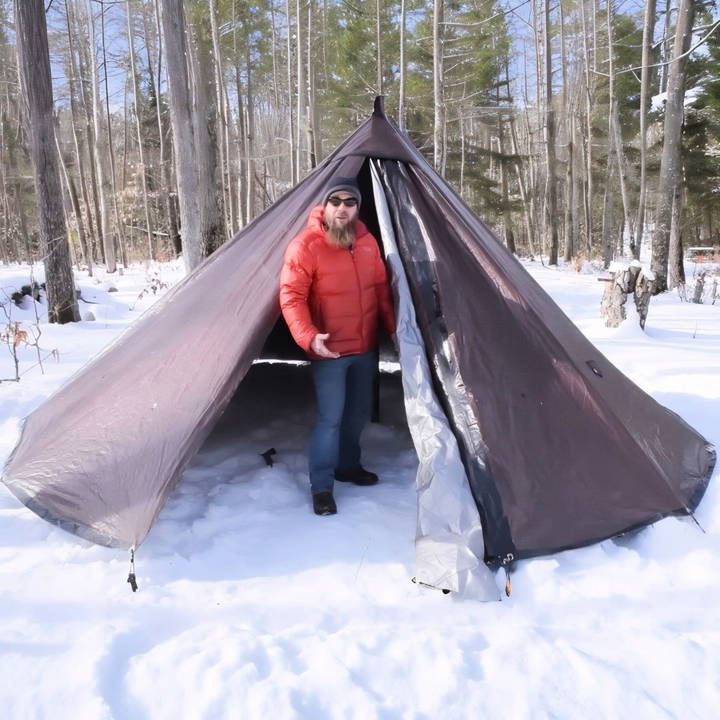
Making your own DIY hot tent can be an affordable and satisfying project, especially if you're an outdoor enthusiast looking for a customizable camping setup. Based on a process developed by Justin, a bushcraft enthusiast, this guide covers everything you need to know to build a hot tent using a tarp. Not only is this a budget-friendly solution, but it also provides a spacious, sturdy, and functional shelter for various outdoor conditions.
Here's a comprehensive, step-by-step guide on building your own DIY hot tent using a tarp, including materials, setup, and tips for reinforcing the structure to withstand the elements.
Materials Needed
To make a DIY hot tent, gather these materials:
- Heavy-Duty Tarp: A 16x20 ft heavy-duty tarp serves as the primary tent material, costing around $55. Ensure it's a durable, weather-resistant tarp to hold up in harsh conditions.
- Gorilla Tape: A strong, weatherproof tape to reinforce tarp edges and areas around grommets, costing about $9.
- Flex Seal Tape: Essential for extra reinforcement around key points, like where the tent stakes attach, costing around $13.
- Grommets and Grommet Kit: Grommets secure points around the tent's perimeter and door, available for about $5 if not already included in your kit.
- Rope or String: Used to measure and swing arcs to achieve the tent shape, as well as securing guidelines for stability.
- Utility Knife: A sharp tool to cut out shapes in the tarp accurately.
While these items are specific to this tent build, you might also want additional gear if customizing the setup or size.
Step by Step Instructions
Learn to build your own DIY hot tent with step-by-step instructions. From layout to pitching, get tips and budget insights for your project.
Step 1: Layout and Marking
- Prepare the Tarp: Lay the tarp flat on the ground and secure all four corners with stakes. Make sure it's stretched tight and lies flat.
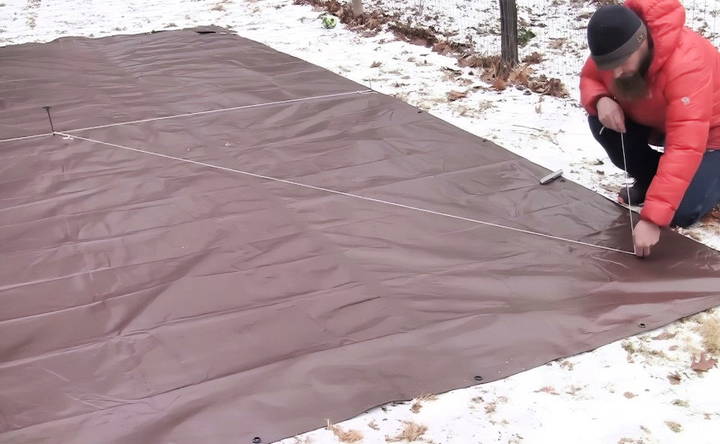
- Find the Center Point: Measure the tarp's length and locate the center point. This spot will be used to swing the arc for the tent's shape.
- Swing the First Arc: Tie a piece of rope or string to the center point.
- Attach the other end to a marker or sharpie.
- Swing the arc across the tarp to mark out the first curve, which will be one side of the tent.
- Mark the Second Arc: Reposition the rope from the other corner to make the second arc, ensuring it matches the length of the first arc. This technique makes the curved wall structure of the tent.
Step 2: Cutting the Tarp
Once the shape is outlined, it's time to cut along the markings.
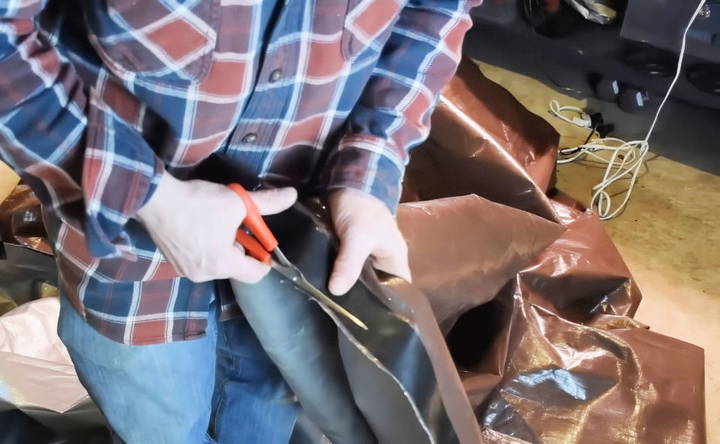
- Cut Along the Lines: Using a utility knife, carefully cut along the curved lines. This will form the basic outer shape of the tent.
- Cut Out the Door: Mark the location for the door along one side of the tent, starting from the base and going upward in a straight line.
- Cut out the door following this line. Be sure to keep the cutout piece, as it will be repurposed later for reinforcement.
Step 3: Reinforcing the Edges
To prevent fraying and increase durability:
- Apply Gorilla Tape Around the Edges: Run Gorilla Tape along the entire perimeter of the tent's cut edges. This not only reinforces the material but also prevents fraying.
- Strengthen the Door Opening: Reinforce the area around the door with extra layers of Gorilla Tape, particularly at the top where it bears weight.
Step 4: Adding Grommets
Grommets are essential for securing the tent to the ground and attaching guidelines.
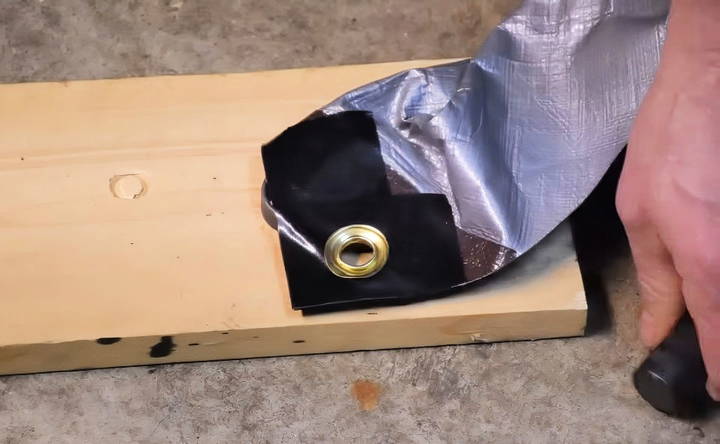
- Place Grommets at Regular Intervals: Install grommets every 4 feet along the bottom edge of the tent.
- Reinforce each grommet location with a layer of Gorilla Tape before punching through with the grommet tool to prevent tearing.
- Install Grommets at the Door Base: The base of the door should have grommets to keep the edges tight when the tent is pitched.
Step 5: Reinforcing the Tent for a Center Pole
A center pole provides stability and supports the roof of the tent.
- Mark the Tent's Apex: This is where the pole will touch the tent top.
- Apply Extra Tape at the Pole Area: Reinforce the spot with multiple layers of Gorilla Tape to prevent the pole from puncturing the tarp.
- Make a Sleeve for the Pole: Once you pitch the tent, use Gorilla Tape to form a sleeve around the top of the center pole, ensuring a snug fit. This keeps the pole in place while tightening the tent's walls.
Step 6: Pitching the Tent
With the tent cut, reinforced, and ready, it's time to pitch it.
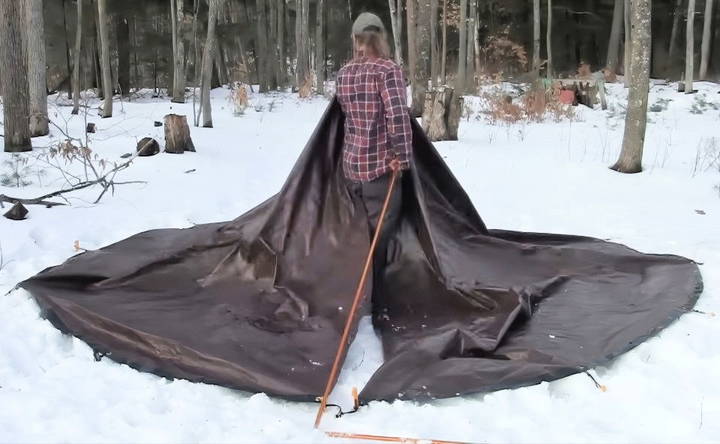
- Set Up and Stake the Tent: Lay the tent out flat on the ground.
- Insert stakes through each grommet, securing the tarp at regular intervals.
- Insert the Center Pole: Raise the tent using the center pole and adjust until it stands securely.
- Mark for Stovepipe Jack (Optional): If using a wood stove, determine where the stovepipe jack should be cut for safe venting. A stove jack allows the pipe to pass through safely without damaging the tarp.
Step 7: Final Reinforcements
- Secure Guy Lines with Flex Seal Tape: Attach guy lines to additional points around the tent's upper edges. Flex Seal Tape is recommended for these points due to its robust adhesive quality.
- Add Extra Grommets: For better stability, add extra grommets at key points where the tent is prone to pulling.
- Make a Rain Flap Over the Door: Use the leftover tarp material to fashion a rain flap above the door, preventing water from entering.
Step 8: Installing a Stovepipe Jack (Optional)
To make your hot tent compatible with a wood stove, install a stovepipe jack.
- Choose a Stove Jack: Various stove jacks are available on Amazon or outdoor supply stores, ranging from $25 to $45. Select one that matches your setup.
- Cut a Hole for the Stove Jack: Mark the spot on the tarp where you'd like the stovepipe to exit.
- Carefully cut out a hole for the stove jack, ensuring it aligns with your stove.
- Attach and Secure the Stove Jack: Use heat-resistant adhesive if necessary and attach the stove jack securely around the hole.
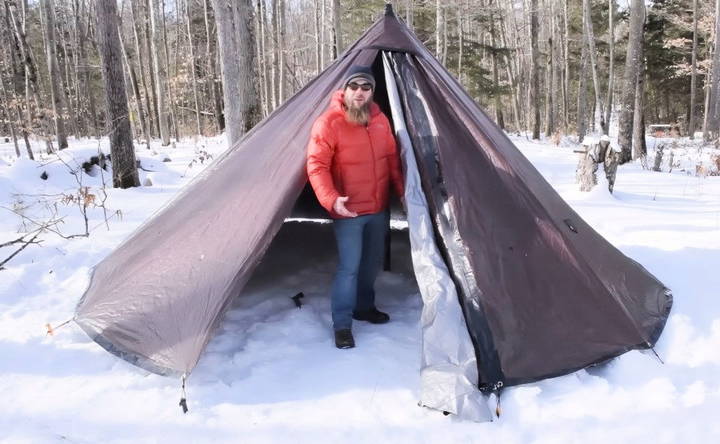
Tips and Additional Adjustments
- Ventilation: Be sure to ventilate the tent well if using a wood stove to prevent condensation or smoke buildup.
- Extra Guy Lines: Adding extra guy lines can help stabilize the tent, particularly in windy or snowy conditions.
- Double Reinforce High-Stress Areas: Corners and edges that experience tension when pitched should be double-reinforced with tape.
Budget Breakdown and Final Thoughts
The total cost for this DIY hot tent project comes to approximately $114, which is a great value considering that most entry-level hot tents start around the same price but offer less space and flexibility.
| Item | Cost |
|---|---|
| Tarp | $54.98 |
| Gorilla Tape | $8.98 |
| Flex Seal Tape | $12.99 |
| Grommets Kit | $4.49 |
| Additional Tape | $8.98 |
| Total | $113.76 |
Compared to commercial hot tents, this DIY version is affordable, spacious, and customizable. It's a fantastic project for those who enjoy camping, bushcraft, or simply want a reliable shelter for car camping or short backpacking trips.
Conclusion: Enjoy Your DIY Hot Tent!
By following these steps, you'll have a custom-built hot tent perfect for cold-weather camping. This DIY approach not only saves money but also offers a personalized outdoor experience that few store-bought tents can match. Remember to double-check each step, reinforce high-stress areas, and enjoy the satisfaction of crafting your own tent.
FAQs About DIY Hot Tent with a Tarp
Discover essential FAQs about DIY hot tent with a tarp. Learn tips and tricks for setup, safety, and maximizing comfort while camping.
The tent is highly durable, having withstood an 8-month outdoor “torture test” under severe weather, including snow, rain, and wind. The Gorilla Tape reinforcement held up well, and the tent only failed when a heavy snow load broke the wooden pole supporting it.
Ventilation is important to reduce condensation. While the tent’s door allows some airflow, you can create additional ventilation by leaving a small gap at the bottom or by installing a vent if necessary. Ensure a steady flow of fresh air when using a stove to prevent buildup of smoke or condensation.
Yes, adding a floor is simple. You can use a tarp cut to size or a removable ground sheet. However, many users prefer leaving the ground bare for winter hot tenting, which allows for snow to act as insulation without melting into a muddy base near the stove.
A tennis ball with a hole cut out can be placed on top of the pole to cushion it and prevent wear on the tarp. This is a practical and lightweight solution for maintaining the tent’s integrity at the peak.
While commercial stove jacks are effective, you can make a DIY version using a silicone baking sheet or oven liner, which withstands high temperatures. Ensure it's installed securely to avoid issues with melting or loosening near the stovepipe.
The complete tent weighs approximately 11 pounds. It is best suited for car camping or short treks due to its weight, size, and bulk. Lightweight alternatives like Tyvek can reduce weight but may compromise durability.
Yes, a smaller version can be made from a 10x12-foot tarp for solo camping, which provides sufficient space for one person and reduces weight. Follow the same arc-cutting technique to make a smaller footprint that still offers protection.
Both tapes are effective, but Gorilla Tape is often preferred for its strength and lower cost. Flex Seal Tape can add durability at high-stress points but may stretch more than Gorilla Tape under tension. Combining the two can yield excellent results.
To secure the door, add a grommet at the bottom corner and use a rope to tie it to a nearby stake. For added stability, consider using bungee cords or installing Velcro strips along the edges of the door for quick and effective sealing.


