As someone who passionately nurtures a leafy family of plants, I've learned some hard truths: not all plants are content with just sunshine and water. When my prayer plant started looking like it had seen better days, I knew I needed a solution fast. Luckily, I discovered the magical transformation powers of a DIY humidity dome. Here's how I saved my plant and how you can, too.
Understanding the Importance of Humidity for Indoor Plants
Most indoor plants thrive in humidity, especially tropical varieties like Calatheas, Marantas, and Monsteras. These plants come from environments where humidity is abundant, so low moisture levels in our homes can stress them out. A humidity dome makes a mini-greenhouse effect, keeping moisture recycled and available to the plant.
Why Humidity is Essential
- Prevents Leaf Crunchiness: Low humidity can cause leaves to dry out and become crunchy, indicating distress.
- Supports New Growth: Adequate moisture encourages new leaf development and overall plant health.
- Aids in Plant Recovery: For plants that appear to be on the brink of death, maintaining a humid environment can aid in their recovery.
Armed with this knowledge, I embarked on my experiment to revive a prayer plant that appeared to have one foot in the compost bin.
Materials You'll Need
Putting together a humidity dome doesn't require a trek to the plant store. Here's what you need:
- Clippers: Sharp and clean, these will be for trimming dead leaves and giving your plant a fresh start.
- Ziploc Bag: Acts as the actual dome. If you have a large plant, consider using several bags or a clear plastic bin.
- Rubber Bands: Essential for securing the Ziploc bag around your plant pot.
- A Tray (optional): For those who prefer bottom watering.
Why These Materials?
- Clippers ensure you have a clean cut, improving regrowth opportunities.
- Ziploc Bag is an affordable way to make a nurturing environment.
- Rubber Bands help seal in the moisture effectively.
- Tray assists in a less disruptive watering process called bottom watering.
Now, let's move on to the exciting part: the step-by-step process of making your very own humidity dome.
Step by Step Instructions
Learn how to make a DIY humidity dome with step-by-step instructions. Perfect for plant care - from trimming and watering to maintenance and success tips.
Step 1: Assess and Trim Your Plant
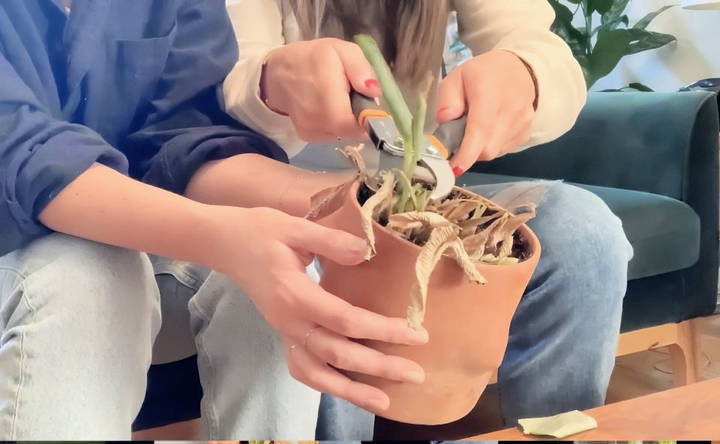
First, closely assess your plant's condition. Are there any leaves that are irreversibly damaged? Time to grab your clippers.
- Trim cautiously: You don't need to cut down to the nub immediately. Remove the dead or crispy leaves, leaving a base for potential new growth.
- Observe the Stem: If the stem still feels firm and you notice tiny hints of green, there's hope yet.
Step 2: Watering Your Plant
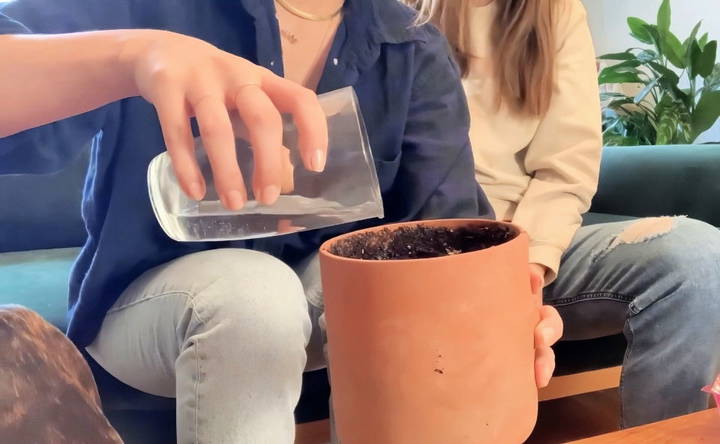
Before enclosing the plant in its new humid habitat, you need to hydrate the soil.
- Use lukewarm water: This is soothing for plants and can prevent shock.
- Water thoroughly: Ensure the entire soil gets damp but not waterlogged, as excess water can lead to root rot.
Step 3: Make the Dome
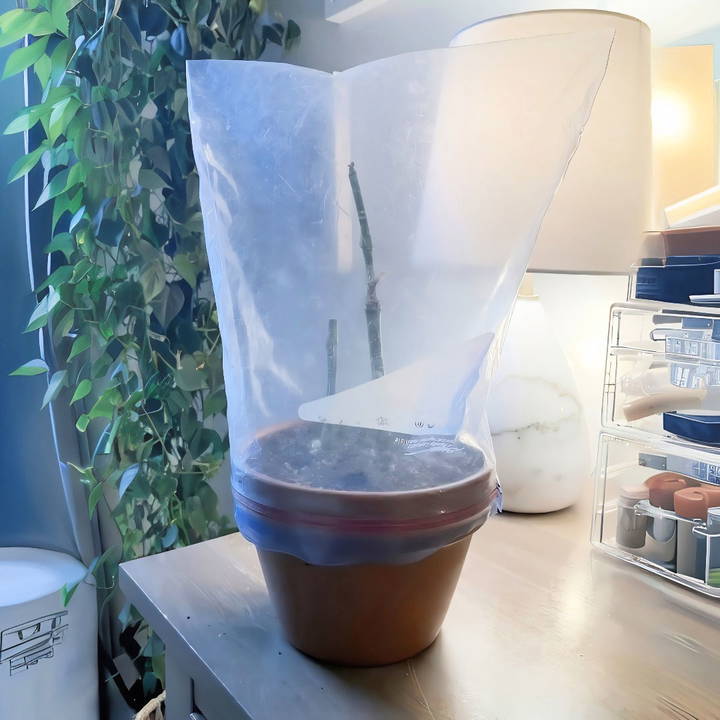
This is where you turn a simple Ziploc bag into a life-support system for your plant.
- Place the Bag Over the Plant: Gently bring the plant into the bag, ensuring it doesn't crush delicate parts.
- Secure with Rubber Bands: Fit the rubber bands around the pot's rim, making a snug fit. This keeps evaporation locked in.
- Check the Fit: The bag should not touch the plant, allowing some air circulation inside.
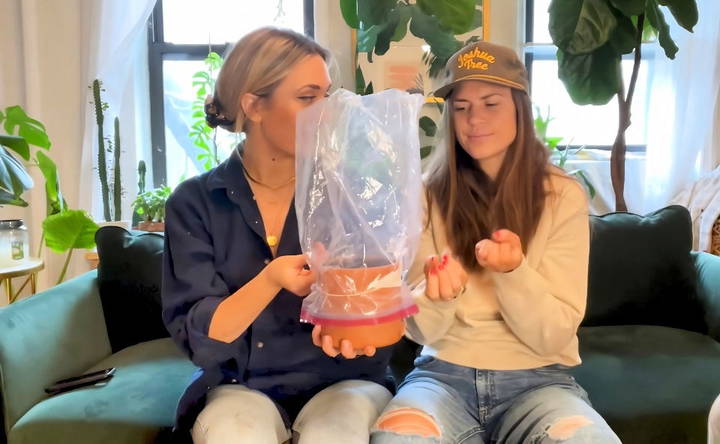
Step 4: Positioning and Maintenance
Place your homemade greenhouse in a well-lit area but not in direct sunlight, as this can overheat and damage the plant.
- Observe Daily: Look for condensation inside the bag, which indicates the humidity is at the right level.
- Monitor New Growth: Celebrate every little sprout, a sign of your plant's comeback story.
Tips for Long-term Success
Making a humidity dome is just the start. Here's how to ensure your plant thrives once it's back in good shape:
- Gradual Rehabilitation: Once new growth is noticeable, start removing the bag for a few hours a day to acclimatize the plant to room humidity levels.
- Pruning: Regularly remove any browned leaves to keep the plant healthy.
- Fertilize: Use a balanced fertilizer to provide essential nutrients during its re-growth phase.
My Experience
A plant recovering from the brink of death is incredibly rewarding. After just about three weeks in its little humid sanctuary, my prayer plant showed promising new leaves unfurling. This simple yet effective method turned a potential plant funeral into a triumphant recovery story.
The anticipation as I watched for tiny green sprouts was intense, but the satisfaction was unmatched when they appeared. Every time I peeked inside the clear Ziploc dome and saw drops of water clinging to its walls, it felt like a victory in nurturing.
Advanced Techniques
Learn about advanced techniques for customizing your dome, automation, advanced plant care, and experimentation and innovation.
Customizing Your Dome
Customizing your humidity dome can help cater to the specific needs of different plants. Here are some ways to do it:
- Adjustable Vents: Adding adjustable vents allows you to control the airflow and humidity levels inside the dome. This is particularly useful for plants that require different humidity levels at various growth stages.
- Size Variations: Make domes of different sizes to accommodate various plant types. Smaller domes are ideal for seedlings, while larger ones can house mature plants.
- Material Choices: Use different materials like clear plastic, glass, or even recycled materials. Each material has its own benefits, such as durability or cost-effectiveness.
Automation
For those looking to take their humidity dome to the next level, automation can be a game-changer. Here are some ideas:
- Automated Humidity Control: Install a small humidifier inside the dome connected to a hygrometer. This setup can automatically adjust the humidity levels based on the readings.
- Temperature Regulation: Use a thermostat to control a small heater or cooling fan inside the dome. This helps maintain a consistent temperature, which is crucial for certain plants.
- Lighting Automation: Integrate grow lights with a timer to ensure your plants receive the right amount of light each day. This is especially useful for indoor setups where natural light is limited.
Advanced Plant Care
Taking care of plants in a humidity dome can be more effective with these advanced techniques:
- Nutrient Delivery: Use a misting system to deliver nutrients directly to the plants. This can be more efficient than traditional watering methods.
- Monitoring Systems: Set up sensors to monitor soil moisture, temperature, and humidity. Connect these sensors to a smartphone app for real-time updates and alerts.
- Hydroponic Integration: Combine your humidity dome with a hydroponic system. This allows for soil-less growing, which can be more efficient and less messy.
Experimentation and Innovation
Don't be afraid to experiment with your humidity dome. Here are some innovative ideas to try:
- Vertical Gardening: Make vertical layers within your dome to maximize space. This is ideal for small areas and can increase your plant yield.
- Aquaponics: Integrate an aquaponic system where fish and plants coexist. The fish waste provides nutrients for the plants, making a self-sustaining ecosystem.
- Smart Technology: Use smart plugs and devices to control various elements of your dome remotely. This can include lighting, humidity, and temperature controls.
By incorporating these advanced techniques, you can make a highly efficient and customized humidity dome that caters to the specific needs of your plants.
Maintenance and Care
Maintaining your DIY humidity dome is essential for healthy plant growth. Here's a simple guide to help you keep your plants thriving.
Daily Care
- Check Moisture Levels: Ensure the soil remains moist but not waterlogged. Use a spray bottle to mist the soil lightly if it starts to dry out.
- Ventilation: Open the dome for a few minutes each day to allow fresh air to circulate. This helps prevent mold and mildew.
- Temperature Monitoring: Keep an eye on the temperature inside the dome. Most plants thrive in temperatures between 70-75°F (21-24°C).
Weekly Care
- Inspect for Mold: Look for any signs of mold or mildew. If you spot any, remove the affected parts and increase ventilation.
- Adjust Watering: Depending on the plant type and growth stage, you might need to adjust your watering schedule. Seedlings usually need more frequent watering than mature plants.
Troubleshooting Common Issues
- Mold Growth: If mold appears, it's usually due to excess moisture and poor ventilation. Increase the time you leave the dome open each day and ensure the soil isn't too wet.
- Wilting Plants: Wilting can be a sign of either too much or too little water. Check the soil moisture and adjust your watering routine accordingly.
- Yellowing Leaves: This can indicate overwatering, underwatering, or nutrient deficiencies. Ensure you're watering correctly and consider adding a balanced fertilizer if needed.
Seasonal Adjustments
- Winter Care: During colder months, ensure the dome is placed in a warm spot with plenty of light. You might need to use a grow light to supplement natural sunlight.
- Summer Care: In hotter months, monitor the temperature closely. If it gets too hot inside the dome, move it to a cooler location or increase ventilation.
Tips for Success
- Label Your Plants: Keep track of what you're growing by labeling each plant. This helps you cater to their specific needs.
- Regular Monitoring: Make it a habit to check on your plants daily. Early detection of issues can prevent bigger problems down the line.
- Keep a Journal: Note down your observations, watering schedule, and any changes you make. This can help you understand what works best for your plants.
By following these maintenance and care tips, you can ensure your DIY humidity dome provides the perfect environment for your plants to flourish.
FAQs About DIY Humidity Domes
Discover answers to common questions about DIY humidity domes. Learn tips, benefits, and best practices for thriving plant growth.
A humidity dome is a clear cover placed over seedlings to make a warm, moist environment. This helps seeds germinate faster and grow stronger by maintaining consistent humidity and temperature levels. It's especially useful in dry or cold climates where maintaining these conditions can be challenging.
To use a humidity dome:
Plant Seeds: Follow the instructions for planting your seeds in a seed tray.
Cover: Place the humidity dome over the tray.
Location: Put the tray in a warm, sunny spot. A south-facing window is ideal.
Monitor: Check daily for moisture and temperature. Open the dome slightly if it gets too hot or humid.
Keep the humidity dome on until the seeds have germinated and the seedlings have their first set of true leaves. This usually takes about 1-2 weeks. Once the seedlings are established, gradually remove the dome to acclimate them to normal humidity levels.
Avoid these common mistakes:
Overwatering: Too much water can lead to mold and root rot. Keep the soil moist, not soggy.
Poor Ventilation: Lack of air circulation can cause fungal growth. Ensure there are small holes for ventilation.
Excessive Heat: Direct sunlight can overheat the dome. Monitor the temperature and provide shade if necessary.
Yes, you can reuse a humidity dome for multiple growing seasons with proper care. Here's how:
Clean Thoroughly: After each use, clean the dome with warm, soapy water to remove any dirt, mold, or pathogens.
Disinfect: Use a mild bleach solution (1 part bleach to 9 parts water) to disinfect the dome. Rinse thoroughly and let it dry completely.
Store Properly: Store the dome in a cool, dry place to prevent damage and contamination.
Inspect Before Use: Before reusing, inspect the dome for any cracks or damage that could affect its performance.
Why Trust DIY Humidity Domes?
Attempting a DIY project might seem daunting, but practical knowledge from my own success proves its worth.
- Cost-Effective: Forget expensive gadgets; a reasonably priced bag and some patience are all you need.
- Proven Results: My own journey, backed by advice from fellow plant enthusiasts, has shown the effectiveness of humidity domes in plant recovery.
- Simplicity: It doesn't get simpler than using household items to restore plant health.
Making a DIY humidity dome is not only a delightful experiment in plant care but also a lesson in patience and persistence. Your plant might appear doomed, but given the right conditions and a little TLC, you'll likely witness its beautiful comeback.


