Making a homemade DIY hummingbird feeder is a fun, easy, and rewarding project for anyone interested in adding a touch of nature to their yard. With simple materials and a bit of creativity, you can make a delightful feeding spot for these mesmerizing birds. Whether you opt for recycled bottle feeders, juice box feeders, or baby food jar feeders, each type offers a unique way to welcome hummingbirds.
This guide provides detailed materials needed and step-by-step instructions, making it easy for you to craft your very own feeder. From preparing the cap and can to assembling and hanging your creation, each step ensures a safe and attractive feeder for hummingbirds. Plus, with additional tips on attracting hummingbirds to your yard and maintaining your feeder, you'll become a hummingbird haven in no time.
Ready to make a buzzing hub in your garden? Let's explore how to make your very own hummingbird feeder.
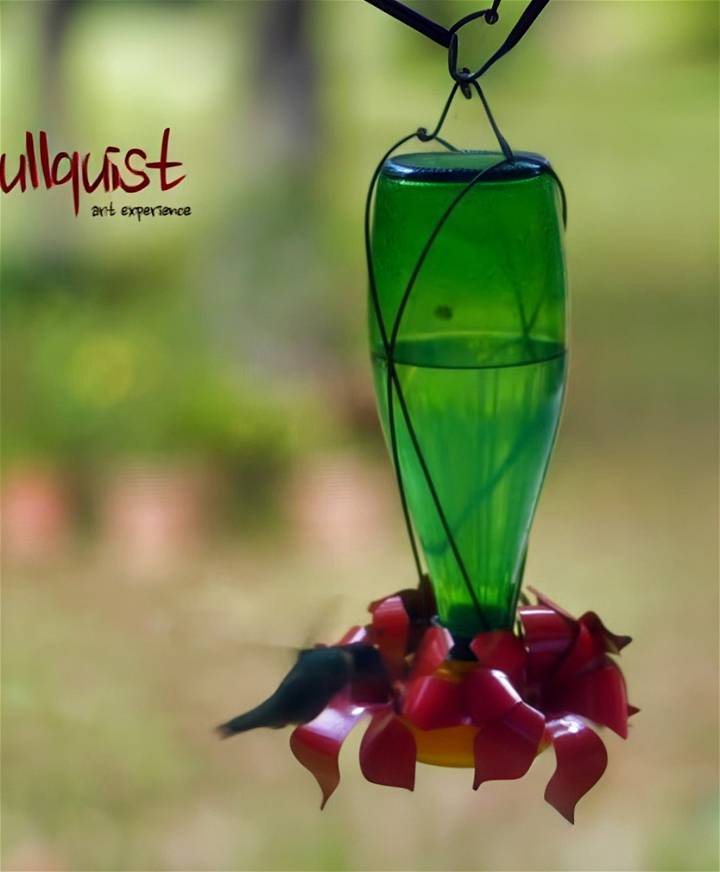
Types of DIY Hummingbird Feeders
Making a DIY hummingbird feeder is a fun and rewarding project. Not only does it provide a source of nectar for these beautiful birds, but it also allows you to express your creativity. Here are some types of DIY hummingbird feeders that you can make at home.
Recycled Bottle Feeders
One of the most popular types of DIY hummingbird feeders is the recycled bottle feeder. This type of feeder is not only eco-friendly but also easy to make. All you need is a clean, empty bottle, some string or wire for hanging, and a feeding tube, which can be purchased online or at a local bird supply store. The bottle serves as a reservoir for the nectar, while the feeding tube allows the hummingbirds to access the sweet liquid.
Juice Box Feeders
Another simple and kid-friendly option is the juice box feeder. For this, you'll need an empty juice box, a straw, and some string for hanging. Simply clean out the juice box, fill it with homemade nectar, and insert the straw. The straw acts as a perch for the hummingbirds as well as a conduit for the nectar.
Baby Food Jar Feeders
Baby food jar feeders are another great option. These small jars are the perfect size for a hummingbird feeder. Plus, they're easy to clean and refill. To make a feeder from a baby food jar, you'll need the jar, a lid with a hole in it, a small plastic cup (like the ones used for ketchup or salsa at fast food restaurants), and some string or wire for hanging. The cup is inverted and glued to the lid to serve as the feeding station.
No matter which type of feeder you choose to make, the most important thing is to keep it clean and filled with fresh nectar. This will ensure that your feathered friends keep coming back for more.
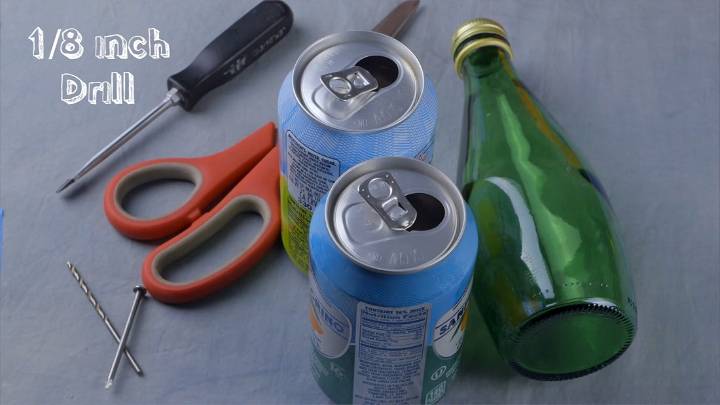
Materials Needed:
- A bottle with a screw-on cap
- Two aluminum cans
- Scissors
- A flat screwdriver
- A 1/8 inch drill or a medium-sized nail
- Five-minute epoxy
- Paint (red and yellow recommended)
- Twine, hot glue, or wire (for hanging)
Step by Step Instructions:
Learn how to make a hummingbird feeder at home with this simple DIY guide below:
Step 1: Prepare the Cap and Can
Begin by using the flat screwdriver to poke a hole in the center of the bottle cap. Gradually enlarge this hole to about 3/8 of an inch (1 cm) in diameter. Then, take one aluminum can and make a matching hole in the center of its bottom end.
Step 2: Cut the Aluminum Cans
Around the bottom edge of each can, mark a line approximately 3/8 of an inch (1 cm) from the edge. Carefully cut the top off each can, ensuring not to injure yourself on the sharp edges. Follow the line you previously marked to remove the bottom sections of the cans.
Step 3: Make the Feeder Base
Take the can piece with the drilled hole and mark three equally spaced points around its tapered edge. Make a single cut on one side and fit it inside the other can piece, which acts as the feeder base.
Step 4: Seal with Epoxy
Mix a small amount of five-minute epoxy, and apply a thin layer around the external seam of the feeder base for a watertight seal. Spread the remaining epoxy on the flat side of the bottle cap and attach it to the base, ensuring the holes align.
Step 5: Add Feeding Holes
Utilizing the drill or nail, make three holes around the edge of the base, evenly spaced.
Step 6: Craft and Paint Flowers
From the leftover aluminum, cut out flower shapes (1 to 1.5 inches in diameter), then drill a small hole in the center of each. Paint the flowers using bright, attractive colors like red and yellow, then allow the paint to dry.
Step 7: Attach the Flowers
Mix another small batch of epoxy and glue the flowers to the base. Use toothpicks to line up the holes accurately, removing them before the epoxy sets. Gently bend the petals to give them a more natural appearance.
Step 8: Assemble and Hang
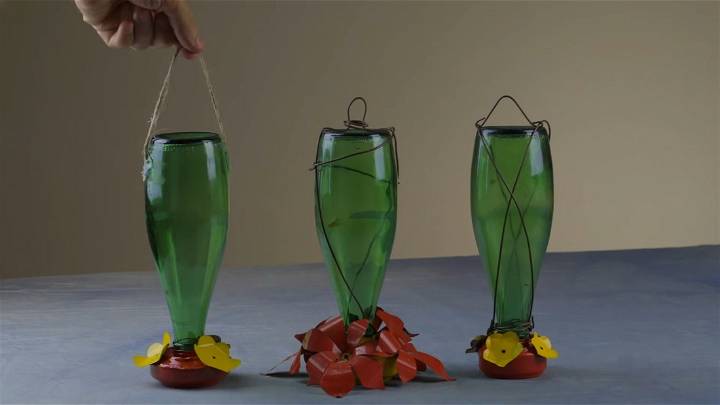
Screw the prepared bottle into the cap secured to the base. Make a hanger using twine, hot glue, or wire, and fix it onto the bottle. Your hummingbird feeder is now ready to be hung in your garden.
Video Tutorial
For a step-by-step video tutorial on making an attractive hummingbird feeder, watch this helpful video: How I Made a Hummingbird Feeder.
It pairs well with this written guide, serving as a visual complement to the crafting process described here, simplifying complex steps into clear, easy-to-follow visuals.
Attracting hummingbirds with a DIY feeder is easy and rewarding. Reuse materials, add color, and remember to clean regularly.
Safety Measures for DIY Hummingbird Feeders
When making a DIY hummingbird feeder, it's essential to consider safety measures. This ensures both your safety during the creation process and the safety of the hummingbirds that will use the feeder.
Safety During Creation
Making a hummingbird feeder often involves using tools and materials that could potentially cause harm if not handled correctly. Here are some safety tips:
- Use Protective Gear: Always wear protective gear, such as gloves and safety glasses, when cutting or drilling materials.
- Handle Sharp Objects Carefully: Be cautious when using sharp objects like scissors or knives. Always cut away from your body and keep your fingers clear of the cutting path.
- Secure Materials: When drilling or cutting, secure the materials properly to prevent them from moving.
Safety for Hummingbirds
The safety of the hummingbirds is just as important as your safety. Here are some tips to ensure the feeder is safe for the birds:
- Avoid Sharp Edges: Ensure there are no sharp edges or points on the feeder that could harm the birds. Smooth any rough edges with sandpaper.
- Use Safe Materials: Use non-toxic, bird-safe materials. Avoid materials that can chip or break easily.
- Clean Regularly: Regular cleaning prevents the growth of mold and bacteria that could harm the birds.
Safety should always be a priority when making DIY projects. By following these safety measures, you can ensure a safe and enjoyable experience for both you and the hummingbirds.
Attracting Hummingbirds to Your Yard
Attracting hummingbirds to your yard involves more than just hanging a feeder. Here are some tips to make your yard more appealing to these beautiful birds.
Planting Hummingbird-Friendly Flowers
Hummingbirds are attracted to bright, tubular flowers that produce a lot of nectar. Some hummingbird-friendly flowers include salvias, fuchsias, and bee balms. Plant these in your yard to provide a natural source of nectar.
Providing a Water Source
Hummingbirds need fresh water for drinking and bathing. Consider adding a birdbath or a misting system to your yard. Make sure to change the water regularly to keep it clean.
Choosing the Right Location for Your Feeder
Place your feeder in a quiet and safe location. It should be out of the wind and away from busy areas. However, it should also be visible so the birds can find it. Try hanging it near a window so you can enjoy watching the birds.
Timing Your Feeding
Hummingbirds are most active during the early morning and late afternoon. Fill your feeders during these times to attract the most birds.
Attracting hummingbirds takes time and patience. But with these tips, you'll be able to make a hummingbird-friendly yard that these beautiful birds will love to visit.
Maintaining Your DIY Hummingbird Feeder
Maintaining your DIY hummingbird feeder is crucial for the health and safety of the hummingbirds. Here are some tips to ensure your feeder stays clean and attractive to these beautiful birds.
Regular Cleaning
Hummingbird feeders should be cleaned every few days, or as soon as you notice the nectar starting to look cloudy. To clean your feeder:
- Empty the feeder and rinse it out with warm water.
- Use a brush to scrub the inside of the feeder, paying special attention to corners and crevices where mold might hide.
- Rinse thoroughly to ensure all soap residue is removed.
Nectar Replacement
The nectar in your feeder should be replaced every 2-3 days, or more often in hot weather. This prevents the growth of mold and bacteria that could harm the hummingbirds.
Feeder Inspection
Regularly inspect your feeder for damage. Cracks in the feeder can harbor bacteria, and sharp edges can injure the birds. If you find any damage, it's best to replace the feeder.
A clean and well-maintained feeder is more likely to attract hummingbirds and keep them coming back.
Fun Facts About Hummingbirds
Hummingbirds are fascinating creatures. Here are some interesting facts about these tiny birds that you might not know.
Smallest Bird in the World
The title of the smallest bird in the world goes to the Bee Hummingbird. It measures only about 2.2 inches long and weighs less than a penny!
Incredible Flight Speed
Hummingbirds are known for their fast flight speeds. They can fly up to 34 miles per hour and their wings can beat up to 200 times per second during courtship displays.
Unique Flying Abilities
Unlike most birds, hummingbirds can fly in all directions. They can fly forward, backward, and even upside down! They're also the only birds that can hover in mid-air.
High Metabolism
Hummingbirds have an incredibly high metabolism. To fuel their energetic flight, they may eat up to three times their body weight in nectar each day!
Long Migration
Despite their small size, some hummingbirds undertake long migration journeys. The Rufous Hummingbird, for example, migrates 3,000 miles from Alaska to Mexico each year.
These are just a few of the many fascinating facts about hummingbirds. These tiny birds are full of surprises!
FAQs About DIY Hummingbird Feeder
Here are some frequently asked questions about DIY hummingbird feeders:
What materials do I need to make a DIY hummingbird feeder?
To make a basic DIY hummingbird feeder, you'll need a container for the nectar (like a bottle or jar), a feeding tube or similar mechanism, and something to hang the feeder with, like string or wire.
How do I make nectar for my hummingbird feeder?
You can make nectar by mixing one part white granulated sugar with four parts water. Boil the mixture to dissolve the sugar and kill any bacteria or mold present, then let it cool before filling your feeder.
How often should I clean my hummingbird feeder?
You should clean your hummingbird feeder every few days, or as soon as you notice the nectar starting to look cloudy. Regular cleaning prevents the growth of mold and bacteria that could harm the hummingbirds.
Where should I hang my hummingbird feeder?
Hang your feeder in a quiet and safe location, out of the wind and away from busy areas. However, it should also be visible so the birds can find it. Try hanging it near a window so you can enjoy watching the birds.
What time of day are hummingbirds most active?
Hummingbirds are most active during the early morning and late afternoon. Fill your feeders during these times to attract the most birds.
What flowers attract hummingbirds?
Hummingbirds are attracted to bright, tubular flowers that produce a lot of nectar. Some hummingbird-friendly flowers include salvias, fuchsias, and bee balms.
Can I use red dye in my hummingbird nectar?
It's best to avoid using red dye in your hummingbird nectar. There's no need for it—hummingbirds will be attracted to the feeder by the sugar water, and some studies suggest that red dye could be harmful to the birds.
Why aren't hummingbirds coming to my feeder?
There could be several reasons why hummingbirds aren't coming to your feeder. It could be that the nectar isn't fresh, the feeder isn't clean, or the location of the feeder isn't ideal. Try changing the nectar, cleaning the feeder, and/or moving the feeder to a new location.
How can I keep ants away from my hummingbird feeder?
One way to keep ants away from your hummingbird feeder is to use an ant moat—a small cup filled with water that you hang above the feeder. The ants can't cross the water to get to the nectar.
What should I do if my hummingbird feeder is leaking?
If your hummingbird feeder is leaking, it could be that it's overfilled, the feeder is in the sun (which can cause the nectar to expand), or there's a problem with the feeder itself. Try filling the feeder less full, moving it out of direct sunlight, or checking for cracks or other damage to the feeder.
Conclusion:
In conclusion, crafting your own homemade DIY hummingbird feeder offers a rewarding project that blends creativity, connection to nature, and sustainability. By following the detailed steps laid out—from selecting materials to assembling and hanging your creation—you'll not only provide a delightful resource for these fascinating birds but also add a personal touch to your yard or garden.
Remember, the right maintenance and safety measures will ensure that your feeder remains a safe and attractive spot for hummingbirds. So, take this opportunity to make a special haven for hummingbirds and enjoy the beauty and vibrancy they bring to your outdoor space. Happy crafting!


