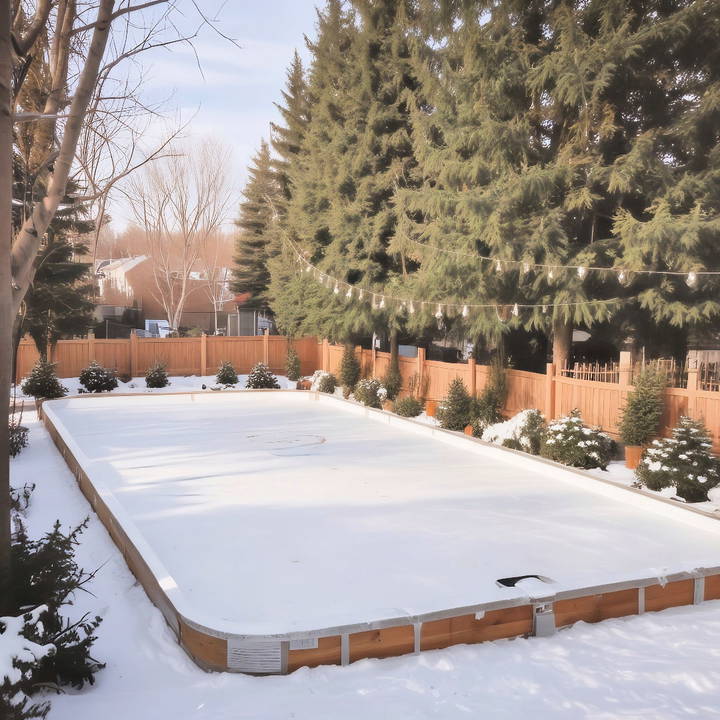
Last winter, I decided to transform my backyard into a personal skating haven. The idea of having an ice rink just steps from my door was too exciting to pass up. I had never built one before, but I was eager to give it a try. With some basic materials and a bit of effort, I set out to build my own homemade ice rink.

If you're thinking about making your own rink, I can share the steps that made my setup quick and easy. Building a DIY ice rink might be simpler than you imagine, and the joy it brings is worth every minute.
Planning and Gathering Materials
Discover why proper planning and choosing the right spot are crucial for any project. Learn about all the materials needed for success.
Why Proper Planning Is Crucial
The first lesson we learned was the importance of planning. A well-laid plan ensures a smoother process and a successful end result. Our goal was to build a rink that was both functional and safe without damaging our lawn permanently.
Choosing the Right Spot
Selecting the ideal location in our backyard was crucial. We needed a spot that was reasonably level to minimize water depth variation across the rink. After checking several areas, we chose a spot that fit our criteria, keeping in mind the rink's size and orientation.
Materials Needed
Gathering the right materials was the next step. Here's a breakdown:
- 2x12 lumber: Provides height for supporting deeper water, ensuring a thick, strong ice surface.
- Concrete stakes: Used for anchoring the frame to the ground, these help keep the structure stable.
- Galvanized screws: For attaching the lumber and brackets. We opted for galvanized to prevent rust.
- Mending plates and corner brackets: Ensure the frame's integrity, keeping it square and secure.
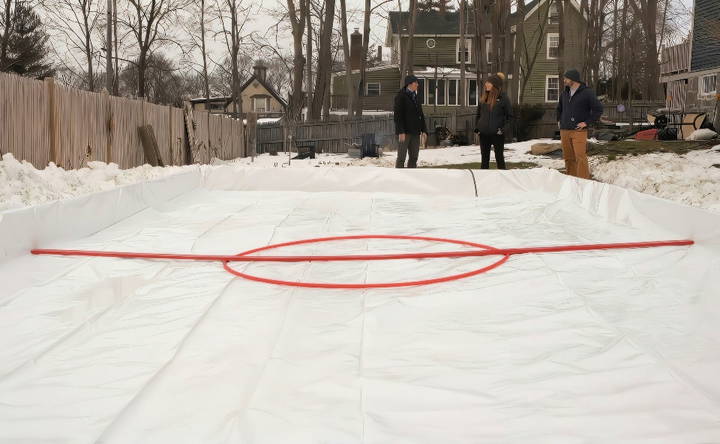
- 7 mil thick white plastic tarp: This acts as the liner to hold the water. White was chosen to reflect sunlight and prevent premature melting.
Each material was selected with care to ensure the durability and reusability of our rink setup.
Step by Step Instructions
Build your own ice skating rink with our step-by-step instructions. From frame construction to freezing, get ready for winter fun!
Constructing the Frame
Learn how to construct a frame: laying out the perimeter, leveling the site, and assembling the frame efficiently and accurately.
Laying Out the Perimeter
Measuring and marking the perimeter was our first practical step toward visualizing the rink. We opted for a 16x32 feet rink, which offered ample space for skating without overwhelming our backyard space.
Leveling the Site
Ensuring the site was level was crucial for even ice thickness. We used a line level on a string stretched across the site to check for levelness and made minor adjustments to the ground as needed.
Assembling the Frame
Constructing the frame required patience and some elbow grease. We attached the 2x12 boards at the corners using mending plates and screws. Corner brackets added extra stability. Driving the concrete stakes into the ground to fix the frame in place was a satisfying step, signaling the rink's shape coming to life.
Laying the Liner
Spreading the white plastic tarp over the frame was a delicate process. We ensured it was centered and had ample overhang on all sides. Securing the liner without puncturing it was paramount, as any holes could lead to leaks that would ruin the ice surface.
Filling and Freezing
Learn about filling and freezing processes. Step-by-step guide on filling with water and the freezing wait to perfect your frozen creations.
Filling With Water
The final construction step was filling the rink with water. This required a gentle approach to prevent displacing the liner. We filled it to a depth that ensured at least a three-inch thick ice layer, ideal for skating.
The Freezing Wait
Patience was key during the freezing process. It took several days of below-freezing temperatures to transform our water-filled rink into solid ice. We eagerly checked the progress, waiting for the moment we could finally skate on it.
Advanced Techniques for Your DIY Ice Skating Rink
When you've mastered the basics of building a DIY ice skating rink, you might be interested in adding some advanced features to enhance your skating experience. Here are some techniques to consider:
Adding Boards
Boards around your rink can prevent pucks and skates from damaging the liner and keep the ice cleaner. Use tall, smooth plywood for the sides, and secure them with brackets to stakes driven into the ground. Ensure the top edges are smooth to avoid injuries.
Installing Lighting
For those late-night skating sessions, lighting is essential. LED rope lights or floodlights can be installed around the perimeter or above the rink. Solar-powered options are great for energy efficiency and ease of installation.
Homemade Zamboni
A smooth ice surface provides the best skating experience. You can build a homemade Zamboni using a wide, flat cloth attached to a pipe. Connect it to a hot water source and slowly drag it over the ice to fill in cracks and smooth the surface.
Ice Maintenance Tools
Invest in or build tools like ice scrapers and snow pushers specifically designed for rinks. These will help you keep the ice in top condition without damaging the surface.
Skating Accessories
Consider adding accessories like goals for hockey or a bench for changing skates. These can be made from weather-resistant materials and secured to the ground or boards.
Using these advanced methods, you'll elevate your DIY ice rink, ensuring a fun and professional touch. Always prioritize safety and check the stability of added structures.

Maintenance Advice for Your DIY Ice Skating Rink
Maintaining your DIY ice skating rink is crucial for ensuring a smooth and enjoyable skating experience. Here's how you can keep your rink in top shape:
Regular Cleaning
Keep the ice clear of leaves, snow, and debris. Use a soft broom or a plastic shovel for this task to avoid scratching the ice.
Smooth Surface
After each skating session, fill any cracks or gouges with water and let it freeze. For a smoother surface, pour thin layers of hot water over the ice.
Check the Liner
Inspect the liner regularly for tears or leaks. Patch any small holes with tape designed for outdoor use to prevent water from seeping out.
Monitor Ice Thickness
Ensure the ice is at least 4 inches thick before skating. Use a drill to check the thickness in multiple spots.
Troubleshooting Guide for Your DIY Ice Skating Rink
Sometimes, issues can arise with your rink. Here are solutions to common problems:
Uneven Freezing
If the ice is freezing unevenly, check for airflow issues or debris under the ice. Clear the area and use hot water to even out the surface.
Cracks and Chips
Cracks can form when the temperature fluctuates. Fill them with water and smooth them out. Chips can be repaired with a slush mixture of snow and water.
Water Pooling
If water is pooling on the surface, it may be due to a high spot in the rink. Use a level to find it and remove snow or ice to even it out.
Safety Tips for Your DIY Ice Skating Rink
Building a safe skating environment is essential for everyone to enjoy their time on the ice. Here are some safety tips to ensure your DIY ice skating rink is secure:
Wear the Right Gear
Always wear skates that fit well and provide ankle support. Helmets, knee pads, elbow pads, and wrist guards can protect you from falls. Don't forget gloves to keep your hands warm and safe.
Prepare the Ice
Before skating, check the ice for any cracks, holes, or debris. Clear the ice surface with a broom or a shovel designed for ice rinks.
Supervise Young Skaters
Children should always have an adult supervising them. Teach them to skate slowly and to fall correctly—on their side to avoid injuries.
Know Your Limits
If you're new to skating, start slow. Practice falling and getting up safely. Avoid attempting jumps or spins without proper training.
Emergency Plan
Have a first-aid kit nearby and know the basics of treating falls and sprains. In case of a serious injury, have a phone ready to call for help.
Adhering to these safety tips will ensure a fun and secure environment for everyone using your DIY ice skating rink.
FAQs About DIY Ice Skating Rink
Here are some FAQs answered about DIY ice skating rinks: setup tips, maintenance, necessary tools, and expert advice for a perfect home ice rink experience.
When selecting a spot for your ice rink, look for a flat area that’s not over a septic or drain field. Ensure the location has good lighting and is close to an outdoor water source. It’s also important to check for any slope in your yard to ensure the surface of the ice will be even.
The size of your ice rink will depend on the space available in your yard. Ideally, you should aim for at least 20 by 40 feet to provide enough room for skating and playing. However, if you have more space and budget, a larger rink will allow for more skaters.
The ideal time to build your rink is before the first freeze of the season. This allows the bracing and sideboards to set. Wait for several days of temperatures below 36°F (2°C) during the day and below 32°F (0°C) at night before filling the rink to ensure proper freezing.
Regular maintenance includes smoothing the surface, which can be done using a homemade resurfacer. If you find a hole in the liner, patch it immediately with roofing tar or specialized patch tape. After the season, disassemble the rink carefully and store the materials properly for next year.
To fill your rink, use a garden hose and fill it all at once to prevent damage to the liner and ensure even freezing. Avoid filling in layers, as this can cause uneven surfaces and potential liner damage. Also, do not put down the liner until you're ready to fill to avoid debris and animals getting into your rink.
Conclusion:
In conclusion, making a DIY ice rink is a rewarding way to make the most of winter. By following the steps outlined, you can transform your backyard into a personal skating rink. Enjoy quality time with family and friends on the ice, making memories that will last a lifetime.


