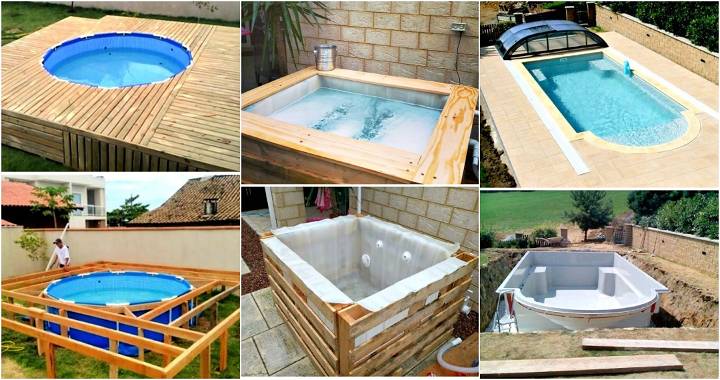
Building your homemade DIY inground pool can be a rewarding project that adds value to your home and joy to your life. Building an inground swimming pool requires careful planning and understanding of the process. From choosing the right type of inground pool to understanding local regulations, every step is crucial for a successful construction. This guide aims to provide you with everything you need to know, from site selection and preparation to step-by-step instructions for assembling your dream pool.
We will also dive into the importance of safety measures and maintenance tips to ensure your pool remains a safe and pleasant space. With insights on cost breakdown and seasonal care, you're equipped to tackle this project with confidence. Ready to take on the challenge of building your own inground pool?
Keep reading for detailed guidance that simplifies the process, making your dream pool a feasible task.
Choosing the Right Type of Inground Pool
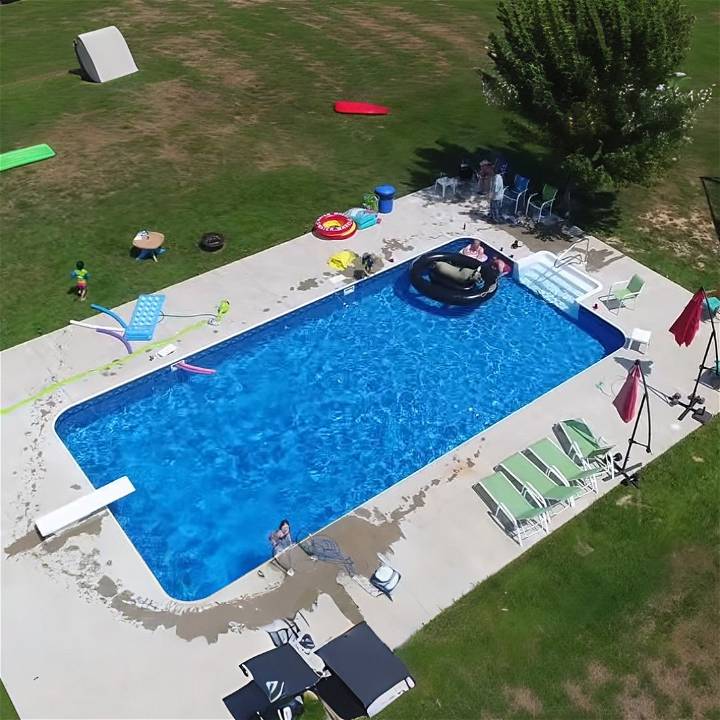
When planning to build an inground pool, one of the first decisions you'll need to make is choosing the type of pool that best suits your needs and budget. There are three main types of inground pools: concrete, vinyl liner, and fiberglass. Each has its own set of advantages and disadvantages.
Concrete Pools
Concrete pools are highly durable and can be built in any shape or size, making them a popular choice for those seeking a custom design. They are constructed using a steel-reinforced concrete shell, which is then plastered, painted, or finished with a special coating.
Pros:
- Highly customizable in terms of shape and size.
- Durable and long-lasting.
Cons:
- More expensive than other types.
- Requires more maintenance and higher chemical usage.
- Longer installation time.
Vinyl Liner Pools
Vinyl liner pools are made from a flexible vinyl liner that fits into a hole dug for the pool, with wall panels attached to a frame. These pools are popular due to their lower initial cost and soft, smooth interior surface.
Pros:
- Lower initial cost.
- Soft, smooth interior is comfortable for swimmers.
- Available in a variety of shapes and sizes.
Cons:
- Liners need to be replaced every 7-10 years.
- Not as durable as concrete or fiberglass.
- Limited customization options.
Fiberglass Pools
Fiberglass pools are factory-molded into giant bowl-shaped structures, which are then set into the excavated hole by a crane. They have a smooth finish that's durable and stain-resistant.
Pros:
- Low maintenance.
- Quick installation.
- Durable and long-lasting.
Cons:
- Higher initial cost.
- Limited in size and shape options.
Choose concrete, vinyl, or fiberglass pools based on budget, maintenance, and customization. Consider the pros and cons before deciding. The pool is a big investment for joy and relaxation.
Understanding Local Regulations
Before you start digging your backyard to build your dream pool, it's crucial to understand and comply with the local regulations. These rules are in place to ensure safety and to maintain the aesthetic and environmental standards of your community.
Importance of Checking Local Regulations
Local regulations can significantly impact your pool construction project. They dictate various aspects, such as the size, depth, location, and safety features of your pool. Non-compliance can lead to penalties, or worse, you might have to modify or remove your pool after it's built.
Obtaining Necessary Permits
Before starting the construction, you'll need to obtain the necessary permits. The process usually involves submitting your pool design and site plan to the local authority for approval. It's advisable to hire a professional pool contractor who is familiar with the local regulations and the permit application process.
Factors Considered in Local Regulations
Here are some factors that local regulations typically consider:
- Setbacks: These are the minimum distances that your pool needs to be from your property lines, house, and any other structures.
- Fencing: Most areas require a fence around the pool for safety reasons. The height and type of fence may be specified.
- Pool Equipment: The location and noise level of pool equipment like pumps and heaters may be regulated.
- Drainage: Your pool design should ensure proper drainage to prevent water from flooding your property or your neighbor's.
When building a DIY pool, ensure you know local regs, get permits to avoid problems. Consult experts or authorities when unsure.
Site Selection and Preparation
Choosing the right location for your inground pool and preparing the site properly are crucial steps in your DIY pool project. Here's what you need to consider:
Choosing the Best Location
The location of your pool can significantly impact its usability, safety, and maintenance needs. Here are some factors to consider:
- Sun Exposure: A sunny spot can help keep the water warm and inhibit algae growth.
- Wind Exposure: Wind can increase water evaporation and cool the water. Consider using windbreaks if necessary.
- Proximity to Trees: While trees provide shade, they can also fill your pool with leaves and debris.
- Accessibility: Ensure easy access to and from your house for safety and convenience.
- Visibility: The pool should be visible from your house for safety reasons.
Preparing the Site
Once you've chosen the location, the next step is site preparation. This involves several tasks:
- Clearing the Area: Remove any grass, plants, or debris from the area where the pool will be installed.
- Leveling the Ground: The ground should be leveled to ensure the pool is stable and safe.
- Marking the Area: Use stakes and string to mark the exact dimensions of the pool.
- Excavation: Dig the hole for the pool, ensuring it's the right shape and depth.
The site selection and preparation require careful planning and hard work. But taking the time to do it right will pay off in the long run, ensuring your pool is a safe and enjoyable addition to your home.
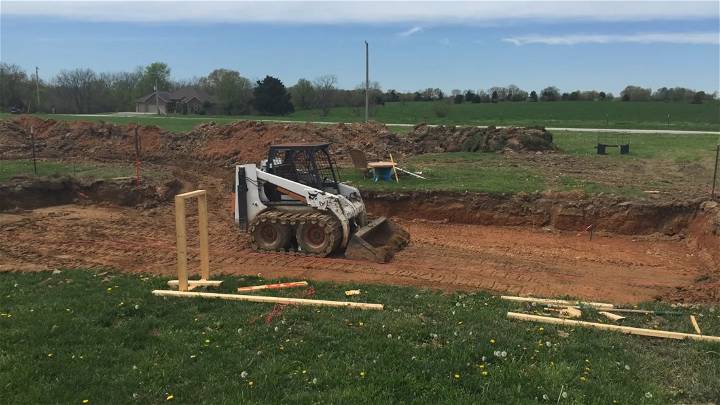
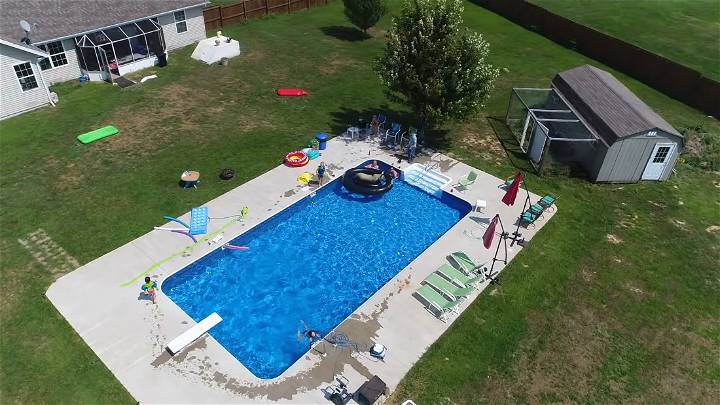
Building an inground pool saves money and gives you a personalized oasis in your backyard. This guide is based on a DIY project that saved $50,000!
Step by Step Instructions
Learn how to build an inground swimming pool with our homemade DIY guide below:
Step 1: Planning and Design
Start by defining the size, shape, and location of your pool. Consider factors like sunlight, privacy, and ease of access. Once you have a clear idea, use spray paint to outline the pool area on the ground. This step is crucial for ensuring everything aligns with your vision before moving forward.
Step 2: Excavation
Rent or hire a skid loader to begin the excavation process according to your outline. This will involve digging out the area where your pool will sit. Remember, the hole should be slightly larger than the actual pool dimensions to accommodate the walls and liners.
Step 3: Building the Walls
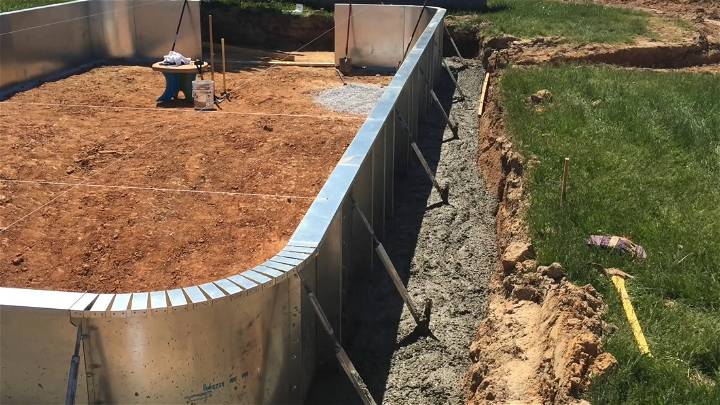
Depending on your budget and preference, choose between metal or composite walls. Metal is generally cheaper and was the chosen material in the DIY project. Assemble the walls around the perimeter of the excavated area.
Step 4: Pouring the Concrete Collar
A concrete collar acts as a foundational support, preventing the walls from collapsing outward. Pour the concrete around the base of the walls, ensuring it's level and secure.
Step 5: Adding Gravel and Plumbing
After the collar, fill the area with gravel to facilitate drainage. Then, lay down your plumbing lines, including skimmers and return jets. Once in place, cover these with more concrete to protect and stabilize them.
Step 6: The Deep End and Mortaring Walls
If your pool design includes a deep end, pour a concrete slab at the designated area. Follow this by applying mortar to the pool walls, which helps in smoothing out and strengthening the structure.
Step 7: Installing the Liner
The pool liner is what holds the water. Start by attaching it around the top edge of the pool walls, then use a shop vac to remove air and ensure it snugly fits against the walls and floor. Begin filling the pool with water to keep the liner in place.
Step 8: Final Touches
With the liner installed, it's time for the finishing touches. This includes securing the coping around the pool's edge, setting up the pool filter, heater (optional), and pump system. Ensure all electrical components are safely installed and properly bonded to avoid potential hazards.
Step 9: Decking and Landscaping
Finally, build the decking around your pool. This could involve laying down gravel, installing wire mesh for support, and pouring concrete to form the deck. Add landscaping around your pool for aesthetic appeal and to blend it into your garden.
Building a DIY in-ground pool takes hard work and patience, but the satisfaction and savings make it worthwhile. Many have succeeded with proper prep and commitment.
Video Tutorial
For a step-by-step video tutorial on building your own DIY in ground pool, watch this YouTube video.
It pairs well with this written guide, serving as a companion visual resource that succinctly demonstrates each phase of the pool construction process.
Cost Breakdown of Building an Inground Pool
Building an inground pool is a significant investment. Understanding the cost breakdown can help you plan your budget effectively. Here's a detailed look at the costs involved:
Initial Construction Costs
The initial construction cost is the most significant part of your budget. It includes:
- Excavation: This is the cost of digging the hole for your pool. It can vary based on the size and depth of the pool and the type of soil in your yard.
- Pool Material: The cost of the pool material (concrete, vinyl liner, or fiberglass) can vary widely. Concrete is typically the most expensive, while vinyl liner is usually the least expensive.
- Installation: This includes the cost of professional labor to install the pool. It can vary based on the complexity of the project and local labor rates.
Equipment Costs
Pool equipment is essential for maintaining the cleanliness and safety of your pool. These costs include:
- Pump and Filter System: These are necessary for circulating and cleaning the water.
- Heater: A pool heater can extend your swimming season by warming the water.
- Safety Equipment: This includes items like pool covers, fences, and alarms.
Ongoing Maintenance Costs
Ongoing maintenance costs are recurring expenses that you'll need to budget for. They include:
- Chemicals: You'll need to regularly add chemicals to your pool to maintain the water balance and prevent algae growth.
- Energy: Running the pump, filter system, and heater will increase your energy bills.
- Repairs: Over time, you may need to repair or replace parts of your pool or equipment.
These are rough estimates. Costs can differ based on location, pool size, type, equipment, and features chosen. Get multiple quotes from pool builders for best value.
Safety Measures for Your DIY Inground Pool
Ensuring safety is paramount when you have an inground pool. Here are some key safety measures that every pool owner should consider:
Fencing
Fencing is one of the most important safety features for a pool. It prevents unsupervised access, especially by children and pets. The fence should be at least four feet high and have a self-closing, self-latching gate.
Pool Covers
A pool cover is not just for keeping your pool clean. It can also prevent accidental falls into the pool when it's not in use. There are various types of pool covers available, including manual, semi-automatic, and automatic covers.
Pool Alarms
Pool alarms can alert you if someone or something enters the pool. They can be installed in the pool, on the pool gate, or even worn as a wristband by children.
Anti-Entrapment Devices
Anti-entrapment devices are designed to prevent swimmers from being trapped by the pool's suction force. They are a must-have safety feature for all pools.
Safety Rules and Supervision
Establishing safety rules and ensuring constant supervision when the pool is in use is crucial. Rules might include no running, no diving in shallow water, and always swimming with a buddy.
While having a pool can provide endless fun and relaxation, it's essential to prioritize safety to prevent accidents and ensure everyone can enjoy the pool safely.
Maintenance Tips for Your DIY Inground Pool
Maintaining your inground pool is essential to ensure it remains clean, safe, and enjoyable. Here are some key maintenance tasks that every pool owner should be aware of:
Regular Cleaning
Regular cleaning is crucial to keep your pool looking its best and prevent problems before they start. This includes skimming the surface for debris, vacuuming the pool floor, and brushing the pool walls and tile line.
Water Testing and Chemical Balance
Testing your pool water regularly and maintaining the right chemical balance is vital for the health of your pool and the safety of its users. This involves checking and adjusting levels of chlorine, pH, alkalinity, and calcium hardness.
Filter Maintenance
Your pool's filter plays a crucial role in keeping the water clean. Regularly cleaning or replacing the filter can ensure it operates efficiently and prolongs its lifespan.
Regular Inspection
A regular inspection can help you spot and address minor issues before they become major problems. Look for signs of damage or wear in the pool liner, pool equipment, and surrounding area.
Professional Servicing
While many maintenance tasks can be done yourself, some require professional expertise. Regular professional servicing can help ensure your pool equipment is working correctly and prolong its lifespan.
This regular and effective maintenance can keep your pool in top condition and enhance your enjoyment of it. It's a small investment of time and effort that can pay off significantly in the long run.
Seasonal Care for Your Inground Pool
Taking care of your DIY inground pool involves more than just daily or weekly maintenance tasks. It's also important to prepare your pool for the changing seasons. Here's how:
Opening Your Pool in the Spring
As the weather warms up, it's time to get your pool ready for use. Here's a simple guide:
- Remove and Clean the Pool Cover: Take off the winter cover, clean it, and let it dry before storing it away.
- Reconnect Pool Equipment: Reinstall any pool equipment that was removed for the winter.
- Fill the Pool: Add water to bring the pool up to its normal level.
- Balance the Water: Test the water and adjust the chemical levels as needed.
Maintaining Your Pool in the Summer
Summer is when your pool gets the most use. Here's how to keep it in top shape:
- Regular Cleaning and Testing: Keep up with your regular cleaning schedule and test the water frequently due to increased use.
- Monitor Water Level: More use and hotter temperatures can lead to water loss. Top up as necessary.
Preparing Your Pool for the Fall
As the weather cools down, you'll need to prepare your pool for the fall. Here's what to do:
- Clean the Pool: Give your pool a thorough cleaning before closing it for the season.
- Balance the Water: Adjust the chemical levels one last time before covering the pool.
- Install a Pool Cover: A pool cover will protect your pool from falling leaves and debris.
Closing Your Pool for the Winter
Properly closing your pool for the winter can make opening it in the spring much easier. Here's a simple guide:
- Lower the Water Level: Lower the water level to below the skimmer line to prevent freezing damage.
- Winterize Pool Equipment: Disconnect and clean pool equipment and protect it from freezing temperatures.
- Cover the Pool: Install a winter pool cover to protect your pool from the harsh winter weather.
Each season requires specific care to keep your pool safe, clean, and ready for use. Regular maintenance and seasonal care can prolong the life of your pool and enhance your enjoyment of it.
Troubleshooting Common Pool Problems
Even with regular maintenance, you may encounter some common problems with your inground pool. Here's a guide on how to identify and address these issues:
Algae Growth
Algae growth is a common issue that can turn your pool water green. It's usually caused by an imbalance in water chemistry or insufficient filtration.
- Solution: Regularly test and adjust your pool's chemical levels. If algae is already present, you may need to “shock” your pool with a high dose of chlorine and use an algaecide.
Cloudy Water
Cloudy water can be caused by various factors, including improper chemical balance, poor filtration, or the presence of contaminants.
- Solution: Test your water chemistry and adjust as necessary. Ensure your filter is working correctly, and consider using a pool clarifier.
Equipment Failure
Equipment failures, such as a broken pump or heater, can disrupt your pool's operation and enjoyment.
- Solution: Regularly inspect your pool equipment for signs of wear or damage. If a piece of equipment is not working correctly, it may need to be repaired or replaced.
Leaks
A leak in your pool can lead to water loss and potentially damage your property.
- Solution: If you suspect a leak, you can perform a simple bucket test: Fill a bucket with pool water and mark the water level. Leave it in the pool for a few days, then check if the water levels have changed. If the pool's water level has dropped more than the bucket's, you may have a leak. In this case, it's best to contact a pool professional.
The key to troubleshooting is to identify the problem early and take corrective action. Regular maintenance and inspection can prevent many common pool problems. However, don't hesitate to seek professional help for more complex issues.
FAQs About DIY Inground Pool
Discover answers to frequently asked questions about DIY inground pools. Learn tips, tricks, and advice for successful pool installation on a budget.
1. What's the cost of an inground pool?
The cost of an inground pool depends on several factors, such as pool type, project location, and the total scope and features of the project.
2. What are the types of inground pools?
There are three types of inground pools to consider: vinyl-liner, fiberglass, and concrete/gunite.
3. What are the township requirements and zoning laws?
Contact your local building department and inquire about inground swimming pool construction requirements.
4. What pool additions and accessories can I add?
There are numerous pool additions and accessories that you can add to your pool such as spas, tanning ledges, splash decks, gas heater or heat pump, color lights, salt or mineral system, pool automation, automatic pool cover, etc.
5. How long does the construction take?
Standard inground swimming construction time varies depending on the pool type, size, pool features, and project location.
6. Can my yard support a pool?
This depends on the specific conditions of your yard.
7. What size and shape can the pool be?
The size and shape of the pool can be customized based on your design ideas and budget.
8. What are the benefits of building a pool as DIY?
The main benefits of DIY pool installation are saving on the cost and being in charge of your installation schedule.
9. Will I lose the pool warranty with DIY?
Some manufacturers offer a comprehensive Pool DIY Assist Program designed to ensure that the factory's pool warranty is issued upon supervised, verified, and protocol-compliant pool installation.
10. What are the fundamental requirements for fiberglass pool installation?
It involves doing your homework and getting everything organized for a perfectly flawless pool installation.
Conclusion:
In conclusion, building a homemade DIY inground pool can be a rewarding project that adds value to your home and provides endless hours of enjoyment. By understanding the different types of inground pools, such as concrete, vinyl liner, and fiberglass pools, you can choose the best option that suits your needs and budget. It's essential to comply with local regulations, select the optimal site, and follow step-by-step instructions to ensure the safety and longevity of your pool.
Whether it involves the initial construction, ongoing maintenance, or seasonal care, being well-informed and prepared can make the process smoother and more efficient. Remember, the key to a successful DIY inground swimming pool project lies in meticulous planning, adherence to safety measures, and regular upkeep. So, dive into building your own inground swimming pool and enjoy the luxury of a personal oasis right in your backyard.


