Installing a DIY inground trampoline is an exciting way to bring new life to your backyard. Unlike the traditional above-ground models, inground trampolines offer a sleek, safe, and low-profile alternative that seamlessly integrates into your landscape. This guide will cover every essential step, from digging the hole and installing the trampoline to making a safe and durable setup, using tips and tricks gleaned from a successful DIY installation.
Let's dive into the details of transforming your garden with an inground trampoline.
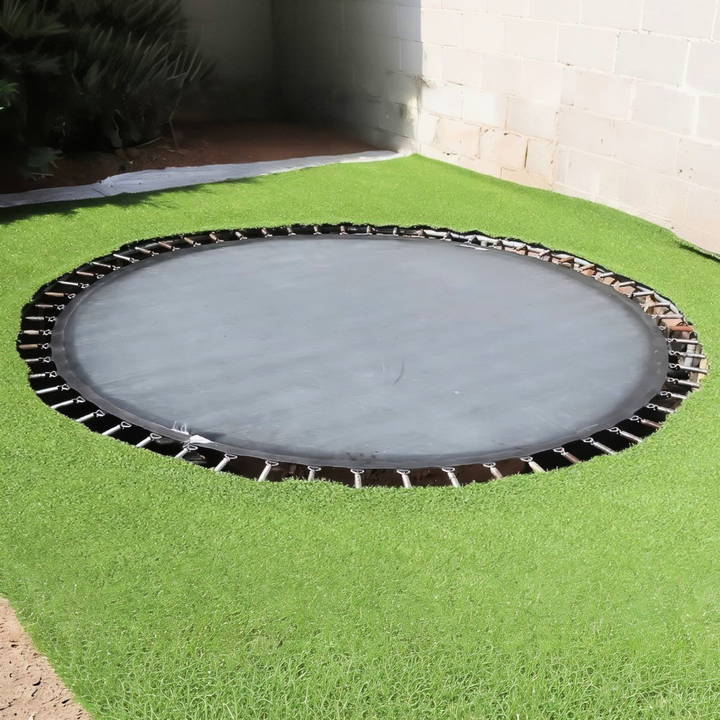
Why Choose an Inground Trampoline?
Inground trampolines are gaining popularity for several reasons:
- Aesthetics: These trampolines blend into your garden, making a minimalist look compared to their above-ground counterparts.
- Safety: Because they're installed at ground level, the risk of falling from a height is significantly reduced.
- Durability: With proper drainage and setup, they withstand various weather conditions and last longer.
Tools and Materials Needed
Here's a list of essential materials and tools:
- Trampoline (a standard above-ground model can work with modifications)
- Excavator or Shovel (for digging the hole)
- Plastic or Steel Retaining Wall Material (to line the walls of the hole)
- Drainage Gravel or Soil (to ensure proper water flow)
- Optional Pump (for rare occasions when water may need to be removed)
Step by Step Instructions
Learn to build your own inground trampoline with our step-by-step guide. Discover safety tips and benefits for your garden today.
Step 1: Choosing the Right Spot
Selecting the best location in your garden is crucial for this project. Consider a spot that:
- Has enough room around it to ensure safety.
- Receives good sunlight but is not in a place prone to waterlogging.
- Blends well with the existing landscape, such as near a play area or open space.
Step 2: Prepare the Trampoline Frame
The example project used a regular above-ground trampoline model. Here's how you can modify it:
- Remove the Middle Sections of the Steel Legs: This adaptation allows the trampoline to sit flush with the ground, eliminating the need for additional supports.
- Reinforce the Frame if Necessary: To ensure long-term stability, reinforce any areas that may experience increased pressure.
By modifying an above-ground trampoline, you save on costs and repurpose existing equipment.
Step 3: Digging the Hole
Digging the right-sized hole is essential for a stable inground trampoline. Here's a step-by-step on dimensions and technique:
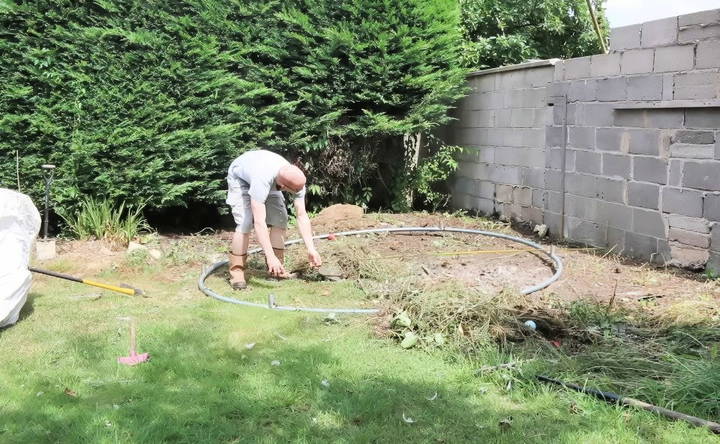
- Mark the Area: Use chalk, string, or spray paint to outline the trampoline's diameter on the ground.
- Depth: Dig approximately 300-400mm deeper than the trampoline's height. This allows for a drainage layer and adequate airflow beneath the trampoline mat.
- Excavation: Use an excavator for faster digging, or a shovel if you prefer a more manual approach. Ensure the sides of the hole are vertical or slightly angled outward to provide support for the retaining walls.
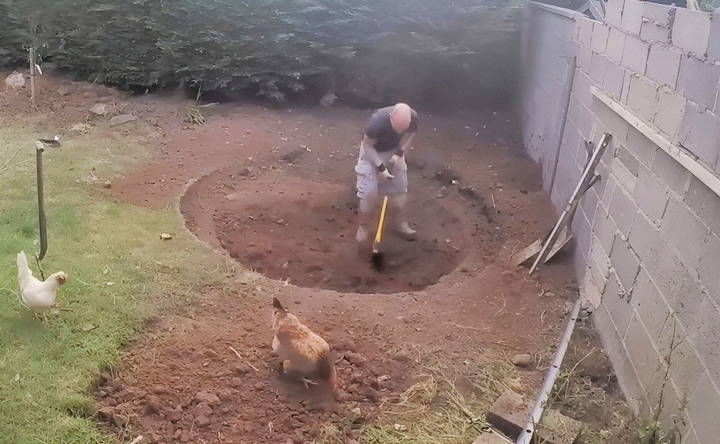
Tip: For enhanced stability, leave a small ledge around the edge. This ledge can support the trampoline frame and reduce shifting.
Step 4: Install Drainage
An effective drainage system is critical to prevent water buildup under your trampoline, especially if your garden is prone to rain or has clay-heavy soil.
- Layer the Bottom with Gravel: Spread a layer of gravel across the bottom of the hole. This layer helps with natural drainage by allowing water to flow out of the pit.
- Optional Pump Installation: If you live in a particularly wet area, consider installing a cheap water pump. This can be used to drain water that occasionally collects after heavy rainfall. Placing the pump within easy access through the trampoline springs makes it simple to manage.
Step 5: Install the Retaining Walls
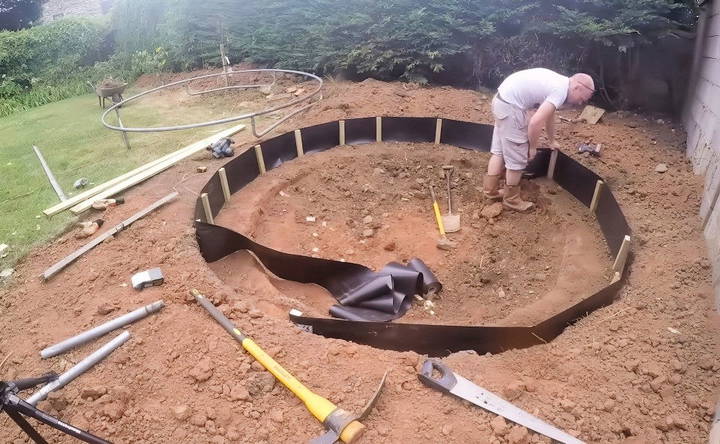
Retaining walls are essential for keeping the soil in place and protecting the trampoline structure. In this example, 300mm damp-proof course (DPC) plastic was used as the wall material, which you can replicate with a similar durable plastic or steel option.
- Cut the Retaining Wall Material: Measure and cut the material to fit the perimeter of your hole.
- Secure the Material: Position the retaining wall around the hole's circumference. Ensure it's firmly in place to prevent collapse or shifting. The walls should reach slightly above ground level to form a barrier against soil erosion.
Step 6: Place and Secure the Trampoline
With the retaining walls installed, it's time to position the trampoline:
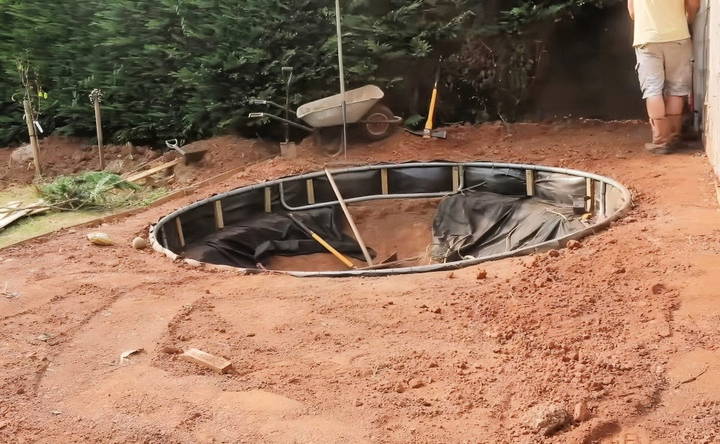
- Position the Frame: Lower the trampoline frame into the hole. Ensure it sits evenly on the ledge buildd during the digging process.
- Adjust for Stability: Check for any wobbling or uneven areas. Adjust the retaining walls or add more gravel if needed to stabilize the structure.
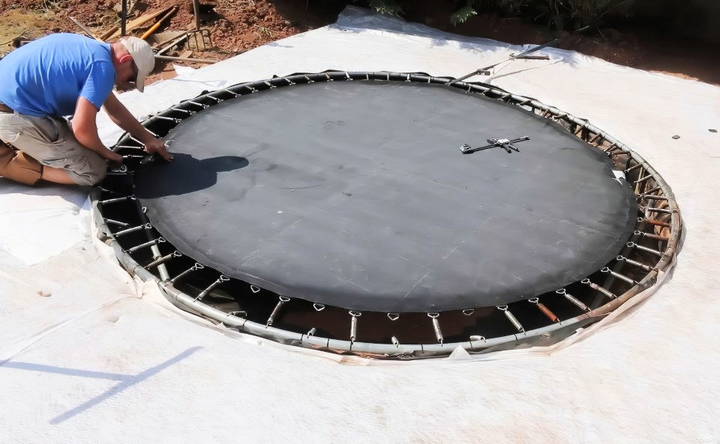
- Secure the Springs and Mat: Attach the springs and mat as you would with an above-ground setup. Double-check that all springs are securely fastened to handle regular use.
Step 7: Finishing Touches and Surrounding Landscaping
Once the trampoline is in place, finish off the area to ensure a seamless look and added safety:
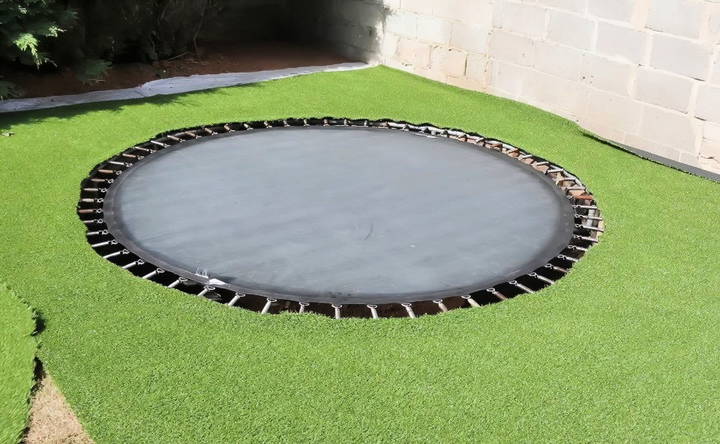
- Turf or Grass Around the Trampoline: Re-plant grass around the trampoline to blend it with your garden. Grass provides a soft, natural transition and helps stabilize the ground around the trampoline.
- Consider Safety Features: While an inground trampoline is safer than above-ground models, adding a soft padding or rubberized edge around the perimeter can offer extra safety.
- Fun Additions: Get creative! The project example mentioned incorporating balancing beams, climbing frames, or even a marble run along a nearby wall. These features make the trampoline area part of a larger play zone, adding variety and interest.
Safety Considerations
Safety is paramount with any backyard play equipment. Follow these tips to keep your inground trampoline safe:
- Supervision: Always supervise children while they use the trampoline.
- Proper Padding: Add padding around the edge to prevent injuries from potential impacts.
- Weight Limits: Be mindful of the trampoline's weight capacity and avoid overcrowding.
Benefits of Adding an Inground Trampoline to Your Garden
Beyond fun, inground trampolines offer:
- Exercise: Trampolining is a fun cardiovascular workout for kids and adults alike.
- Aesthetic Value: The low profile of an inground trampoline allows it to blend into your garden without obstructing views or requiring extra space.
- Family Fun: This simple addition transforms your garden into a recreational area everyone can enjoy.
Final Thoughts
Building an inground trampoline is a rewarding DIY project that transforms your backyard into a playground while enhancing your landscape's aesthetic. With proper planning and attention to drainage, retaining walls, and stability, this project is a durable and safe addition that offers endless fun. Whether you're enhancing a garden or making a dedicated play area, an inground trampoline provides a lasting upgrade that combines exercise, entertainment, and aesthetics.
Now that you have all the steps, it's time to start digging and bring the joy of trampolining closer to the ground—right in your backyard!
FAQs About DIY Inground Trampoline
Discover answers to common questions about DIY inground trampolines, from installation tips to safety guidelines, in our comprehensive FAQs guide.
During winter, drainage becomes especially important. As noted, this setup is designed to handle a few inches of water without issue. However, if you live in a region with heavy rainfall, ensure you dig deep enough to accommodate drainage gravel. In rare cases, you may need to use a pump.
If installed properly, an inground trampoline is designed to be durable. Using strong retaining walls and adding a gravel base are crucial to its longevity. Checking the area seasonally to ensure everything is in place will help maintain its stability.
While installing an inground trampoline is a straightforward DIY project, it requires time, tools, and some physical labor. If you’re comfortable with digging, retaining wall installation, and trampoline assembly, it’s feasible to do this solo. Otherwise, professional help for excavation or drainage setup might be worthwhile.
Maintenance for an inground trampoline includes:
Regularly checking for rust or loose springs.
Ensuring proper drainage by monitoring the gravel base or pump.
Clearing any debris that may collect under the trampoline.
With a setup like this, small animals may occasionally find the sheltered trampoline area appealing. Regular cleaning and covering the trampoline when not in use can help deter pests.
To prevent water accumulation, dig slightly deeper than the trampoline’s height and add a gravel bed for natural drainage. If water buildup persists, use a submersible pump to remove excess water, especially after heavy rainfall.
Yes, insufficient airflow can slightly impact bounce quality. To improve this, install a 4-inch ventilation pipe from the pit to the outside. Cover the pipe with mesh to prevent debris from entering.
Durable plastic damp-proof course (DPC) material or bricks work well for retaining walls. DPC is easy to install and has held up well for users over multiple seasons.
Remove the middle leg sections of a standard trampoline to lower its height. This adjustment allows the trampoline to sit flush with the ground, providing the necessary inground setup.
If gaps are present between the trampoline and the hole, fill them with soil or gravel. This will stabilize the trampoline and prevent soil from collapsing into the pit.
Yes, artificial grass is a low-maintenance option that can be placed directly on top of a weed membrane. It provides a neat look and reduces the need for mowing or trimming around the trampoline.
Ideally, keep at least 10–12 feet of space from any walls or fences to prevent injuries from bouncing into nearby structures. Safety padding can also be added around the trampoline’s edges for extra protection.
In areas with small animals like mice, it's wise to cover ventilation openings with mesh to keep pests out. Regular maintenance checks will also help ensure no unwanted guests take shelter under the trampoline.


