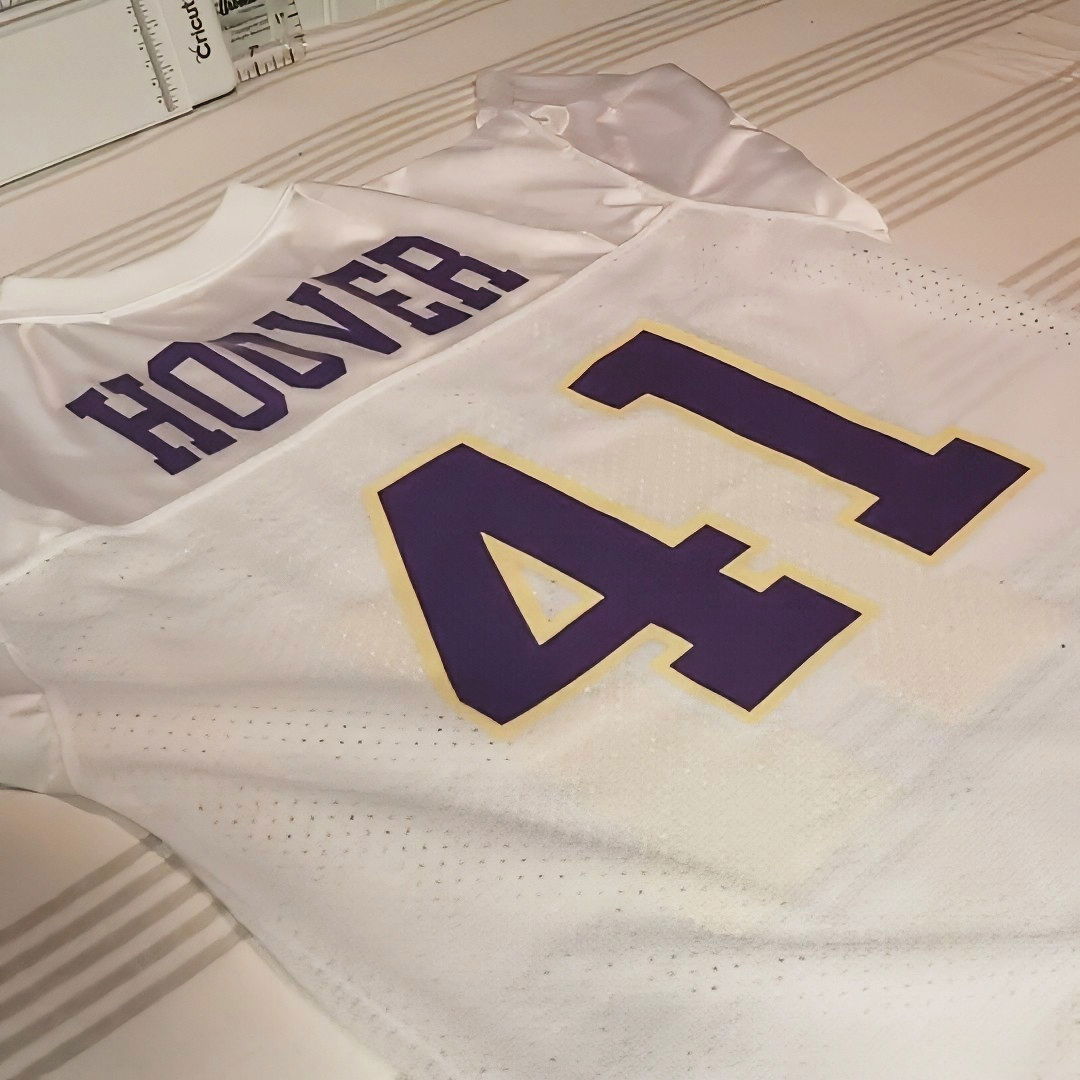
Making a custom football jersey can be a fun and rewarding project, especially if you're looking to show off team spirit, honor a player, or simply want a unique jersey for game day. With a few supplies, a bit of patience, and some creativity, you can design a high-quality jersey that looks professional and personalized. In this guide, you'll find all the steps for making a custom DIY jersey with heat transfer vinyl (HTV) and Cricut Design Space, plus expert tips to make your project shine.
Getting Started with Your DIY Jersey Project
Before diving into the actual design and creation process, it's essential to gather the necessary supplies. This project uses Cricut Design Space to customize the jersey design, alongside heat transfer vinyl (HTV) and a heat press for application.
What You'll Need
- Football Jersey: Choose a polyester jersey, ideally with a mesh pattern. This fabric works well with vinyl.
- Siser Easy Weed Heat Transfer Vinyl (HTV): Known for its durability and ease of use, HTV is a great choice for jersey designs.
- Cricut Cutting Machine: Essential for precisely cutting out your design from the vinyl.
- Pressing Pillow: Helps distribute the heat evenly across the mesh fabric to prevent sticking.
- Protective Paper: Can be used as an alternative to the pressing pillow.
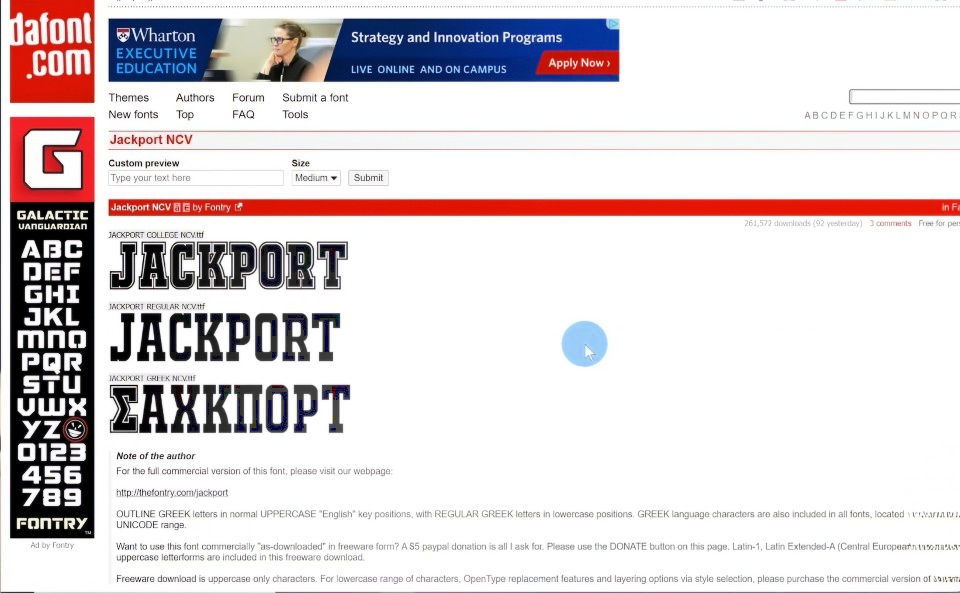
- Fonts: Download from online font repositories like dafont.com for unique player names and numbers. Common choices include Jackport College for numbers and College Block for names.
- Additional Software (if needed): Microsoft Notepad, Microsoft Word, or GIMP for making and formatting text designs.
Step by Step Instructions
Make your custom DIY jersey with our step-by-step guide, from selecting materials to applying vinyl for a professional finish.
1. Preparing the Jersey
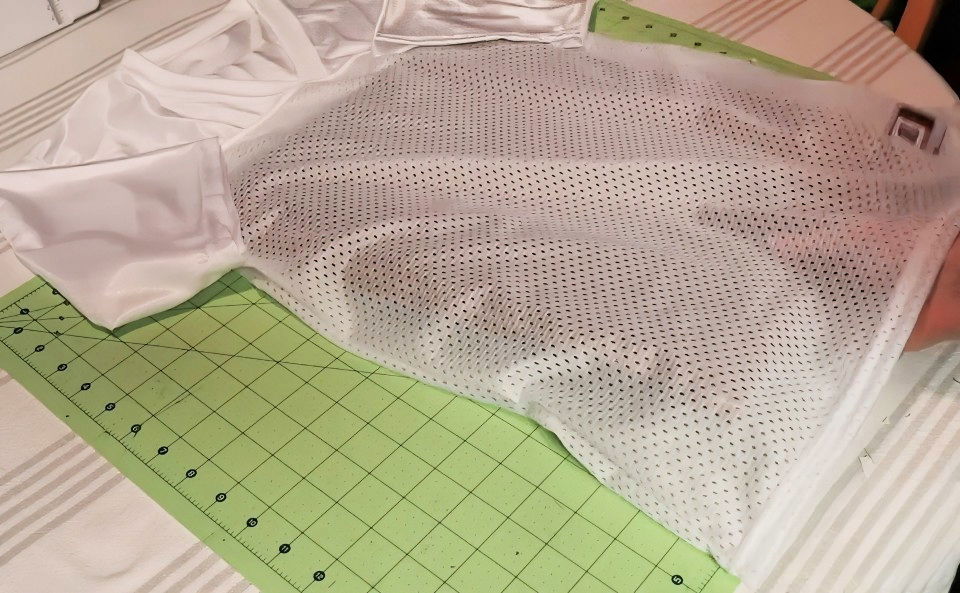
Selecting the right jersey and fabric type is crucial for a successful project. Polyester jerseys, especially those with a mesh texture, work best with vinyl because the design remains visible and doesn't embed too deeply into the fabric.
Choosing the Right Jersey
When choosing a jersey:
- Size and Fit: Make sure the jersey is the correct size. Look for options from suppliers like Joe's USA or other recommended sportswear outlets.
- Material: Polyester is ideal for vinyl application, while mesh fabric allows for better adhesion and a professional finish.
2. Designing Your Jersey in Cricut Design Space
Cricut Design Space is a powerful tool for making custom designs. By importing text, adjusting fonts, and layering colors, you can make a personalized jersey that stands out.
Selecting and Downloading Fonts
Visit daFont to find unique fonts.
- Popular Choices: Jackport College for numbers. College Block for names.
- Font Licensing: Ensure any font you download complies with licensing requirements. Many fonts on daFont are free for personal use, but commercial use may require a license.
Making and Formatting Text
Because fonts can't always be edited directly in Cricut Design Space, you'll need to make and format the text in another program like Microsoft Notepad. Here's how:
- Open Notepad: Click on
Format>Fontand choose your downloaded font. - Adjust Font Size: Set a large font size to maintain clarity when importing into Cricut.
- Save as an Image: Use the Snipping Tool on your computer to capture your text and save it as an image.
Repeat this process for the player's name and number, using the desired fonts for each.
Importing and Editing in Cricut Design Space
- Upload Your Design: Open Cricut Design Space, click on
New Project, and upload your snipped images. - Set Image Type: Choose
Complexto maintain design details. - Remove Backgrounds: Use the background remover tool in Cricut to clean up your design.
- Cut Image Selection: Choose
Cut Imageas your upload type to prepare for precise cutting. - Outline and Layering: For a multi-layer design (e.g., a colored outline around the numbers), upload the design multiple times and remove or adjust specific layers.
3. Setting Up the Design for Cutting
Once your design is ready in Cricut Design Space, it's time to configure it for cutting on HTV. This stage involves setting up the color and size for each part of the design.
Organizing Layers and Colors
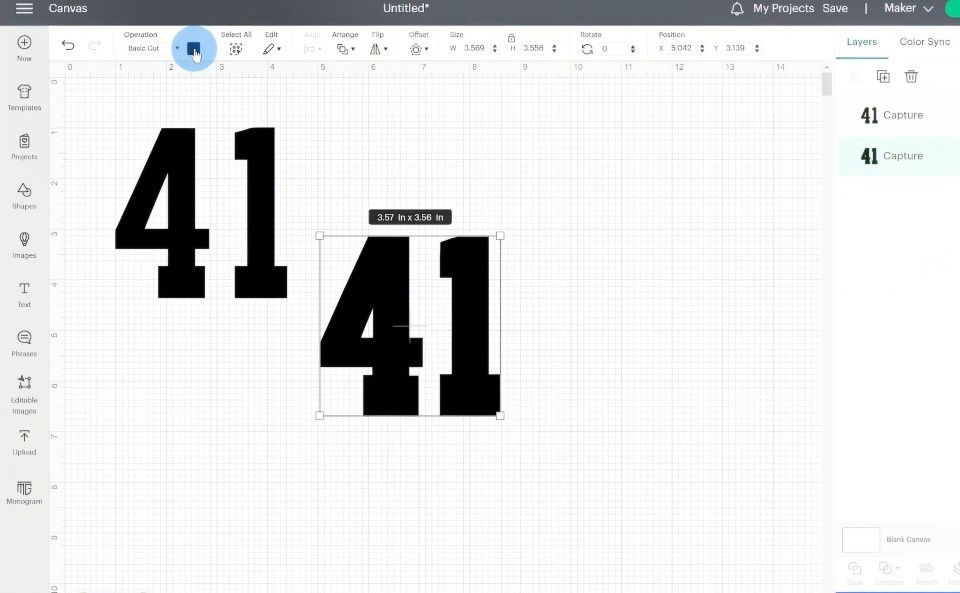
- Assign Colors: In Cricut Design Space, select the color for each layer in your design. This helps keep track of which vinyl color goes with each cut.
- Sizing: Adjust the size to fit your jersey. For example, you might set the number width to 10 inches and height to 7.5 inches.
- Group Layers: Once your design is complete, select all layers, group them, and size them appropriately for your jersey.
Cutting the Design
- Mirror Image: Ensure
Mirror Imageis selected for each layer. This is essential for HTV projects since designs are applied face-down. - Choose Material Settings: Select
Everyday Iron-Onfor Siser Easy Weed HTV. - Load the Mat: Place the vinyl, shiny side down, onto the mat. Feed it into the Cricut machine, and press the
Gobutton to start cutting.
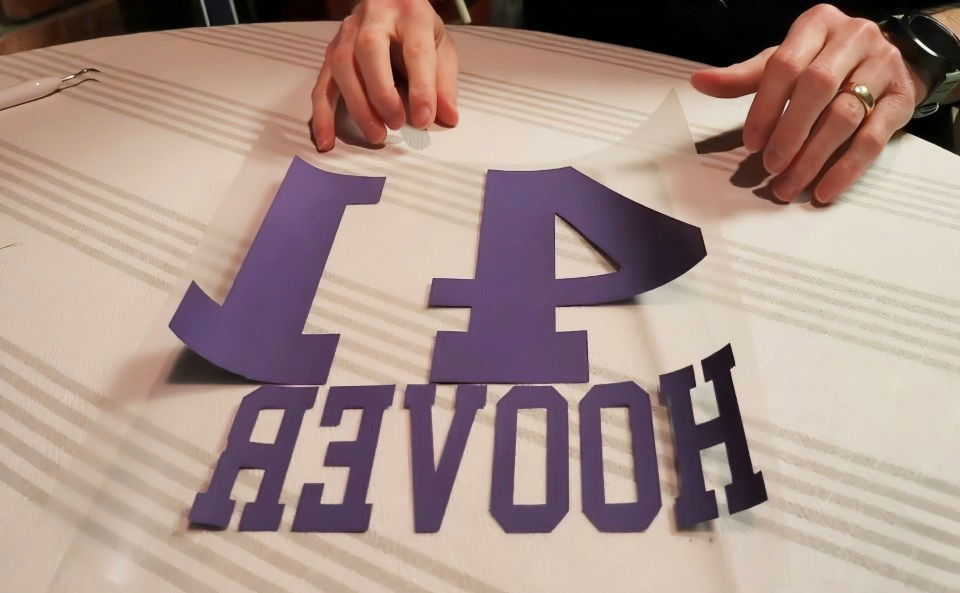
Repeat this process for each color and layer in your design.
4. Weeding the Vinyl
Weeding involves removing the excess vinyl that is not part of the design. This step requires careful attention to avoid pulling off any part of your letters or numbers.
Tips for Effective Weeding
- Tools: Use a weeding tool to remove small vinyl pieces.
- Technique: Slowly peel away the negative space, leaving only the design on the backing.
- Organization: Keep each color separated on its respective backing sheet, ready for pressing.
5. Applying the Vinyl to the Jersey
This step involves pressing the design onto the jersey using heat, which fuses the vinyl to the fabric permanently. The process is done layer by layer, especially if you have multiple colors.
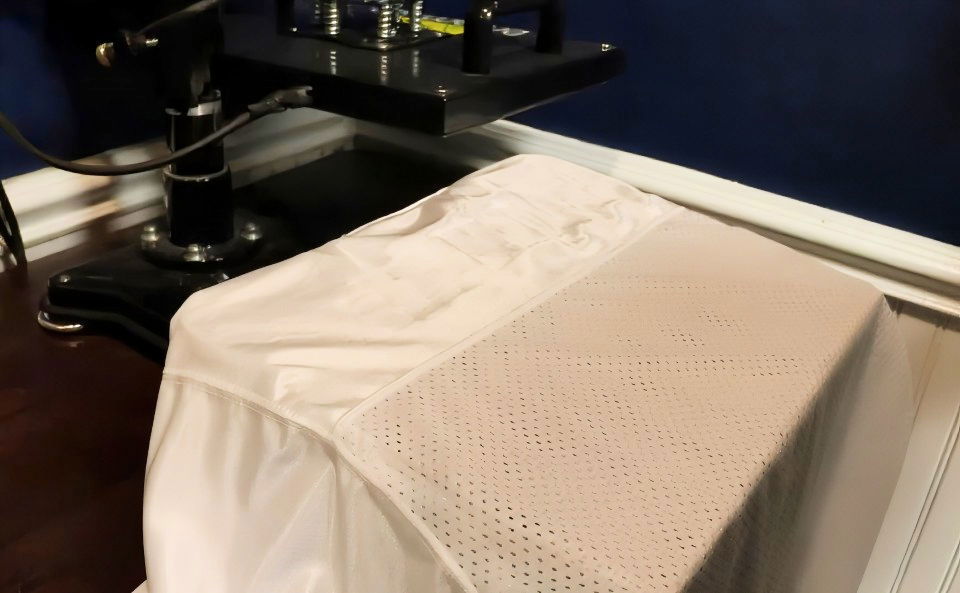
Preparing the Jersey for Heat Press
- Lint Roll: Remove any lint from the fabric to ensure the vinyl adheres smoothly.
- Insert Pressing Pillow: Place a pressing pillow under the jersey to prevent the vinyl from sticking to both sides of the fabric.
Heat Pressing Steps
- Pre-Press: Apply heat to the jersey for a few seconds to smooth out wrinkles.
- Positioning: Center the vinyl on the jersey with the design face-down.
- Protective Covering: Use protective paper over the vinyl to avoid scorching.
- Pressing Time and Temperature: For most designs, set the heat press to 305°F and press for 15 seconds.
- Apply each layer individually, starting with the name and then moving to the number.
- Peeling: Peel off the backing sheet while the vinyl is warm for a clean transfer.
Handling Multi-Layer Designs
- Base Layer: Press for only 1-2 seconds to “pin” the base layer, reducing heat exposure on additional layers.
- Top Layers: Press the top layer for the full 15 seconds to secure it to the base layer and jersey.
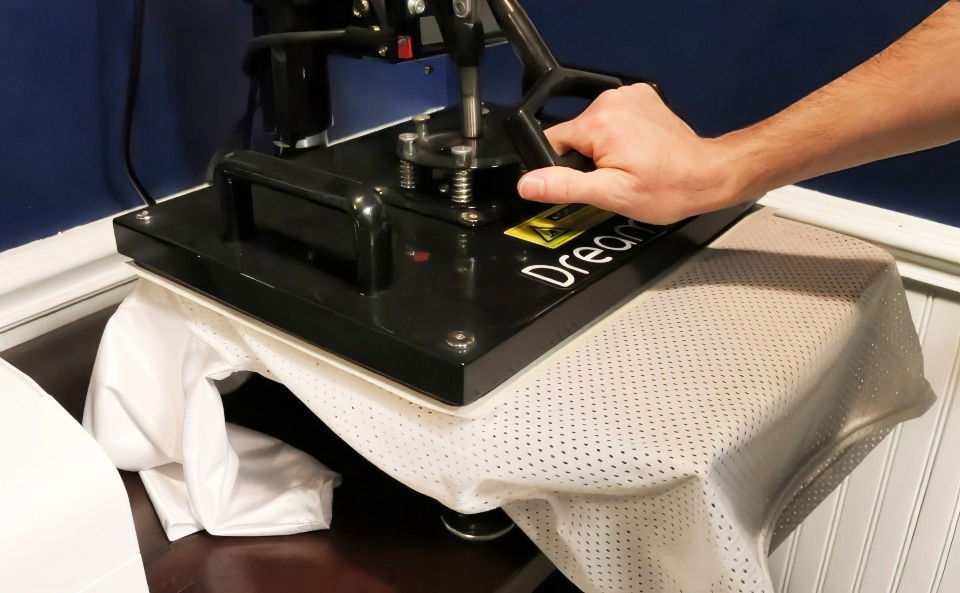
6. Final Touches and Tips
After completing the pressing process, double-check your design for any errors or areas that may need additional pressing. Here are a few final tips to perfect your DIY jersey:
Post-Pressing Checklist
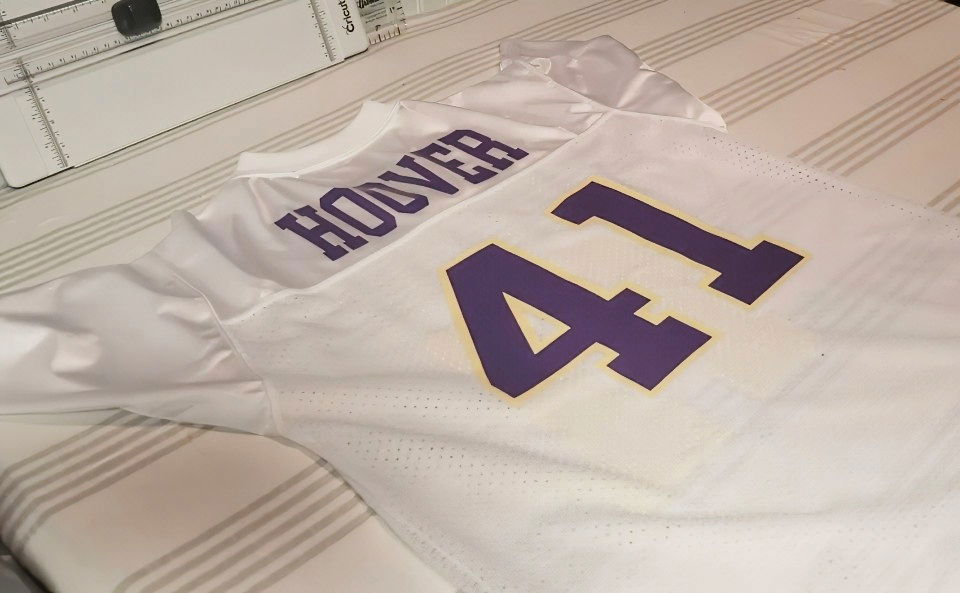
- Inspect Edges: Make sure all edges are firmly attached. If any areas start to lift, press them again.
- Final Press: For added durability, give the entire design a final press with protective paper.
Additional Tips
- Practice on Scrap Fabric: Before applying your design to the jersey, test the process on a similar scrap material.
- Avoid Overheating: Excessive heat can damage vinyl and polyester, so stick to the recommended settings.
- Washing Tips: To keep your jersey in top condition, turn it inside out and wash on a gentle cycle.
Conclusion: Enjoying Your Custom Jersey
With your custom DIY jersey complete, you're ready for game day! Making your own football jersey is a satisfying project that combines creativity with practical crafting skills. By following these steps, you can make a high-quality jersey that reflects your unique style or team pride. Whether you're making it for yourself, a friend, or a fan, this custom jersey is sure to make a statement.
Remember, crafting is about experimentation and learning, so don't hesitate to try different designs or techniques to make each project uniquely yours. Now go out there and showcase your new custom jersey!
FAQs About DIY Jersey
Discover answers to common questions about DIY jerseys, from materials needed to step-by-step guides for making your custom design.
For a standard adult jersey, a single number typically measures 10 inches in width and 7.5 inches in height. Adjust the dimensions to match the size of the jersey for the best visual fit.
To avoid bubbles, press the first layer for only 1-2 seconds, just enough to transfer it to the fabric. This reduces trapped air when pressing the second layer. If bubbles persist, try slightly lowering the heat or pressure, as different heat presses may vary.
Differences in outcome can result from minor variations in settings, pressure, or temperature across cuts. Ensure consistent application of each setting. Experimenting on spare fabric before the final jersey can help make consistent results.
All measurements mentioned are in inches. If needed, you can convert them to centimeters for more specific adjustments.
To preserve the vinyl, turn the jersey inside-out and wash on a gentle cycle with mild detergent in cold water. Avoid high temperatures as they can weaken the adhesive. If damage occurs, repairs are possible with additional tools and materials.
A 100% polyester jersey is ideal, particularly one with a mesh structure. This type allows the vinyl to adhere better without the design embedding too deeply, keeping it visible and vibrant.


