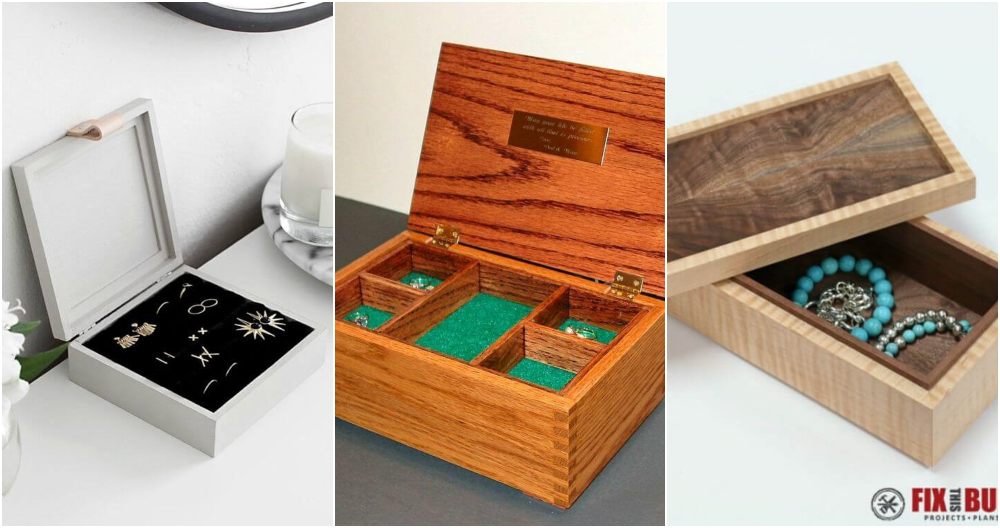
Building a DIY jewelry box is a fun and rewarding project that anyone can enjoy. Whether you want a simple design or something more decorative, this guide for how to make a jewelry box has you covered. You'll learn the basics of measuring, cutting, and assembling your materials. This step-by-step process ensures that your finished product is both functional and stylish.
Choosing the right materials is essential for your DIY jewelry box. You can use wood, cardboard, or even recycled items to build a sturdy and attractive box. The instructions will guide you through the selection process and offer tips for adding unique touches. By following these steps, you'll have a beautiful new place to store your precious items.
Historical and Cultural Significance
Jewelry boxes have a rich history that spans across various cultures and eras, reflecting the art, design, and social customs of their times. These small, decorative containers have been used for centuries to store and protect personal treasures.
- In Ancient Civilizations, jewelry boxes were not only storage solutions but also symbols of wealth and status. The Egyptians, for example, crafted elaborate boxes adorned with gold and precious stones, which were often buried with the deceased as part of their journey to the afterlife. Similarly, in ancient China, intricately carved wooden boxes were common, often featuring sophisticated locking mechanisms that showcased the owner’s importance.
- During the Renaissance, the art of crafting jewelry boxes flourished in Europe. Artisans buildd exquisite caskets using materials like ivory, silver, and mother-of-pearl. These boxes were miniature masterpieces, displaying the high level of craftsmanship and artistry of the period.
- The Victorian Era saw the rise of mass-produced jewelry boxes, thanks to the Industrial Revolution. However, handcrafted boxes remained popular, often featuring romantic motifs and sentimental imagery. This period also introduced the “music box,” which played a melody when opened, adding an auditory charm to the visual appeal.
- In Modern Times, jewelry boxes have become more than just functional items; they are expressions of personal style and fashion. They range from minimalist designs to elaborate works of art, often influenced by contemporary trends and technology.
Exploring jewelry box history and culture inspires your elegant, traditional DIY designs. They offer storage and a link to the past.
Materials Needed and Why:
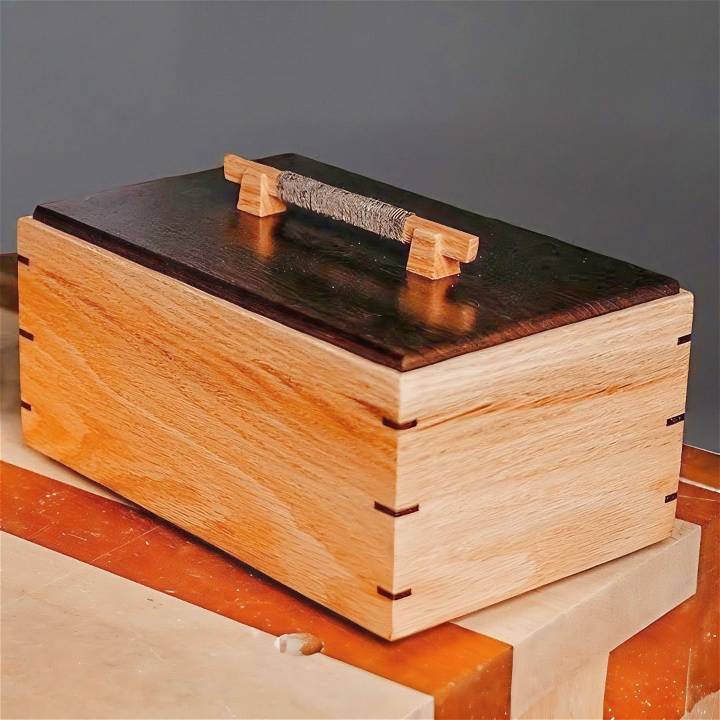
- Resawed Boards: I chose white oak for its strength and aesthetic appeal. Resawing the boards enables book matching, which is critical for a consistent grain pattern, enhancing the box's appearance.
- Wenge Wood: I selected wenge wood for contrast. Its dark, almost black appearance against white oak elevates the jewelry box's visual dynamics.
- Leather Thread: Inspired by Matt Kenny's work, the handle wrapped in leather thread not only adds sophistication but also a unique tactile experience.
- Wood Glue, F-Clamps, Strap Clamps: Essential for securing joints during the assembly phase.
- Fine Grit Sandpaper: Smoothing out the wood surfaces before and after assembly ensures a refined finish.
- Wood Filler: To address any imperfections and prepare the wood for staining.
- Lacquer and Shellac: These finishes protect the wood and highlight its natural beauty.
Step by Step Instructions
Build a stunning DIY jewelry box with our step-by-step guide. Learn the materials needed and why, as well as the mitering, assembling, sanding, and finishing tips
Book Matching and Preparing the Boards:
The initial step involved resawing and book-matching the oak boards to ensure a seamless grain pattern. This process is the backbone of the box's aesthetics, emphasizing the natural beauty of the wood. The key here is precision – each cut must be meticulously planned and executed to maintain the grain pattern continuity.
Mitering and Assembling the Box:
After cutting the boards to size, I proceeded with mitering the edges. The miters had to be perfect, as any gaps could disrupt the box's clean lines. The assembly was done using wood glue and taped joints to hold everything in place while drying. The trick to a stress-free glue-up is patience and ensuring every piece aligns perfectly.
Incorporating the Wenge Wood:
The contrast between the wenge wood and the oak was striking. I used the wenge for the bottom panel and miter splines, adding structural integrity and aesthetic appeal to the box. The thin kerf of the saw blade minimized material loss, preserving the grain pattern.
Sanding and Glue-Up:
Sanding was arguably the most time-consuming part. Every interior surface had to be sanded before the glue-up to avoid unreachable areas later. The outside got a thorough sanding post-assembly, preparing it for the finishing touches.
Making the Handle and Adding the Finish:
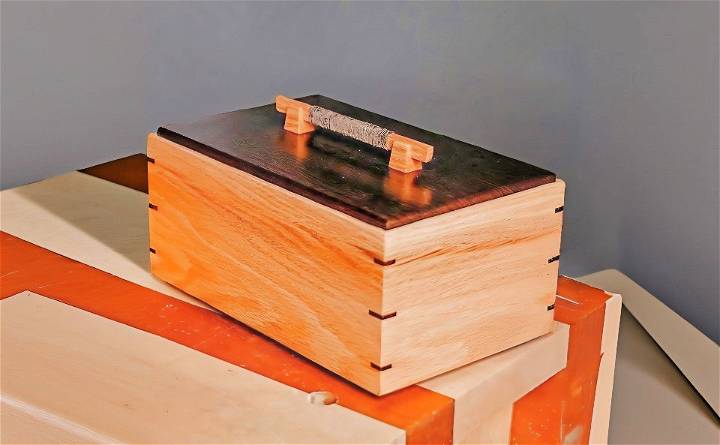
Inspired by Matt Kenny, I fashioned a handle from white oak wrapped in leather thread. This element was not just a functional part of the box but also a distinctive design feature. Finishing was done in stages – wood filler to smooth any grain, followed by lacquer on the exterior and shellac with a wax finish inside. Each layer was applied carefully, sanded down, and inspected for imperfections.
Assembly and Final Touches:
With all the pieces prepared and finished, assembling the box was rewarding. The piston-fit trays, lined with blue felt, slid in perfectly, embodying the precision of the entire project. The wrapped handle added the final, personal touch, symbolizing the bond between my friend and me.
Reflections and Advice:
This project, while challenging, was a labor of love. It pushed my limits and made me a better craftsman. For those aspiring to undertake a similar project, my advice is simple:
- Plan meticulously and proceed with patience. Every step, from selecting the wood to the final finish, affects the outcome.
- Invest time in sanding and finishing. These stages make or break the aesthetic appeal of your box.
- Embrace mistakes and learn from them. Not all aspects went as planned, but each misstep was a learning opportunity.
Customization Ideas
When it comes to making a DIY jewelry box, the possibilities for customization are as vast as your imagination. Here are some ideas to inspire your creativity and help you make a truly one-of-a-kind jewelry box:
- Choose Your Materials Wisely: Start by selecting materials that resonate with your personal style. Whether it’s classic wood, chic leather, or modern acrylic, the material sets the tone for your project.
- Paint and Color: Express yourself with color. Paint your box in a solid hue, try an ombre effect, or go wild with patterns. Remember, the colors you choose can transform the mood of your box.
- Lining Options: The inside matters too! Line your box with velvet for a luxurious feel, or use felt for a soft touch. Consider using a contrasting color for the lining to add an unexpected pop.
- Dividers and Compartments: Customize the inside layout to suit your jewelry collection. Adjustable dividers can build space for everything from rings to necklaces.
- Personalized Details: Add monograms, names, or meaningful dates with stencils or hand-painting. These personal touches make your box uniquely yours.
- Decorative Knobs and Handles: Swap out standard knobs for something that speaks to you. Vintage pulls, gemstone knobs, or even repurposed jewelry can serve as the perfect finishing touch.
- Embellishments: Embellish your box with beads, sequins, or lace. Think about themes that you love and incorporate elements that reflect those motifs.
- Functional Features: Consider adding features like a built-in mirror or a hidden compartment. These practical additions enhance the functionality of your jewelry box.
- Eco-Friendly Touches: For the environmentally conscious, use recycled materials or eco-friendly paints. It’s a great way to be creative and sustainable at the same time.
- Seasonal Themes: Decorate your box to reflect the seasons or holidays. This can be a fun way to change things up throughout the year.
Incorporate these customization ideas to build a jewelry box that reflects your style.
Advanced Techniques for Crafting a Jewelry Box
Exploring advanced techniques can be a rewarding challenge for those who have mastered the basics of DIY jewelry box creation. Here are some sophisticated methods to elevate your craftsmanship:
- Marquetry and Inlay Work: Marquetry involves making patterns or pictures using thin slices of wood, known as veneers. Inlay, on the other hand, is the process of embedding materials into the base wood to form designs. Both techniques require precision and can produce stunning visual effects.
- Joinery Techniques: Learning advanced joinery techniques, such as dovetail or mortise-and-tenon joints, can enhance the durability and aesthetic of your jewelry box. These methods build strong connections without the need for nails or screws.
- Carving and Sculpting: Wood carving allows you to add intricate details and relief work to your box. With the right tools, you can sculpt elaborate scenes or patterns that make your box a true work of art.
- Lid Mechanisms: Experiment with different types of lid mechanisms, such as hinged, sliding, or even secret compartments. This not only adds an element of surprise but also tests your engineering skills.
- Varnishing and Finishing Techniques: A high-quality finish can transform the look of your jewelry box. Learn about different varnishing techniques and how to apply them for a smooth, professional appearance.
- Hardware Installation: Selecting and installing high-end hardware, like brass hinges or locksets, can give your box a luxurious feel. It’s important to choose pieces that complement the design and ensure they are fitted correctly.
Troubleshooting Common Issues
When crafting a DIY jewelry box, you might encounter a few hiccups along the way. Here’s a helpful guide to troubleshooting common issues, ensuring your project turns out beautifully:
Paint Not Adhering
- Solution: Ensure the surface is clean and sanded. Apply a primer before painting for better adhesion.
Lid Doesn’t Fit Properly
- Solution: Measure the lid and box dimensions again. Sand down any edges for a smoother fit, or adjust the hinges.
Weak Joints or Corners
- Solution: Reinforce with wood glue and let it dry completely. Use clamps to hold pieces together tightly during drying.
Scratches on the Surface
- Solution: Gently sand the area with fine-grit sandpaper, then reapply finish or paint to the sanded area.
Difficulty Installing Hardware
- Solution: Double-check measurements before drilling. Use a template to ensure accurate placement of knobs or hooks.
Sticking Drawers
- Solution: Apply a thin layer of wax or soap on the tracks to allow smoother movement.
Material Warping
- Solution: Store materials in a dry, flat area before use. If warping occurs, heavy objects are used to flatten the material under controlled conditions.
Faded Color
- Solution: Use UV-protective finishes for areas exposed to sunlight. Consider repainting with fade-resistant paint.
Maintenance and Care Tips
Taking care of your DIY jewelry box is essential to ensure it remains a beautiful and functional piece for years to come. Here are some straightforward maintenance and care tips:
Regular Cleaning:
- Dust it off: Use a soft, dry cloth to gently dust your jewelry box regularly.
- Wipe down: For deeper cleaning, use a slightly damp cloth and then dry it immediately to avoid water damage.
Avoid Harsh Chemicals:
- Gentle is key: Steer clear of harsh cleaners that can strip paint or damage finishes.
Mind the Humidity:
- Keep it dry: Store your jewelry box in a place with stable humidity to prevent warping or mold.
Sunlight Exposure:
- Protect from sun: Keep your box out of direct sunlight to prevent fading or heat damage.
Handle with Care:
- Be gentle: When opening drawers or compartments, use a light touch to prevent wear and tear on hinges and knobs.
Check for Wear:
- Inspect regularly: Look for signs of wear or damage and address them promptly to keep your box in top condition.
Refresh the Finish:
- Reapply as needed: If the finish starts to look dull, apply a new coat of varnish or paint following the manufacturer’s instructions.
Follow these tips to keep your DIY jewelry box looking new. Use suitable products and test cleaners or finishes on a small area first.
FAQs About DIY Jewelry Box
Get answers to common questions about DIY jewelry box projects, including materials, designs, and step-by-step tips to build your own.
Start by assessing your jewelry collection and categorize by type—earrings, bracelets, necklaces, and rings. This will help you determine the specific storage needs and compartment sizes. Then, search online for jewelry box plans that match your skill level and build a detailed cut list for all components.
Absolutely! You can stain or paint the wood to match your decor and choose a velvet fabric that complements your interior design. Adding personal touches like decorative knobs or engraving can also make your jewelry box unique.
Line the compartments with velvet fabric to prevent scratches, and use cotton batting for additional protection against impact. Ensure that each piece of jewelry has its own space to avoid tangling and damage.
Yes, there are many simple designs available online that are perfect for beginners. Look for plans that require basic tools and materials, and don’t hesitate to practice techniques like cutting mitered corners on scrap wood before starting your project.
To ensure durability, select high-quality hardwood for the structure and use strong wood glue for assembly. Reinforce the corners with a rabbet or dovetail joints for extra stability. Apply a finish like polyurethane to protect the wood from moisture and wear.
Conclusion:
In conclusion, making a diy jewelry box is a fun and rewarding project. By following the steps outlined in this article on how to make a jewelry box, you can create a personalized storage solution for your treasures. Enjoy the process and the final product!


