I recently embarked on a quest to restore the sparkle to my beloved but tarnished jewelry without breaking the bank on professional cleaning services or specialized products. My journey led me to discover a surprisingly simple and highly effective homemade DIY jewelry cleaner using ingredients I already had in my kitchen. I want to share this experience with you, guiding you through each step with insights into why each component is used. This method is particularly effective for silver and gold jewelry.
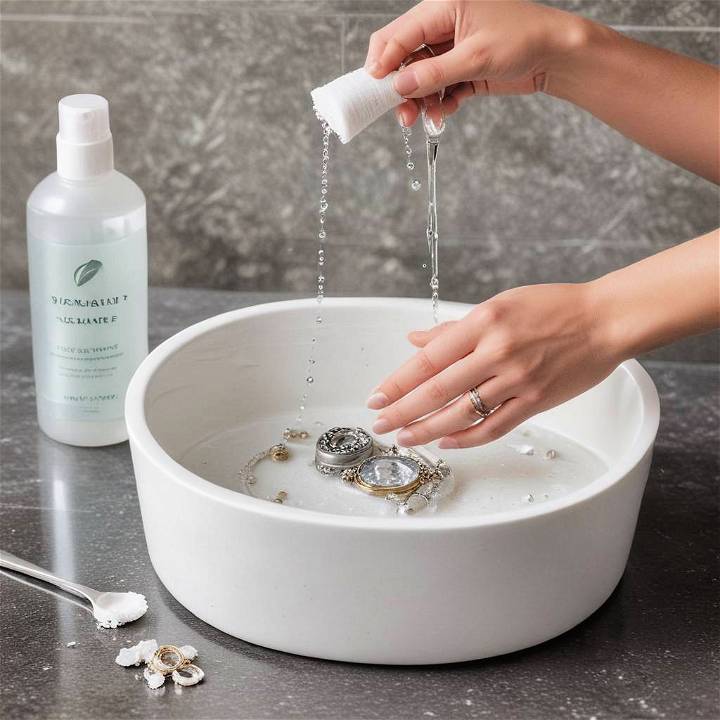
Materials Needed and Their Purpose
- Aluminum Foil: Acts as a conductor for the cleaning reaction.
- Salt: Enhances the cleaning process by reacting with aluminum foil.
- Baking Soda: A gentle abrasive that helps in cleaning and serves as the catalyst for the reaction.
- Vinegar: Accelerates the cleaning reaction with baking soda and dissolves tarnish.
- Hot Water: Enhances the cleaning reaction's efficiency, making it more effective.
- Bowl: To hold the mixture and jewelry during the cleaning process.
- Paper Towel or Soft Cloth: This is used for drying and polishing the jewelry after cleaning.
I chose these materials because they are non-toxic, inexpensive, and usually readily available at home. This method is gentle on your jewelry while effective in removing tarnish and restoring shine.
Step-by-Step Guide to Cleaning Your Jewelry
Learn how to clean your jewelry step-by-step with our easy guide. Prepare the cleaning mixture, clean, rinse, and dry your jewelry for a sparkling shine.
1. Prepare Your Cleaning Mixture
- Line a bowl with aluminum foil: Make sure the shiny side of the foil is facing up. This will interact with the cleaning mixture to make a gentle cleaning reaction that removes tarnish.
- Add a half teaspoon of salt: This doesn't need to be exact; a rough estimate will do. The salt works together with the aluminum foil to amplify the cleaning effect.
- Mix in two to three tablespoons of baking soda: Again, precision isn't crucial here. Baking soda is the main cleaning agent that will help scrub away tarnishes without damaging your jewelry.
- Pour in about six ounces of vinegar. The vinegar will react with the baking soda, causing a bubbling action that helps lift the tarnish from the jewelry. You'll notice this reaction as soon as you add the vinegar.
- Add hot water to the mixture: Use enough to adequately cover your jewelry when submerged. Hot water makes the cleaning reaction more effective.
2. Clean Your Jewelry
- Submerge your tarnished jewelry in the mixture: Ensure it's fully coated and touching the aluminum foil. I usually leave mine in for about five to six minutes.
- Observe the reaction: You should see some bubbling and fizzing, which are indications that the cleaning action is happening.
3. Rinse and Dry Your Jewelry
- Carefully remove your jewelry from the mixture: I recommend using a spoon or tongs to avoid spills or messes.
- Rinse under cold running water: This stops the cleaning process and helps remove any lingering cleaning residue.
- Pat dry with a paper towel or soft cloth: Ensure your jewelry is completely dry to prevent water spots. This also polishes it slightly, restoring its shine.
Using just four common household items, I managed to clean my jewelry so effectively that it sparkled like it was brand new. This homemade cleaner works wonders on both silver and gold, saving money and a trip to the jewelry store for professional cleaning.
It's essential to handle your jewelry gently throughout this process and dry it thoroughly to prevent any potential damage. This straightforward, cost-effective method has completely changed how I care for my jewelry, and I hope it does the same for you.
Understanding the Importance of Safe and Effective Jewelry Cleaning
Keeping your cherished jewelry radiant and beautiful doesn't have to be a daunting task. Regular cleaning is essential to maintain its sparkle, protect against tarnishing, and prevent irreversible damage. Let's delve into why proper jewelry cleaning matters and how you can care for your precious pieces.
Gemstones Deserve Special Attention
Before you embark on any cleaning journey, get to know your gemstones. Each gem has unique properties, and understanding them is crucial:
- Heat Sensitivity: Some gem materials react adversely to heat. Exposing them to high temperatures can alter their appearance or even cause fractures.
- Chemical Reactions: Different gems respond differently to acids and chemicals. For instance, emeralds may not tolerate ultrasonic cleaning due to oil treatments.
- Inclusions and Durability: Inclusions (tiny crystals or fractures) within gems can weaken their structure. While some gems are durable, others require gentle care.
The Myth of Hardness
Hardness, often measured using the Mohs scale, indicates a gem's resistance to scratching. However, it doesn't guarantee indestructibility. Diamonds, with their supreme hardness, can still have internal flaws. Treat all gems with care, regardless of their hardness.
Gemstone Treatments and Enhancements
Be aware of any treatments your gemstones have undergone. Some enhancements, like oil-filled fractures in emeralds, improve transparency but require cautious handling. Consult a professional gemologist for accurate identification and care advice.
Safe Cleaning Methods
For most gems, a simple yet effective cleaning method involves:
- Mild Detergent: Mix a drop of mild dish soap with warm water.
- Soft Brush: Gently scrub your jewelry using a soft-bristle toothbrush.
- Rinse and Dry: Rinse thoroughly and pat dry with a microfiber cloth.
Plated and Vermeil Jewelry
Handle gold-plated and gold vermeil jewelry with extra care:
- Nonabrasive Sponge: Swap the toothbrush for a nonabrasive cellulose sponge.
- Avoid Excessive Scrubbing: Too much abrasion can erode plating, revealing discoloration.
Professional Gem Identification
Before choosing a cleaning method, identify your gems accurately. Reputable jewelers and gemologists can provide essential information about your collection.
Proper gemstone care ensures longevity, brilliance, and the continued enjoyment of your treasured jewelry.
Common Jewelry Cleaning Mistakes to Avoid
Keeping your precious jewelry clean and sparkling doesn't have to be a daunting task. However, there are some common pitfalls to avoid. Let's explore these mistakes and learn how to care for your jewelry effectively.
1. Overusing the Solution
- Mistake: Dousing your jewelry in the cleaning solution excessively.
- Why It's a Problem: Using too much cleaner can weaken prongs, especially in delicate settings like those of engagement rings. It may also strip away protective coatings on gemstones.
- Solution: Less is more! A small amount of the cleaning solution goes a long way. Dip your jewelry briefly and gently scrub with a soft-bristle toothbrush.
2. Using Abrasive Brushes
- Mistake: Scrubbing your jewelry with a harsh brush.
- Why It's a Problem: Abrasive brushes can scratch metal surfaces and damage gemstones. Over time, this can dull the shine and compromise the overall appearance.
- Solution: Opt for a soft-bristle toothbrush or a dedicated jewelry brush. Be gentle while scrubbing to avoid unnecessary wear.
3. Ignoring Gemstone-Specific Care
- Mistake: Treating all gemstones the same way.
- Why It's a Problem: Different gemstones have varying hardness levels and sensitivities. For instance:
- Opals: Extremely delicate and prone to cracking.
- Pearls: Sensitive to acids and chemicals.
- Emeralds: Can be damaged by heat and sudden temperature changes.
- Solution: Research specific care guidelines for each gemstone in your collection. Treat them accordingly to maintain their brilliance.
4. Skipping Regular Maintenance
- Mistake: Waiting until your jewelry visibly appears dirty before cleaning.
- Why It's a Problem: Dirt, oils, and everyday wear gradually accumulate, affecting the sparkle and luster. Neglecting regular cleaning can lead to irreversible damage.
- Solution: Make jewelry cleaning a routine. Clean your pieces every few weeks, especially those worn frequently. Prevention is key!
5. Not Checking Prongs and Settings
- Mistake: Assuming your prongs and settings are secure without inspection.
- Why It's a Problem: Loose prongs can result in lost gemstones. Regularly check for any signs of weakness or movement.
- Solution: Examine prongs under good lighting. If you notice any wiggling or gaps, seek professional repair promptly.
Proper jewelry care maintains beauty and sentimental value. Treat jewelry carefully for lasting shine!
FAQs About DIY Jewelry Cleaners
Discover answers to all your FAQs about Homemade DIY jewelry cleaners. Find out how to keep your jewelry sparkling with these helpful tips and tricks!
1. What is a DIY jewelry cleaner, and why should I use one?
A DIY jewelry cleaner is a homemade solution designed to keep your precious pieces sparkling and free from dirt, grime, and tarnish. Unlike store-bought cleaners, it's cost-effective, easy to make, and uses common household ingredients. Regular cleaning helps maintain the brilliance of your jewelry and prolongs its lifespan.
2. Can I use other DIY jewelry cleaner recipes?
Absolutely! Here are a couple of alternatives:
- Vinegar Soak: Fill a glass mason jar with vinegar or witch hazel, add a few drops of tea tree oil, and let your jewelry soak overnight. Scrub with baking soda and rinse.
- Baking Soda Fizz: Line a bowl with aluminum foil, add salt, baking soda, and dish detergent. Drop your jewelry in, pour warm water, and watch it fizz. Scrub with an old toothbrush.
3. How often should I clean my jewelry using a DIY cleaner?
For routine maintenance, clean your jewelry every 1-2 weeks. If your pieces are heavily tarnished or have visible dirt, consider more frequent cleaning.
4. Are there any precautions when using DIY jewelry cleaners?
Certainly! Keep these tips in mind:
- Avoid Gemstones: Some gemstones (like opals and pearls) are sensitive to chemicals. Skip the DIY cleaner for these delicate pieces.
- Soft Toothbrush Only: Use a soft-bristle toothbrush to prevent scratching.
- Test First: Before cleaning valuable jewelry, test the solution on a small, inconspicuous area.
Remember, a little TLC goes a long way in keeping your jewelry looking its best!
Final Thoughts
This experience not only educated me on the simple chemistry behind jewelry cleaning but also reiterated the value of trying DIY solutions using everyday household products. I encourage you to give this method a try; it's a practical, eco-friendly, and satisfying way to keep your jewelry looking its best.


