Starting off with a need to organize my jewelry in a way that kept it untangled and easy to find led me to think about making my own jewelry holder. My room was always a bit cluttered, and my necklaces would often end up in a tangled mess. I needed a simple solution that wouldn't take up too much space or require me to spend a lot of money.
I decided to use materials I already had at home to make something functional yet aesthetically pleasing. With some old picture frames, hooks, and a bit of creativity, I managed to put together a jewelry holder that not only solved my problem but also added a personal touch to my room. It was a rewarding experience to see my idea come to life, and it encouraged me to tackle more DIY projects.
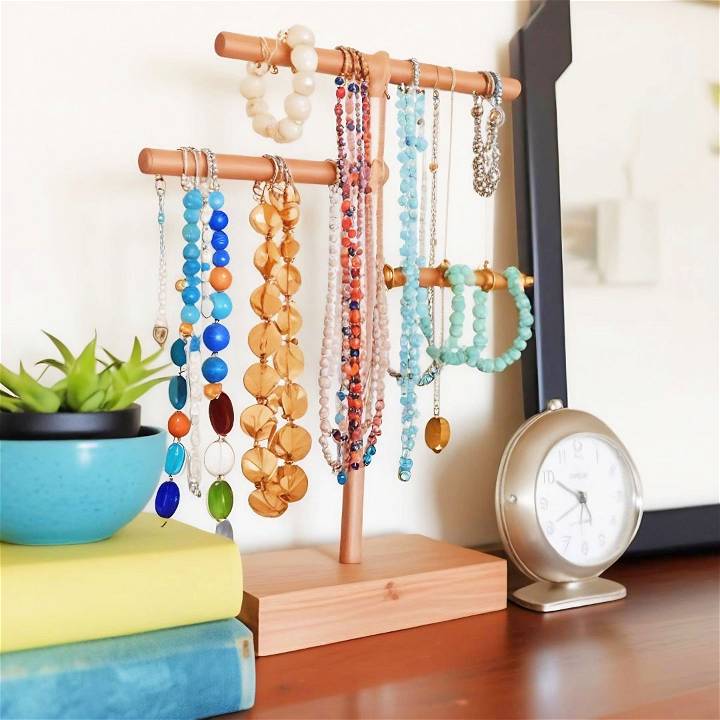
I hope sharing my experience inspires you to try making your own DIY jewelry holder. It's a fun and practical project that can help keep your space organized and your jewelry in easy reach. I found it to be a great way to spend an afternoon, and the result was not only useful but also a unique piece of decor for my room. Let's get started, and I promise, the outcome will be worth it!
Materials You Will Need and Why
For the Wooden Dowel Method:
- Candle Holders: Look for unique designs at your local thrift store. They serve as a sturdy base.
- Wooden Dowels: Easily available at craft stores, they work as the perfect rod to hang your jewelry.
- High-temperature Glue Gun or E6000: Essential for a durable bond between the dowel and the base.
- Primer and Paint: These are used to give your wooden jewelry holder a neat finish.
For the Paper Towel Roll Method:
- Paper Towel Roll: Acts as an inexpensive rod for hanging jewelry.
- Fabric or Vinyl: This is to neatly cover the cardboard, elevating its look.
- Magazine (optional): Rolled and inserted into the paper roll for added sturdiness.
- Ruler, Pen, Glue Gun: For measuring, marking, and assembling your project.
Each material was selected for its ease of availability and effectiveness in making a sturdy and attractive jewelry holder.
Step-by-Step Guide for DIY Jewelry Holder
Learn how to make your own DIY jewelry holder with this easy step-by-step guide. Organize your accessories in style!
Wooden Dowel Method
- Preparation: Use a ruler and pen to find and mark the center of your wooden dowel. This ensures your dowel is perfectly aligned on the base.
- Assembling: Apply a generous amount of glue (high-temperature glue gun or E6000) to the top of your candle holder. Align the dowel with the center mark you made, and press firmly. Allow the glue to set for about 30 minutes.
- Painting: Once the glue has cured, apply primer to the dowel and base. After the primer dries, paint them in the color of your choice. Allow it to dry completely.
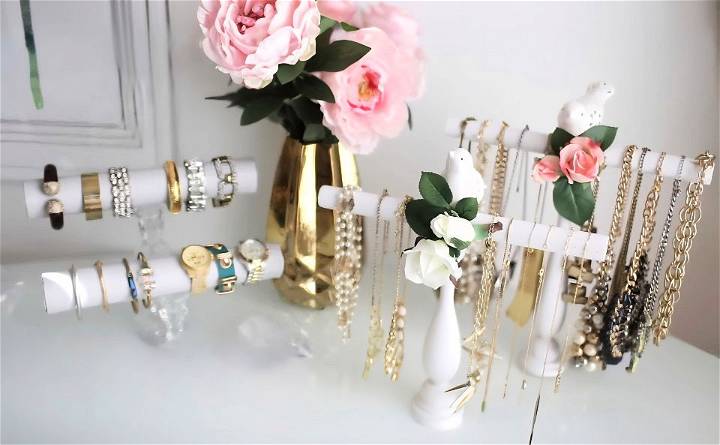
- Decorating: Personalize with decorations like faux flowers or little figurines to match your room's theme. This step brings your jewelry holder to life.
Paper Towel Roll Method
- Covering the Roll: Measure and cut your chosen fabric or vinyl to wrap around the paper towel roll. Glue the material onto the roll, ensuring it is smooth and wrinkle-free.
- Strengthening: For extra durability, roll up a magazine and insert it inside the paper towel roll. This step is especially useful if you're using heavier jewelry.
- Finishing Touches: Trace the end of your wrapped roll onto more fabric or vinyl to make end caps. Glue these securely in place. Finally, attach your decorated roll to the candle holder base with a strong adhesive.
Personalizing Your Jewelry Holder
The true beauty of these DIY projects lies in how you can customize each piece. Whether you choose a spring theme with vibrant flowers or a chic, minimalist look with sleek fabric, your jewelry holder can become a statement piece in your room.
Troubleshooting Common Issues
When making your DIY Jewelry Holder, you might encounter a few hiccups along the way. Here's a helpful guide to troubleshoot common issues:
Problem: Materials Not Adhering Together
- Solution: Ensure surfaces are clean before applying any adhesive. If you're using glue, check if it's suitable for the materials you're working with. For a stronger bond, lightly sanding the surfaces can help.
Problem: Holder is Unstable
- Solution: Stability is key for a jewelry holder. Make sure the base is heavy or wide enough to support the structure. Consider adding a weighted bottom or a wider base.
Problem: Difficulty Hanging Larger Jewelry
- Solution: For larger pieces, like statement necklaces, use sturdy hooks or pegs. Space them out evenly to prevent tangling and to make each piece easily accessible.
Problem: Paint or Finish Not Setting Properly
- Solution: Apply thin, even coats of paint or finish, allowing ample drying time between layers. If the environment is humid, extend the drying time or use a dehumidifier.
Problem: Tools Not Suitable for the Job
- Solution: Using the right tools can make all the difference. Research the best tools for the material you're working with, and don't hesitate to invest in quality tools for better results.
Remember, patience and careful planning are your best tools. If an issue persists, take a step back and review your process. Sometimes, a fresh perspective can lead to a simple solution.
Adorable Tips
Making a DIY Jewelry Holder is not just about functionality; it’s also about adding a personal touch to your space. Here are some tips to enhance the user experience:
- Reflect Your Style: Think about your personal style and the decor of the room where you’ll place the jewelry holder. Whether it’s minimalist, bohemian, rustic, or modern, your jewelry holder can be a reflection of you.
- Color Coordination: Choose colors that complement your room. If you’re going for a calm vibe, consider pastels or neutral tones. For a more vibrant touch, opt for bold colors.
- Accessible Design: Place the holder at a convenient height and location. Ensure that it’s easily reachable and that the jewelry is displayed in a way that makes selection effortless.
- Personalization: Add elements that are uniquely you, like a monogram, favorite quotes, or patterns that you love. This makes the holder special and truly one-of-a-kind.
- Versatility: Design your holder to accommodate different types of jewelry. Include varied hook sizes, compartments for smaller pieces, and perhaps a small stand for watches or bracelets.
- Interactive Elements: Consider adding a small chalkboard or whiteboard to jot down reminders or inspirational quotes. This adds an interactive and functional element to your holder.
By focusing on these aspects, you’ll create a jewelry holder that’s not only practical but also a joy to use and a beautiful addition to your home.
FAQs About DIY Jewelry Holders
Discover all you need to know about DIY jewelry holders in this comprehensive FAQ guide. Find tips, ideas, and inspiration for making your own!
How can I ensure my jewelry holder is stable?
A stable base is crucial. Use a heavy material like wood for the base, or add weight to a lighter base with stones or sand. Make sure the base is wide enough to support the holder's height and the weight of the jewelry.
Can I make a jewelry holder if I'm not very crafty?
Absolutely! There are many simple designs that require minimal tools and materials. Start with a basic model using items like picture frames or small boxes, and as you gain confidence, you can try more complex designs.
What's the best way to organize jewelry on the holder?
Organize your jewelry by type or frequency of use. Hang necklaces and bracelets on hooks or pegs, and use smaller compartments or dishes for rings and earrings. This will keep your jewelry tangle-free and easily accessible.
How do I take care of my DIY jewelry holder?
Keep your jewelry holder clean by dusting it regularly. If it's made of wood, you might need to reapply finish or paint over time. For holders made of fabric or paper, avoid exposure to moisture to prevent damage.
Are there eco-friendly options for making a jewelry holder?
Yes, you can use recycled materials like old picture frames, fabric scraps, or reclaimed wood. Look for non-toxic paints and adhesives to minimize environmental impact. Being creative with materials you already have is both eco-friendly and cost-effective.
Final Thoughts
In conclusion, making a DIY jewelry holder is a fun and practical project that can help you organize your accessories in style. Get creative with materials and designs to make a personalized organizer for your jewelry collection. Happy crafting!


