Building a DIY kayak trailer can be a fun and cost-saving project. Last summer, I decided to build my own trailer because renting one was becoming too expensive. I gathered a few basic tools and some spare parts from my garage. I managed to keep the cost low by using recycled materials and seeking advice from online forums.
Constructing the kayak trailer was intuitive and straightforward with the right guidance. Detailed instructions and video tutorials were incredibly helpful. Within a weekend, I had a sturdy and functional trailer ready to go. This project gave me a great sense of pride and accomplishment. If you'd like to build your own, the following tips will guide you through the process.
Building a DIY kayak trailer can save you money and provide a fulfilling project. Follow this guide to get started.
Finding the Base: The Old Boat Trailer
The inception of my project commenced with an old, somewhat neglected boat trailer I acquired from a friend. Initially designed to cradle a vintage fiberglass bass boat, its potential as the foundation for my kayak trailer sparked my imagination. Understanding that the success of this project hinged on a solid base, I carefully selected this trailer for its sturdy frame and suitable dimensions.
Materials and Tools: The Building Blocks of Innovation
- Old boat trailer: Served as the skeletal structure for the kayak trailer.
- EMT Conduit (Electrical Metallic Tubing): Chosen for its durability and light weight, used to build the kayak runners.
- Welder and Bandsaw: Essential tools for cutting and joining metal components.
- Wiring kit and lights: To ensure road safety and visibility.
- Fenders and front wheel jack: Added for functionality and ease of maneuverability.
Each material was chosen for its role in enhancing the trailer's functionality and durability. The welding tools facilitated the transformation, allowing me to mold and adapt the trailer to fit my specific needs.
Step by Step Instructions
Learn how to build a DIY kayak trailer with our step-by-step guide. From cutting the tongue to adding the finishing touches, we've got you covered!
Step 1: Cutting and Extending the Tongue
The first significant modification involved cutting off the original front tongue of the trailer. Utilizing a bandsaw, I meticulously removed the outdated portion and welded on a more robust extension. This not only strengthened the frame but also provided the necessary length to accommodate the kayak.
Step 2: Wiring and Adding Fenders
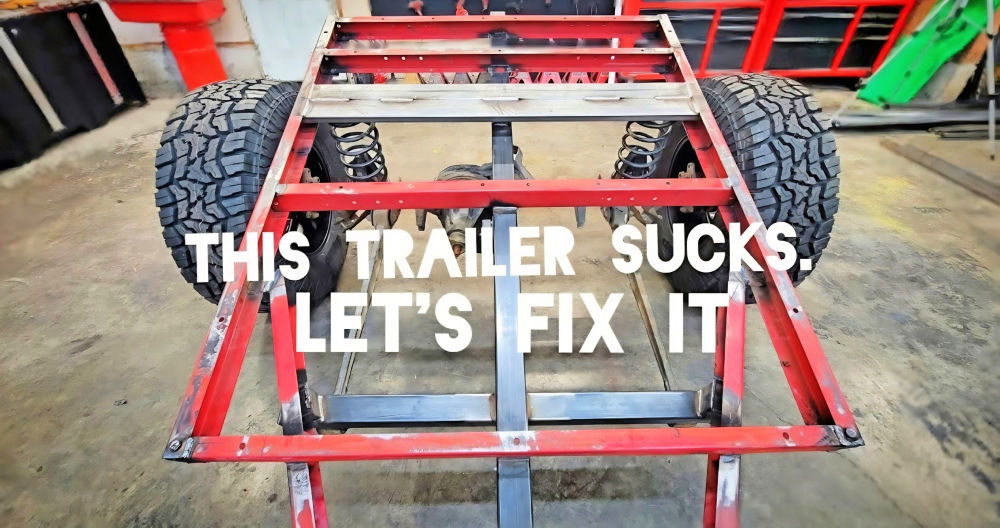
With safety as a priority, I rewired the entire trailer, ensuring every connection was secure. Subsequently, I installed new lights and attached plastic fenders, not only for compliance with road safety regulations but also to protect the kayak and trailer from road debris.
Step 3: Constructing Kayak Runners from EMT Conduits
The core of customization lies in crafting the kayak runners. I opted for EMT due to its durability and resistance to corrosion. After cutting the conduits to the desired length, a friend helped bend them at strategic points to cradle the kayak perfectly. These runners were then welded onto the trailer, providing a secure and customized fit for my kayak.
Step 4: Adding the Finishing Touches
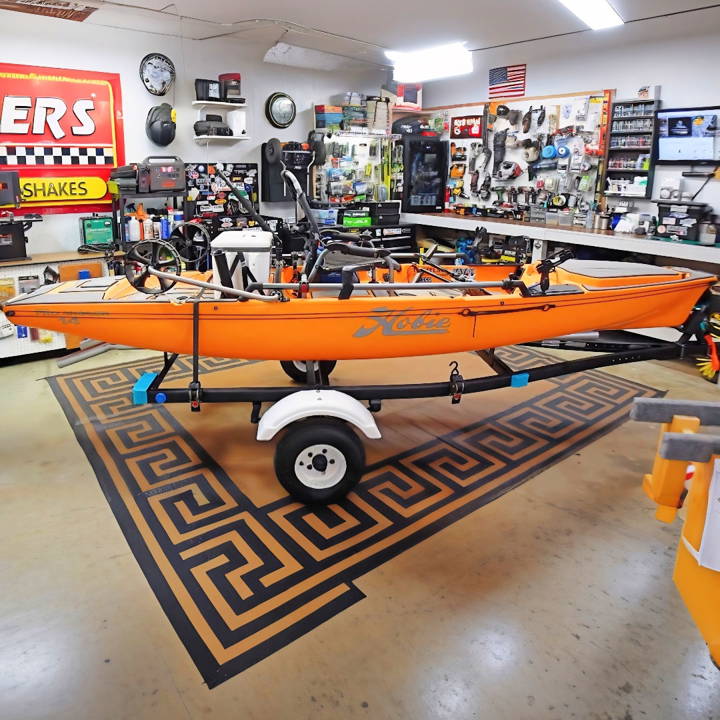
The final steps included mounting a front wheel jack for easier handling and crafting a nose stop from spare materials, ensuring the kayak would remain stationary during transport. I also innovated a strapping system using retractable ratchet straps and heavy-duty eye bolts, guaranteeing the kayak would be tightly secured.
The Outcome: A Testament to DIY Spirit
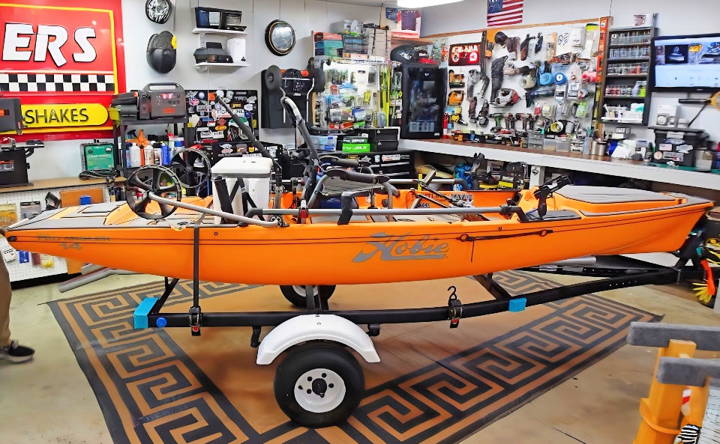
The result was a highly functional, lightweight kayak trailer tailored precisely to my kayak's dimensions. Its simplicity belied the meticulous planning and effort involved, from selecting the right materials to executing each modification with precision.
Taking It to the Water: The True Test
The trailer's maiden voyage to the water was a moment of truth. Its performance exceeded expectations; loading and unloading the kayak became effortlessly simple, and the trailer's lightweight design made maneuvering a breeze. It was a proud moment, realizing that this DIY project had not only met but surpassed my needs.
Customization Options
When building your own kayak trailer, customization is key to ensuring it meets your specific needs. Here are some options you can consider to tailor your trailer for maximum utility and personal flair:
- Adjustable Framework: Design your trailer with an adjustable frame that can accommodate kayaks of various sizes. This can be achieved by using telescopic bars or removable components that allow you to modify the length and width of the trailer.
- Detachable Components: Consider adding detachable racks or holders that can be easily installed or removed. This flexibility allows you to switch between carrying kayaks and other gear, such as bikes or camping equipment.
- Wheel Upgrades: Opt for high-quality, durable wheels that can handle different terrains. Pneumatic tires are a great choice for smooth towing and are gentle on your kayak during transport.
- Personalized Paint Job: Give your trailer a unique look with a custom paint job. Use marine-grade paint to protect against rust and corrosion, and choose colors that match your kayak or your vehicle.
- Lighting System: For safety during early morning or evening trips, install a reliable lighting system. LED lights are energy-efficient and provide excellent visibility.
- Storage Solutions: Maximize space by adding storage compartments for paddles, life vests, and other accessories. Waterproof containers can keep your gear dry and secure.
- Security Features: Protect your investment with security features like locks for the wheels and a hitch lock to prevent theft.
- Tool Kit: Equip your trailer with a small tool kit for on-the-go repairs. Include items like a tire repair kit, wrenches, and spare bolts.
- Eco-Friendly Materials: Where possible, choose sustainable materials. Recycled metals or plastics can reduce your trailer's environmental impact.
- Soft Padding: To prevent scratches and dents on your kayak, line the contact points on the trailer with soft padding or foam.
Incorporate these options to craft a kayak trailer that's functional and reflects your style. Prioritize safety and durability to ensure years of adventure.
Advanced Features and Technologies
Incorporating advanced features and technologies into your DIY kayak trailer can significantly enhance its functionality and safety. Here's a detailed section on how to integrate modern advancements into your trailer design:
- Solar Charging Panels: Install solar panels on your trailer to harness the power of the sun. This eco-friendly option can charge batteries for electronic devices or power lights for your trailer.
- GPS Tracking: For added security, equip your trailer with a GPS tracking device. This technology helps you locate your trailer if it's stolen or misplaced.
- Electronic Braking System: Consider an electronic braking system for your trailer. This feature provides better control and safety, especially when towing on steep or slippery roads.
- Smart Lighting: Smart LED lights can be programmed to respond to various conditions, such as braking or turning, increasing visibility and safety on the road.
- Foldable Design: A foldable trailer is easier to store and transport. Design your trailer with hinged sections that can be collapsed when not in use.
- Waterproof Electronics: If you're adding any electronic components, ensure they are waterproof or housed in waterproof casings to protect against water damage.
- Adjustable Suspension: An adjustable suspension system can improve the ride quality of your trailer. It allows you to change the stiffness based on the load and terrain.
- Remote Monitoring: With remote monitoring systems, you can check on the status of your trailer through your smartphone, including tire pressure and temperature.
- Energy-Efficient Tires: Use tires designed for low rolling resistance to improve fuel efficiency when towing your trailer.
- Automated Coupling: An automated coupling system can make it easier to attach and detach your trailer from your vehicle.
Incorporate advanced features for a state-of-the-art, safe, efficient, and convenient kayak trailer. Prioritize quality and compatibility for optimal performance and durability.
Troubleshooting Common Issues
Building a DIY kayak trailer can be a rewarding project, but you might encounter some hiccups along the way. Here's a guide to troubleshooting common issues you may face:
Wheels Wobbling or Coming Loose
- Solution: Check that all bolts are tightened securely. If the problem persists, inspect the wheel bearings and replace them if they are worn out.
Trailer Lights Not Working
- Solution: First, ensure all connections are secure and free of corrosion. Then, check the bulbs and fuses, replacing any that are faulty.
Difficulty Attaching or Detaching Trailer
- Solution: Lubricate the hitch ball and coupler. Also, make sure they are the correct size and not damaged.
Trailer Not Level When Attached to Vehicle
- Solution: Adjust the height of the hitch on your vehicle or the coupler on the trailer to achieve a level stance.
Kayak Not Secure on Trailer
- Solution: Verify that all straps and tie-downs are in good condition and properly fastened. Consider adding additional padding where the kayak contacts the trailer.
Trailer Tires Wearing Unevenly
- Solution: This could be due to improper tire inflation or misaligned wheels. Check and adjust the tire pressure, and if necessary, realign the trailer's axle.
Rust or Corrosion on Metal Parts
- Solution: Clean off any rust with a wire brush and apply a rust-inhibiting paint or spray. Regular maintenance can prevent this issue.
The trailer is Bouncing Excessively
- Solution: This is often caused by overloading the trailer or uneven weight distribution. Make sure the load is within the trailer's weight capacity and evenly distributed.
By predicting and addressing common issues, your DIY kayak trailer will stay reliable for your next adventure. Regular maintenance prevents many problems.
Maintenance and Upkeep
Taking care of your DIY kayak trailer is crucial for its longevity and performance. Here's a detailed guide on maintaining your trailer:
- Regular Cleaning: After each use, especially in saltwater, rinse your trailer with fresh water. This prevents rust and corrosion. Use a mild soap for a deeper clean, and avoid harsh chemicals.
- Tire Maintenance: Check tire pressure regularly and keep them inflated to the manufacturer's recommended level. Inspect tires for wear and tear and replace them if needed.
- Lubrication: Keep moving parts, such as the wheels and hitch, well-lubricated. Use grease designed for marine environments to withstand water exposure.
- Rust Prevention: Inspect the trailer for rust spots. Treat any rusted areas immediately with a rust converter and touch-up paint to prevent spreading.
- Hardware Check: Periodically tighten bolts and screws, as vibrations from travel can loosen them over time. Replace any rusted or damaged hardware.
- Lighting Inspection: Ensure all lights are functioning correctly. Clean the light covers and replace any burnt-out bulbs.
- Storage: When not in use, store your trailer in a covered area to protect it from the elements. If outdoor storage is unavoidable, use a tarp to shield it from rain and sun.
- Straps and Cables: Examine straps and cables for fraying or damage. Secure your kayak with straps that are in good condition to ensure safety during transport.
- Load Check: Before each trip, check that the kayak is loaded correctly and the weight is evenly distributed. This helps prevent damage to the trailer and the kayak.
- Emergency Kit: Keep an emergency repair kit on your trailer, including spare tires, tools, and replacement lights.
Follow these tips to keep your DIY kayak trailer in top condition for your next adventure. Regular maintenance extends its life and ensures safe, reliable kayak transport.
FAQs About DIY Kayak Trailer
Discover essential faqs about DIY kayak trailers. Get tips on materials, assembly, costs, and safety to build your kayak trailer with ease.
Yes, you can modify an existing utility trailer to transport kayaks. You’ll need to ensure that the trailer bed is adapted to securely hold the kayaks and that the weight capacity is suitable for your needs.
Yes, there are legal requirements for using any trailer on public roads, including those for lighting, licensing, and ensuring the trailer is roadworthy. Check your local regulations to ensure compliance.
Absolutely! A DIY kayak trailer can be versatile. With the right modifications, you can use it to transport other items such as bikes, camping gear, or even as a utility trailer for general hauling purposes.
Regular maintenance is key to ensuring your trailer's longevity. This includes checking tire pressure, lubricating moving parts, inspecting for rust or damage, and ensuring that all lights and electrical connections are functioning properly. It's also important to rinse off any saltwater after use to prevent corrosion.
When loading kayaks onto your trailer, balance is crucial. Place the heaviest kayak in the center and distribute the others evenly. Use straps to secure each kayak at both the bow and stern to the trailer, and check that they are tight enough to prevent movement but not so tight as to damage the kayaks. Padding or kayak cradles can help protect your kayaks during transport.
Conclusion:
Wrapping up, building a DIY kayak trailer on a budget is both fun and rewarding. With some basic tools and creativity, you can craft a reliable trailer for your kayaking adventures. This project not only saves money but also gives you a sense of accomplishment. Happy kayaking!


