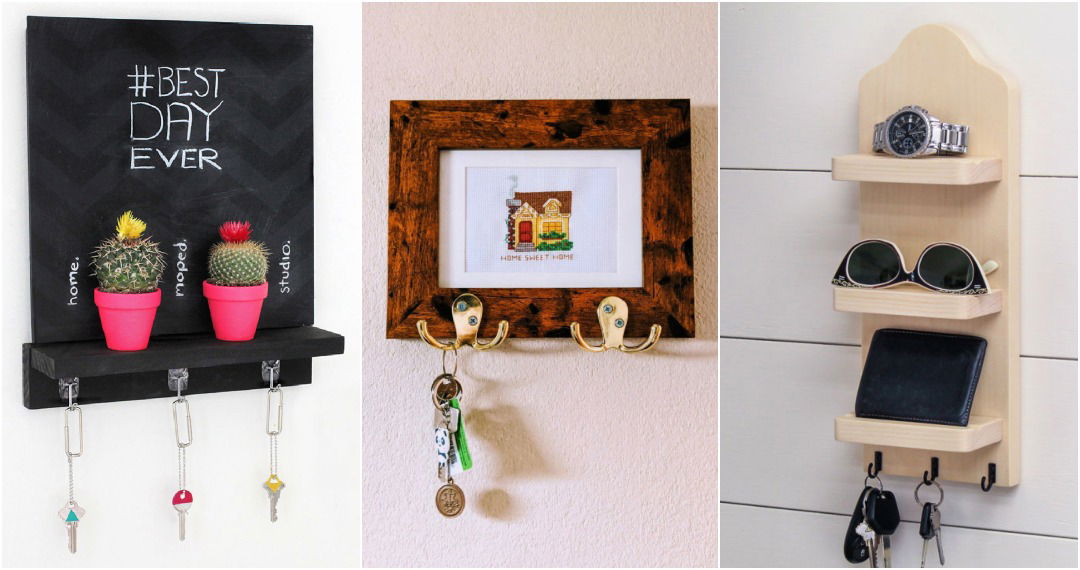
Making a DIY key holder has transformed my daily routine. Before, I would always misplace my keys and waste precious minutes searching for them. One day, I decided to make my own key holder to simplify my life. With just a few materials and a bit of patience, I was able to craft a useful organizer for my keys.
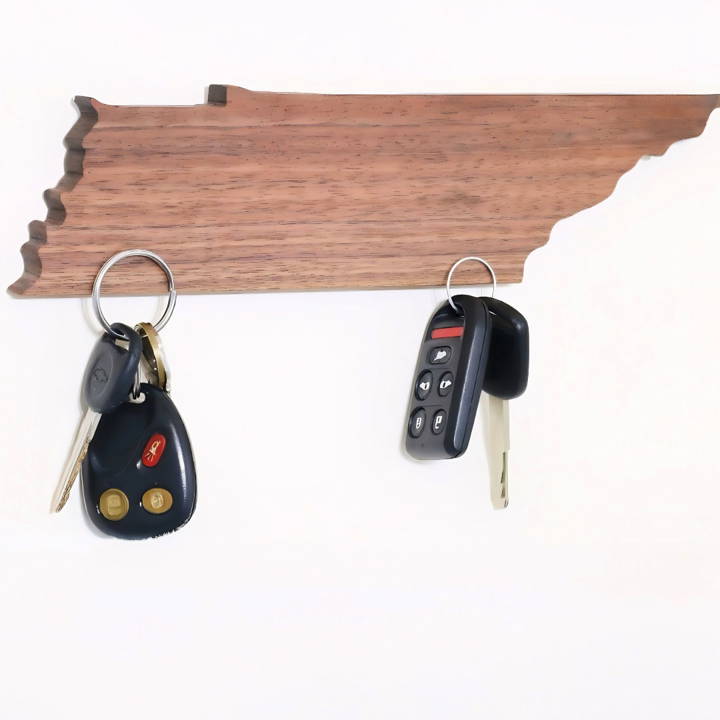
By mounting my DIY key holder for the wall, I ensured my keys always had a designated spot. It not only saves time but also adds a personalized touch to my home. If you often find yourself scrambling for your keys, this simple project is just what you need.
I'm helping with this: you can make your own key holder and bring more order and style into your daily life.
Materials You'll Need:
- Wood - Your choice, but ensure it's at least 0.75 inches thick for durability and to support the magnets without risk of breakage. Plus, the aesthetics of natural wood are unbeatable.
- Rare Earth Magnets - Three should suffice, offering enough hold for several keys. Their strength ensures your keys stay put.
- Spray Adhesive & Paper Template - This is for transferring your state's outline onto the wood.
- Basic Tools - A saw (band, jig, or scroll), a drill with a forstner bit, sandpapers, and optional finishing oil.
Step by Step Instructions
Learn to build a DIY key holder with our step-by-step guide, from preparing the wood to adding final touches. Perfect for organizing your keys!
Step 1: Preparing the Wood
Using a piece of walnut, I planed and joined it to smooth perfection, aiming for a half-inch in thickness. This process might sound complex, but a simple 1x4 board works if you're looking for ease.
Step 2: Tracing the State Shape
After printing out my state's outline, I used spray adhesive to fix it onto the wood. A straight edge helped me adjust for easier cuts - don't hesitate to simplify complex curves for your sanity.
Step 3: Cutting Out the Shape
I opted for my bandsaw for the long edges and intricate cuts, though a jig or scroll saw does the job just as well. Remember, patience here prevents extra sanding later.
Step 4: Detailing and Sanding
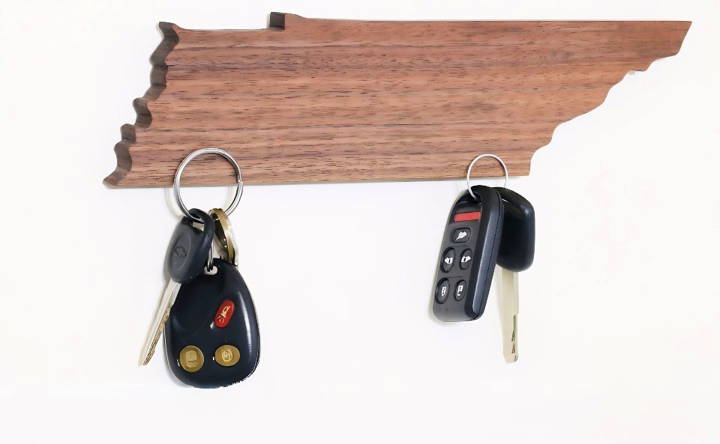
Next came the detailing. I tackled Tennessee's challenging geography with various sanding tools. Files, sanding sticks, and discs made those quirky river bends manageable. A thorough sanding ensured a smooth finish, prepping it nicely for the magnets.
Step 5: Adding Magnets
With a forstner bit matched to my magnet size, I carefully drilled into the backside of the state, ensuring not to pierce through. Sanding the magnet edges slightly, they fit snugly into their holes without any adhesive needed. This grip alone was strong enough to hold a hefty bundle of keys.
Step 6: Finishing Touches
A layer of boiled linseed oil gave the wood a protective finish that was easy to maintain. Not only does it look stellar, but it's also practical, enabling easy touch-ups from wear and tear.
Finally, I installed the hanging hardware, careful to adjust the screw length to avoid any unsightly protrusions on the front face.
The Final Masterpiece
And there it was, my very own state-shaped magnetic key holder. It wasn't just a convenient spot for my keys; it felt like a celebration of my home state, adding a personalized touch to my entryway.
Additional Tips:
- Choose Your Wood Wisely: The wood's color and grain can complement your home decor. I went with walnut for its rich color and durability.
- Magnet Placement: Test the strength before final installation. Depending on your wood thickness, you might want to adjust the depth.
- Creative License: Feel free to customize further. Stain your wood, paint your state's flag, or add a gloss for that extra sheen.
Personalization Tips
Personalizing your DIY key holder can transform a simple utility into a piece of art that reflects your personality and complements your home's decor. Here are some tips to help you make your key holder uniquely yours:
- Choose Your Theme: Think about what inspires you. Is it a color, a travel destination, a hobby, or perhaps a certain artistic style? Select a theme that resonates with you and use it as the foundation for your design.
- Select Materials That Speak to You: Whether it's reclaimed wood for a rustic look, a sleek metal for a modern vibe, or colorful beads for a bohemian flair, the materials you choose will set the tone for your key holder.
- Incorporate Meaningful Embellishments: Add personal touches like initials, family names, or important dates. Use stencils, decals, or hand-painting to include these elements in your design.
- Play With Colors: Color can dramatically affect the look and feel of your key holder. Choose a palette that matches your interior or go bold with contrasting colors for a statement piece.
- Function Meets Fashion: Consider how you'll use the key holder. If you need more hooks for a large family or want to combine it with a letter organizer, plan your design accordingly.
- Experiment With Layouts: Arrange your hooks or magnets in a pattern that pleases you. Symmetry can build harmony, while an asymmetrical layout might lend a more dynamic look.
- Add a Personal Touch with Accessories: Small shelves, a mini flower vase, or a picture frame can add both function and personalization to your key holder.
- Think Outside the Box: Who says a key holder has to be on the wall? Consider making a magnetic key holder for the fridge or a portable one for your purse.
Personalization means reflecting who you are. Enjoy the process and try new things. Your DIY key holder is a useful tool and shows your creativity.
Functionality and Design
When making a DIY key holder, it's essential to merge functionality with design. This ensures that your key holder not only looks good but also serves its purpose effectively. Here's how you can achieve a balance:
- Start with Purpose: Before diving into the design, consider what functions your key holder must serve. How many sets of keys will it hold? Do you need space for anything else, like mail or accessories?
- Plan Your Space: Measure the area where you'll place the key holder. Ensure it's easily accessible but doesn't interfere with other elements of your home.
- Choose the Right Materials: Durable materials like metal or hardwood can support more weight, which is crucial if you plan to hang several keys or add extra features like a shelf.
- Design for Everyone: If you're not the only one using it, think about the height and reachability for all family members, including kids.
- Keep It Simple: A simple design is often more functional. Avoid overly intricate details that might make it difficult to use or clean.
- Accessibility Is Key: Place hooks at a comfortable distance from each other to avoid overcrowding. Ensure that each key can be easily placed and removed.
- Think Long-Term: Choose a timeless design that you'll love for years, and consider how it might fit with future changes in your decor.
- Safety First: If you have small children or pets, ensure that the key holder is mounted securely and that any small, detachable parts are out of reach.
By focusing on these aspects, you'll make a key holder that's both decorative and functional. The best designs meet real needs simply and elegantly.
Advanced Customization
For those who are looking to take their DIY key holder to the next level, advanced customization offers a world of possibilities. Here's how you can incorporate sophisticated features into your project:
- Integrate Smart Technology: Consider adding a smart tile or Bluetooth tracker compartment to your key holder. This modern touch can help you locate your keys via a smartphone app if they're misplaced.
- Use Multifunctional Designs: Think about how your key holder can serve multiple purposes. For example, you could add a magnetic strip for holding notes, a small whiteboard for reminders, or a clip to hold mail.
- Experiment with Lighting: LED strips or small spotlights can be incorporated to highlight your key holder and make it easier to find keys in the dark.
- Incorporate Modular Elements: Make a key holder with interchangeable parts. This allows you to swap out components or add new ones as your needs change.
- Personalize with High-Tech Tools: Use laser engraving for precise and permanent designs. If you have access to a 3D printer, you can build custom hooks and features that fit perfectly with your vision.
- Add Security Features: For added safety, you can include a small combination lock or fingerprint scanner to ensure that only authorized individuals have access to the keys.
- Consider Connectivity: If you're tech-savvy, why not make your key holder part of your smart home system? With the right tools, you can set it to notify you when keys are removed or returned.
Add these features to make a functional, stylish key holder that showcases your technical skills. The aim is to blend utility with personal style and tech expertise.
Troubleshooting Common Issues
Encountering problems when crafting or using your DIY key holder is normal. Here's how to troubleshoot some common issues:
- Loose Hooks: If hooks become loose, tighten them with a screwdriver. If they keep loosening, apply a drop of strong adhesive like epoxy to the base before screwing them back in.
- Wood Splitting: When working with wood, pre-drill holes to prevent splitting. If the wood does split, use wood filler to repair it, then sand and finish the area to match the rest of the holder.
- Paint Peeling: If paint starts to peel, gently sand the area and apply a fresh coat. Make sure the surface is clean and dry before painting.
- Key Rings Not Fitting: If the hooks are too thick for your key rings, replace them with thinner ones or use a key ring that has a clasp to attach to the hooks.
FAQs About DIY Key Holder
Discover the top faqs about DIY key holders, including tips, materials, and simple steps to build your own stylish and functional key holder.
Personalizing your key holder can be done by selecting colors and finishes that match your decor, adding patterns or engravings, or incorporating elements that reflect your hobbies or interests. You can also choose the size and shape to fit your space and needs.
Yes, there are many beginner-friendly plans available that require minimal tools and materials. Look for plans that use straightforward construction methods, such as simple hook boards or memo board key holders, which are easy to assemble and install.
Absolutely! A DIY key holder can serve as functional art in your home. By using creative designs and materials, you can make a key holder that not only organizes your keys but also enhances the aesthetic of your entryway or the room where it’s placed.
Creative ideas for DIY key holders include using repurposed items like old frames or scrap wood, making a key holder with a built-in shelf or storage, or making a modular board that can hold more than just keys. You can also explore intricate designs with patterns or combine materials like wood and resin for a unique look.
To ensure your DIY key holder lasts a long time, choose sturdy materials like solid wood or metal and use reliable fasteners such as screws or wall anchors appropriate for your wall type. Applying a protective finish like varnish or sealant can also help protect it from wear and tear. It's important to follow the instructions carefully, especially when working with tools and materials you're not familiar with. If you're using wood, consider hardwoods like oak or maple for added durability. Remember, the more effort you put into the construction and finishing, the longer your key holder will serve you.
Summing It Up:
Finishing your own key holder project will definitely be rewarding. Trust me, starting this DIY key organizer project will make your life easier and more organized.


