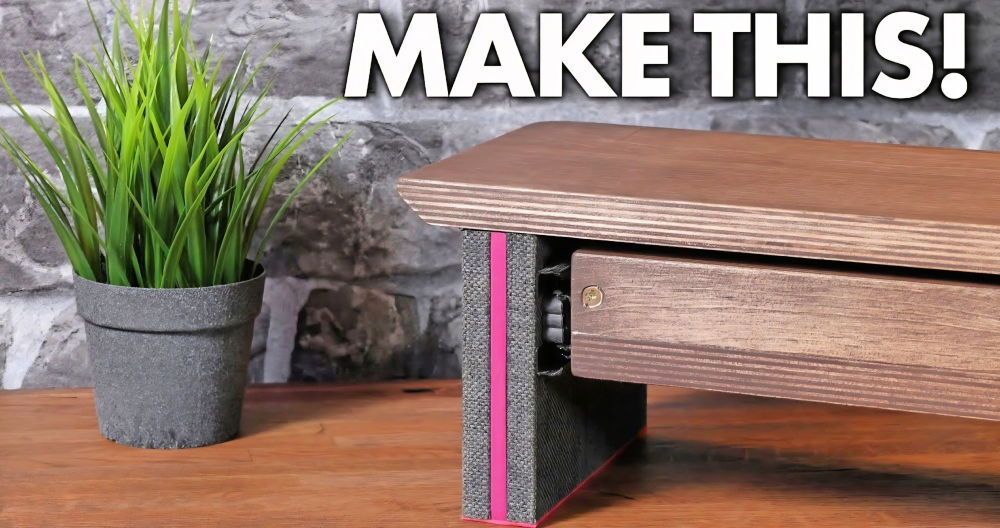
When I first looked at the basic keyboard stand in my home, I felt it didn't match the aesthetic of my space. I wanted something more than just functional—a piece that could blend seamlessly with my other furniture. So, I took on the challenge of building my own custom DIY keyboard stand from walnut wood.
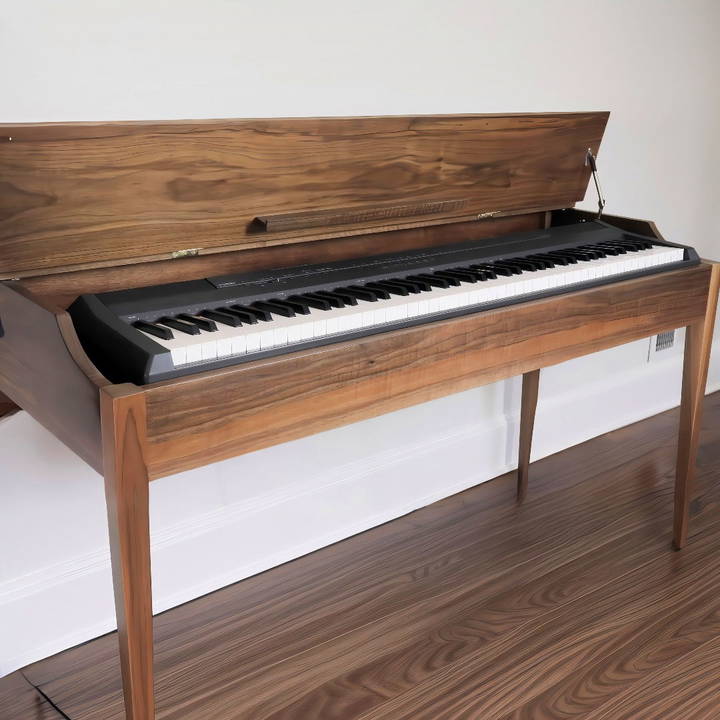
This journey wasn't just about the final product but also about the learning process that came with each step. From selecting the wood to assembling the final stand, each phase brought its own lessons and moments of discovery. What I found was that even a simple woodworking project can become an engaging and rewarding experience with the right approach and mindset.
Choosing the Right Materials
When it comes to woodworking, material selection is crucial. I chose walnut for this project because of its rich, warm tones and durability. Walnut has a way of elevating the design of a piece, giving it a sense of both modern and classic appeal. Plus, walnut is strong and easy to work with when it comes to intricate cuts and joinery.
My Experience with Walnut
I was fortunate to find some walnut pieces that were wide enough for my needs, which meant I didn't have to glue up any panels. This saved a lot of time and effort and allowed me to focus more on the design and finishing details. The first lesson I learned was the importance of inspecting and choosing your wood carefully. It might seem like a small detail, but starting with the right materials can make or break your project.
Step by Step Instructions
Learn to make a DIY keyboard stand with our detailed guide. From cutting wood to final assembly, follow our expert tips for a flawless finish.
Preparing and Cutting the Wood
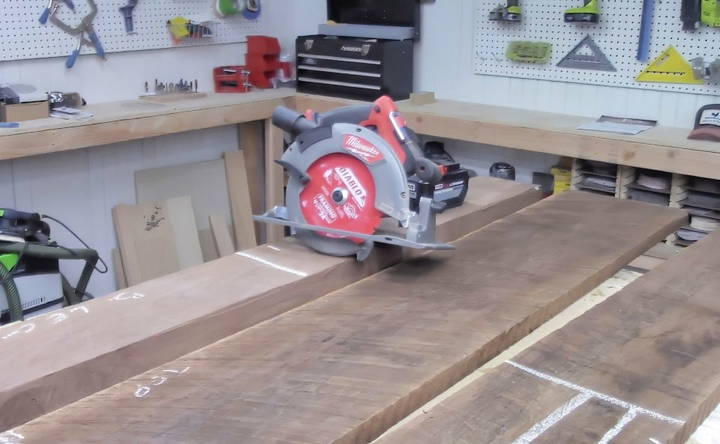
Once I had my walnut boards, it was time to prepare and cut them to size. I don't own a jointer, so I had to be a bit creative. I used a planer sled to surface one face of the walnut. For the pieces that were too long for my sled, I turned to my hand plane to flatten one side enough to run it through my planer for a clean finish.
Tips for Milling Without a Jointer
Milling without a jointer can be challenging, especially if you're working with longer pieces of wood. To clean up the edges, I offset the outfeed fence on my router table. This provided a perfectly square edge, which I then trimmed on the table saw. This process taught me the value of improvisation in woodworking—sometimes, you have to make the most of the tools you have.
Building the Tapered Legs
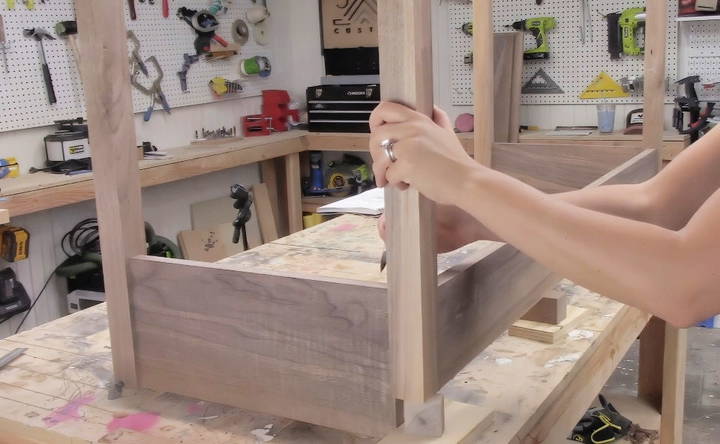
One of the standout features of this keyboard stand is the tapered legs. They add a subtle elegance to the design that makes it feel like a piece of high-end furniture rather than a typical keyboard stand. I marked the leg tapers by measuring from the bottom of the apron down one inch and then started the taper at that point.
How I Made the Tapers
To cut the tapers, I used a taper jig on my table saw. While this might sound complicated, it's a straightforward process once you set the jig correctly. My jig didn't have auto-adjust toggle clamps, so after making the first cut, I kept the cutoff piece and taped it back onto the leg. This allowed me to rotate the leg to an adjacent side without readjusting the clamps.
- Pro Tip: If you're going to be cutting multiple legs, it's worth taking the time to set up a jig properly. You only need to set it once, and then you can make consistent cuts without much adjustment.
Shaping the Curved Sides
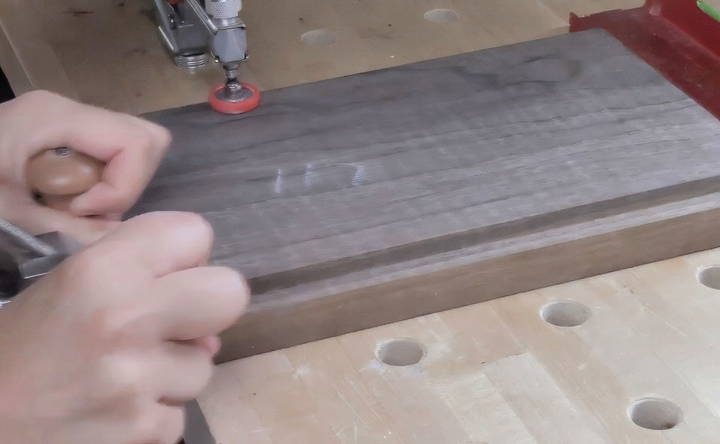
Originally, I planned for a more boxy design with the lid covering the keys when closed. However, during the process, I decided to add a slight curve to the sides, which significantly enhanced the overall aesthetic. This curve was cut on a bandsaw and refined on a benchtop sander.
The Importance of Flexibility in Design
This change in design direction was a bit of an experiment, but it ended up being one of my favorite aspects of the piece. Sometimes, being flexible and willing to deviate from your initial plan can lead to unexpected and delightful outcomes. Don't be afraid to adjust your design as you go along; woodworking is as much about creativity as it is about precision.
Crafting the Joinery
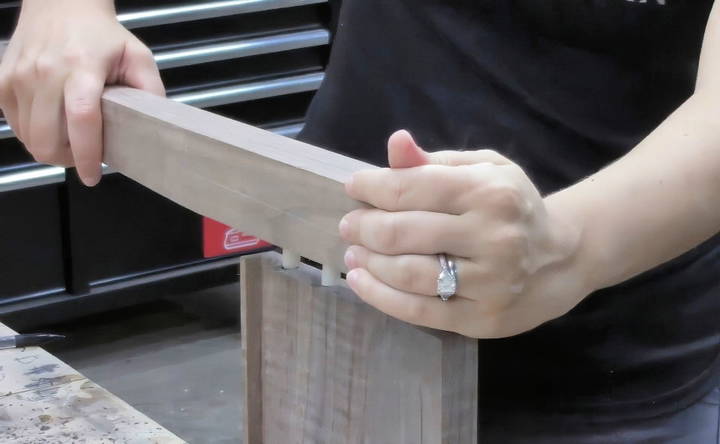
For the joinery, I opted for dowels. This method is not only strong but also relatively simple once you get the hang of it. I buildd a template to mark the dowel locations, ensuring that everything would line up perfectly when it came time to assemble.
Using Dowels for Strong Joints
If you're like me and don't have access to a domino jointer, dowels are a fantastic alternative. They provide a very strong joint and, with the help of a self-centering jig, are easy to place accurately. One thing I always remember is to drill slightly deeper than halfway into each piece to allow for glue and expansion.
- Pro Tip: To avoid glue squeezing out and making a mess, use a countersink bit to build a small recess around the dowel holes. This gives excess glue somewhere to go and prevents the wood from swelling.
Adding the Soft-Close Lid
The soft-close lid is a luxurious touch that not only looks great but is also highly functional. I love how it prevents the lid from slamming shut, adding to the durability of the piece.
Navigating Confusing Instructions
The soft-close mechanism I used didn't come with the clearest instructions—most of it was in gibberish. I had to rely on the pictures and some trial and error to figure out the installation. Here, patience and a bit of ingenuity went a long way. I used tape to mark the positions for drilling, ensuring everything lined up perfectly.
Final Assembly and Finishing Touches
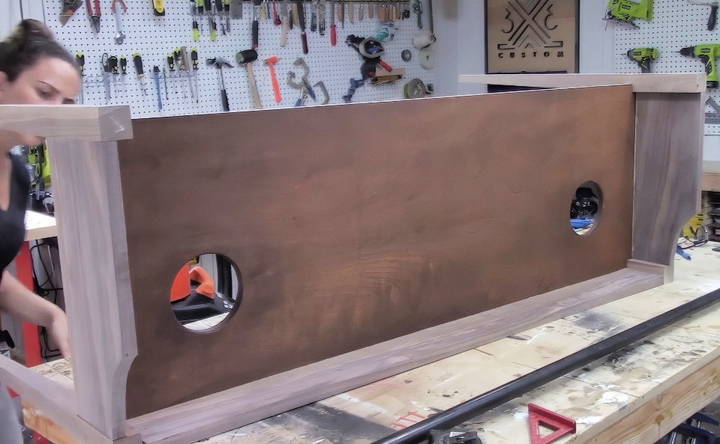
With all the parts ready, it was time to assemble the stand. This is always the most nerve-wracking part for me, especially when glue is involved. I tend to overuse glue, but I've learned it's better to have too much than too little. After clamping everything in place and letting it dry overnight, I attached the back panel with pocket holes and installed the soft-close lid.
Finishing with Care
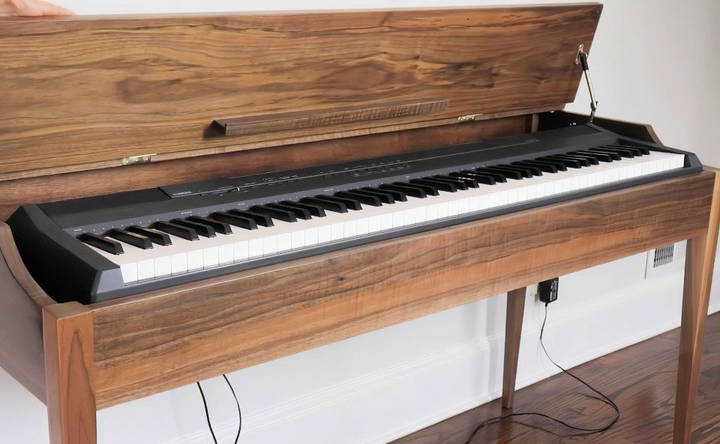
For the finish, I went with AquaCoat AquaThane, applying four coats with a light sanding in between. This buildd a durable, hard-wearing surface that can withstand the daily wear and tear from my kids.
Customization Ideas
Customizing your DIY keyboard stand can make it unique and perfectly suited to your needs and style. Here are some easy and creative ideas to get you started:
1. Design Variations
Discover the ideal multi-tier stand with adjustable height and a foldable design. Maximize space and functionality effortlessly!
Adjustable Height:
- Build a stand with adjustable legs. This allows you to change the height to suit different playing positions, whether sitting or standing.
- Use telescoping tubes or adjustable brackets for this feature.
Foldable Design:
- Make a foldable stand for easy storage and portability. Hinges and locking mechanisms can help achieve this.
- This is especially useful if you need to transport your keyboard frequently.
Multi-Tier Stand:
- Add extra tiers to hold additional equipment like a laptop, mixer, or other instruments.
- Ensure each tier is sturdy and can support the weight of your gear.
2. Personal Touches
Learn how to add personal touches with custom paint, decals, and unique materials to make your projects stand out. enhance your creativity today!
Paint and Finish:
- Paint your stand in your favorite color or match it to your room's decor.
- Use a high-quality finish to protect the wood and give it a polished look.
Decals and Stickers:
- Decorate your stand with decals or stickers that reflect your personality or interests.
- This is a simple way to add a personal touch without much effort.
Unique Materials:
- Experiment with different materials like reclaimed wood, metal pipes, or acrylic sheets.
- Combining materials can build a modern and stylish look.
3. Functional Enhancements
Discover functional enhancements like cable management, built-in storage, and lighting solutions for a more organized and well-lit space.
Cable Management:
- Add hooks or clips to manage cables neatly. This keeps your setup tidy and reduces the risk of tripping over wires.
- You can also drill holes in strategic places to route cables through the stand.
Built-in Storage:
- Incorporate shelves or drawers into the stand to store accessories like pedals, sheet music, or headphones.
- This keeps everything you need within easy reach.
Lighting:
- Attach LED strips or small lamps to illuminate your keyboard. This is useful for playing in low-light conditions.
- Choose adjustable lighting to control the brightness and color.
4. Eco-Friendly Options
Uncover eco-friendly options with sustainable materials and upcycling ideas to reduce waste and protect our planet. Go green today!
Sustainable Materials:
- Use eco-friendly materials like bamboo or recycled wood. These materials are not only sustainable but also add a unique aesthetic.
- Ensure any finishes or paints used are non-toxic and environmentally friendly.
Upcycling:
- Repurpose old furniture or materials to build your stand. This reduces waste and gives new life to items you might otherwise discard.
- Look for inspiration in thrift stores or around your home.
By incorporating these customization ideas, you can build a keyboard stand that is not only functional but also a reflection of your personal style and needs.
Common Mistakes and How to Avoid Them
Building a DIY keyboard stand can be a rewarding project, but it's easy to make mistakes along the way. Here are some common pitfalls and how to avoid them:
1. Incorrect Measurements
- Problem: Incorrect measurements can lead to a stand that doesn't fit your keyboard or is unstable.
- Solution: Double-check all measurements before cutting any materials. Use a measuring tape and a square to ensure accuracy. Measure twice, cut once.
2. Using the Wrong Materials
- Problem: Using materials that are too weak or heavy can affect the stand's stability and portability.
- Solution: Choose materials that are strong yet lightweight, like plywood or aluminum. Avoid using particleboard as it can break easily under weight.
3. Poor Joinery
- Problem: Weak joints can cause the stand to wobble or collapse.
- Solution: Use proper joinery techniques like dowels, screws, or brackets. Apply wood glue to reinforce joints. Ensure all joints are tight and secure.
4. Ignoring Ergonomics
- Problem: A stand that is too high or too low can cause discomfort or strain during use.
- Solution: Adjust the height of the stand to match your playing position. Consider adding adjustable legs for flexibility.Test the stand's height before final assembly.
5. Skipping the Finishing Touches
- Problem: Neglecting to sand or finish the stand can result in rough edges and splinters.
- Solution: Sand all surfaces and edges to smooth out rough spots. Apply a finish like paint, varnish, or stain to protect the wood and enhance its appearance. Let the finish dry completely before using the stand.
6. Overlooking Stability
- Problem: A stand that tips over easily can damage your keyboard and pose a safety risk.
- Solution: Ensure the base of the stand is wide enough to provide stability. Add cross-bracing or support bars to strengthen the structure. Test the stand's stability by placing your keyboard on it and gently pushing from different angles.
7. Inadequate Cable Management
- Problem: Tangled cables can build a messy and hazardous setup.
- Solution: Incorporate cable management solutions like clips, hooks, or channels. Route cables neatly and secure them to the stand. Label cables to easily identify them.
8. Not Planning for Future Needs
- Problem: Building a stand that doesn't accommodate future equipment or changes can limit its usefulness.
- Solution: Consider potential future needs, such as additional tiers or space for accessories. Design the stand with modularity in mind, allowing for easy modifications.
By being aware of these common mistakes and taking steps to avoid them, you can build a sturdy, functional, and aesthetically pleasing keyboard stand.
FAQs About DIY Keyboard Stands
Discover essential FAQs about DIY keyboard stands! Get expert tips, tools, and techniques for making your own keyboard stand at home.
To ensure stability, use high-quality materials and follow precise measurements. Reinforce joints with screws and wood glue. Adding cross braces or support beams can enhance stability. Make sure the base is wide enough to prevent tipping.
Yes, you can customize the height to suit your needs. Measure the height that is comfortable for you while playing. Cut the legs of the stand to this height. Adjustable designs using PVC pipes or telescoping legs can offer flexibility.
Before painting or staining, sand the wood to remove any rough edges and ensure a smooth surface. Apply a primer if you're painting, and use a wood conditioner before staining to achieve an even finish. Use multiple thin coats of paint or stain, allowing each coat to dry completely before applying the next.
Yes, adding wheels can make your keyboard stand more mobile. Choose sturdy, lockable caster wheels to ensure stability when the stand is in use. Attach the wheels to the bottom of the legs, making sure they are evenly spaced and securely fastened.
You can enhance your DIY keyboard stand with several additional features. Consider adding a shelf or hooks for storing accessories like headphones and cables. Integrate a music sheet holder or a tablet stand for convenience. If you perform often, adding LED strip lights can provide better visibility and a professional look.
Final Thoughts and Reflections
Looking back, this DIY keyboard stand project was more than just building a piece of furniture—it was a learning experience that pushed me to improve my skills and think creatively. If I were to do it again, I might explore alternative joinery methods to avoid visible pocket holes, but overall, I'm thrilled with the result.
This woodworking project taught me that sometimes the journey is just as rewarding as the destination. So, whether you're a seasoned woodworker or just starting, remember to enjoy the process, embrace mistakes as learning opportunities, and let your creativity guide you.


