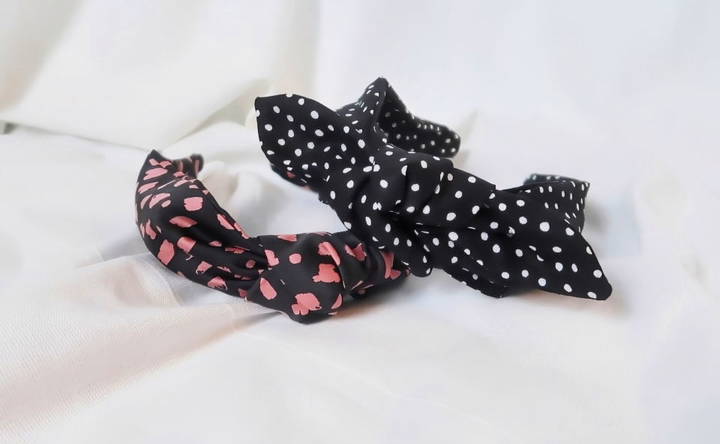
Making your own DIY knotted headbands is not only fun but also allows for personal customization, whether you're looking for a casual turban style or a cute bow knot design. In this tutorial, I'll share my experiences making two different styles of headbands.
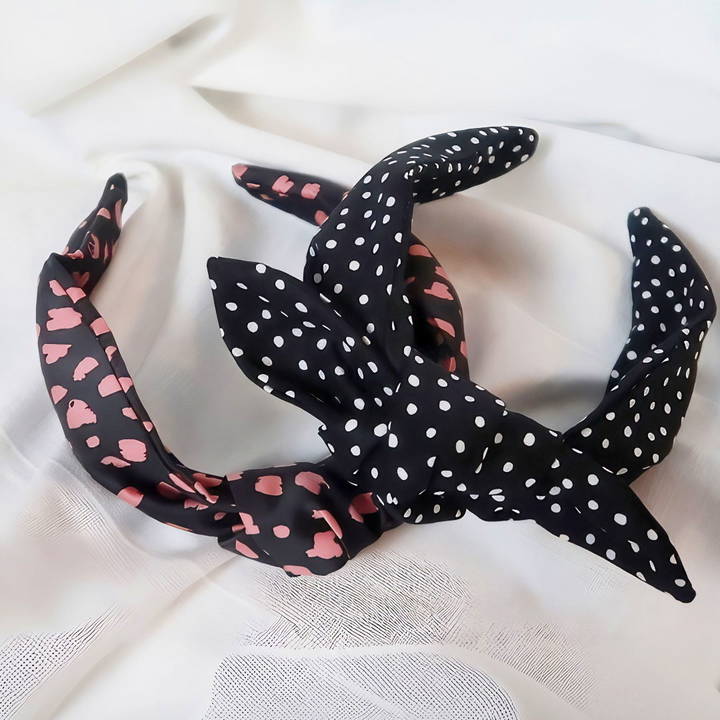
I'll guide you through every step, from drafting your pattern to sewing and finishing the perfect headband. By the end, you'll have a stylish accessory that you can proudly wear or gift.
Materials You'll Need
Before we start, let's make sure you have all the necessary materials:
- Fabric: Choose a stretchy fabric like cotton jersey or knit. It provides flexibility and comfort, making it ideal for headbands.
- Sewing Machine: A basic sewing machine will do the job perfectly.
- Needle and Thread: For any hand-sewing details, especially when finishing off the edges.
- Rotary Cutter and Mat: Essential for cutting the fabric accurately.
- Pins or Clips: To hold your fabric pieces in place while sewing.
- Iron and Ironing Board: For pressing seams flat and giving your headbands a professional finish.
- Ruler and Chalk or Fabric Marker: For measuring and marking your fabric.
- Pattern (Printable or Handmade): You can draft your own or use a pre-made one.
Why These Materials Matter
Each material plays a crucial role in the process. The fabric you choose can significantly impact the look and feel of your headbands. A good rotary cutter and mat provide precision, ensuring each piece fits together neatly. Ironing is a game-changer—pressing your fabric makes a huge difference in the quality of your finished product.
Step by Step Instructions
Learn to craft stylish DIY knot headbands at home with step-by-step instructions. Perfect for beginners, packed with tips and tricks!
Drafting the Pattern for Your Headbands
Learn how to draft the perfect pattern and cut fabric for your headbands. Step-by-step guide on making patterns and cutting fabric efficiently.
Step 1: Making the Pattern
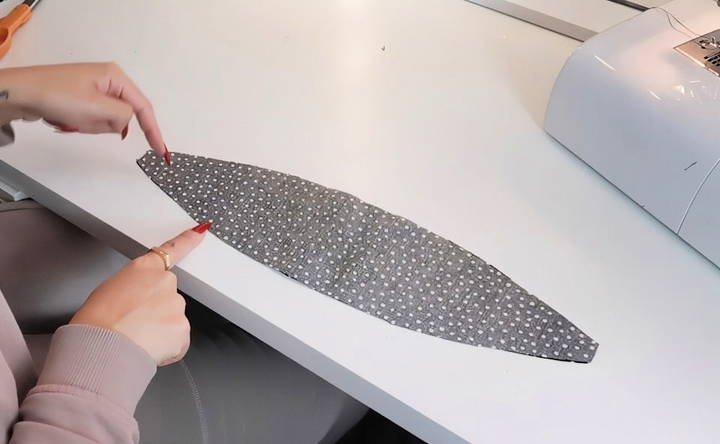
To start, you need to draft a pattern for both styles of headbands: the knotted bow and the turban style. I found that keeping my patterns simple and straightforward works best. For the knotted bow headband, you'll need a long rectangle (about 20 inches by 5 inches) for the main band and a smaller piece (about 6 inches by 3 inches) for the bow.
For the turban style, the pattern is similar but slightly longer, around 23 inches by 6 inches, to account for the added knot. When drafting, remember to leave an allowance of about 0.5 inches around all sides for seams.
Step 2: Cutting the Fabric
Using a rotary cutter makes this step a breeze. I like to fold my fabric over twice, as it allows me to cut two layers simultaneously, ensuring both sides are perfectly symmetrical. I've learned that this little trick saves time and keeps the pieces consistent.
Sewing the Knotted Bow Headband
Learn how to make a stylish knotted bow headband with our easy step-by-step sewing guide. Perfect for beginners. Start sewing today!
Step 1: Sewing the Main Piece
Take the fabric for the main band and place the right sides together. Pin or clip the edges, but leave a small gap (around two inches) at one end—this is where you will flip the fabric right side out. Sew around the edges with a 0.5-inch seam allowance. When I first started, I used to skip pinning, thinking it wasn't necessary, but trust me, pinning makes all the difference in keeping your edges aligned.
Step 2: Turning and Pressing
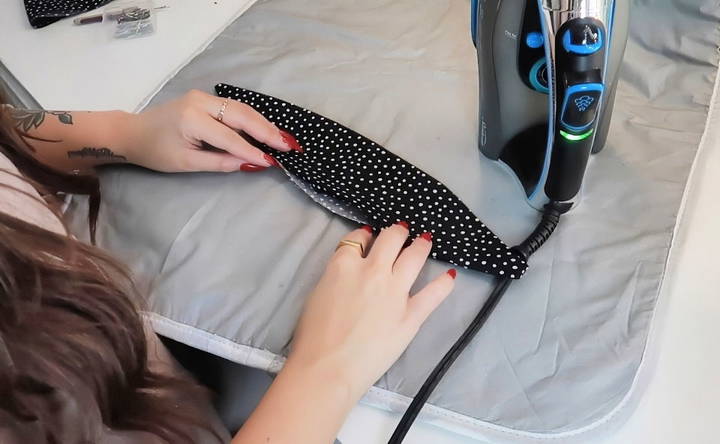
After sewing, it's time to turn the piece right side out. This is where a little tool like a loop turner can save you a lot of time and frustration. Once turned, press the fabric flat with an iron. Don't skip this step; pressing makes crisp, clean edges that look polished.
Step 3: Inserting the Headband and Closing the Opening
Slide the headband piece into the fabric sleeve you maked. It may seem like a tight squeeze, but it's designed that way to ensure a snug fit. Make sure the seams line up, and then topstitch the opening closed. One tip: removing the extra piece on the sewing machine platform makes it easier to maneuver around tight spaces.
Step 4: Finishing with the Bow
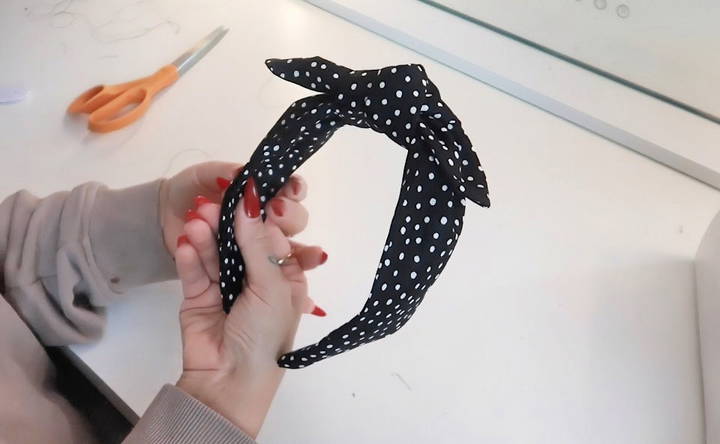
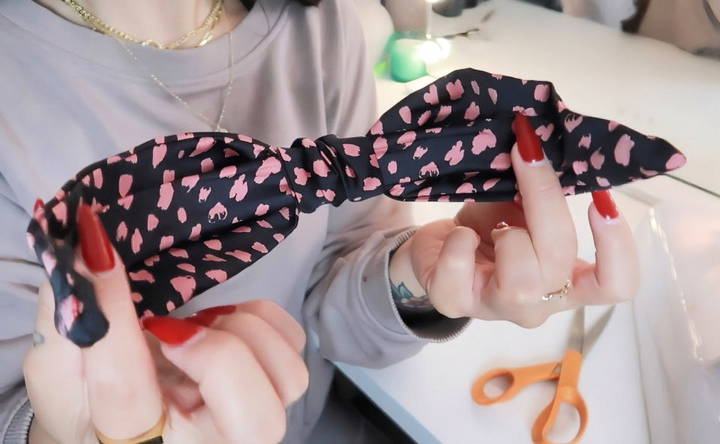
For the bow piece, sew it similarly by leaving a smaller opening. Once it's sewn and turned right side out, tie it around the center of the headband. Adjust it until it looks just right. I find that a tightly tied bow holds its shape much better.
Making the Turban Style Headband
Learn how to make a stylish turban headband step-by-step, from modifying patterns to securing the ends. Perfect DIY accessory for any fashionista!
Step 1: Modifying the Main Pattern
For the turban style, you'll need to extend the main pattern piece by three inches at the bottom. This gives enough length for making a secure knot. It's a small modification, but it makes a big difference in the final fit and appearance.
Step 2: Adding a Fabric Strip Inside
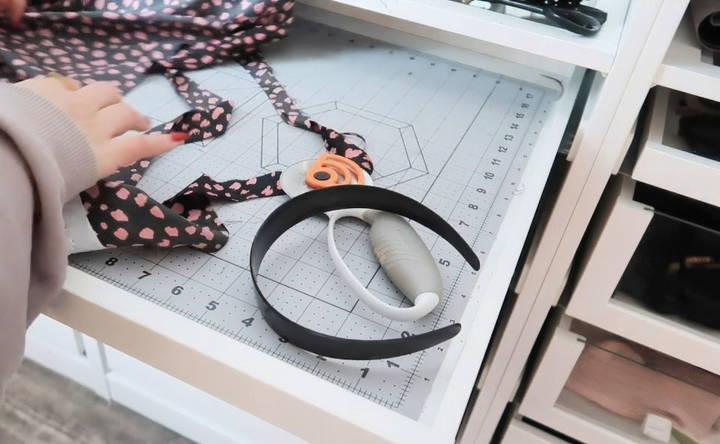
I like to add a strip of fabric inside the headband to cover any exposed edges. You can attach this strip using a thin layer of fabric glue or Mod Podge. Smooth it out to avoid any wrinkles or bubbles. This step is optional, but I've found it gives the headband a cleaner, more finished look.
Step 3: Sewing the Main Piece and Knotting
Similar to the bow style, sew the main piece by placing the right sides together and leaving a small opening. Once turned and pressed flat, find the center and tie a knot. The knot should be tight enough to hold but loose enough to adjust for comfort.
Step 4: Securing the Ends
To keep everything in place, make small slits in the inner layer of fabric at each end of the headband. Slide the ends of the headband into these slits. This prevents the ends from slipping out and gives the headband a more secure fit. It took me a few tries to perfect this technique, but it's well worth the effort for a more polished result.
Tips and Tricks for Perfect Headbands
- Choosing the Right Fabric: A slightly stretchy fabric is best for headbands, especially when making knots or bows. I've found cotton jersey to be the most comfortable and forgiving when sewing.
- Precision in Cutting and Sewing: Use a rotary cutter for sharp, clean cuts, and always press seams as you sew. A good press can take your project from homemade to professional.
- Experiment with Sizes and Styles: Don't be afraid to modify the sizes or try different knot styles. Sometimes a small change, like adjusting the width of the band, can make a whole new look.
- Add Embellishments: Consider adding buttons, beads, or fabric flowers for a unique touch. Personalization can turn a simple headband into a statement accessory.
- Practice Makes Perfect: The more you sew, the better you'll get. Don't get discouraged if your first few attempts aren't perfect. Sewing is a skill that improves with practice, and each project will teach you something new.
Customization Ideas
Customizing your DIY knot headbands can make them unique and personal. Here are some easy and creative ideas to help you add a special touch to your headbands:
1. Fabric Choices
- Patterns and Colors: Choose fabrics with different patterns and colors. Floral, polka dots, stripes, or even solid colors can give your headbands a distinct look.
- Textures: Experiment with various textures like velvet, satin, cotton, or lace. Each fabric type can change the overall feel and appearance of the headband.
2. Embellishments
- Beads and Sequins: Sew beads or sequins onto the fabric for a sparkly effect. This works great for special occasions or festive looks.
- Buttons and Charms: Add small buttons or charms to the knot area. This can be a fun way to personalize your headband.
- Embroidery: If you enjoy embroidery, add some stitched designs to your headband. Simple patterns like flowers or initials can make it stand out.
3. Knot Variations
- Twisted Knot: Instead of a simple knot, try a twisted knot for a different look. This adds a bit of complexity and style.
- Double Knot: Make a double knot for a chunkier, more prominent feature. This can be a bold fashion statement.
4. Mix and Match
- Combine Fabrics: Use two different fabrics for the headband and the knot. This contrast can make the headband more visually interesting.
- Layering: Layer two headbands of different colors or patterns together. This can make a unique and colorful accessory.
5. Seasonal Themes
- Spring and Summer: Use light, bright fabrics with floral or tropical prints.
- Fall and Winter: Opt for warmer, richer fabrics like wool or velvet in deeper colors.
6. Functional Additions
- Elastic Bands: Add an elastic band at the back for a more secure fit. This is especially useful for active wear.
- Adjustable Ties: Make adjustable ties instead of a fixed knot. This allows for a customizable fit and can be more comfortable.
7. Personal Touches
- Monograms: Add monograms or initials to make the headband uniquely yours.
- Themed Designs: Make headbands based on themes like holidays, favorite movies, or hobbies. This can be a fun way to express your personality.
By incorporating these customization ideas, you can make a variety of unique and stylish knot headbands that reflect your personal taste and creativity.
Common Mistakes and How to Avoid Them
Making DIY knot headbands can be a fun and rewarding project, but there are some common mistakes that can make the process frustrating. Here are some of the most frequent errors and tips on how to avoid them:
1. Choosing the Wrong Fabric
- Mistake: Using fabric that is too stiff or too slippery can make it difficult to tie a neat knot.
- Solution: Opt for fabrics with a bit of stretch, like cotton jersey or knit fabrics. These materials are easier to work with and make a comfortable fit.
2. Incorrect Measurements
- Mistake: Not measuring your head correctly can result in a headband that is too tight or too loose.
- Solution: Measure your head circumference accurately and add a little extra length for seam allowances. It's better to cut the fabric slightly longer and trim it down if needed.
3. Poor Knot Tying Technique
- Mistake: Tying the knot too loosely or too tightly can affect the look and fit of the headband.
- Solution: Practice tying the knot a few times before sewing the ends together. Aim for a knot that is snug but not overly tight, so it sits comfortably on your head.
4. Uneven Edges
- Mistake: Cutting the fabric unevenly can lead to a lopsided headband.
- Solution: Use a rotary cutter and a cutting mat for straight, even edges. If you don't have these tools, carefully mark your fabric with a ruler and cut slowly with sharp scissors.
5. Skipping the Ironing Step
- Mistake: Not ironing the fabric before sewing can result in wrinkles and uneven seams.
- Solution: Always iron your fabric before you start cutting and sewing. This ensures smooth, even seams and a professional finish.
6. Ignoring Seam Allowances
- Mistake: Forgetting to include seam allowances can make the headband too small.
- Solution: Always add a seam allowance of about 1/4 inch (0.6 cm) to your measurements. This extra fabric is necessary for sewing the pieces together.
7. Using the Wrong Thread
- Mistake: Using a thread that doesn't match the fabric can make the stitches stand out.
- Solution: Choose a thread color that closely matches your fabric. This helps the stitches blend in and gives a cleaner look.
8. Not Securing the Ends
- Mistake: Leaving the ends of the headband unsecured can cause it to unravel.
- Solution: Secure the ends by sewing them together or using fabric glue. This ensures the headband stays intact and lasts longer.
9. Overstretching the Fabric
- Mistake: Stretching the fabric too much while sewing can cause it to lose its shape.
- Solution: Handle the fabric gently and avoid pulling it too tight. Let the sewing machine feed the fabric through at its own pace.
10. Neglecting to Test Fit
- Mistake: Not trying on the headband before finishing can lead to fit issues.
- Solution: Test the fit of the headband before sewing the final seams. Make any necessary adjustments to ensure it fits comfortably.
By being aware of these common mistakes and following these tips, you can make beautiful and well-fitting knot headbands with ease.
FAQs About DIY Knot Headbands
Discover answers to common questions about DIY knot headbands. Learn how to make and style trendy knot headbands at home.
Choose a fabric that is stretchy and comfortable. Knit fabrics, spandex, or jersey are great options. These fabrics stretch well and hold the knot shape nicely. Avoid stiff or non-stretchy fabrics as they can be uncomfortable and difficult to work with.
Yes, you can make a no-sew knot headband. Use fabric glue instead of sewing. Follow the same steps for measuring, cutting, and knotting. Instead of sewing, use fabric glue to secure the edges and ends.
You can customize your knot headband by:
Using different fabrics and colors
Adding embellishments like beads, sequins, or embroidery
Making variations in the knot style (e.g., double knot, twisted knot)
Adjusting the width and length of the fabric strip to fit your preference
To keep your DIY knot headband in good condition:
Hand wash: Gently hand wash in cold water with mild detergent.
Air dry: Lay flat to dry to maintain its shape.
Avoid heat: Do not use a dryer or iron directly on the headband, as high heat can damage the fabric and elastic.
Absolutely! To make a knot headband for kids:
Adjust measurements: Use a shorter length of fabric, around 18 inches long and 6 inches wide, depending on the child's head size.
Follow the same steps: The process is the same as for an adult headband, just scaled down.
Final Thoughts
Making your own knotted headbands is a fun and rewarding project. With just a few materials and a little bit of time, you can make stylish and comfortable accessories that suit your style. The beauty of DIY is in its flexibility—experiment with different fabrics, try new techniques, and make each headband your own. Whether you're a seasoned sewer or just starting out, these knotted headbands are a perfect project to express your creativity.


