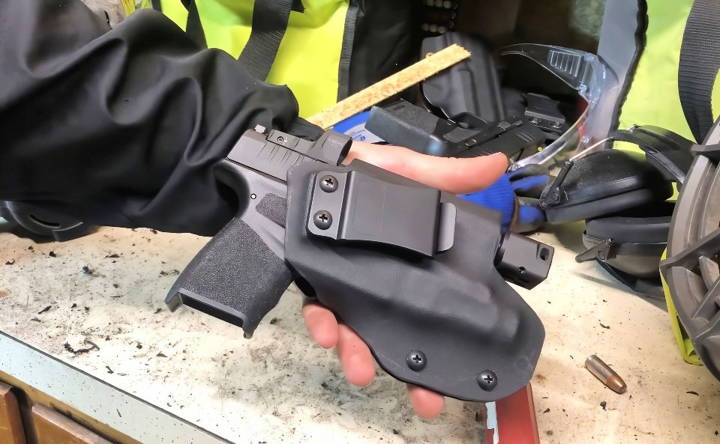
Building your own DIY Kydex holster is rewarding. I first learned about it when I wanted a custom fit for my pistol. It's easier than it sounds and saves money. I started with basic tools and a Kydex sheet from a local store. Heating the Kydex made it flexible enough to mold around my pistol.
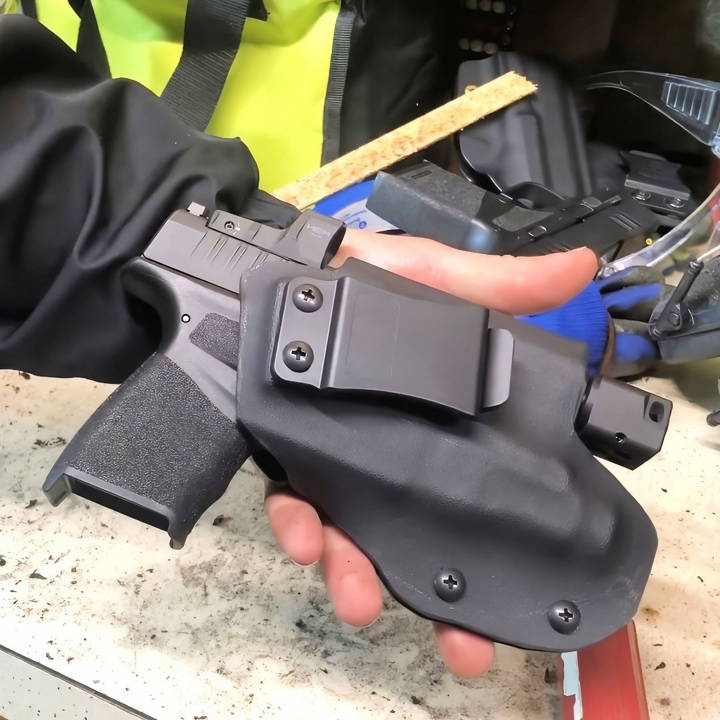
After shaping the Kydex, I drilled holes for screws and added belt loops to make it wearable. The finished holster was sturdy and fit like a glove. I felt proud to use something I made myself. This simple project not only gave me a new skill but also a sense of accomplishment.
For detailed steps, keep reading. This guide will help you make your very own holster. Enjoy the process, it's worth it.
Materials Needed
- Kydex Sheet: This thermoplastic material will form the body of the holster. It's durable, heat-resistant, and molds well when heated.
- Masking Tape: Essential for taping up the gun and filling in moisture traps, ensuring the Kydex doesn't get stuck in unwanted grooves.
- Popsicle Sticks and Scrap Wood: These make necessary channels and standoff points in your holster, such as for lights, controls, and the clip.
- Heat Gun: Useful for pre-heating components and fine-tuning the shape of your holster.
- Box Cutter: For cutting the Kydex sheet to size.
- Oven: To heat the Kydex for molding.
- Press: For clamping the heated Kydex around your gun.
- Clamps and Vise: Needed to hold the press together while the Kydex cools and takes shape.
- Drill & Chicago Style Screws: For making attachment points and adjustable retention settings.
- Pencil or Silver Sharpie: For marking cutting lines on the Kydex.
Step by Step Instructions
Learn how to build a custom DIY Kydex holster with our step-by-step instructions. Perfect your creation with preparation, molding, finishing, and final adjustments.
Step 1: Preparing the Gun
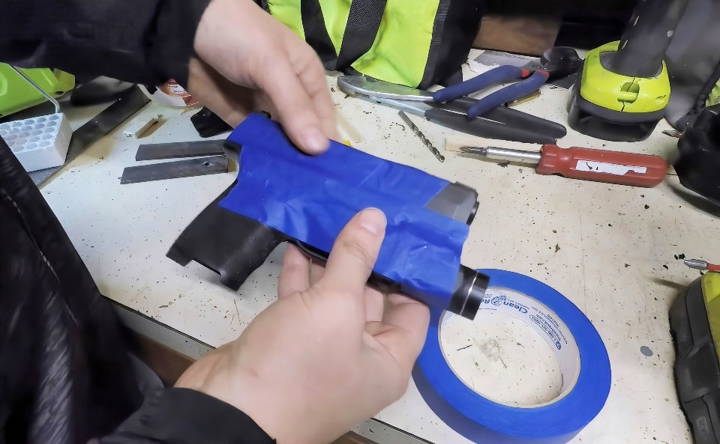
First, tape up the gun to protect it and fill in any grooves where the Kydex might accidentally press in and trap the gun. Pay special attention to areas like the trigger guard and ejection port.
- Masking Tape: Wrap it over controls and around triggers to avoid pressing the Kydex into hard-to-remove shapes.
- Popsicle Sticks: Use these to make standoffs in areas where the shape needs to remain open, like the ejection port and light channels.
Step 2: Making Channels
If your gun has a light or other attachments that need clearance:
- Metal Strips and Popsicle Sticks: Attach these to the taped gun to ensure the Kydex molds in a way that leaves these areas clear. Tape these parts securely in place.
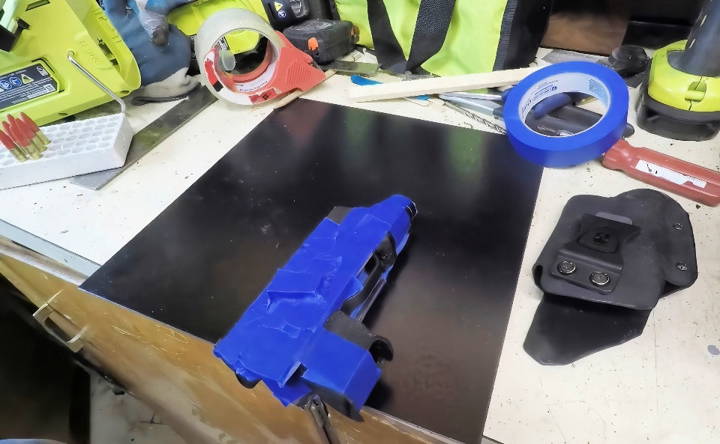
Step 3: Preparing and Cutting the Kydex
Before heating, you need to cut the Kydex to a manageable size.
- Box Cutter: Carefully measure the size you need, and cut the Kydex a little larger than required. Excess can be trimmed later, but it's difficult to add more material if you cut too small.
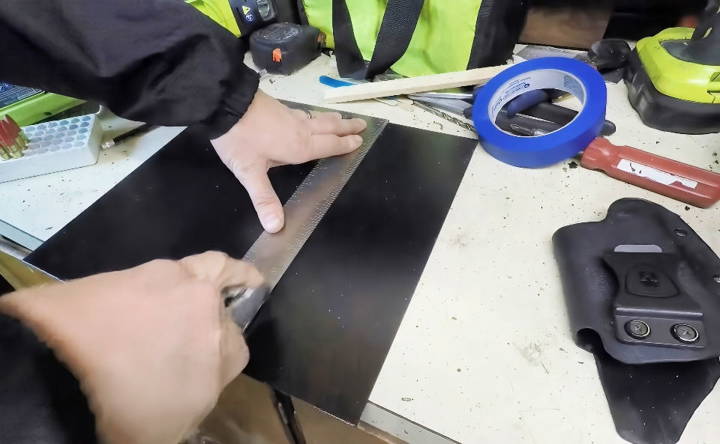
Step 4: Heating the Kydex
Preheat your oven to around 360°F. Heat the Kydex for about 60-90 seconds until it becomes pliable.
- Pro Tip: While the Kydex heats, ensure your press is ready with all clamps and vises in place.
Step 5: Molding the Kydex
Once heated, remove the Kydex with gloves to avoid burns and immediately place it around your prepared gun.
- Press: Clamp the Kydex securely, ensuring it molds tightly but not overly snugly around the standoffs and channels you've prepared.
- Vise and Clamps: Use these to hold the press together tightly while the Kydex cools and hardens, usually taking about 5-10 minutes.
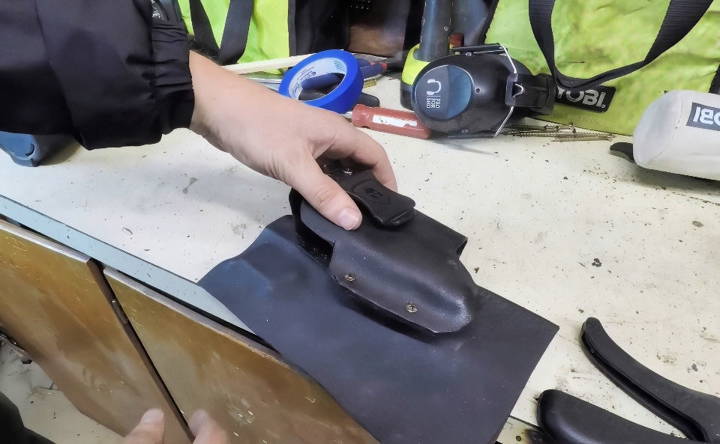
Step 6: Trimming and Finishing
After the Kydex has cooled:
- Pencil or Sharpie: Mark the lines where you need to trim away excess material. Ensure you leave enough material around the edges to protect both the gun and your body.
- Cut: Use your box cutter carefully to trim along the marked lines. Sand any rough edges to avoid discomfort and look neat.
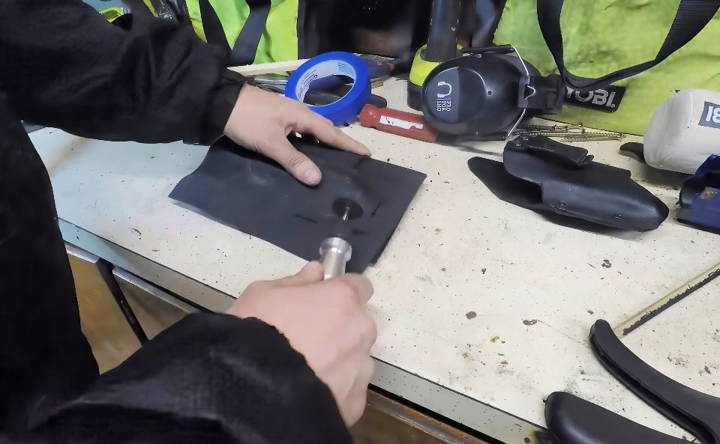
Step 7: Attachment Points and Fine-tuning
Drill holes for the clips and any other attachment points.
- Chicago Style Screws: Make sure you're using high-quality screws. Installing these will allow you to adjust the retention and ensure your holster sits comfortably at your desired height.
- Drill Angles: Drill slightly angled holes if you need adjustable positioning for the clip.
Step 8: Final Adjustments and Testing
Finally, test the fit of your gun in the holster. If areas feel too snug or loose:
- Heat Gun: Apply localized heat and make fine adjustments, such as pinching the Kydex by hand if needed.
Customization Ideas for Your DIY Kydex Holster
Customizing your DIY Kydex holster can be a fun and rewarding process. It allows you to make a holster that is uniquely yours, tailored to your style and needs. Here are some ideas to inspire your customization journey:
- Choose Your Color or Pattern: Kydex sheets come in a variety of colors and patterns. For a traditional look, you can select a classic black or coyote brown, or opt for something more vibrant, like neon green or pink. Camouflage patterns are also popular among outdoor enthusiasts.
- Add Textures for Grip: Applying textures to your Kydex can enhance the grip and make your holster more secure. You can use tools to press patterns into the warm Kydex before it hardens, making a custom texture that feels good in your hand.
- Personalize with Engravings: If you have access to an engraving tool, consider adding a personal touch to your holster with your initials, a meaningful date, or a simple design. This not only adds personality but also makes your holster easily identifiable.
- Attach Custom Clips or Loops: The type of clips or loops you choose for your holster can significantly affect its carry. Experiment with different styles to find what works best for you. Some prefer the stability of loops, while others like the convenience of quick clips.
- Experiment with Molding Techniques: Kydex is a thermoplastic, which means you can mold it into various shapes. Try different molding techniques to make unique contours and fits for your firearm. This can also affect the retention and draw speed of your holster.
- Incorporate a Light or Laser Cutout: If you use a light or laser attachment on your firearm, you can customize your holster to accommodate it. This requires precise cutting and molding to ensure a snug fit while still allowing for quick access.
- Use Decorative Rivets or Eyelets: The rivets or eyelets used to assemble your holster can also be a decorative element. Choose from different metals or colored finishes to add a subtle flair to your design.
- Consider Comfort Modifications: Think about where the holster will sit on your body and make adjustments for comfort. This might include smoothing edges, adding padding, or altering the shape to fit better against your body.
Plan your design carefully and test modifications for enhanced look and function. Prioritize safety and enjoy making your Kydex holster unique.
Troubleshooting Common Issues
When crafting your own Kydex holster, you might encounter a few hiccups along the way. Here's a straightforward guide to solving some of the most common problems you may face:
Kydex Isn't Molding Properly
- Solution: Ensure the Kydex is heated evenly to the right temperature, typically around 300-350°F (149-177°C). Use an oven thermometer to check the temperature if you're unsure.
Holster Is Too Tight or Too Loose
- Solution: Adjust the retention by reheating the Kydex around the retention points and pressing it more firmly or gently around the firearm. Practice makes perfect, so don't be afraid to try a few times.
Air Bubbles or Imperfections in the Kydex
- Solution: Air bubbles can form if the Kydex is overheated. Heat the material slowly and evenly, and use a roller or similar tool to smooth out any bubbles or imperfections before it cools.
Rough Edges or Sharp Corners
- Solution: After cutting and molding your holster, use fine-grit sandpaper to smooth any rough edges. This will make the holster more comfortable to wear and prevent it from snagging on clothing.
Holster Doesn't Fit the Belt Properly
- Solution: Check the size of your belt loops or clips and compare them to your belt's width. You may need to resize or replace them to ensure a secure fit.
Difficulty Drawing the Firearm Quickly
- Solution: Work on the draw angle and the placement of the holster on your body. Adjusting these can significantly improve your draw speed.
Holster Is Not Aesthetically Pleasing
- Solution: Consider redoing the finish on your holster. A heat gun can be used to give a polished look, and edge paint can add a professional touch.
Making a DIY Kydex holster takes patience and practice. Don't get discouraged by mistakes. You'll soon make a functional, personalized holster.
Safety Precautions
When working on a DIY Kydex holster project, safety is paramount. Here are some essential safety tips to keep in mind to ensure a safe and enjoyable crafting experience:
- Work in a Well-Ventilated Area: Kydex can release fumes when heated. Always work in a well-ventilated space or use a respirator mask designed for fume protection.
- Use Heat-Resistant Gloves: Handling hot Kydex can cause burns. Wear heat-resistant gloves to protect your hands when molding and shaping the material.
- Eye Protection Is a Must: Tiny fragments can fly off when cutting or drilling Kydex. Protect your eyes with safety goggles to prevent injury.
- Be Mindful of Sharp Tools: Always use sharp tools with care. Keep your fingers away from blades when cutting, and use a stable surface.
- Keep a First Aid Kit Handy: Accidents happen, so it's wise to have a first aid kit nearby. It should include burn cream, bandages, and antiseptics.
- Secure Loose Clothing and Hair: Loose items can get caught in tools or machinery. Tie back long hair and avoid loose-fitting clothes or jewelry.
- Check Your Equipment: Before starting, ensure all your tools and equipment are in good working order. This includes checking for frayed wires or damaged parts.
- Know Your Materials: Familiarize yourself with the properties of Kydex and any other materials you're using. Understanding their limits helps prevent mishaps.
- Practice Fire Safety: Keep a fire extinguisher accessible in case of an emergency, especially when working with heat sources.
- Read Manufacturer Instructions: Whether it's a new tool or material, always read the manufacturer's instructions. They provide valuable information on safe usage.
Adopting these safety measures ensures a safer crafting space and minimizes accident risks. Preparation and protection are as vital as crafting.
FAQs About DIY Kydex Holster
Discover essential FAQs about DIY Kydex holsters. Get expert insights on materials, tools, techniques, and tips to make your custom Kydex holster.
Kydex is a type of thermoplastic material that’s popular for making durable, water-resistant, and low-maintenance holsters for firearms. Making your own Kydex holster allows for a custom fit for your specific gun model, ensuring a secure hold and quick draw. It’s also a cost-effective and rewarding DIY project.
First, heat the Kydex until it becomes pliable. Then, place it over the form of your gun and use a molding press to shape it. If you don't have a press, you can use foam and clamps to apply even pressure. Once cooled, the Kydex will retain the shape of your firearm, making a custom-fit holster.
Yes, you can customize your Kydex holster by choosing different colors, patterns, and textures of Kydex sheets. You can also add custom images or logos. For functional customization, you can adjust the retention level, add sweat guards, or modify the cant and ride height to suit your preferences.
Kydex holsters are easy to maintain. Simply wash them with soap and water to clean. Avoid using abrasive materials that can scratch the surface. To keep the holster in top condition, you can apply a light coat of silicone spray occasionally.
Safety is paramount when working with firearms and heated materials. Always start by ensuring your firearm is unloaded, and there is no ammunition in the work area. Use a replica or unloaded firearm for molding. When heating Kydex, do so in a well-ventilated area and wear protective gloves to prevent burns. Never rush the process, and always prioritize your safety and the safety of those around you.
Conclusion
Making your own DIY Kydex holster at home is simple and fulfilling. I'm helping you discover how easy and fun it can be with these tips.


