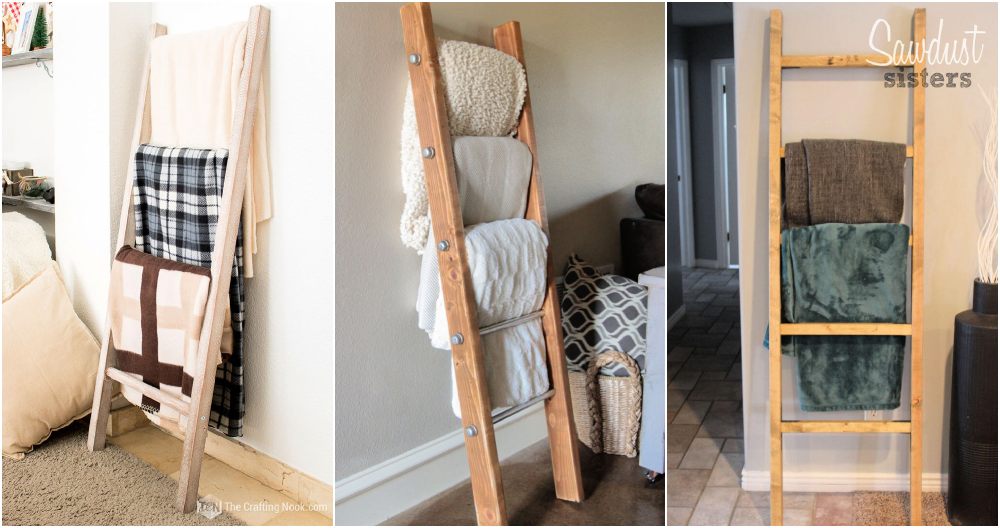
Making your own DIY ladder shelf can be a rewarding and practical project. It allows you to add a stylish and functional piece of furniture to your home. With easy-to-follow ladder shelf plans, you can craft a sturdy and attractive piece that suits your needs. This project is perfect for showcasing your favorite books, plants, and decorative items.
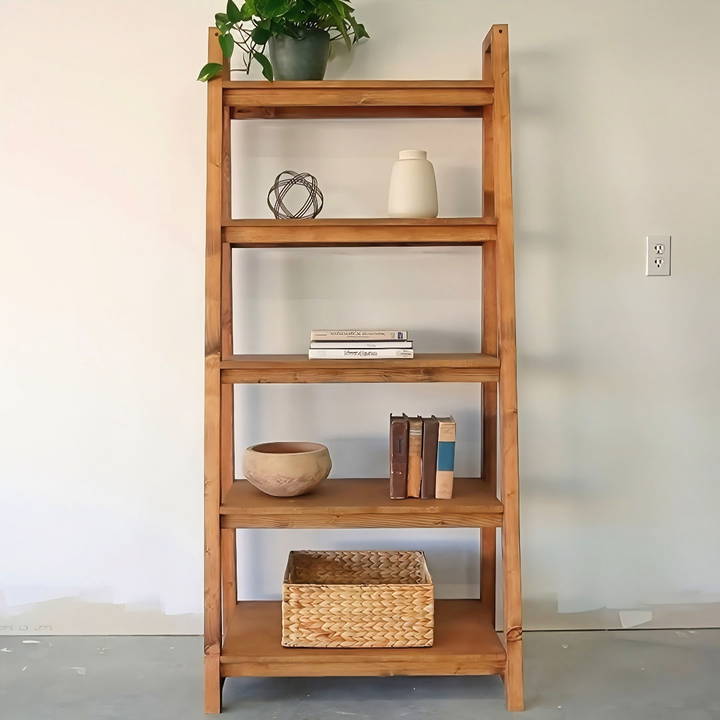
Interested in making a unique addition to your space? A DIY ladder bookshelf not only saves money but also gives you the freedom to customize it to your style. Follow our comprehensive guide and build a standout piece for any room.
Ready to get started? Explore the next section for detailed steps and tips.
Why a Ladder Shelf?
I was in need of a versatile storage solution that wouldn't take up too much space. Ladder shelves are perfect because they lean against the wall, have a slim profile, and the shelving increases in size from top to bottom, offering varied storage options. Plus, the unique design adds an aesthetically pleasing element to any d* écor.
Materials Needed
Before we dive into the building process, let's talk about the materials. You will need:
- Four 2x2s for the frame
- Four 1x2s for additional frame support and shelf brackets
- One sheet of * ¾ inch plywood for the shelves (or a combination of 1x8, 1x10, and 1x12 boards)
- Wood glue
- Pocket hole screws
- Optional: iron-on edge banding for plywood
Each material plays a crucial role in the stability and appearance of your shelf. The 2x2s and 1x2s construct a sturdy frame, while the plywood or board options give you flexibility for the shelves.
Tools Required
I used a variety of tools for this project:
- Miter saw
- Pocket hole jig
- Sander
- Iron (for edge banding)
A miter saw made cutting the angles for the frame effortless. A pocket hole jig was indispensable for making strong, hidden joints. The sander ensured a smooth finish, and the iron was used for applying edge banding to the plywood, giving it a neat look.
Step by Step Instructions
Learn how to build a DIY ladder shelf with our step-by-step guide. From cutting pieces to finishing touches, get detailed instructions for a perfect project.
Cutting the Pieces
Firstly, I cut the 2x2s and 1x2s to the required lengths. The back frame pieces were cut with square ends, while the front pieces had mitered ends at an 8.3-degree angle to build the slant of the ladder.
Assembly
Using wood glue and pocket hole screws, I started assembling the frame. The 2x2s formed the outer frame, and the 1x2s were installed as the bottom brace and the shelf supports. It was crucial to ensure that everything was square as I went along.
Adding the Shelves
I opted for plywood for the shelves because of its versatility and cost-effectiveness. After cutting the plywood to size, I applied iron-on edge banding to give it a finished look. Before attaching them to the frame, I applied a coat of stain to both the frame and the shelves.
Attaching the Shelves
I used wood glue to secure the shelves to the shelf supports on the frame. For added stability, you could use screws or nails, but I found that glue provided ample strength and kept the look clean.
Finishing Touches
After everything was assembled, I applied a few coats of polyurethane to protect the wood and enhance its natural beauty. This step is vital for ensuring your shelf withstands the test of time.
The Final Product
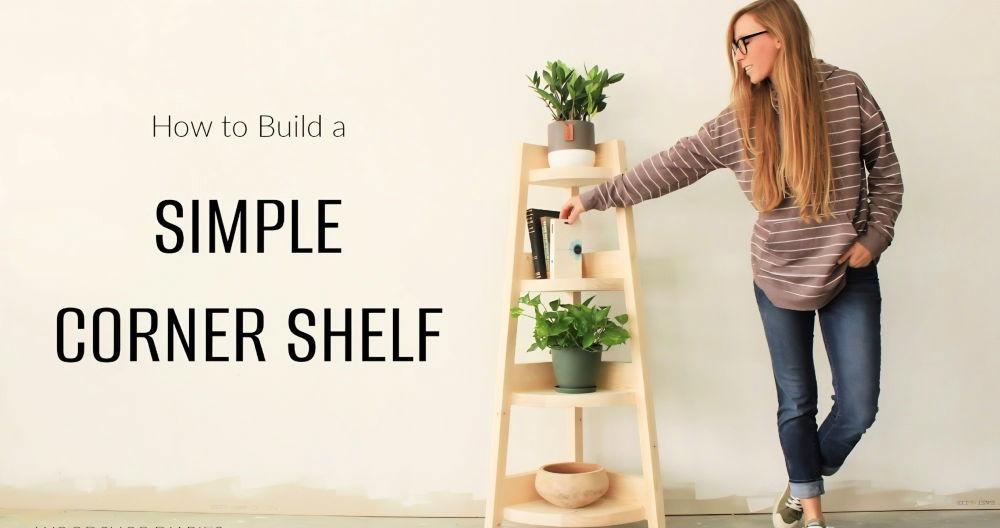
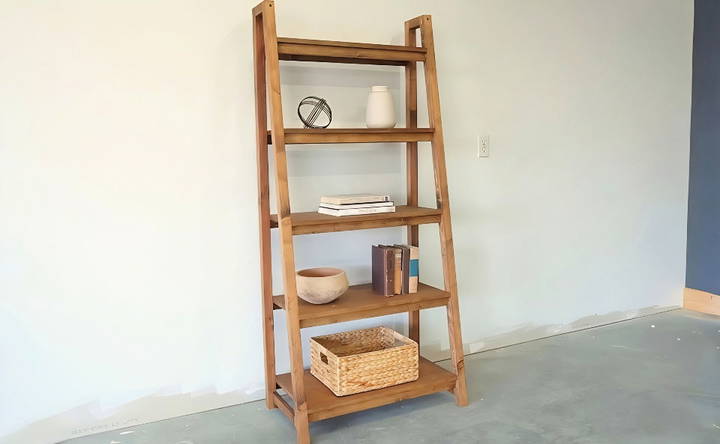
The ladder shelf turned out better than I could have hoped. It fits perfectly in my living room, offering additional storage and displaying some of my favorite items. Its modern yet rustic charm has drawn compliments from everyone who's seen it.
Design Customization Ideas for Your DIY Ladder Shelf
Building a DIY ladder shelf lets you enhance storage, personalize your decor, and build a unique home accent. Here are some custom design ideas to match your style and space:
Choose Your Style:
- Modern Minimalist: Opt for clean lines and a monochromatic color scheme. Use materials like metal or glossy finished wood.
- Rustic Charm: Go for a distressed wood finish and add elements like iron brackets or vintage knobs for a cozy, country feel.
- Industrial Edge: Incorporate metal pipes as the frame with reclaimed wood for shelves to achieve an industrial look.
Play with Colors:
- Neutral Palette: Stick to whites, grays, or natural wood tones for a shelf that complements any room.
- Bold Statement: Choose a vibrant color that stands out against your wall, like a deep blue or a bright yellow.
- Two-Tone: Paint the frame and shelves in contrasting colors for a modern twist.
Adjust the Size:
- Slim and Tall: Perfect for tight spaces, a slender ladder shelf can fit into narrow areas, offering vertical storage.
- Wide and Low: Ideal for large rooms or as a media stand, a wider shelf can hold more items and serve multiple purposes.
Add Functional Details:
- Hooks and Hangers: Attach hooks on the sides for hanging plants, keys, or mugs.
- Drawers or Baskets: Incorporate drawers at the lower shelves or add baskets for hidden storage.
- Foldable Design: Make your ladder shelf foldable for easy storage and portability.
Personalize with Decor:
- Themed Decorations: Decorate your shelf according to the seasons or holidays for a festive touch.
- Memorable Displays: Use the shelves to display photos, souvenirs, or collectibles that tell your story.
- Plant Haven: Turn your ladder shelf into a green oasis by arranging a variety of indoor plants.
Make your DIY project unique. Use these design ideas as a guide, mix and match to make a ladder shelf that serves its purpose and reflects your style.
Troubleshooting Common Issues with DIY Ladder Shelves
When embarking on a DIY ladder shelf project, you might encounter a few hiccups along the way. Here's a helpful guide to troubleshooting common issues, ensuring your project turns out just as you envisioned:
Unstable Shelf
- Solution: Ensure all joints are tightly secured. Use a level to check that shelves are horizontally aligned. If necessary, add additional support brackets or wall anchors for stability.
Wood Splitting
- Solution: Pre-drill holes to prevent wood from splitting when inserting screws. Choose the correct drill bit size and avoid over-tightening screws.
Paint or Stain Not Adhering
- Solution: Properly sand the wood before applying paint or stain. Clean off any dust and apply a primer if needed. Let each coat dry completely before adding the next.
Shelves Not Level
- Solution: Adjust the positioning of the shelves before securing them in place. Use shims under the shelf brackets if the floor or wall is uneven.
Visible Screws or Hardware
- Solution: Use wood filler to cover screw heads, then sand and paint over them. Select hardware that matches the color of your wood or paint for a seamless look.
Too Much Wobble
- Solution: If your ladder shelf wobbles, it may be due to an uneven floor. Place felt pads under the legs to even it out, or attach the shelf to the wall with brackets for added security.
Difficulty Assembling Alone
- Solution: DIY doesn't mean you have to do it all by yourself. Ask a friend or family member to help hold pieces in place while you secure them.
Incorrect Measurements
- Solution: Double-check all measurements before cutting or drilling. Remember the carpenter's rule: “Measure twice, cut once.”
Damaged Wood or Materials
- Solution: Inspect all materials before starting your project. If you find any defects, return them to the store for replacements.
Anticipating these issues and knowing how to address them helps you build a sturdy, beautiful ladder shelf. Patience and planning are key to DIY success.
Safety Precautions for Building a DIY Ladder Shelf
When making a DIY ladder shelf, safety is paramount. Here are some key safety precautions to keep in mind to ensure a smooth and safe building process:
Wear Protective Gear:
- Safety Glasses: Protect your eyes from dust and debris when cutting or sanding wood.
- Gloves: Wear sturdy gloves to safeguard your hands from splinters and sharp tools.
Use Tools Properly:
- Read Manuals: Before using any power tool, read the instruction manual carefully.
- Secure Materials: Clamp down wood or materials firmly before cutting or drilling.
Work in a Safe Area:
- Well-Lit Space: Choose a well-lit area to work in so you can clearly see what you're doing.
- Keep It Clean: Maintain a clean workspace that is free of clutter and loose items that could cause tripping.
Be Mindful of Electricity:
- Check Cords: Inspect power cords for damage before use and keep them away from cutting areas.
- Dry Hands: Always have dry hands when handling electrical tools to prevent shocks.
Lift Correctly:
- Proper Technique: Lift heavy materials with your legs, not your back, to avoid strain.
- Ask for Help: If an item is too heavy, don't hesitate to ask someone for assistance.
Stay Focused:
- Avoid Distractions: Keep your attention on the task at hand to prevent accidents.
- Take Breaks: If you feel tired or distracted, take a break and return to your project later.
Store Tools Safely:
- Tool Storage: After use, store tools in a secure place out of reach of children and pets.
- Sharp Items: Keep blades and drill bits covered when not in use.
Handle Chemicals with Care:
- Ventilation: Work in a well-ventilated area when using paints, stains, or adhesives.
- Follow Instructions: Use chemicals according to the manufacturer's instructions and dispose of them properly.
Follow these safety tips to build your DIY ladder shelf safely and enjoyably.
FAQs About DIY Ladder Shelf
Answers to frequently asked questions about DIY ladder shelf projects, materials, steps, and tips for building and styling your own ladder shelf.
To ensure stability:
Use thick boards for the frame to support the weight.
Make sure all joints are tight and well-secured with screws and glue.
Attach the shelf to the wall with brackets if it’s a leaning type.
For freestanding shelves, ensure the base is wider and the center of gravity is low.
Yes, you can customize the size of your ladder shelf to fit your space. Measure the area where you want to place the shelf and adjust the length of the sides and the width of the shelves accordingly. Remember, the shelves typically get narrower towards the top.
The best way to finish your ladder shelf is by:
Sanding the wood thoroughly to remove any rough spots.
Applying a primer if you’re going to paint it.
Using a paint or stain that complements your room’s decor.
Applying a sealant for extra protection, especially if the shelf will be used in a humid area like a bathroom.
When building your ladder shelf, always:
Wear safety goggles and a dust mask while cutting and sanding wood.
Follow the tool manufacturer's safety instructions.
Keep your workspace clean and organized to avoid accidents.
Make sure the ladder shelf is securely mounted to the wall to prevent tipping.
To add more storage to your ladder shelf, consider:
Installing hooks underneath the shelves for hanging items.
Adding small baskets or bins that can slide onto the shelves.
Using shelf dividers to organize items and maximize space.
Attaching magnetic strips or pegboards to the sides for additional hanging storage.
Concluding Thoughts
In conclusion, making your DIY ladder shelf is a fantastic way to add style and functionality to your home. You'll enjoy the process of crafting while getting a unique piece that suits your space perfectly. Building a DIY ladder bookshelf can be equally rewarding, offering both aesthetics and practicality for displaying your favorite books and decor. Follow the simple steps outlined, and you'll have a great DIY ladder shelf in no time.


