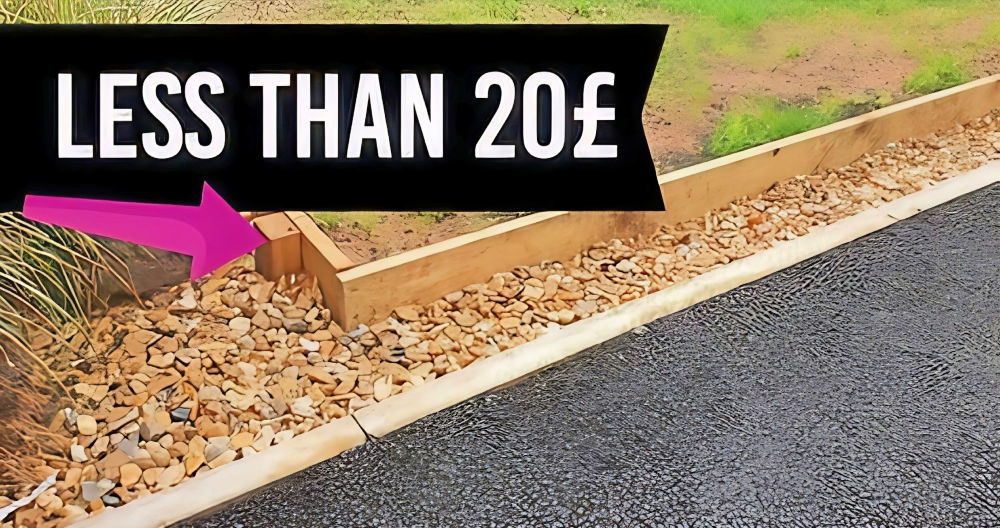
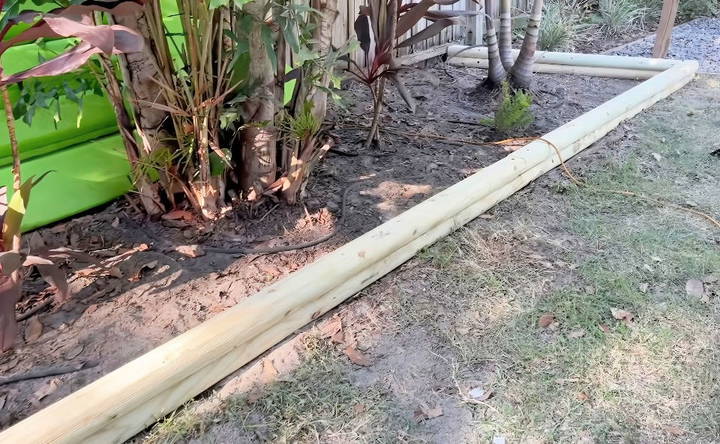
Making attractive DIY landscape timber edging for your garden does not have to be challenging. Learning the basics of landscape timber installation can transform your outdoor space, providing tidy garden beds or distinct pathways. This is a practical, affordable option that can add structure and style to any yard, enhancing its overall appearance.
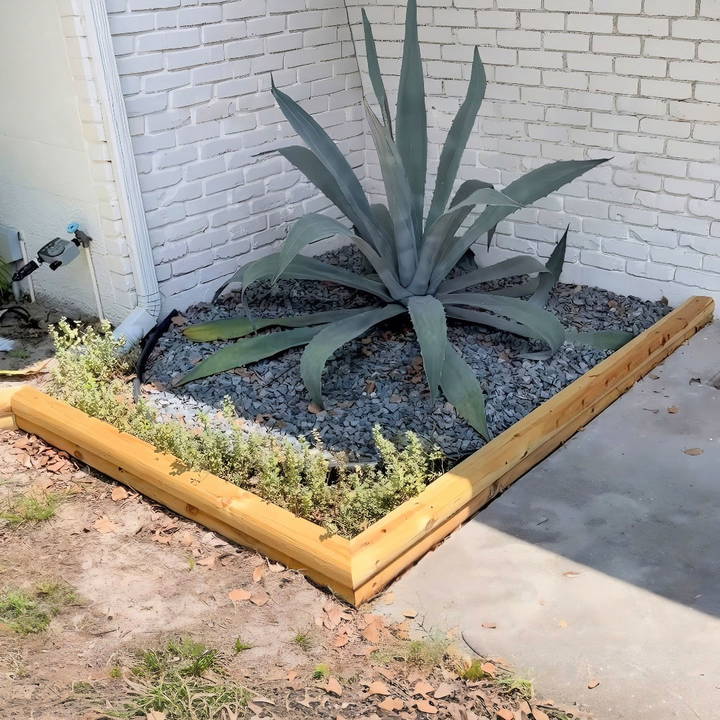
Clear instructions on how to install landscape timbers will guide you through every step. From selecting the best timbers to proper placement techniques, we'll walk you through the entire process. Whether you want to keep soil in place or build a rustic border, mastering this skill can offer many possibilities for your landscaping projects.
Interested in learning more? Explore the next section for detailed steps and essential tips on making your landscape timber edging.
Materials Needed
Before starting any project, it's essential to gather all necessary materials. This ensures a smooth workflow and less disruption. Here's what you'll need:
- Pressure-Treated Landscape Timbers: These are weather-resistant and durable, perfect for landscaping. You can get these at any home improvement store. I used 10 timbers for this project.
- Heavy-Duty Exterior Structural Screws: These screws are robust and ideal for outdoor projects. They come with a star bit for easy installation.
- Skill Saw: To cut the timbers to your required lengths and notches.
- Square: Useful for drawing accurate lines for cuts.
- Wood Bit: For drilling pilot holes.
- 5/8 Wood Paddle Bit: For countersinking the screw heads so they sit flush with the wood surface.
- Impact Drill: Makes inserting screws smooth and easy.
- Measuring Tape: Ensures precise measurement of wood pieces.
- Safety Gear: Gloves and safety goggles to protect your hands and eyes during cutting and drilling.
Step by Step Instructions
Learn how to build pretty DIY landscape timber edging with step-by-step instructions, from planning and cutting to layering and final adjustments.
1. Planning and Measuring
First, identify and clear the area in your yard where you want to install the landscape border. Measure the total length and width of the border. This will help you estimate the number of timbers you need.
2. Cutting the Timbers
- Measure and Mark: Start by measuring the timbers according to the required lengths. Use the square to draw straight, accurate lines for your cuts.
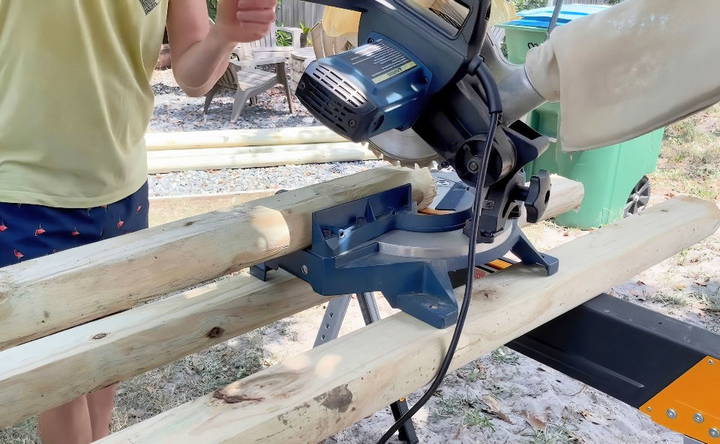
- Cut the Timbers: Using the skill saw, cut the timbers along the marked lines. Be cautious and always follow safety procedures while using power tools.
- Making Notches: To join two timbers end-to-end securely, cut a notch out of each timber. Measure half the thickness (usually 1 1/4 inches for a 2 1/2-inch thick timber), set your skill saw to this depth, and cut halfway down the width of the timber.
- Remove the Notch: Once horizontal cuts are made, make vertical cuts to remove the notched wood piece. This helps in securely fastening the timbers together.
3. Laying Out the First Layer
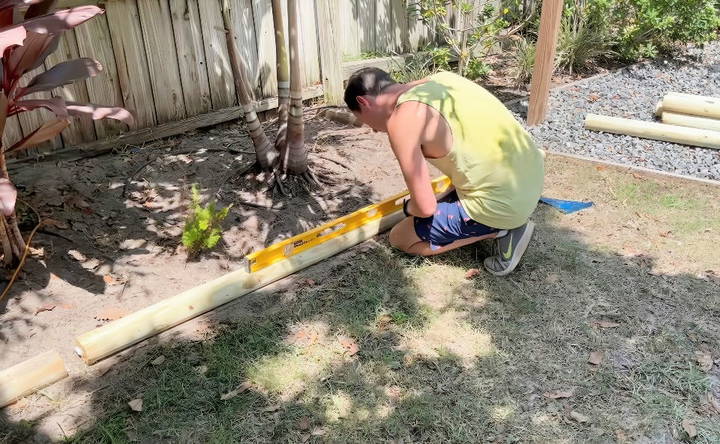
- Position the First Timber: Place the first timber along the edge of your designated area.
- Align and Adjust: Ensure the timber is flush with adjacent surfaces, like existing borders or fences. Adjust accordingly.
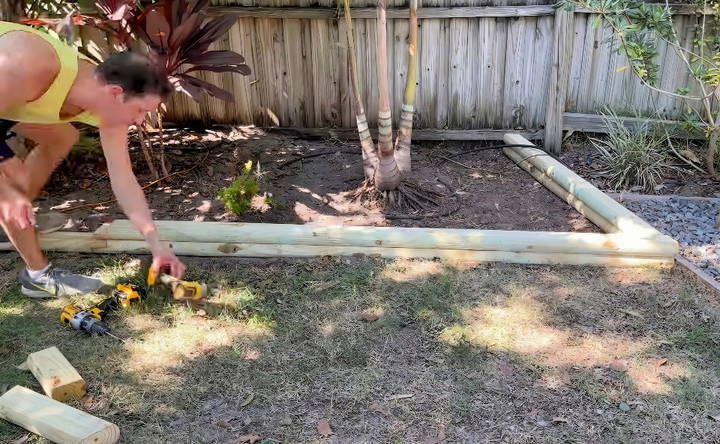
- Secure the First Timber: Drill pilot holes using the wood bit at intervals along the timber. Countersink these holes with the paddle bit, then insert the heavy-duty exterior structural screws using the impact drill.
4. Continuing the First Layer
- Notch and Connect Timbers: Where two timbers meet, align their notches and insert screws to secure them together. This builds a seamless, sturdy connection.
- Check Level and Alignment: Continuously check the alignment and level of each timber as you proceed to ensure an even and aesthetically pleasing border.
5. Adding the Second Layer
- Repeat Cutting and Measuring: Measure, mark, and cut each timber for the second layer, mirroring the first layer.
- Align Timber Layers: Place the second layer of timbers directly above the first, ensuring they are centered correctly.
- Secure Layers Together: Drill pilot holes and countersink holes for screws as before. Secure the second layer to the first using the structural screws.
6. Final Adjustments
Inspect the entire border, ensuring all screws are tight and each timber is securely in place. Make any necessary adjustments to the alignment and level.
7. Completion
Repeat the above steps for each section of your order until the project is complete. Stand back and admire your work! Not only have you buildd a functional landscape border, but you've also enhanced the beauty of your yard.
Tips for a Successful Project
- Eyeballing Angles: Don't fret about getting perfect angles. Eyeballing works fine for landscape projects.
- Using Scrap Pieces: Don't hesitate to use smaller scrap timber pieces where appropriate, especially for lower layers where they'll be less visible.
- Double-Check Measurements: Always double-check your measurements before cutting to avoid mistakes.
Common Mistakes in DIY Landscape Timber Edging
When embarking on a DIY landscape timber edging project, it's crucial to be aware of common pitfalls that could hinder the success and longevity of your edging. Here are some mistakes to avoid:
- Overlooking Timber Flexibility: If your garden design includes curves, ensure the timbers you select can bend to fit or can be cut without compromising their integrity.
- Ignoring Drainage: Proper drainage is vital. Timber edging can inadvertently act as a dam, leading to water pooling. Ensure there's a way for water to escape to prevent plant roots from rotting.
- Inadequate Ground Preparation: Before laying your timbers, the ground should be level and firm. An uneven base can lead to shifting and settling over time, which can distort the shape and effectiveness of your edging.
- Forgetting to Treat Wood: Use pressure-treated, rot-resistant wood suitable for ground contact. Untreated wood can decay quickly when exposed to soil and moisture.
- Neglecting to Secure Timbers: Secure your timbers with rebar or heavy-duty spikes. Without proper anchoring, they can move out of place due to soil pressure or heavy rainfall.
- Spacing Issues: When placing timbers, leave a slight gap between them to allow for wood expansion. Overlapping or tightly butting them together can cause buckling.
- Mismatched Height Levels: Keep the top of the timbers level for a clean, professional look. Variations in height can build tripping hazards and detract from the aesthetic appeal.
Avoiding these mistakes ensures successful, long-lasting timber edging, enhancing your garden. Careful planning and execution save time and resources.
Safety Tips for DIY Landscape Timber Edging
When working on a DIY landscape timber edging project, safety should be your top priority. Here are some essential safety tips to ensure your project is not only successful but also safe:
- Wear Protective Gear: Always wear gloves to protect your hands from splinters and cuts. Eye protection is also crucial when cutting wood or hammering stakes.
- Work in Good Conditions: Ensure you're working during daylight or in well-lit conditions to avoid mistakes that could lead to injuries.
- Check for Underground Hazards: Before digging, it's important to check for hidden objects or utilities underground. This can prevent damage to utility lines and potential injury.
- Use the Right Tools: Employ the correct tools for the job and make sure they are in good condition. Dull blades or improper tools can increase the risk of accidents.
- Follow Instructions: If using pressure-treated wood, follow the manufacturer's instructions for safe handling and installation, as some types of treated wood require specific safety measures.
- Lift Properly: When moving heavy timbers, lift with your legs, not your back, to prevent strain or injury. If a piece is too heavy, don't hesitate to ask for help.
- Secure the Area: Keep children and pets away from the work area. This prevents distractions and ensures they stay safe from any tools or materials that could be hazardous.
- Stay Hydrated: Take regular breaks and stay hydrated, especially when working in hot weather. This helps maintain focus and prevents heat-related illnesses.
By following these safety tips, you can enjoy a productive and accident-free experience while making beautiful landscape timber edging for your garden.
FAQs About DIY Landscape Timber Edging
Discover answers to common questions about DIY landscape timber edging, including installation tips, benefits, and maintenance advice.
Landscape timber edging is a popular method for making clean, attractive borders around garden beds, pathways, or lawns. It involves placing timbers in a line, at the edge of the area you wish to define, and securing them in place. This type of edging is cost-effective, durable, and adds a natural, rustic charm to your outdoor space.
When selecting timber for garden edging, it’s best to opt for redwood or cedar because they are naturally resistant to decay, insects, and weather conditions. Pressure-treated wood is also a good choice as it’s treated to resist rot and pests, ensuring a longer lifespan for your garden edging.
Yes, you can install landscape timber edging on a slope. You'll need to dig trenches that are deeper on the higher end to ensure the timbers sit level. For shallow slopes, dig about 8 inches deep, and for steeper slopes, go up to 12 inches. Use a level to ensure your timbers sit flat and build a stable border.
Maintaining your landscape timber edging involves:
Regularly checking for signs of rot or insect damage, especially if you haven't used pressure-treated wood.
Replacing damaged timbers as needed.
Keeping the edging clear of soil and mulch build-up to prevent moisture retention.
Applying a wood preservative or sealant every few years to extend the life of non-pressure-treated wood.
To ensure proper alignment of your landscape timbers, follow these steps:
Outline the area where you plan to install the edging using stakes and a mason's line or string.
Dig a trench along the outline, making sure it's level and the correct width for your timbers.
Place the timbers in the trench and use a level to check that they are straight and even.
Secure the timbers by drilling pilot holes and using galvanized screws or nails.
Backfill the trench with soil to hold the timbers in place and provide a clean finish.
Conclusion:
In conclusion, this DIY landscape timber edging is a simple yet effective way to enhance your garden's appearance. By following the steps to install landscape timbers properly, you can build beautiful, defined spaces. Enjoy the satisfaction of transforming your outdoor area with landscape timber edging.


