As someone always on the lookout for ways to personalize my living space without breaking the bank, I recently embarked on a project to make my own large textured wall art. Inspired by countless DIY tutorials and driven by a desire for a cheap canvas hack that still looked aesthetic and minimal, I discovered a process that transformed simple materials into a stunning piece of art.
Gathering the Materials
- Styrofoam Sheets: The foundation of our DIY canvas, chosen for its affordability and versatility.
- Styrofoam Adhesive: Essential for bonding the styrofoam sheets securely, ensuring our canvas has the strength to support our artwork.
- Fiberglass Mesh: This acts as a reinforcement layer, preventing the styrofoam base from cracking under the weight of the texture and paint.
- Plastering Trowel or Any Similar Tool: Needed to evenly spread the adhesive and later, the plaster, across the canvas.
- Plaster: Gives texture to our artwork, making it rich and visually captivating.
- White Acrylic Paint and Pigments: The basis of our painting, chosen for its versatility and ease of use.
- Wooden Frames: Adds a polished look to our DIY canvas, giving it the appearance of a high-end art piece.
Step-by-Step Guide
Discover how to make DIY large wall art with our step-by-step guide. Learn canvas preparation, texturing, painting, and finishing touches for the perfect final reveal.
Preparing the Canvas
- Layering the Styrofoam: I started by laying out the styrofoam sheets and applying styrofoam adhesive between each layer. Pressing them firmly together ensured they bonded well.
- Applying the Adhesive: Once the base was secure, I coated the entire surface with adhesive, using a plastering trowel to spread it evenly.
- Adding the Fiberglass Mesh: Cutting the mesh to size, I then placed it over the adhesive-coated styrofoam, pressing it into the adhesive with the trowel.
Texturing and Painting
- Sketching the Design: With a pencil, I sketched out my artwork directly on the canvas. This step was crucial for visualizing the final piece.
- Applying Plaster: Using a brush, I applied plaster across the sketched areas, making a textured layer. For different textures, I experimented with various application techniques.
- Painting: After the plaster dried, I mixed white acrylic paint with pigments to make a creamy, sandy texture, applying it over the plastered areas.
Finishing Touches
- Adding Depth with Plaster: To cover the entire canvas, I applied more plaster with a blade, smoothing it out for a uniform texture.
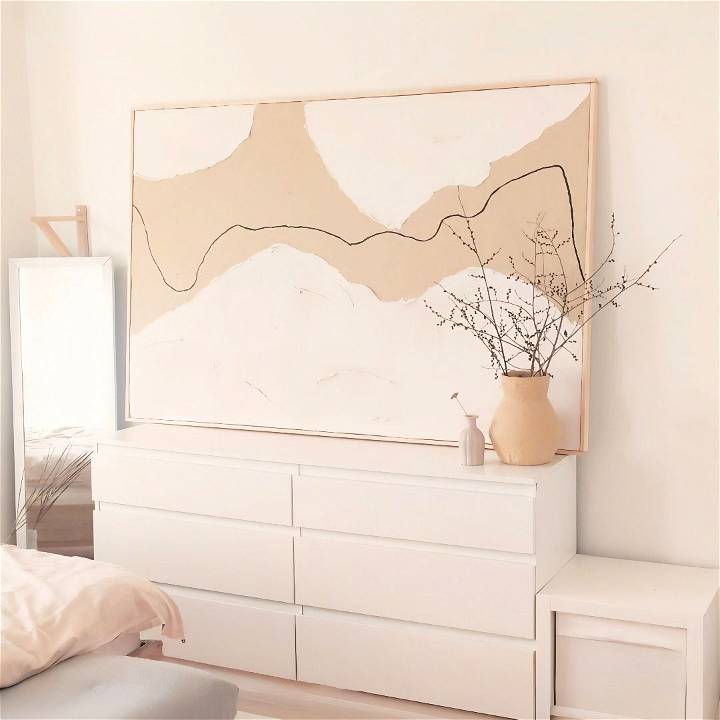
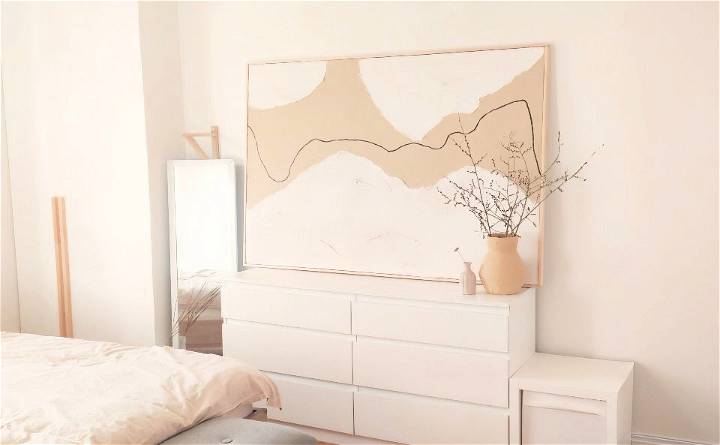
- Incorporating Contrast: Considering the minimal aesthetic, I decided to add a pop of contrast. After laying down a piece of black yarn for visualization, I traced over it with black acrylic paint.
- Framing: Lastly, I framed the canvas with wood, cutting pieces to size and securing them with adhesive and a hot glue gun for extra hold.
The Final Reveal
The moment of truth was breathtaking. The combination of textures, the contrast between the creamy base and the bold black line, all framed beautifully, exceeded my expectations. This project was a testament to the fact that with a little creativity and some basic materials, you can make something truly special and unique for your home.
Lessons Learned and Tips
- Patience is Key: The drying times, especially for the adhesive and plaster, are crucial to the project's success. Rushing can lead to cracks or weak bonds.
- Texture is Forgiving: Don't be afraid to experiment with plaster textures. The forgiving nature of these materials means you can always adjust as you go.
- Visualization Aids: Using something as simple as a piece of yarn to visualize elements before committing can save time and ensure you're happy with the final design.
- Personal Touch: This project reinforced the joy of making something that's not only beautiful but also reflects personal taste and creativity.
Customization Ideas for DIY Large Wall Art
When it comes to personalizing your space, making your own large wall art is a fantastic way to express your individual style and add a unique touch to your home. Here are some ideas to help you customize your DIY large wall art:
- Choose a Theme That Reflects Your Personality Start by selecting a theme that resonates with you. Whether it's a serene landscape, abstract patterns, or a collage of your favorite photographs, the theme should be something you love and are excited to see every day.
- Play With Colors Colors can dramatically alter the mood of a room. Pick a color palette that complements your existing decor or go bold with contrasting colors for a statement piece. Remember, there's no right or wrong choice—it's all about what makes you happy.
- Incorporate Textures and Materials Mixing different textures and materials can add depth and interest to your artwork. Consider using fabric, wood, metal, or even recycled materials to make a piece that's not only visually appealing but also tactile.
- Add Personal Touches Personalize your artwork by incorporating elements that have special meaning to you. This could be anything from handwritten notes, quotes, or stenciled letters to items like seashells collected from a memorable beach vacation.
- Make It Interactive Consider making a piece of art that you can interact with. For example, a chalkboard paint section where you can doodle or write messages, or a magnetic area to display notes and photos.
- Think Outside the Frame Who says art has to be framed? Try making a three-dimensional piece that extends beyond the traditional boundaries of wall art. This could be a hanging installation or a series of smaller pieces that come together to form a larger image.
- Keep It Changeable Design your artwork so that it can evolve with your tastes. Use elements that can be easily updated, like a photo grid that allows you to switch out images, or a fabric background that can be changed seasonally.
By adding these customization ideas, you'll make a big wall art piece that shows your style. The best DIY projects make you happy every time you see them. Enjoy crafting!
FAQs About DIY Large Wall Art
Discover common FAQs about making DIY large wall art. Find answers to your questions and unleash your creativity with these helpful tips and tricks.
How can I choose the right size for my wall art?
Measure the wall space where you plan to hang your art. A general rule is that the art should cover about two-thirds to three-quarters of the wall. If you're unsure, use painter's tape to outline the size on the wall before you begin.
Can I make large wall art if I'm not an experienced artist?
Absolutely! DIY wall art is about creativity and personal expression. You can use simple techniques like abstract painting, geometric patterns, or even a collage of photos or magazine cutouts to make something unique without needing advanced skills.
What are some budget-friendly ideas for large wall art?
Budget-friendly ideas include enlarging a favorite photograph at a print shop, painting over thrift store canvases, or using recycled materials. You can also make a large impact by arranging a series of smaller, inexpensive frames in a grid.
How do I hang large wall art securely?
For heavy or large pieces, use wall anchors and screws appropriate for your wall type. For lighter pieces, picture hanging strips or hooks can work well. Always ensure the art is level and securely fastened to avoid accidents.
How can I protect my DIY wall art from damage?
To protect your artwork, apply a clear sealant or varnish to shield it from dust and sunlight. If it's a fabric piece, consider framing it behind glass. Keep the art away from direct sunlight and high-humidity areas to prevent fading and warping.
Conclusion
Embarking on this DIY large wall art project was a rewarding journey, filled with learning and creativity. Not only did I save money by making my own canvas, but I also ended up with a piece of art that adds character and warmth to my home. For those looking to personalize their space, I highly recommend giving this project a try. With some simple materials and a bit of patience, you too can make something truly unique and beautiful.


