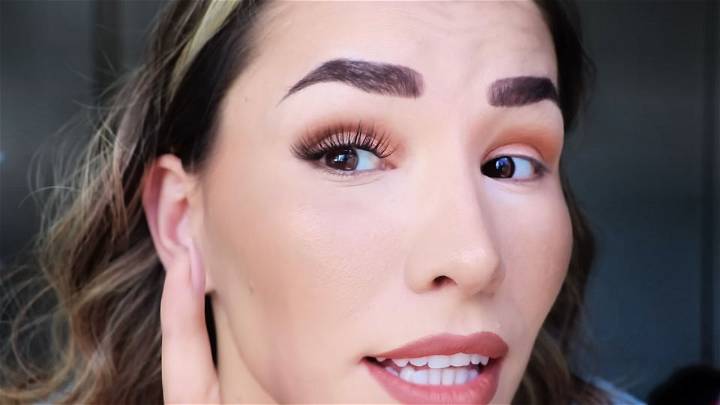
As someone who has struggled with the upkeep of professional eyelash extensions, I stumbled upon a life-changing trick that has completely transformed my daily routine. The best part? It's incredibly easy, anyone can master it, and you won't believe how much time and money it saves you. I'm excited to guide you through the step-by-step process of applying DIY permanent eyelash extensions from the comfort of your own home.
Why Try DIY Eyelash Extensions?
Professional eyelash extensions can be costly, time-consuming, and, if I'm honest, a bit of a hassle. I've lost count of the times I've woken up with an eyelash poking my eye or dealt with them flapping wildly on a breezy day. Plus, driving with an eyelash in your eye? Dangerous!
Enter the game-changer: DIY eyelash clusters. They're affordable, look incredibly natural, and you can apply them in under 10 minutes. Let's dive into how you can achieve that salon-look from home.
Materials Needed:
- Eyelash Clusters: I prefer the soft, natural-looking ones available on Amazon. They're not overly wispy, thick, or artificial in appearance.
- Lash Bond: A reliable lash bond ensures longevity. I recommend the Lashify Bond for its durability and affordability.
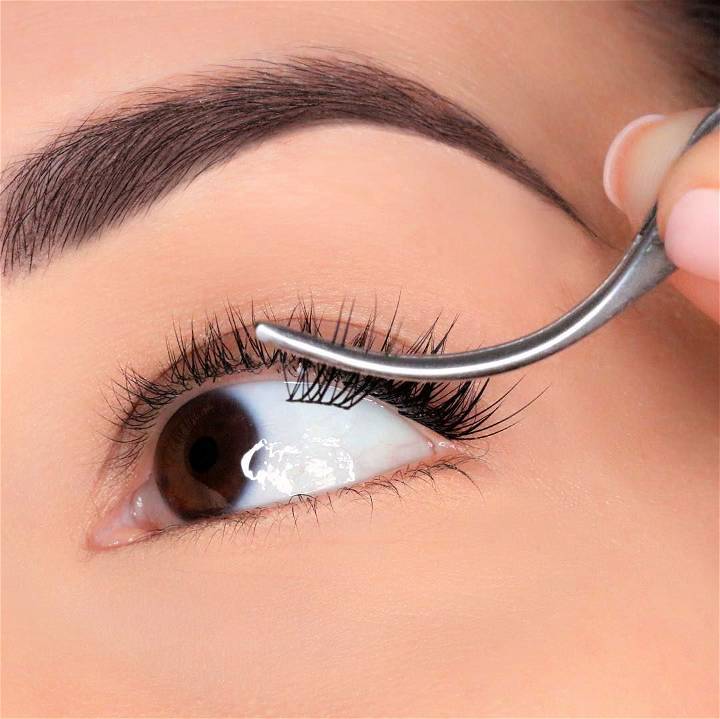
- Tweezer: No need for anything special; any tweezer you have lying around will do the trick.
- Sealant (Optional): For an extra hold, the Lashify Seal can make the lashes last a tad longer.
Why Each Item Is Key:
- Eyelash Clusters: These are the cornerstone of your DIY process, offering the natural look we're aiming for.
- Lash Bond: Essential for keeping your lashes in place, ensuring they last up to a week or more.
- Tweezer: Precision application is key to natural-looking lashes, and a tweezer is your best friend here.
- Sealant: Not mandatory, but great for adding an extra layer of durability to your lash application.
Step-by-Step Guide:
Learn how to do DIY lash extensions with this step-by-step guide. Prepare, apply, bond, and seal for beautiful lashes at home.
1. Prepare Your Lashes
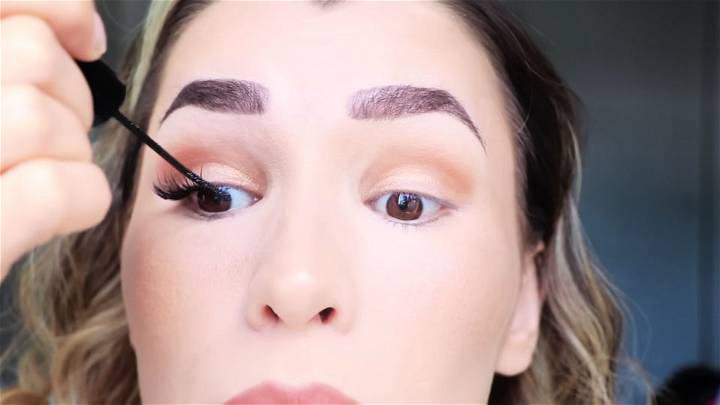
Lay out the eyelash clusters for easy access. Apply the lash bond to your natural lashes as you would mascara, ensuring even coverage.
2. Apply the Clusters
Starting from the outer corner of your eye, use the tweezer to carefully place each cluster as close to your lash line as possible without touching the skin. This step is critical for a seamless look.
3. Bond Them Together
Once all clusters are in place, pinch them gently with the tweezer to bond them naturally with your lashes.
4. (Optional) Seal the Deal
If you've opted for a sealant, now's the time to apply it. This can bolster the bond, making your lashes last through more wear and tear.
Tips for Success:
- Be patient: Take your time with each step for the most natural-looking results.
- Customize: Feel free to mix and match cluster sizes for a custom lash look that perfectly frames your eyes.
- Care and Maintenance: Gently wash your clusters if you plan to reuse them, and never pull on your lashes to remove them. Use a dedicated remover if necessary.
Why This Changed My Life
Switching to DIY eyelash extensions has not only saved me countless hours at the salon but also given me the confidence that comes with knowing my lashes look flawless every day. Plus, the savings are nothing to blink at, either!
The best part is waking up every morning feeling ready to go without worrying about my lashes throughout the day. Whether I'm heading to a wedding or just running errands, I constantly receive compliments and questions about my lashes. And honestly, there's nothing better than the pride in saying, “I did them myself!”
Troubleshooting Common Issues with DIY Lash Extensions
When it comes to DIY lash extensions, it's not uncommon to run into a few hiccups along the way. Whether you're a seasoned pro or trying out lash extensions for the first time, here's a helpful guide to troubleshoot common issues.
Lashes Falling Out Prematurely
Why it happens:
- Improper application: Not applying the lashes correctly can lead to them falling out sooner than expected.
- Oil-based products: Using oil-based makeup or removers can weaken the adhesive bond.
- Natural lash cycle: Your natural lashes have a growth cycle, and extensions may shed with them.
How to fix it:
- Check the technique: Make sure you're applying the extensions as close to the lash line as possible without touching the skin.
- Use oil-free products: Switch to oil-free makeup and removers to protect the adhesive.
- Regular maintenance: Fill in gaps every 2-3 weeks to keep your lashes looking full.
Irritation or Discomfort
Why it happens:
- Sensitive skin: Some people may have reactions to the adhesive used for lash extensions.
- Allergies: Ingredients in the adhesive or lash materials can trigger allergic reactions.
How to fix it:
- Patch test: Always do a patch test with the adhesive on your skin before full application.
- Consult a professional: If irritation persists, seek advice from a professional lash technician or dermatologist.
Difficulty in Application
Why it happens:
- Complexity: Applying lash extensions requires a steady hand and patience.
- Lack of tools: Not having the right tools can make the application process more challenging.
How to fix it:
- Practice: Like any skill, practice makes perfect. Don't get discouraged if it takes a few tries to get it right.
- Invest in tools: Quality tweezers and a good magnifying mirror can make a big difference.
Aftercare and Maintenance Tips for DIY Lash Extensions
Proper aftercare and maintenance are essential for maximizing the life of your DIY lash extensions and ensuring the health of your natural lashes. Here's a guide to help you keep your lash extensions in top condition.
The First 24 Hours: Initial Care
Critical Steps:
- Avoid moisture: Keep your lashes completely dry to allow the glue to cure.
- Be gentle: Avoid touching or rubbing your eyes to prevent dislodging the extensions.
Why It Matters:
- Bonding time: The adhesive needs adequate time to bond with your natural lashes.
- Lash integrity: Rough handling can weaken the extensions and cause them to fall out.
Daily Maintenance: Keeping Lashes Pristine
Routine Care:
- Cleanse carefully: Use a gentle, oil-free cleanser and a soft brush to clean your lashes.
- Comb through: Gently brush your lashes daily with a clean spoolie to maintain alignment.
Why It Matters:
- Prevent buildup: Regular cleansing prevents the accumulation of debris and oils.
- Maintain appearance: Combing helps retain the neat, fanned-out look of your extensions.
Long-Term Upkeep: Sustaining Your Look
Consistent Follow-Up:
- Schedule fills: Get touch-ups every 2-3 weeks to replace shed lashes.
- Assess lash health: Keep an eye on your natural lashes for any signs of distress.
Why It Matters:
- Aesthetic maintenance: Regular fills keep your lash line looking full and even.
- Natural lash care: Monitoring the condition of your natural lashes is crucial for ongoing extension wear.
By adhering to these aftercare and maintenance tips, you can enjoy your DIY lash extensions for longer while keeping your natural lashes healthy.
FAQs About DIY Lash Extensions
Get all your questions about DIY lash extensions answered in one place. From application to maintenance, find out everything you need to know.
Can I apply lash extensions on myself?
Yes, you can apply lash extensions on yourself, although it requires patience and practice. It's important to have the right tools, like precision tweezers and a good adhesive, and to follow a step-by-step guide to ensure proper application.
How long do DIY lash extensions last?
DIY lash extensions typically last 2 to 4 weeks, depending on the quality of the adhesive used and how well you take care of them. Regular maintenance and touch-ups can help prolong their lifespan.
Are DIY lash extensions safe?
When applied correctly, DIY lash extensions are generally safe. However, it's crucial to perform a patch test with the adhesive to check for any allergic reactions and to use high-quality, safe materials.
How do I remove lash extensions safely at home?
To remove lash extensions safely, use a specialized lash glue remover. Apply the remover according to the instructions, wait for the adhesive to dissolve, and gently slide the extensions off without pulling.
Can I wear makeup with lash extensions?
Yes, you can wear makeup with lash extensions, but it's best to use oil-free products and avoid waterproof mascara, as these can weaken the adhesive and cause the extensions to fall out prematurely.
Final Thoughts
The world of DIY beauty can be incredibly empowering. This simple yet transformative eyelash trick is a testament to how something small can make a big difference in your daily routine. I encourage you to give it a try, tweak the process to fit your style, and enjoy the freedom of easy, beautiful lashes every day.


