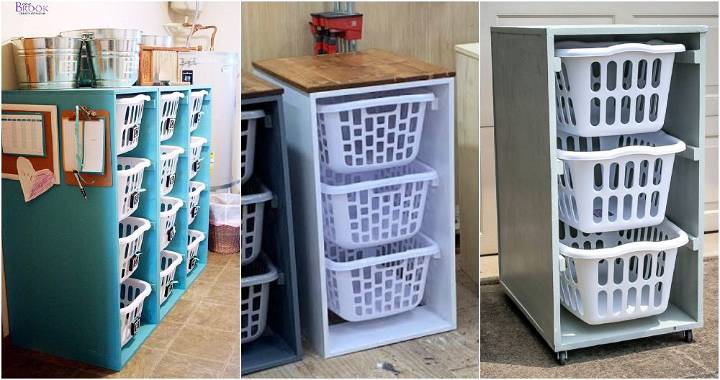
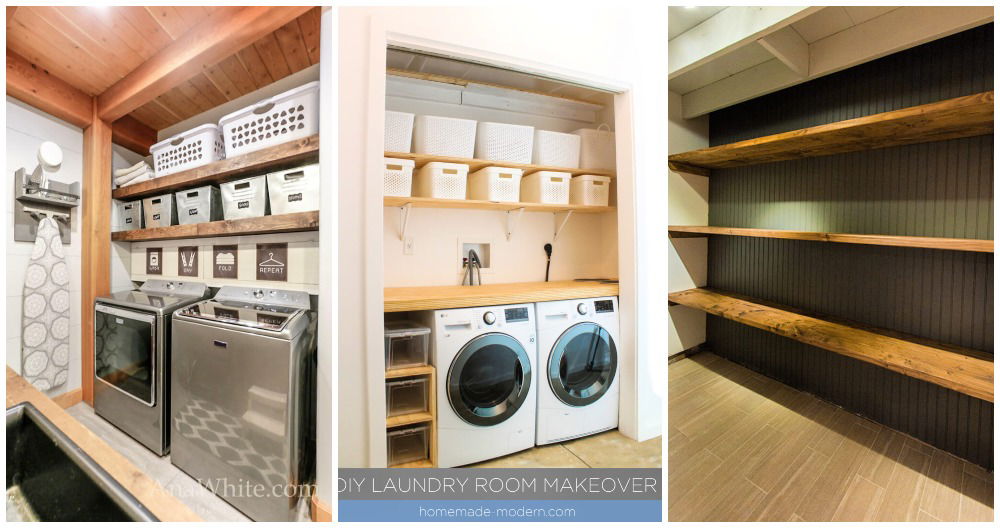
Building an easy DIY laundry basket holder was one of the best decisions I made for my home. I was always struggling to keep the laundry room neat, with clothes strewn everywhere. Building the holder was simple and didn't take much time. With just a few materials like wood, screws, and a bit of paint, I turned a chaotic space into an organized haven.
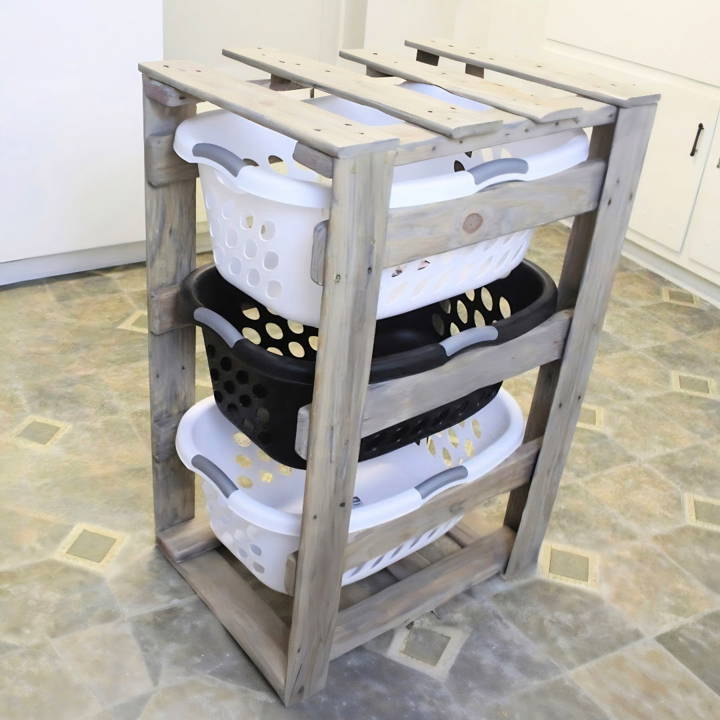
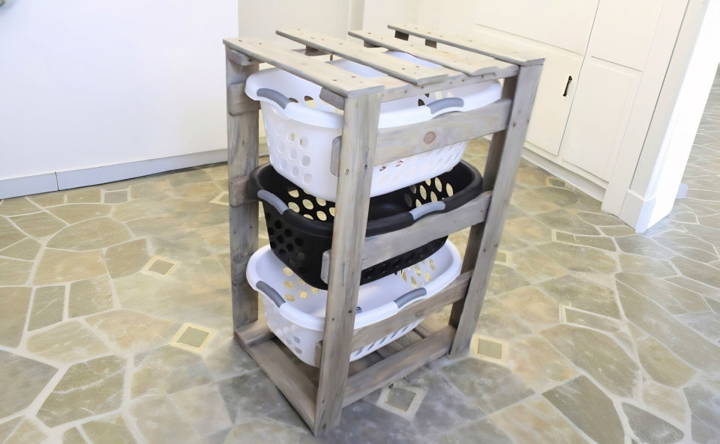
The DIY laundry basket holder not only organized my space but also made laundry day easier. I could sort clothes directly into baskets labeled for whites, colors, and delicates. This made washing more efficient and less of a chore. If your laundry room needs a bit of organization, this easy project can make a big difference.
I'm helping with this guide so you can start your own DIY laundry basket holder project and enjoy an organized laundry space. With clear steps and simple materials, you can build a laundry basket holder that fits your needs and brings order to your laundry area. Give it a try, and see how much easier your laundry routine can become!
Materials You'll Need
- Old Pallets: The soul of this project. Choosing pallets was all about giving new life to what otherwise might be wasted. They're sturdy and lend a rustic charm to the finished product.
- Sander and Sandpaper: Essential for smoothing out the rough pallet wood. It prepares the wood for further processing and ensures your laundry basket holder is splinter-free.
- Saw: A miter saw for precise cuts and a jigsaw for adjustments.
- Drill and Screws: For assembling the pieces. Ensure your screws are the right length to bind the woods without poking out.
- Wood Glue: Just in case of splits or cracks. A good quality wood glue can save the day.
- Stain and Polyurethane: To finish and protect your creation. We went for a weathered grey stain to match our decor, but choose what matches yours.
- Framing Square, Clamp, and Measuring Tape: For accuracy in measurement and assembly.
Why These Materials?
The choice of materials was driven by the objectives to repurpose, to withstand daily use, and to look aesthetically pleasing. Each material plays its part in achieving these goals, from the structural integrity offered by the pallets to the aesthetic and protective qualities of the stain and polyurethane finish.
Step by Step Instructions
Discover easy, step-by-step instructions for a DIY laundry basket holder. Maximize space and organize laundry efficiently with our detailed guide!
1. Preparing the Pallets
The journey began with dismantling the pallets, a task that requires patience. I aimed for both flat boards for the shelves and bulkier pieces for the frame. Sanding came next. A thorough sanding ensured a smooth touch and removed any old paint or splinters.
2. Cutting to Dimensions
Measurements were crucial. The size of the baskets determined the dimensions of the holder. Precision in cutting ensured that the baskets would fit snugly and that the holder would be stable. My tip here is to measure twice and cut once — a mantra for success.
3. Assembly with Foresight
As I progressed to assembly, the realization hit that a balance between sturdiness and aesthetics was key. Using a framing square helped maintain right angles, ensuring the structure's integrity. Pilot holes before screwing prevented the wood from splitting. Remember, wood glue is your friend for any unforeseen splits.
4. Adjusting on the Fly
Not everything went according to the initial plan. The beauty of DIY projects lies in the freedom to modify. When I realized the holder was too tall, a swift decision was made to cut down the height. This adaptability is something to embrace.
5. The Finishing Touch
Choosing the right stain and polyurethane was about more than just protection; it was about completion. The weathered grey stain we chose turned the holder into a piece that didn't just serve a purpose but also complemented our laundry room's theme.
Learning From My Mistakes
Here are some lessons from my venture:
- Pallet Selection: Not all pallets are buildd equal. Choose wisely, looking for less damaged pieces.
- Over-sanding: While ensuring the wood is smooth is important, there's a point where it becomes counterproductive. Learn to stop when it's just right.
- Test Fitting: Always test fit your pieces before final assembly. It saves time and effort in adjustments later.
Customization Ideas for Your DIY Laundry Basket Holder
Discover unique DIY laundry basket holder ideas to add functionality and personal style to your home decor. Customize it to fit your needs and taste.
Choose Your Material Wisely:
- Wood: For a classic look, choose wood. It's sturdy and can be painted or stained to match your decor.
- PVC Pipes: Lightweight and easy to work with, PVC pipes can be a great choice for a modern look.
- Metal Frames: If you're going for an industrial vibe, metal frames can be both chic and durable.
Play with Colors and Patterns:
- Paint: A fresh coat of paint can transform your holder. Go bold with bright colors or choose soft pastels for a calming effect.
- Decals: Use wall decals or stickers to add patterns without the commitment of paint.
- Fabric: Cover the exterior with fabric for a cozy, upholstered feel. Choose a washable fabric for easy cleaning.
Add Functional Features:
- Wheels: Attach casters to the bottom for easy mobility, especially useful for larger baskets.
- Lids: Consider adding a lid to keep laundry out of sight. A flip-top lid can double as a folding table.
- Pockets: Sew or attach pockets on the sides for storing laundry essentials like detergent and softener.
Incorporate Decorative Elements:
- Handles: Upgrade the handles with leather straps or rope for a rustic touch.
- Embellishments: Add decorative elements like beads, shells, or embroidery to reflect your personality.
- Lighting: Attach a small LED light inside for those late-night laundry sessions.
Think Outside the Basket:
- Multipurpose Design: Design your holder to serve multiple functions, like doubling as a bench or a storage unit for other items.
- Shape and Size: Don't be confined to traditional shapes. Experiment with oval, square, or even hexagonal baskets.
- Stackable Units: Build a modular system that can be stacked or rearranged according to your space and needs.
Make your DIY project unique. These ideas are just the start. Be creative and try new things. Your laundry basket holder should be practical and reflect your style.
Advanced Techniques for Your DIY Laundry Basket Holder
For those who have a bit more experience with DIY projects and are looking to challenge themselves, here are some advanced techniques to consider when making your laundry basket holder:
Incorporate Joinery Skills:
- Dovetail Joints: For wooden basket holders, mastering dovetail joints can provide both strength and a touch of craftsmanship.
- Mortise and Tenon: This classic joint has stood the test of time for a reason. It's strong and, when done well, looks fantastic.
Experiment with Materials:
- Mixed Media: Combine wood with metal or glass for a contemporary look. For example, use a metal frame with wooden slats for the basket area.
- Reclaimed Materials: Use reclaimed wood or metal for an eco-friendly approach that adds character.
Add Smart Features:
- Sensor Lights: Install motion-activated lights that turn on when you approach the basket in the dark.
- Weight Sensors: Integrate a weight sensor to alert you when the basket is full and needs attention.
Try Advanced Woodworking Techniques:
- Steam Bending: Build curved wooden handles or sides by learning steam bending techniques.
- Wood Inlays: Add decorative inlays to the sides of your basket holder for a custom, high-end finish.
Innovative Design:
- Collapsible Design: For those with limited space, design a holder that can be easily collapsed and stored away when not in use.
- Adjustable Size: Build a holder with adjustable sides to accommodate different volumes of laundry.
Focus on Finishing Touches:
- High-Quality Finish: Use finer grit sandpaper and high-quality stains or paints for a smooth, professional finish.
- Decorative Hardware: Select unique knobs or pulls for any drawers or compartments in your holder.
Using these techniques, you'll build a functional laundry basket holder that also shows your woodworking skills and creativity. DIY beauty is in the details, so perfect each part of your project.
Troubleshooting Common Problems
When crafting a DIY laundry basket holder, you might encounter a few hiccups along the way. Here's a guide to troubleshooting some common problems, ensuring your project stays on track:
The Holder is Wobbly
- Solution: Check all connections and tighten any loose screws or joints. If you're using wood, ensure all pieces are cut straight and are the correct length.
The Basket Doesn't Fit
- Solution: Measure your basket's dimensions carefully before building. If it's too late, adjust the holder's size by trimming the frame or adding spacers.
Difficulty Moving the Holder
- Solution: If you've added wheels but they're not rolling smoothly, check for obstructions and ensure they're securely attached. Consider upgrading to higher quality casters if necessary.
Wood is Splitting
- Solution: Pre-drill holes to prevent splitting when inserting screws, especially near the ends of boards. Use the correct screw size and type for your material.
Paint or Stain Isn't Adhering
- Solution: Sand the surface to remove any finishes or debris. Apply a primer suitable for your material before painting or staining.
The Holder Isn't Level
- Solution: Use a level during assembly to ensure all parts are even. Adjust leg lengths or add shims under the legs if needed.
The Holder is Too Heavy
- Solution: If portability is an issue, consider using lighter materials like PVC or aluminum. You can also redesign the holder to be more compact.
Fabric Covers are Sagging
- Solution: Ensure the fabric is taut when attaching it. Use a sturdy frame, and consider adding a support in the middle if the fabric is still sagging.
The Holder Looks Unfinished
- Solution: Add trim or edge banding for a polished look. Sand rough edges and apply a final coat of paint or sealant.
By anticipating and solving these common issues, you'll build a sturdy, functional, and beautiful laundry basket holder that will serve you well.
FAQs About DIY Laundry Basket Holder
Discover faqs about DIY laundry basket holders, and learn tips and benefits for making your own laundry organization solution at home.
You can customize your laundry basket holder by:
Choosing the size that fits your space and baskets
Selecting a color scheme that matches your decor
Adding labels or decorations to personalize it
Incorporating additional features like hooks or shelves for extra storage.
The benefits include:
Space-saving: Keeps laundry organized and off the floor
Cost-effective: Can be cheaper than buying a pre-made holder
Customizable: Tailored to fit your specific needs and preferences
Easy sorting: Assign baskets for different laundry types or family members.
Yes, adding casters to your laundry basket holder is a popular option. It allows for easy movement, making it convenient to transport laundry or clean behind the holder. Ensure the casters are securely attached and suitable for the holder’s weight.
Absolutely! There are various online resources that offer free PDF plans and step-by-step guides. These resources provide detailed instructions, materials lists, and tips for constructing your own laundry basket holder. You can find such guides on DIY and crafting websites.
To ensure your laundry basket holder is stable:
Use sturdy materials: Opt for high-quality plywood and solid wood for the frame.
Reinforce joints: Use wood glue in conjunction with screws or bolts at all joints.
Square your corners: Use a carpenter's square to ensure all corners are 90 degrees during assembly.
Test the weight capacity: Gradually add weight to test the holder's strength before full use.
Secure the base: If adding casters, make sure they are rated for the weight and are evenly distributed.
Final Thoughts
In conclusion, building an easy DIY laundry basket holder is a practical and fun way to organize your laundry space. Anyone can build it with just a few simple tools and materials. Your laundry basket organizer will help keep your laundry area tidy and efficient. So why wait? Start your DIY laundry basket holder project today and enjoy a cleaner, more organized home.


