The siren song of DIY projects often lures me into ambitious endeavors—this time, it was building a lift-top coffee table. Inspired by other creators, like Ana White, I embarked on this journey fueled by a desire for both functionality and style in my living room. Here, I document my step-by-step process, incorporating practical insights and valuable lessons learned along the way. This guide is imbued with my personal experience and is designed to empower you to replicate this project successfully.
Materials and Their Purpose
Required Tools and Materials:
- Lumber (1x6s for the top; 2x2s for the frame): Selected for their sturdiness and aesthetic appeal.
- Chop Saw/Circular Saw/Jigsaw: Essential for making precise cuts.
- Drill and Self-tapping Screws: For assembling the pieces together.
- Wood Glue: To strengthen the joints beyond what screws alone can provide.
- Lift-Top Mechanism: The heart of the project, transforming a simple table into a versatile piece of furniture.
- Stain and Paint: To finish the table according to personal decor preferences.
Why Each Material Matters:
Choosing straight, quality lumber minimizes warping and ensures a smooth, stable build. The saw is vital for precision, which directly affects the outcome's quality. Self-tapping screws are chosen for their ease of use, eliminating the need for pre-drilling. Wood glue is non-negotiable for durable joints. The lift-top mechanism is what sets this project apart, enabling the transformation of the table. Finally, stain and paint not only protect the wood but also offer an opportunity to match the table to your room's aesthetic.
The Building Process
Learn how to build your own DIY lift top coffee table with our easy step-by-step guide. From cutting boards to finishing touches, we've got you covered!
Step 1: Cutting the Boards
The adventure begins with cutting the lumber to size. Accuracy here impacts everything that follows. I dedicated extra care to this step, ensuring each piece matched the dimensions laid out in the plans.
Step 2: Assembling the Frame
With all pieces cut, assembling the frame was up next. I drilled holes and used self-tapping screws to attach the pieces, applying wood glue at every joint for added stability. The key here was patience; taking the time to align everything properly paid off in a sturdy frame.
Step 3: Choosing and Attaching the Top Planks
Selecting the 1x6s for the table top was a process of matching grains and colors. I laid them next to one another, adjusting for the best overall look before securing them together. Initially, I attached them using a method recommended for those without a pocket hole jig—gluing and nailing a support piece underneath. However, if you have access to one, it simplifies the process considerably.
Step 4: Installing the Lift-Top Mechanism
The lift-top mechanism installation was an exercise in precision. Following the instructions was crucial, as was taking my time to ensure accurate placement. I encountered a bit of trial and error here, but ultimately, accuracy in this step was fundamental for smooth operation.
Step 5: Finishing Touches
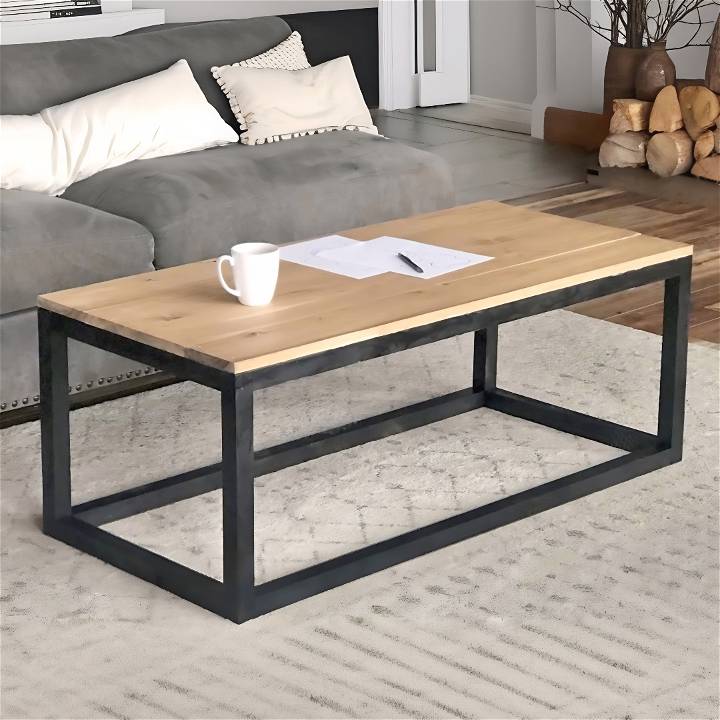
After the mechanism was installed, I moved on to staining and painting. The top received a golden oak stain for a warm, neutral look, while the base was painted black for contrast. The finishing touches not only enhanced the table's appearance but also provided necessary protection to the wood.
Adjustments and Enhancements
Throughout the build, I made a few adjustments based on my own needs and space. Most notably, I added a bottom shelf to increase the table's weight and functionality. This additional step addressed the issue of the table being too lightweight and added extra storage—a win-win in my book.
Design Customization Ideas for Your DIY Lift Top Coffee Table
Building a lift top coffee table that perfectly fits your home's style is not only a fun DIY project but also a great way to add a personal touch to your living space. Here are some design customization ideas that can help you tailor your coffee table to match various decor styles.
For the Modern Minimalist
If your home has a modern minimalist design, consider building a lift top coffee table with clean lines and a sleek finish. Use a neutral color palette like whites, blacks, or grays, and opt for a high-gloss finish to give it that contemporary feel. Incorporate hidden storage compartments to maintain the uncluttered look that is signature to this style.
Rustic Charm Enthusiasts
For those who love the rustic aesthetic, choose materials that reflect natural beauty. Reclaimed wood is an excellent choice for its unique character and sustainability. Consider leaving the wood lightly stained to showcase its natural grain and imperfections. Adding iron hardware can complement the rustic look while providing sturdy support for the lift mechanism.
Industrial Edge
An industrial-themed lift top coffee table can be a statement piece in your living area. Use metal accents and exposed hardware to bring out the industrial vibe. Materials like aged steel or brushed nickel work well for the frame, and you can pair it with a dark-stained wood top for contrast.
Coastal Retreat
For a coastal-inspired home, aim for a light and airy lift top coffee table. Use whitewashed wood or painted finishes in shades of blue or green. Consider adding rope handles or dock cleat hardware for a nautical touch. The lift top can double as a hidden spot for storing beach reads and cozy throws.
Bohemian Rhapsody
Bohemian style is all about eclectic and colorful designs. Mix and match different textures and patterns for your table. Incorporate mosaic tiles or colorful inlays into the tabletop. The lift mechanism can reveal a space for your art supplies or vintage finds.
Personalized Touches
No matter the style, adding personalized touches will make your lift top coffee table truly yours. Consider engraving a family name, a significant date, or a favorite quote into the wood. You can also add decorative knobs or custom legs that reflect your personal taste.
Remember, make a DIY project your own. Mix styles for a unique lift top coffee table. Keep content clear and organized for creative DIY endeavors.
Troubleshooting Common Issues with DIY Lift Top Coffee Tables
When embarking on a DIY project to build a lift top coffee table, it's normal to encounter a few hiccups along the way. Here's a helpful guide to troubleshoot common issues, ensuring your project is successful and enjoyable.
Difficulty in Aligning the Top
One of the most common challenges is getting the top of the coffee table to align correctly with the base when closed. To address this:
- Double-check measurements before cutting any materials.
- Use clamps to hold pieces in place before finalizing the assembly.
- Adjust the hinge placement if there's a misalignment.
Lift Mechanism Isn't Smooth
If the lift mechanism isn't operating smoothly:
- Ensure all screws and bolts are tightened properly but not over-tightened.
- Lubricate the moving parts with a silicone-based lubricant for smoother operation.
- Check for any obstructions or misaligned parts that may be causing resistance.
Wood Splitting or Cracking
To prevent wood from splitting or cracking:
- Pre-drill holes before inserting screws, especially near the ends of boards.
- Use wood glue along with screws for added strength and to reduce stress on the wood.
- Choose quality wood that's properly dried to minimize warping and cracking.
Difficulty in Attaching Hardware
When attaching hardware, such as lift hinges or handles:
- Use a template or jig to ensure consistent placement.
- Start with a smaller drill bit and work your way up to the size needed.
- Hand-tighten screws initially to ensure correct placement before fully securing.
Stability Concerns
A wobbly table can be frustrating. To enhance stability:
- Use thicker wood or add additional supports underneath the tabletop.
- Ensure the base is even and level before attaching the top.
- Consider adding feet or pads to the bottom to prevent sliding and to level the table.
Finishing Flaws
For a flawless finish:
- Sand the wood thoroughly through progressively finer grits before applying any finish.
- Apply thin coats of stain or paint, allowing ample drying time between coats.
- Use a sealer to protect the finish and give it a professional look.
By foreseeing common issues and addressing them, you'll be ready to tackle your DIY coffee table project. Remember, patience and detail are key for a great outcome. Keep your work organized and focused for the best reader experience.

FAQs about DIY Lift Top Coffee Table
Discover all your DIY Lift Top Coffee Table FAQs answered! Find tips, tricks, and inspiration for building your own functional and stylish piece.
What is a lift top coffee table?
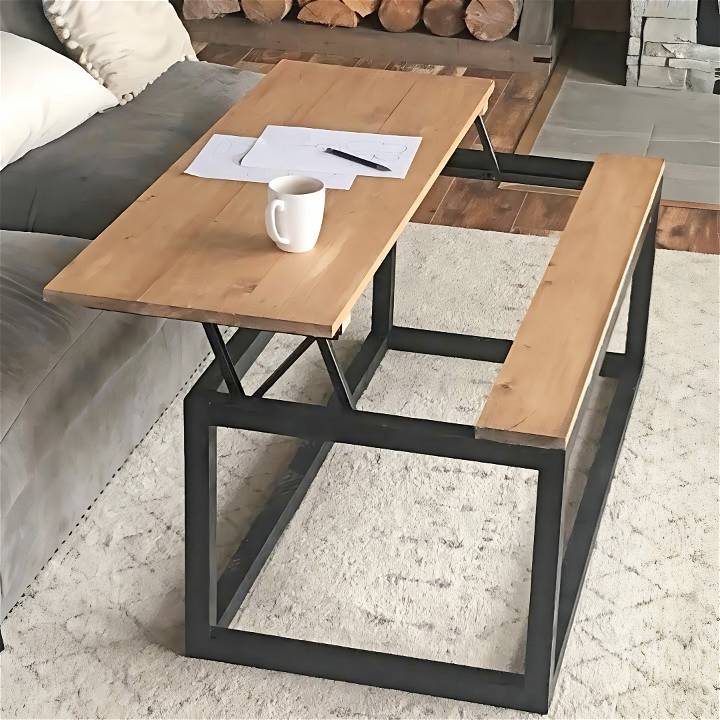
A lift top coffee table is a versatile piece of furniture that features a top which can be raised to a more comfortable height for use as a work surface or dining table. It's hinged so that it can lift up and move towards you. Underneath the lifting top, there's usually storage space for items like books, magazines, laptops, or remote controls.
How do I choose the right size for my lift top coffee table?
When selecting a lift top coffee table, consider the size of your room and the seating arrangement. The table should be within reach of all seating areas and not obstruct movement. A good rule is that the table should be no more than 1-2 inches lower than the seat of your couch. The standard height for coffee tables is between 14 and 20 inches.
What materials do I need to build a DIY lift top coffee table?
To build a DIY lift top coffee table, you'll need materials like plywood or solid wood for the top and base, wood glue, screws, and a lift top mechanism. You may also want to include additional materials like stain or paint for finishing, and hardware like drawer handles or wheels if you're adding storage or mobility features.
Can I build a lift top coffee table if I'm new to woodworking?
Yes, building a lift top coffee table is a project that can be tackled by beginners with some basic tools and careful planning. There are many tutorials and plans available that provide step-by-step instructions. It's important to follow these instructions closely, measure twice before cutting, and ensure all safety precautions are taken when using tools.
How do I install the lift top mechanism?
Installing the lift top mechanism involves attaching it to the inside of the coffee table's base and then to the underside of the top. Each mechanism might have slightly different installation requirements, so it's crucial to follow the manufacturer's instructions. Generally, you'll need to measure and mark where the mechanism will go, pre-drill holes, and then screw the mechanism in place.
How can I customize my DIY lift top coffee table?
Customizing your DIY lift top coffee table can be done in various ways. You can choose the type of wood and finish to match your decor, add decorative elements like trim or hardware, or even incorporate additional features like drawers or shelves. The design can be as simple or complex as you wish, depending on your skill level and the functionality you desire.
Conclusion
Building this lift-top coffee table was a rewarding challenge. It taught me the importance of precision, patience, and planning in woodworking. Every step, from selecting materials to the final coat of stain, was a learning opportunity, culminating in a piece of furniture that's not only functional but also a testament to the DIY spirit.
What I hope you take away from this guide is not just a set of instructions but the confidence to tackle your projects. Remember, each cut, screw, and brush stroke is a step towards realizing your vision. Don't hesitate to customize this project to fit your needs and preferences.


