Making home decor with your own hands can be really satisfying. I remember when I made my first DIY magnetic board. It took some time and patience, but the result was amazing. I used simple supplies like a metal sheet, a frame, and some pretty fabric. It was a fun project, and now I have a cute and useful board for my notes and photos.
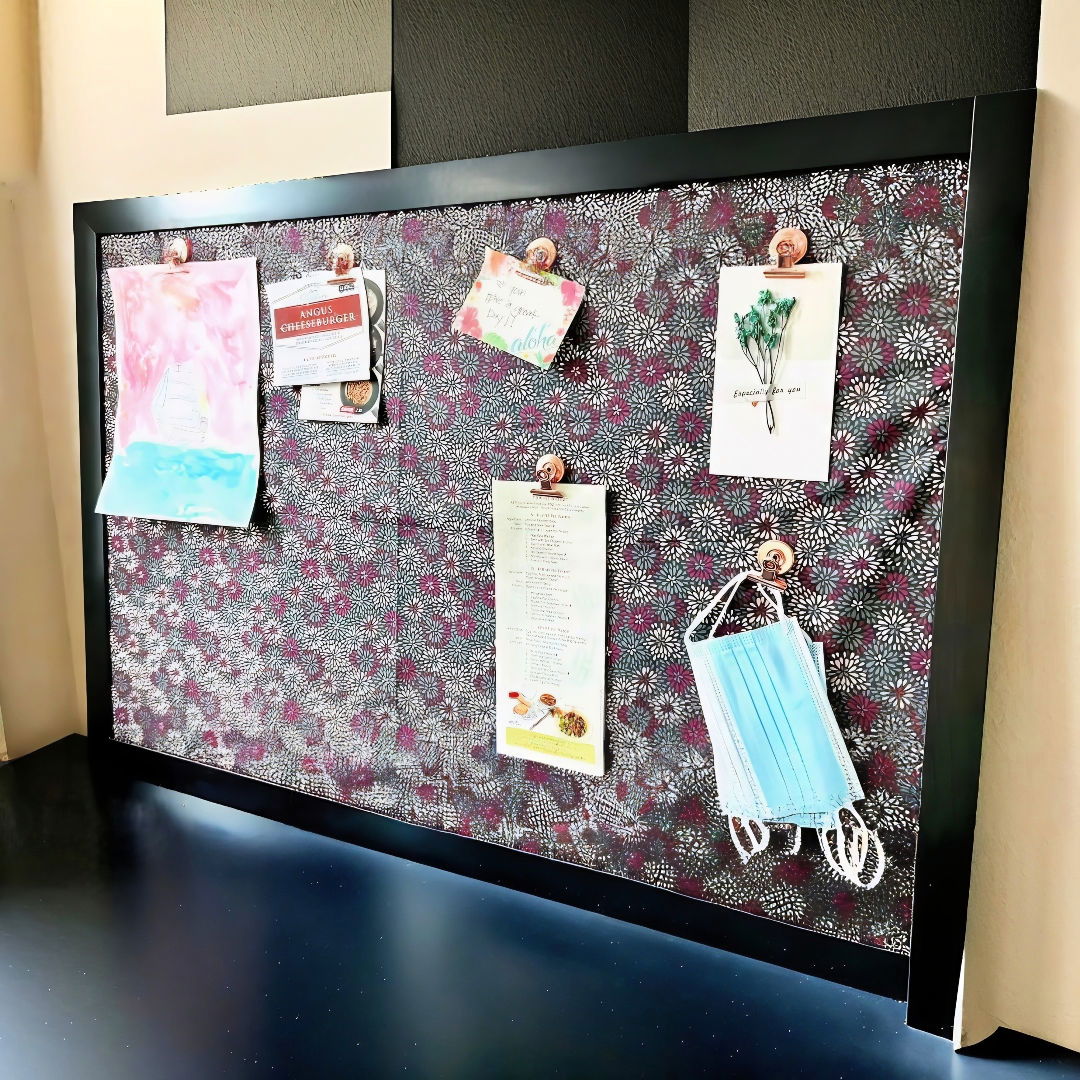
Getting started with your own magnetic board is easy. First, gather your supplies: a metal sheet, a frame, fabric, and scissors. Cut the fabric to cover the metal sheet and attach it using glue or tape. Place the covered metal sheet into the frame. That's it! You now have a handmade magnetic board to display your favorite memories or keep track of reminders.
I'm happy to share these easy steps. Make your own magnetic board with this guide, and it will help you stay organized and add a personal touch to your space.
Why You Need a Magnetic Board
A magnetic board is a fantastic organizational tool that can be used in numerous ways:
- Home Organization: Keep track of grocery lists, family schedules, and important reminders.
- Office: Use it for project planning, to-do lists, or to display important notes.
- Classroom: Ideal for teaching, displaying student work, and more.
- Anywhere Else: Dorm rooms, cars, workshops—the possibilities are endless.
Materials You Will Need
Before we dive into the process, let's gather all the materials. Each of these items serves a specific purpose:
- Metal Sheet: This is the base of your magnetic board. Make sure to get a metal sheet and not aluminum, as magnets will not stick to aluminum.
- Thin Fabric: Acts as a decorative cover for the metal sheet. Thin fabric ensures the magnets stick properly.
- Scissors: To cut the fabric to the appropriate size.
- Packing Tape: Keeps the fabric secure on the metal sheet.
- Poster Frame: Provides a finished look and makes the board easier to hang.
Step by Step Instructions
Learn how to make a DIY magnetic board with step-by-step instructions. With our expert tips, customize and place it perfectly in your home!
Step 1: Choose Your Metal Sheet
Visit your local hardware store to purchase a metal sheet. I bought a 24" x 36" sheet, but you can choose any size that fits your space. Remember, the only rule is that it must be a metal sheet, not aluminum, to ensure that magnets will stick.
Step 2: Select and Cut the Fabric
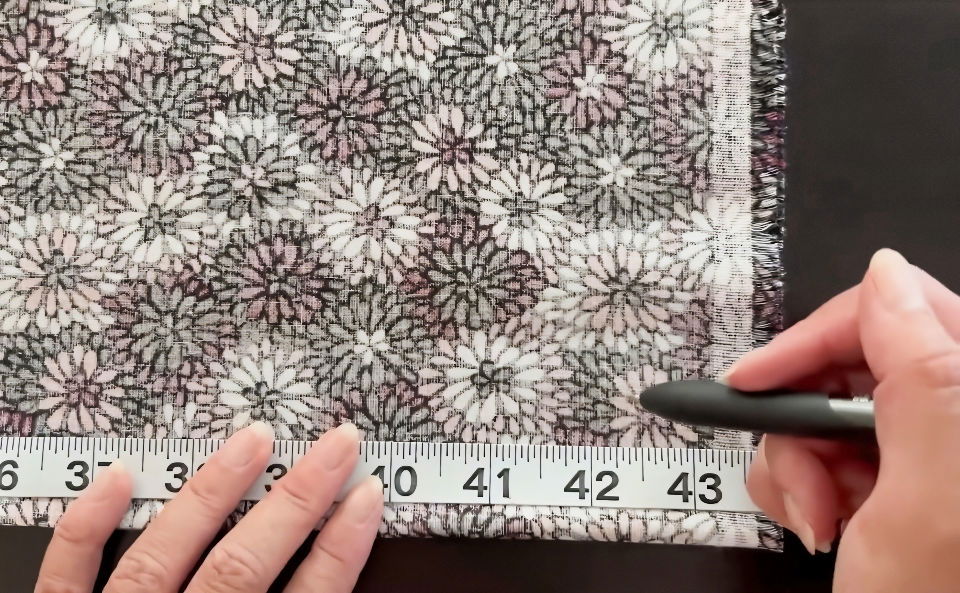
Pick a fabric that matches your decor. I opted for a thin cotton fabric to ensure that the magnets would stick without any issues. For a 24" x 36" board, one yard of fabric was plenty.
Cutting the Fabric:
- Lay the fabric on a flat surface.
- Place the metal sheet on top of the fabric.
- Use scissors to cut the fabric, leaving an extra 2 inches on each side to wrap around the back of the metal sheet.
Step 3: Secure the Fabric to the Metal Sheet
Once the fabric is cut to size, it's time to adhere it to the metal sheet.
Securing the Fabric:
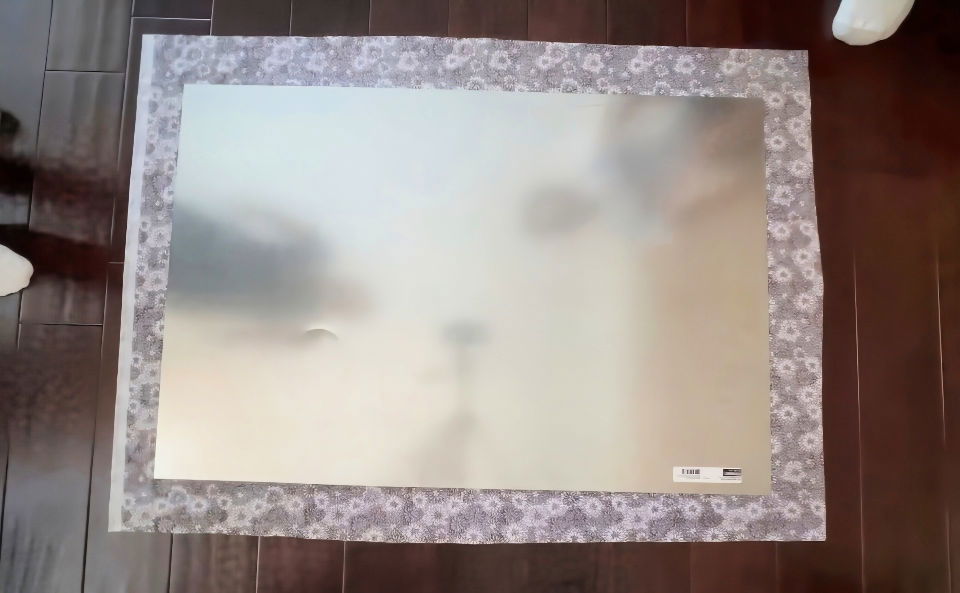
- Lay the metal sheet flat.
- Place the fabric on top, ensuring it's centered.
- Flip the metal sheet over so the fabric is underneath.
- Pull the fabric tight and begin taping the edges to the back of the metal sheet using packing tape.
- Make sure to smooth out any wrinkles as you go along.
Step 4: Frame Your Magnetic Board
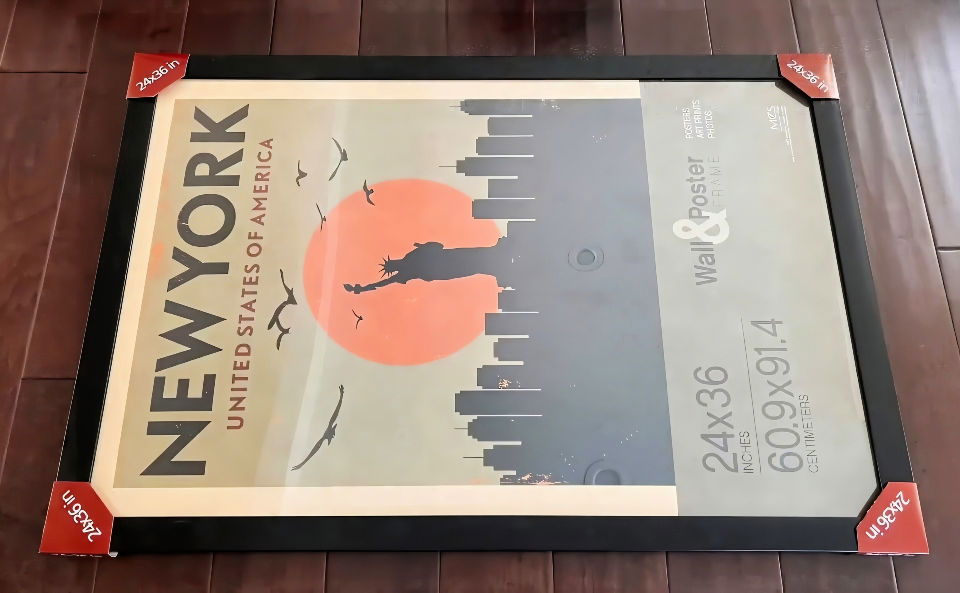
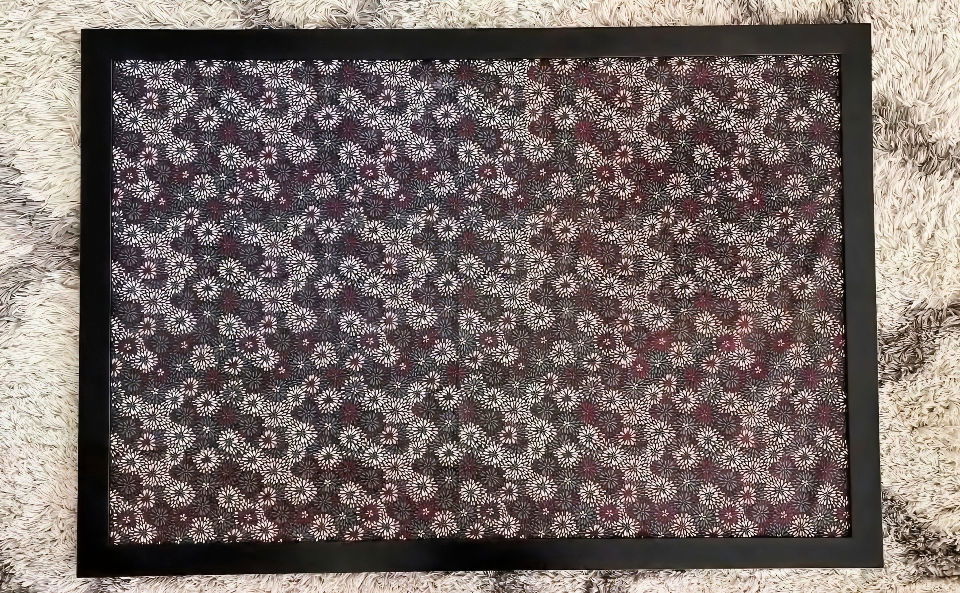
A poster frame not only gives the board a polished look but also provides an easy way to hang it.
Framing the Board:
- Open the poster frame.
- Place the fabric-covered metal sheet inside the frame.
- Secure the back of the frame.
Most poster frames come with hooks or hanging parts to make mounting your board to the wall easy.
Additional Tips and Ideas
Discover additional tips and ideas for customization, smart placement, and easy maintenance to enhance your space effortlessly.
Customization
One of the best aspects of this DIY project is the ability to customize it. Here are some ideas:
- Fabric Patterns: Choose different fabrics for different rooms or seasons.
- Frame Styles: Select a frame that complements your interior design.
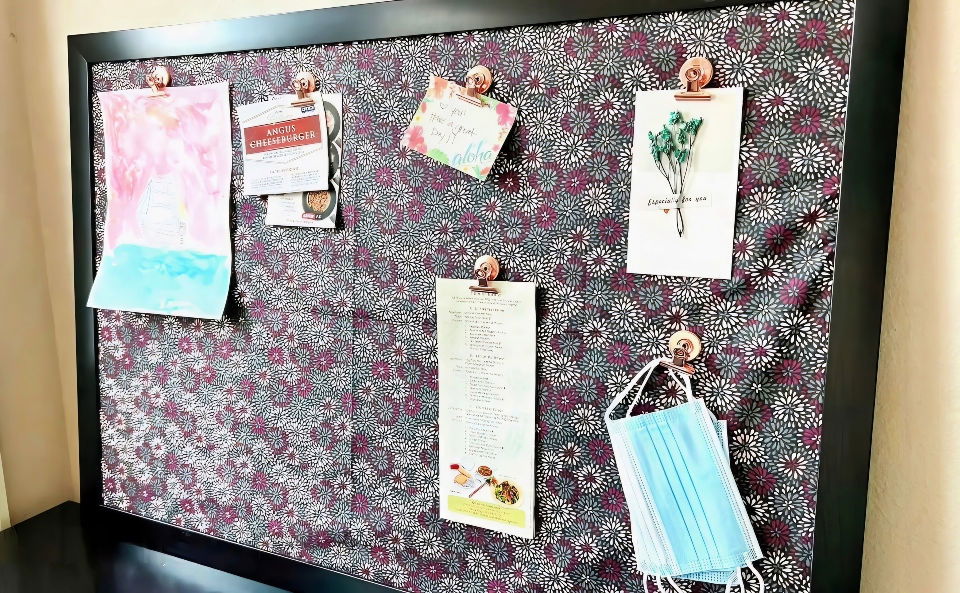
- Accessories: Add magnetic hooks, clips, or even small magnetic baskets for extra functionality.
Placement Ideas
Consider where a magnetic board would be most useful in your home or office:
- Kitchen: For grocery lists, meal plans, and recipe cards.
- Home Office: Ideal for pinning up work schedules, deadlines, and important documents.
- Bedroom: A great place for motivational quotes, personal notes, or even jewelry organization.
Maintenance
Maintaining your magnetic board is straightforward:
- Cleaning: Wipe it down with a damp cloth to keep it spotless.
- Updating: Change the fabric and frame as your decor or needs evolve.
Customization Ideas for Your DIY Magnetic Board
Making a DIY magnetic board is not just about functionality; it's also an opportunity to express your creativity and personalize your space. Here are some customization ideas that can help you make a magnetic board that truly reflects your style:
- Choose Your Size and Shape: Start by deciding the size and shape of your magnetic board. It doesn't have to be rectangular! Consider circular, hexagonal, or even cloud-shaped boards for a fun twist.
- Select a Color Scheme: Choose colors that complement your room. You can paint the board a solid color, use patterns, or even make an ombre effect. Metallic paints can give a more sophisticated look, giving it a sleek, modern finish.
- Add a Frame: A frame can transform your magnetic board from a simple utility to a piece of art. Use wood for a rustic feel, metal for industrial chic, or colorful plastic for a playful vibe.
- Functional Zones: Divide your board into zones for different purposes, like to-do lists, inspirational quotes, or family photos. Use washi tape or painted lines to separate these areas visually.
- Magnetic Containers: Attach small magnetic containers or clips to hold pens, clips, or other small items. This is especially useful in a home office or kitchen.
- Interactive Elements: Consider adding elements that invite interaction, such as a magnetic calendar, a weekly menu planner, or a section for leaving notes to family members.
- Themed Decorations: If you have a theme for your room, carry it onto your magnetic board. For example, if you love the beach, use seashell magnets or sandy textures.
- Layered Textures: Use fabric, cork, or leather as a base layer for added texture and warmth. These materials can also add an extra dimension to your board.
- Light It Up: Incorporate string lights or LED strips around the edges for a board that doubles as a nightlight or mood lighting.
- Personal Touches: Finally, add personal touches like your initials, favorite quotes, or stenciled designs. These details make your board unique.
Enjoy your DIY project, and let your imagination soar. Your magnetic board is your canvas.
Advanced Techniques for Your DIY Magnetic Board
Enhance your DIY magnetic board with advanced techniques for a standout piece. Perfect for seasoned DIYers or those seeking a challenge, these tips add complexity and functionality.
- Incorporate Lighting: Adding lighting to your magnetic board can make it a focal point in any room. Consider installing LED strip lights along the edges or behind the board for a backlit effect. This not only highlights your board but also serves as ambient lighting.
- Make a Modular System: For those who love organization, a modular magnetic board system can be incredibly useful. Design your board with interchangeable sections that can be moved around or swapped out. This could include calendar modules, note sections, or even shelves.
- Use Mixed Materials: Experiment with different materials on your board. Attach a corkboard section for pinning items, or use chalkboard paint to make a writable area. Mixing materials adds texture and versatility to your board.
- Add Interactive Tech: If you're tech-savvy, consider integrating interactive elements like a digital clock, a weather display, or even touch-sensitive areas that can control smart home devices.
- Craft with Precision: Use more precise tools like a laser cutter or CNC machine to cut intricate designs into the metal. This can add an artistic touch or functional elements like slots for holding tablets or phones.
- Magnetic Accessories: Make or purchase specialized magnetic accessories like clips, hooks, or holders. These can be used to hang keys, store pens, or keep other items within easy reach.
- Safety First: Always prioritize safety when trying advanced techniques. Wear protective gear, work in a well-ventilated area, and follow all instructions for any tools or materials you use.
By using these techniques, your DIY magnetic board will be a unique and functional organizational tool, showcasing your skills and creativity.
Troubleshooting Common Issues with DIY Magnetic Boards
When crafting your DIY magnetic board, you might encounter a few hiccups along the way. Here's a helpful guide to troubleshooting common issues, ensuring your project turns out just as you envisioned.
Paint Not Sticking to the Metal
- Solution: Use paint formulated for metal surfaces. Clean the metal thoroughly before painting, and consider using a primer designed for metal to improve adhesion.
Sharp Edges After Cutting Metal
- Solution: After cutting the metal sheet, use a file or sandpaper to smooth out any sharp edges. This step is crucial to prevent injuries and to make your board safe to handle.
Metal Sheet Doesn't Fit the Frame
- Solution: Measure the frame, and the glass or backing it came with, not the frame's outer dimensions. Use these measurements to cut your metal sheet, ensuring a perfect fit.
Magnets Not Sticking Well
- Solution: Not all metals are magnetic. Make sure you're using a ferrous metal sheet, such as steel, for your board. If the magnets are weak, consider using neodymium magnets for a stronger hold.
Board Warping Over Time
- Solution: To prevent warping, choose a thicker metal sheet or reinforce the board with a sturdy backing. This can be a piece of wood or a rigid plastic sheet attached to the metal.
Difficulty Hanging the Board
- Solution: If the board is heavy, use appropriate wall anchors and screws for support. For lighter boards, adhesive strips designed for hanging may suffice.
Rust Formation on the Board
- Solution: If you're using a metal that's prone to rust, apply a clear sealant over the painted surface. This will protect the metal from moisture and prevent rust.
By anticipating these common issues and knowing how to address them, you'll be well on your way to making a beautiful and functional DIY magnetic board.
FAQs About DIY Magnetic Board
Discover all you need to know about DIY magnetic boards with our comprehensive FAQs. Materials, tips, and steps to make your perfect board.
You can personalize your board by choosing a fabric that matches your decor. For a more durable and unique look, consider painting the metal sheet with spray paint before attaching the fabric.
Yes, you can! The basic process involves cutting fabric to size and wrapping it around a metal sheet, which doesn’t require any power tools. However, if you opt to use a frame or paint the metal, some additional tools might be helpful.
A magnetic board is versatile and can be used to display photos, reminders, notes, or even as a vision board. It’s also great for organizing jewelry, keys, or any small metal items.
To keep your board looking its best, wipe it down with a damp cloth to remove dust. If you've painted your board, make sure the paint is fully dry and sealed before cleaning.
To mount your magnetic board, you can use picture hanging strips if the board is light or screw-in anchors for heavier boards. Make sure to choose a method that is appropriate for the weight of your board and the type of wall you're attaching it to. Always follow the manufacturer's instructions for the best results.
Conclusion
Wrapping up, making a DIY magnetic board is a fun and useful project. It's a budget-friendly way to stay organized and add a personal touch to your space. With the steps outlined in this guide on how to make a magnetic board, you'll have a stylish and functional board in no time.


