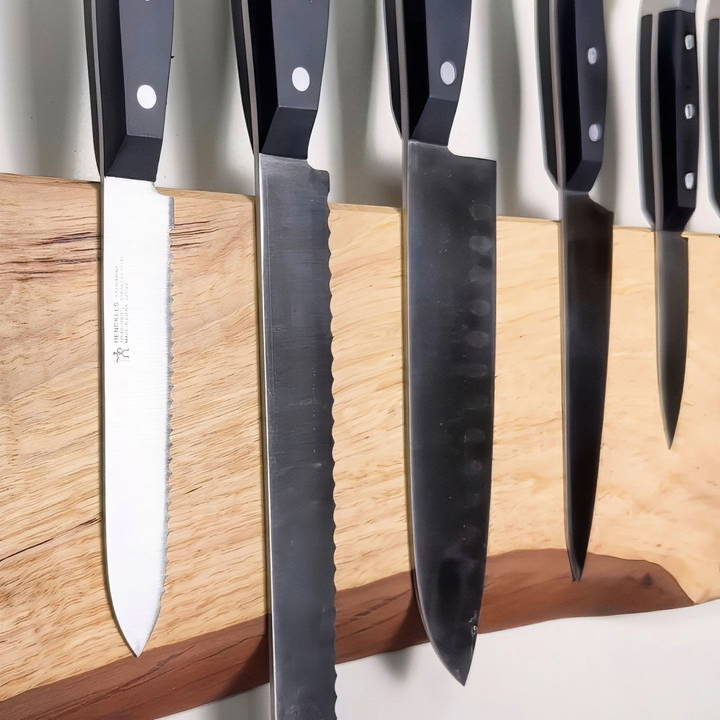
Making a custom DIY magnetic knife holder is a practical and stylish solution for organizing your kitchen knives. Unlike traditional knife blocks or simple magnetic bars, this DIY project combines functionality with aesthetic appeal. Using a beautiful piece of live edge wood like pecan, you can craft a knife holder that suits your kitchen's decor and keeps your blades easily accessible. Here's a comprehensive guide to making your own magnetic knife holder, covering materials, tools, and the process in detail.
Why Make a Magnetic Knife Holder?
Before diving into the instructions, let's understand why a magnetic knife holder is a great addition to your kitchen:
- Space-saving: It frees up valuable countertop space and keeps your knives within easy reach.
- Hygienic: Unlike wooden knife blocks, a magnetic holder doesn't trap moisture or harbor bacteria, making it easier to clean.
- Stylish: A live-edge magnetic holder adds a natural, custom-made touch that enhances the kitchen's overall aesthetic.
- Functional: The magnetic strip holds each knife securely, keeping your blades organized and safe.
Materials You'll Need
To build a high-quality magnetic knife holder, gather the following materials:
- Piece of Wood: A hardwood-like pecan is ideal for durability and beauty. Other options include walnut, cherry, or even a piece of epoxy art.
- Neodymium Magnets: These rare-earth magnets provide the necessary strength to hold knives securely. Choose 0.5-inch diameter magnets with a strong pull force.
- Epoxy Resin: For securing the magnets in place, you'll need a high-quality tabletop epoxy. Consider using a digital food scale for accurate mixing.
- Sandpaper: Grits ranging from 120 to 320 will be used for finishing the wood.
- Rubio Monocoat Pure: This hard oil wax finish provides a protective layer while enhancing the natural beauty of the wood.
Essential Tools
Having the right tools is key to a smooth DIY process:
- CNC Machine or Drill Press: A CNC machine ensures precise placement of the magnets, but a drill press with a Forstner bit can work as well.
- Digital Caliper: For precise measurements of wood thickness.
- Router with Keyhole Bit: To make slots for mounting the holder on the wall.
- Crosscut Sled: To cut the wood to length.
- Clamps: For securing the wood during cutting and sanding.
- Planer: Useful for achieving a smooth surface after installing the magnets.
Step by Step Instructions
Learn how to make a DIY magnetic knife holder with easy, step-by-step instructions. Perfect for organizing your kitchen space efficiently!
Step 1: Selecting and Preparing the Wood
Start by choosing a piece of hardwood that complements your kitchen's style. Pecan is a great option for lighter kitchens, offering strength and an attractive grain. Measure and cut the wood to the desired length—18 inches is a good standard size for most knife sets.
- Rough Cut: Cut the wood into a segment of about 20 inches, then surface it on three sides, leaving the live edge intact.
- Final Length: Using a crosscut sled, trim the wood to 18 inches.
- Remove Loose Bark: Carefully strip off any loose bark from the live edge to maintain a clean, rustic look.
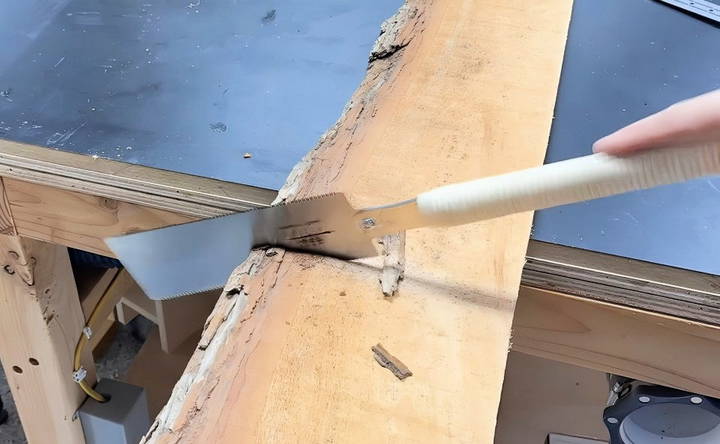
Step 2: Determine Magnet Placement
The next step is deciding how deep to place the neodymium magnets. Finding the right depth is critical for the holder's effectiveness—too deep and the magnetic pull weakens, too shallow and you risk the magnets showing through the wood.
- Testing Magnet Strength: Use aluminum table saw setup blocks to test the pull strength through varying depths. An ideal depth is around 1/8 inch below the surface, providing a good balance between holding power and maintaining the wood's integrity.
- Layout the Magnet Holes: Mark the area on the back of the wood where you'll place the magnets, focusing on a section without the live edge.
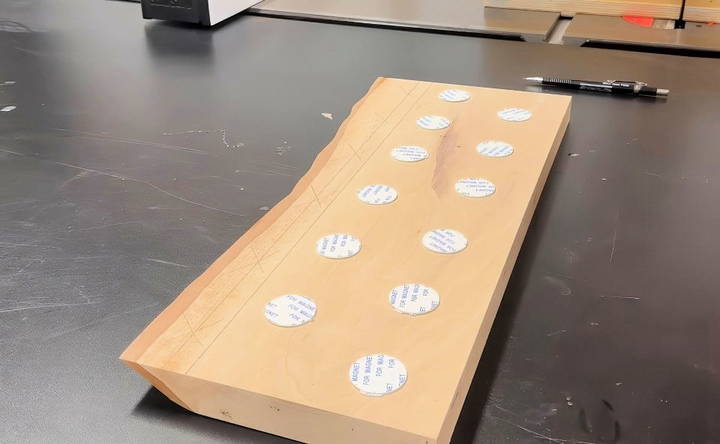
Step 3: Drilling Holes for Magnets
This step requires precision:
- Using a CNC Machine: A CNC allows for precise and consistent depth across all holes, ensuring a snug fit for each magnet. Alternatively, a drill press with a 0.5-inch Forstner bit can achieve similar results.
- Positioning the Magnets: Stack the magnets instead of staggering them. This arrangement offers two advantages:
- Increased Holding Force: Stacked magnets double the magnetic pull, ensuring even large knives stay secure.
- Aesthetic Consistency: Stacked magnets prevent knives from orienting at odd angles.
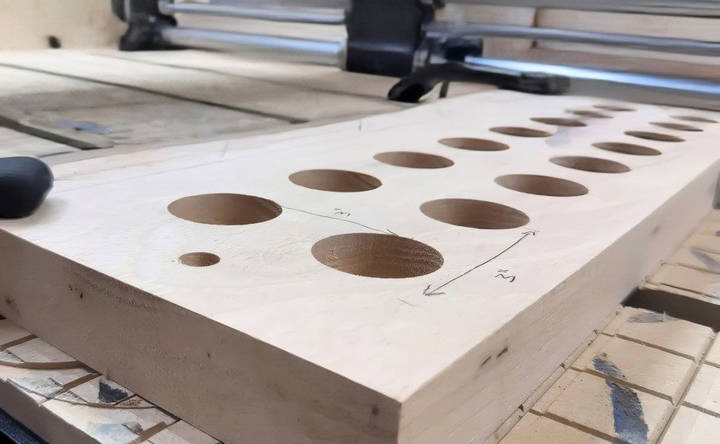
Step 4: Installing the Magnets
Once the holes are drilled, it's time to install the magnets using epoxy:
- Mix the Epoxy: Use a digital scale to measure the components accurately for a strong bond. Mix thoroughly as per the manufacturer's instructions.
- Install Magnets: Place each magnet in its hole, ensuring consistent polarity so that all magnets attract the knife blades correctly. Use a cast iron surface like a table saw to keep magnets flush with the bottom of each hole while the epoxy cures.
- Epoxy Tips: To avoid a mess, place butcher paper beneath the project to catch any epoxy drips.
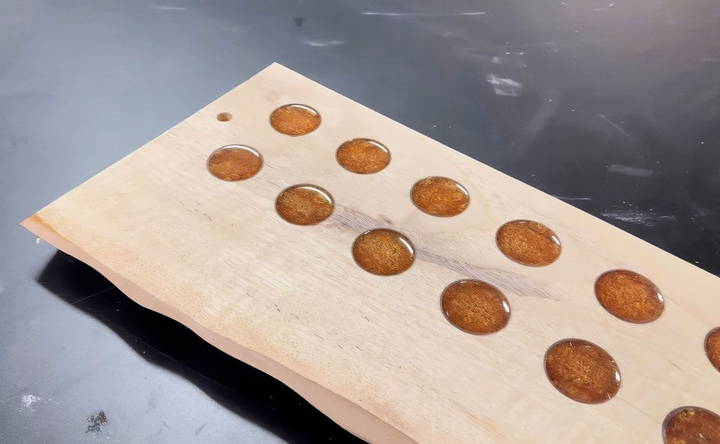
Step 5: Finishing the Wood
After the epoxy has cured, it's time to bring out the natural beauty of the wood:
- Planing and Sanding: Run the holder through a planer for a smooth surface, then sand progressively from 120 to 320 grit to achieve a fine finish.
- Routing Keyhole Slots: Use a keyhole router bit to make slots on the back, allowing you to mount the holder to a wall.
- Edge Routing: Add a slight bevel to the edges for a polished look.
Step 6: Applying the Final Finish
A durable finish protects the wood and enhances its appearance:
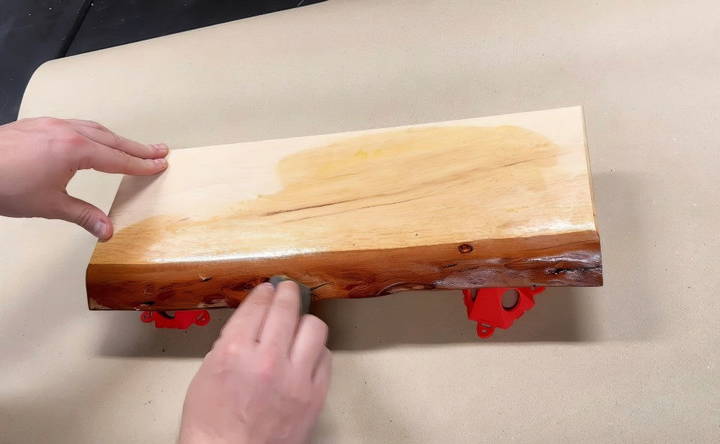
- Applying Rubio Monocoat Pure: This oil-wax finish is perfect for a project like this. It brings out the richness of the wood grain and provides a water-resistant layer, ensuring the holder stands up to kitchen conditions.
- Application: Use a clean cloth or applicator pad to apply a thin coat of finish, let it penetrate the wood for 5-10 minutes, and then buff off any excess for a smooth, matte finish.
Step 7: Installing and Enjoying Your Knife Holder
Once finished, it's time to mount the magnetic knife holder:
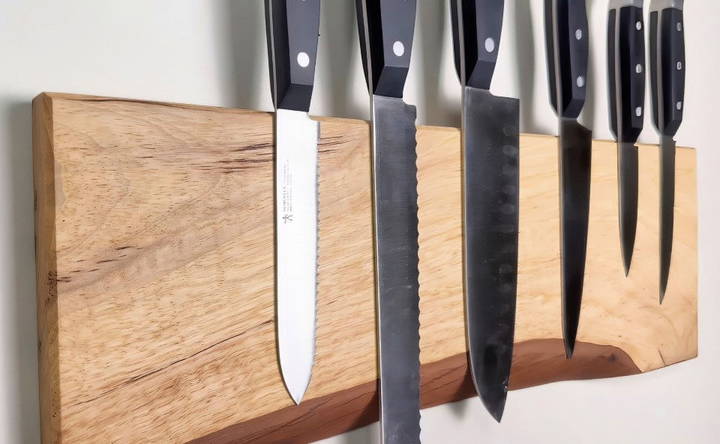
- Wall Installation: Insert screws or nails into the wall at the correct spacing and slide the holder onto them using the keyhole slots.
- Testing the Strength: Place a variety of knives on the holder to ensure that the magnets hold them securely. Even heavier knives should remain in place without sliding.
Maintenance Tips
To keep your magnetic knife holder looking and functioning at its best, follow these maintenance tips:
- Regular Cleaning: Wipe down with a damp cloth to remove dust and fingerprints. Avoid using harsh chemicals that can damage the finish.
- Reapply Finish: Every year or so, apply a fresh coat of oil-wax finish to maintain the wood's luster and protect it from moisture.
Creative Variations
While this guide focuses on using pecan wood, you can customize your knife holder in various ways:
- Wood Type: Use dark walnut for a richer look or maple for a lighter, modern style.
- Epoxy Color: Add pigment to the epoxy for a custom-colored inlay.
- Live Edge vs. Straight Edge: If a live edge isn't your style, use straight-edged lumber for a more contemporary appearance.
- Size Adjustments: Make longer holders for extensive knife collections or smaller ones for compact kitchens.
Final Thoughts
Crafting your own magnetic knife holder is a rewarding project that combines practical storage with a touch of artistry. It makes an excellent gift for culinary enthusiasts or a personal addition to elevate your kitchen's organization. The combination of strong neodymium magnets, high-quality hardwood, and a carefully applied finish ensures that this holder will serve you well for years to come. Give it a try, and enjoy the satisfaction of using a custom-made tool in your everyday cooking!
FAQs About DIY Magnetic Knife Holder
Discover answers to common questions about DIY magnetic knife holders, including materials, installation tips, and safety considerations.
You can use a drill press with a 0.5-inch Forstner bit to create holes for the magnets. A CNC machine offers precision, but a drill press can achieve similar results for most DIYers if used carefully.
Aim for a depth that leaves about 1/8 inch of wood between the magnets and the front surface. This ensures a strong enough magnetic pull to hold the knives while keeping the magnets hidden.
Yes, but hardwoods like pecan, walnut, or maple are ideal because of their durability. A hardwood with an attractive grain enhances the aesthetic appeal of the knife holder.
Use one magnet per hole. Each magnet should be strong enough to hold a knife securely, especially when stacked as described in the project.
No, the magnets have enough pull that the knives will automatically “snap” to their location. A 2-inch spacing between magnets is typically sufficient to prevent knife overlap.
Epoxy is recommended to secure the magnets in place, as it ensures they remain fixed over time. Alternatives like strong adhesives may work, but they might not offer the same durability.
A hard oil-wax finish like Rubio Monocoat Pure works well for this project. It enhances the wood's natural grain while providing a protective layer that is suitable for kitchen environments.
Use a router with a keyhole bit to create slots on the back of the holder. These slots will allow you to hang the holder securely on screws or nails.
While the steps are straightforward, using tools like a CNC machine or a drill press may require some experience. However, with careful measurements and patience, beginners can successfully complete this project using simpler tools.
Yes, you can add pigment or dye to the epoxy if you want to make a custom inlay color. This can add a unique touch, though it won't be visible from the front of the holder.


