Making DIY fridge magnets at home is fun and easy. Last weekend, I decided to try making my own magnets. I gathered some old buttons, glue, small magnets, and colorful paints. I was excited and ready to start my new project.
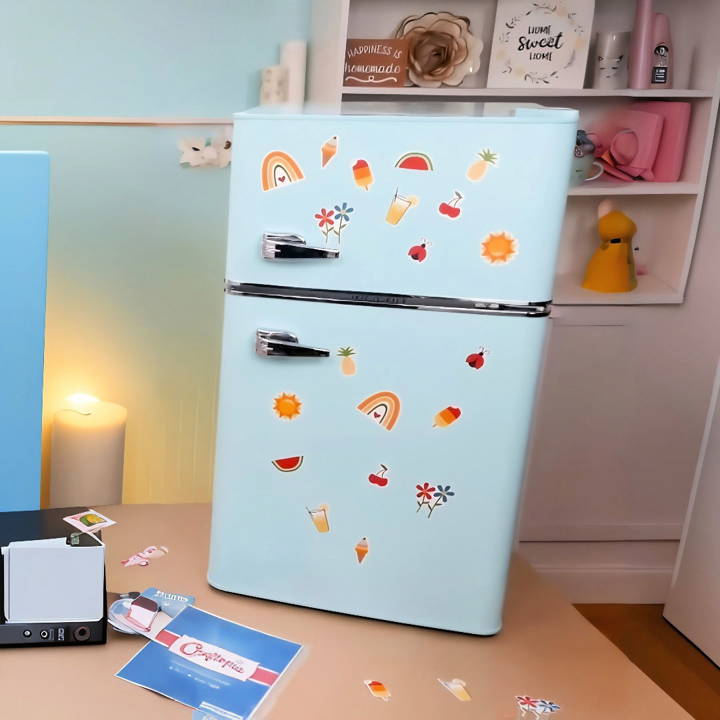
With a bit of patience and creativity, I transformed simple items into beautiful magnets. Each magnet had its own unique design and charm. I'm happy to share these simple steps to help you make your own. Follow along, and you'll have a collection of cool fridge magnets too.
Materials Needed and Why
Before diving into the crafting process, let's talk about the essentials. You'll need:
- Printable magnetic sheets or printable vinyl sticker paper are used to make the magnet's front design. I used both types to test which one suits different uses best.
- Adhesive Magnetic Sheet: If you're using vinyl sticker paper, this will make it magnet-friendly.
- Laminate Sheets: To add durability and a professional finish to your magnets. This step is crucial as it protects the design from water and wear.
- Inkjet Printer: This is used to print your chosen designs. Almost any model will do, but make sure it's set for high-quality printing on the specific paper type.
- Cricut Cutting Machine: I used the Cricut Maker 3 for precision cutting, but other models work well too. Note: Cricut Joy isn't suitable for print-then-cut projects.
- Standard Grip and StrongGrip Mats: Depending on the material thickness, choose the mat that ensures your material stays put during the cutting process.
- Brayer and Scraper Tools: These help in applying the laminate and ensuring the material adheres well to the mat.
- Design File: Choose or make designs that you'd love to see on your fridge.
Step by Step Instructions
Learn how to make DIY fridge magnets with our easy step-by-step instructions. Perfect for personalized gifts and home decor projects.
Step 1: Preparing Your Machine
Calibrating your Cricut machine is essential. This ensures that the print-then-cut function works perfectly. My initial calibration was a tad off, leading to some misalignment. After recalibrating, following the machine's guide for print-then-cut calibration, the results improved remarkably.
Step 2: Design Time
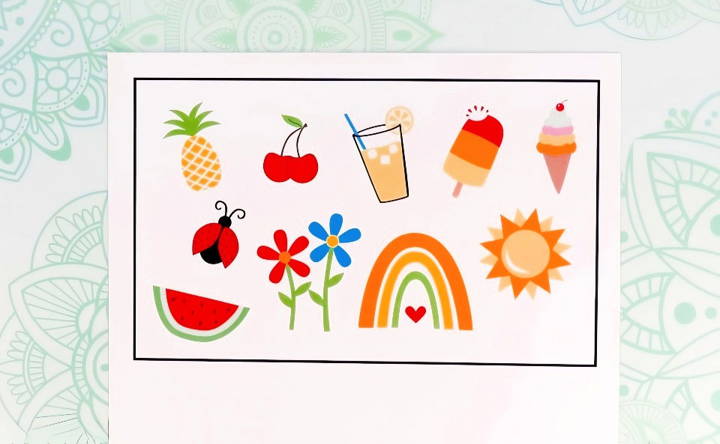
Download or make your magnet designs. For starters, I opted for simple, cheerful graphics that brought a pop of color to my kitchen. Websites like JenniferMaker.com offer free designs, which can be a great starting point. Import your chosen design into Cricut Design Space, making sure they are sized within the Cricut's print-then-cut dimensions.
Step 3: Print, Then Cut
- Print Your Design: Using your inkjet printer, print the designs on your chosen paper. If you're using printable vinyl, remember you'll adhere this to an adhesive magnetic sheet later. For the best results, select "Best" or "High" quality settings, and choose glossy photo paper as your material setting to get vibrant colors.
- Lamination (Optional but Recommended): Laminating the printed designs adds durability. This step can be a bit fiddly. I had to ensure the laminate did not cover the print-then-cut registration marks; otherwise, the Cricut couldn't read them properly. Gently apply the laminate, starting from the center outwards to avoid air bubbles.
- Cutting With Your Cricut: Attach your material (with laminate, if used) to the appropriate Cricut mat. Load it into your Cricut and set the machine to cut the specific material you're using. My first attempt saw me nervously unloading the mat too early, only to find uncut parts. I learned that checking the cut before unloading is crucial; you can always send the machine to cut again if it's not perfect.
Tips and Tricks I Learned Along the Way
- Test Your Printer Settings: Don't skimp on printing a test page before committing to your actual magnet sheet. This can save your materials from being wasted.
- Patience with Lamination: Applying the laminate smoothly takes practice. Don't be disheartened by air bubbles; use the scraper tool to gently push them to the edges.
- Be Mindful of Material Thickness: When cutting, remember the thicker the material, the more passes your Cricut might need. Adjust blade pressure accordingly.
Customization Ideas for DIY Magnets
Making DIY magnets is not just about functionality; it's also an opportunity to express your creativity and personalize your space. Here are some customization ideas that can help you make your magnet projects truly your own:
Personal Photos and Artwork:
- Transform Memories: Use personal photos to make fridge magnets that keep your loved ones and cherished memories in view.
- Miniature Masterpieces: Turn your or your children's artwork into magnets, showcasing the creativity of your family.
Themed Designs:
- Seasonal Celebrations: Craft magnets that celebrate seasons and holidays, like snowflakes for winter or pumpkins for Halloween.
- Hobby Highlights: Reflect your hobbies or interests, such as music, books, or travel, through themed magnet designs.
Material Magic:
- Upcycle Everyday Items: Look for small objects around the house, like buttons or fabric scraps, and repurpose them into unique magnets.
- Natural Elements: Incorporate elements from nature, like pebbles or pressed flowers, to bring an organic touch to your creations.
Functional Flair:
- Organizational Helpers: Design magnets to hold pens, notes, or clips, adding both style and function to your workspace.
- Interactive Sets: Make a set of magnets that can be arranged into different patterns or messages, adding an interactive element.
Cultural Crafts:
- Cultural Motifs: Celebrate your heritage by incorporating traditional patterns or symbols into your magnet designs.
- Language and Lettering: Use calligraphy or different scripts to make word magnets in various languages.
Customization means making something meaningful for you or the recipient. It adds a personal touch, making a magnet into meaningful art.
Advanced Techniques for DIY Magnets
When you're ready to take your DIY magnet projects to the next level, advanced techniques can add complexity and sophistication. Here's how you can elevate your magnet-making skills:
Magnetizing Materials:
- Electromagnets: Learn how to make an electromagnet by coiling wire around an iron core and connecting it to a battery.
- Magnetic Strength: Experiment with different materials to see which ones can be magnetized and how strong they can become.
Intricate Designs:
- Precision Cutting: Use tools like laser cutters or CNC machines to make intricate shapes and designs out of magnetic sheets.
- 3D Printing: Combine 3D printing with magnetic filaments to make custom shapes that can be magnetized.
Complex Assemblies:
- Layering Techniques: Build up layers of different materials to make multi-dimensional magnets with depth and texture.
- Moving Parts: Incorporate hinges or rotating elements to make interactive magnets that move or change.
Surface Treatments:
- Painting and Sealing: Apply specialized paints and sealants to protect your magnets and add visual effects like gloss or matte finishes.
- Texturing: Use techniques like embossing or engraving to add texture to the surface of your magnets for a tactile experience.
Integration with Technology:
- LED Lights: Embed small LED lights into your magnets for a glowing effect.
- Smart Magnets: Tiny microcontrollers like Arduino are integrated to make magnets that can interact with apps or change color.
Master these advanced techniques to improve your DIY magnets' quality and enjoy learning and making. Prioritize safety, especially with sharp tools or electrical parts. With practice and patience, craft decorative magnets that showcase impressive craftsmanship.

Troubleshooting Common Issues with DIY Magnets
When crafting DIY magnets, you might encounter a few hiccups along the way. Here's a helpful guide to troubleshooting common issues, ensuring your magnet projects turn out just as you planned:
Weak Magnetism:
- Check Material: Ensure you're using materials that can maintain strong magnetism, like neodymium or ferrite.
- Surface Contact: Verify that the magnet is making full contact with the metal surface; any gaps can weaken the connection.
Magnets Not Sticking:
- Clean Surfaces: Dirt or oil can prevent magnets from sticking. Clean both the magnet and the metal surface with alcohol.
- Correct Polarity: If using multiple magnets, make sure they are aligned with the correct polarity to attract rather than repel.
Adhesive Failures:
- Right Glue for the Job: Use a strong adhesive like epoxy or super glue designed for the materials you're bonding.
- Proper Application: Apply glue evenly and allow it to cure for the full recommended time before testing the bond.
Chipping or Breaking:
- Gentle Handling: Magnets, especially ceramic ones, can be brittle. Handle them with care to avoid drops or impacts.
- Protective Coating: Apply a thin layer of clear nail polish or varnish to protect the magnet's surface from damage.
Rust and Corrosion:
- Moisture Control: Keep magnets in a dry environment to prevent rust, especially if they are made of iron-based materials.
- Coating: Use a rust-inhibitor spray or paint to make a barrier against moisture.
Discoloration or Fading:
- UV Protection: If your magnets are exposed to sunlight, use UV-resistant materials or coatings to prevent fading.
- Quality Materials: Choose high-quality pigments and paints that are less likely to discolor over time.
Use these tips to make durable and attractive DIY magnets. Focus on patience and detail. If problems persist, reassess with a fresh perspective.
FAQs About DIY Magnets
Discover everything you need to know about DIY magnets in our comprehensive faqs guide! Tips, materials, and step-by-step instructions are included.
Personalization is all about expressing your creativity. You can use photos, quotes, or artwork that you love. Consider the decor of your kitchen, your hobbies, or even the current season for inspiration. The design possibilities are endless, from miniature succulent planters to personalized photo magnets.
Yes, DIY magnets can be very eco-friendly. By using upcycled materials like old buttons, fabric scraps, or broken jewelry, you’re turning potential waste into art. It’s a creative way to reduce waste and decorate your space.
Absolutely! Making your own magnets can be more cost-effective than purchasing them, especially if you utilize recycled materials. Plus, it adds a personal touch that you can’t buy in stores.
There are many easy projects to get you started. For example, you can make pom-pom magnets using yarn and a pom-pom maker or make heart-shaped magnets with thumbprints for a personal touch. These projects require minimal supplies and are perfect for crafting with kids or for a fun solo activity.
The strength of your DIY magnets depends on the type of magnet you use. Neodymium magnets are the strongest type of permanent magnets available and are ideal for fridge magnets. When crafting, ensure that the decorative elements you add are not too heavy for the magnet's pull strength. If you're using magnet sheets, layering multiple sheets can increase the magnetic force.
Final Thoughts
Give these instructions a try. Making DIY fridge magnets is both easy and enjoyable. Let's get creative together!


