Making a simple DIY mail organizer helped me keep my home tidy. I used wood, paint, and a few nails. It took only a day to make. Now, my mail is always organized and easy to find. This project saved me from the mess of piles of letters scattered everywhere.
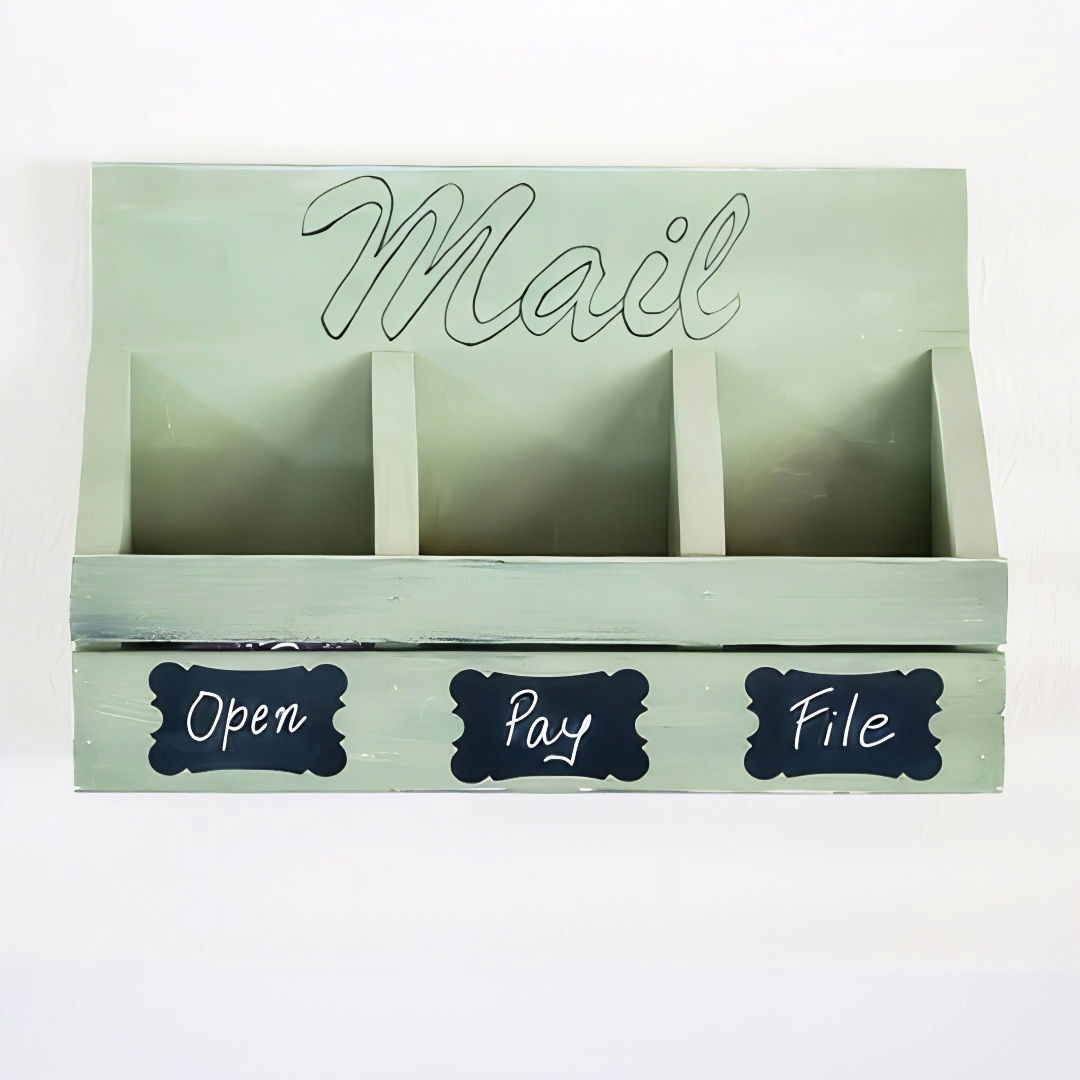
Every morning, I feel a sense of accomplishment when I see my organized mail. It keeps me motivated and stress-free. I enjoyed making it and want to share my experience with you. Building a DIY mail organizer can bring order to your home and simplify your life.
If you're looking to organize your mail, the steps below will help you. Trust me, you'll love the results.
Materials You'll Need
Before we begin, let's gather all our materials. Here's a list of what you'll need and why each item is essential for making a sturdy and visually appealing mail organizer.
- Wooden Boards (Three 1x6 boards, each 24 inches long): These will form the main structure of your organizer.
- Wood Glue: This will hold the wooden boards together without needing nails or screws.
- Wood Stain or Paint: To give your organizer a polished look that matches your home decor.
- Foam Brushes: For applying stain or paint evenly.
- Sandpaper (120-grit): To smooth out any rough edges on the wood.
- Clamps: To hold the boards together while the glue dries.
- Ruler or Measuring Tape: To ensure precise measurements.
- Pencil: For marking cut lines on the wood.
- Decorative Hooks or Knobs: Optional but adds a touch of style and functionality for hanging keys.
Step by Step Instructions
Learn how to build a DIY mail organizer with step-by-step instructions, from preparing wooden boards to adding final touches, customized with your choice of finish.
Step 1: Prepare Your Wooden Boards
First things first, you'll want to prepare your wooden boards.
Sand the Boards
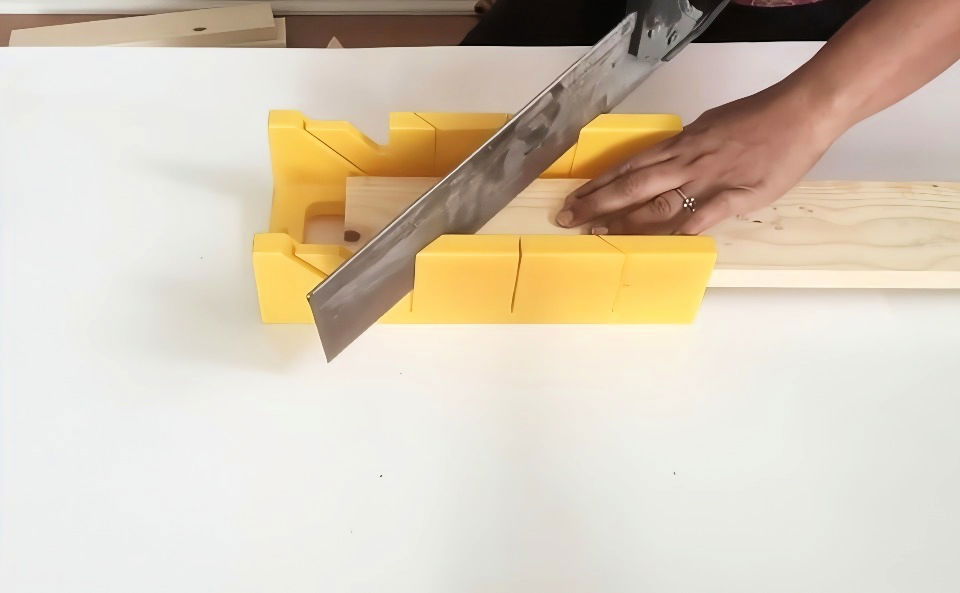
Start by using your 120-grit sandpaper to smooth out any rough edges or surfaces. This step is crucial because it will help the wood glue adhere better and give a more polished finish when you stain or paint the boards. Trust me; you don't want splinters!
Step 2: Assemble the Main Structure
Learn how to assemble the main structure, layout the boards, apply wood glue, and clamp and dry in our easy-to-follow woodworking guide.
Layout the Boards
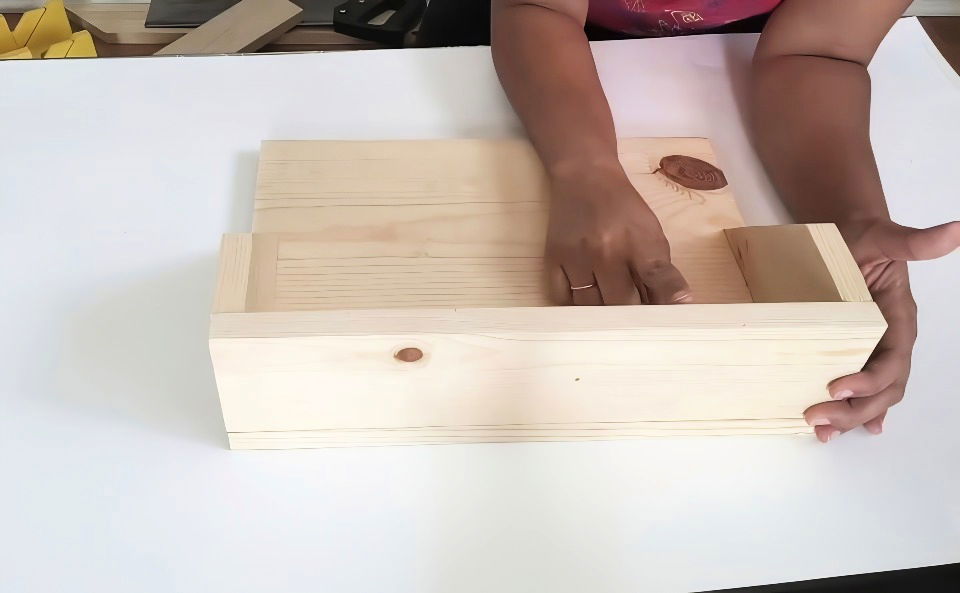
Lay your three wooden boards flat on a work surface. Arrange them to form a U-shape with one board acting as the back and the other two as the sides. Use your ruler and pencil to ensure everything lines up perfectly. Precision here will ensure that your organizer stands upright and looks neat.
Apply Wood Glue
Next, apply a generous amount of wood glue to the edges of the side boards that will attach to the backboard. Align them carefully and press them together. The glue should squeeze out a bit, indicating good coverage.
Clamp and Dry
Use the clamps to hold the boards together while the glue dries. Make sure the boards are still aligned correctly after clamping. Allow the glue to dry for at least an hour. This part is a test of patience, but the wait is worth it for a strong bond.
Step 3: Add Shelves
Add shelves to your space effortlessly. Measure and cut precisely, then securely attach the shelves for a perfect fit and maximum storage.
Measure and Cut
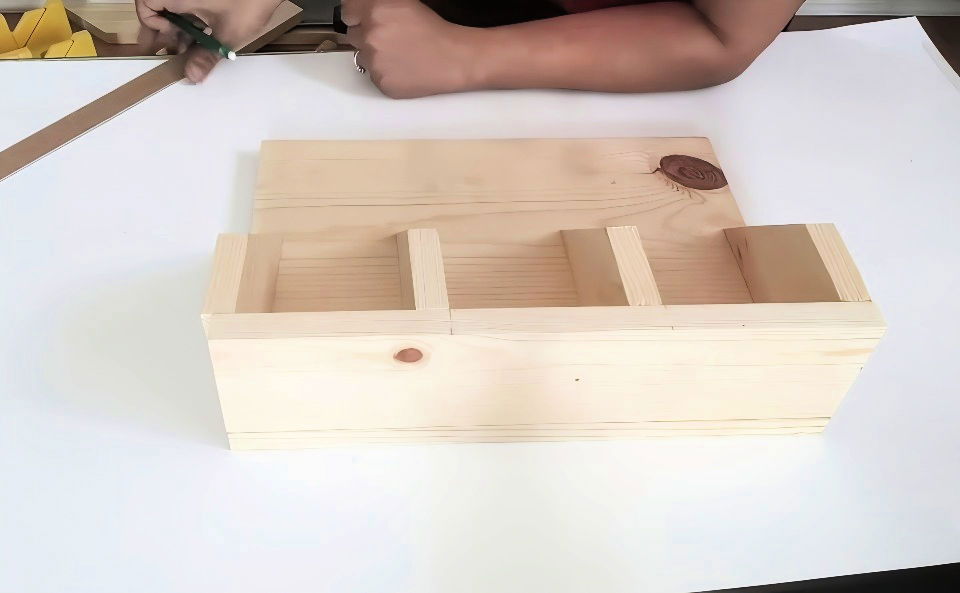
Now that the glue has dried, we'll measure for the internal shelves. Depending on your preference for the spacing of mail slots, mark the positions on the inside of the side boards. I opted for three slots, which meant two shelves.
If you have extra 1x6 boards, cut them to the internal width of the organizer. These will fit snugly inside.
Attach the Shelves
Apply wood glue to the edges of the shelves and slide them into place. Use clamps again to hold everything while the glue dries, ensuring the shelves are level. Allow another hour for drying.
Step 4: Customize with Paint or Stain
Transform your space with DIY wooden shelves. Customize with paint or stain, choose your finish, and let it dry for a personalized touch!
Choose Your Finish
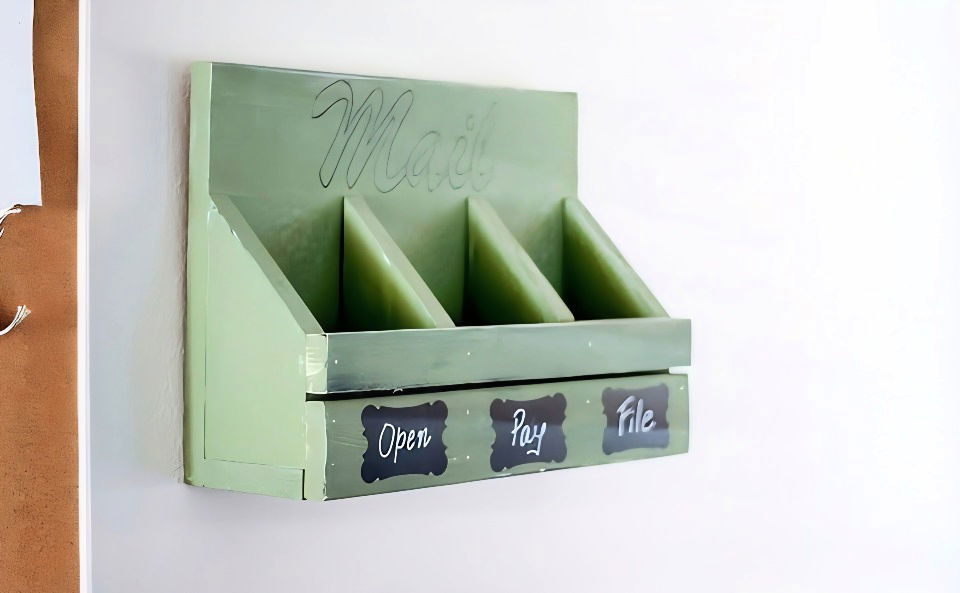
For a personal touch, stain or paint your organizer. I chose a dark wood stain to match my home decor. Use your foam brushes to apply the stain evenly, always following the direction of the wood grain. If you're using paint, a couple of coats may be necessary for full coverage.
Let It Dry
After staining or painting, let it dry completely. This is another test of patience, but hurrying will lead to smudges or uneven coloring.
Step 5: Final Touches
Finalize your project with these essential tips on the final touches, optional hooks or knobs, and mounting techniques. Elevate your craftsmanship!
Optional Hooks or Knobs
Here's where you can get creative. I added some decorative hooks to the bottom of the organizer for keys and a couple of knobs on each mail slot for easier access. These little accents make your organizer not just functional but also a piece of home decor.
Mounting
If you plan to hang your organizer on a wall, you can use a couple of picture-hanging brackets on the back. Measure carefully to ensure it's level once mounted.
Customization Tips for Your DIY Mail Organizer
Building a DIY mail organizer is not just about functionality; it's also an opportunity to add a personal touch to your home decor. Here are some tips to customize your mail organizer:
- Choose Your Style: Think about the overall look you want. Do you prefer a modern, sleek design or a rustic, vintage feel? Select materials and colors that match your home's aesthetic.
- Add a Personal Touch: Incorporate elements that reflect your personality. Use stencils to paint on patterns, attach decorative knobs or handles, or add a monogram of your initials.
- Functional Decor: Consider how your mail organizer can serve as a piece of art. For example, use a picture frame as the base for a chic and elegant look.
- Mix Materials: Don't be afraid to combine different materials. Wood with metal accents can offer a sophisticated industrial vibe, while combining different fabrics can add warmth and texture.
- Adjustable Compartments: Build adjustable or removable dividers in your organizer. This allows you to customize the space as your mail sorting needs change.
- Magnetic or Chalkboard Surface: Add a magnetic board or chalkboard to one side of your organizer. It's perfect for pinning important notes or writing reminders.
- Light It Up: Attach small LED lights under the shelves or compartments. This not only highlights your mail organizer but also makes it easier to find things in low light.
- Go Green: Add small planters or succulent holders to bring life to your organizer. It's a great way to incorporate greenery into your space.
Customize to fit your needs and style. Keep it simple and fun. Make something you'll love to display and use daily. Follow these tips for a functional and personal mail organizer.
Space-Saving Solutions for Your DIY Mail Organizer
When you're short on space, every inch counts. A DIY mail organizer can help you reclaim some of that precious real estate. Here's how to make a space-efficient mail organizer:
- Vertical Design: Utilize vertical space by making a tall, narrow organizer. Hang it on the wall or the back of a door to keep countertops clear.
- Foldable Features: Consider a design that can be folded away when not in use. A simple hinge mechanism can allow parts of the organizer to lie flat against the wall.
- Inside Cabinet Doors: Use the inside of cabinet doors to hide away your mail organizer. It's out of sight but still easily accessible.
- Hanging Pockets: Fabric or mesh hanging pockets can be suspended from hooks or a rod. They're lightweight and can be adjusted as needed.
- Stackable Trays: If horizontal space isn't too tight, stackable trays can keep mail organized without spreading outwards.
- Magnetic Strips: For a minimalist approach, attach magnetic strips to the wall. Clip your mail with magnetic clips for an instant, space-saving solution.
- Corner Shelves: Don't overlook corners. A small, corner-mounted shelf can serve as a perfect spot for sorting mail.
- Under-Shelf Baskets: Slide-in baskets under existing shelves can add storage without taking up additional space.
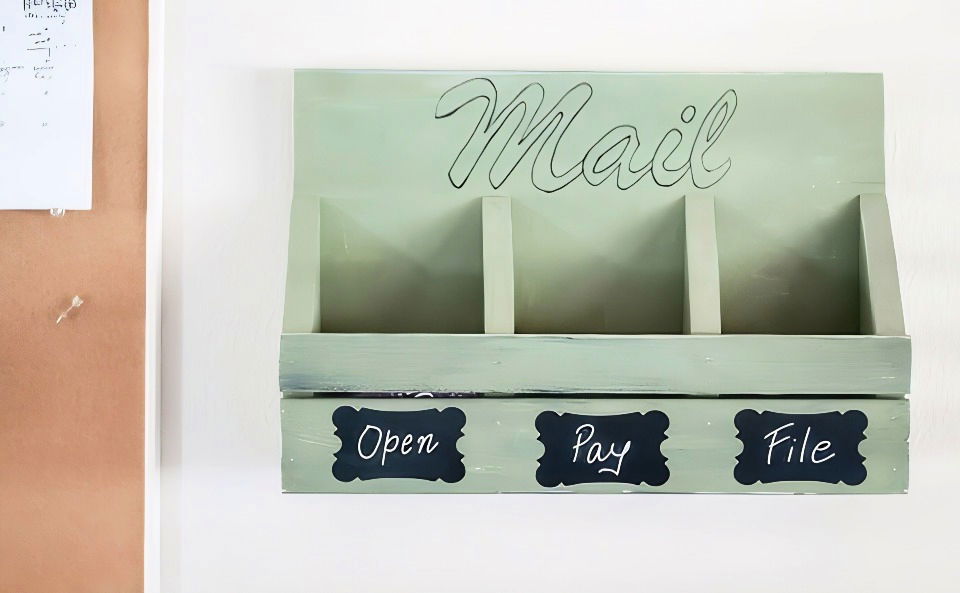
- Label Everything: Clearly label each section of your organizer. It will save you time looking for the right spot to place or find mail.
With these space-saving tips, make a mail organizer that suits any size home. Keep it simple, functional, and tailored to your space. Even small areas can become organized mail stations with creativity.
FAQs About DIY Mail Organizer
Discover the answers to frequently asked questions about DIY mail organizer to streamline your home organization projects efficiently.
A DIY mail organizer is a homemade solution to sort and store your mail. It can be as simple as a labeled basket or as elaborate as a custom-built shelving unit. The goal is to keep your mail organized and prevent it from cluttering your home.
Creative ideas include a magnetized fridge mail holder, a wall-mounted mail sorter with multiple slots, or a fabric wall organizer with pockets for different family members. You can also use a shallow wood bowl on an entryway table as a stylish option.
Place your mail organizer in a spot that’s easily accessible and visible. Common locations include the entryway, kitchen, home office, or mudroom. Choose a location where you typically sort your mail to ensure it’s used regularly.
Yes! There are many simple and easy-to-follow DIY projects that don't require advanced crafting skills. Look for tutorials with step-by-step instructions and photos to guide you through the process. You can build a functional and attractive mail organizer with minimal tools and materials.
When making a DIY mail organizer, consider the color scheme and style of your home. Use materials and finishes that complement your decor. For example, if you have a modern home, you might opt for a sleek metal or acrylic organizer. For a rustic look, repurposed wood or wicker would be ideal. Personalize it with paint, fabric, or decorative elements to make it a seamless part of your living space.
Conclusion
And there you have it! Your very own DIY mail organizer made without any power tools. This project is a perfect blend of organization and creativity. Not only did I clear up the mail clutter in my home, but I also had a great time making something with my hands.


