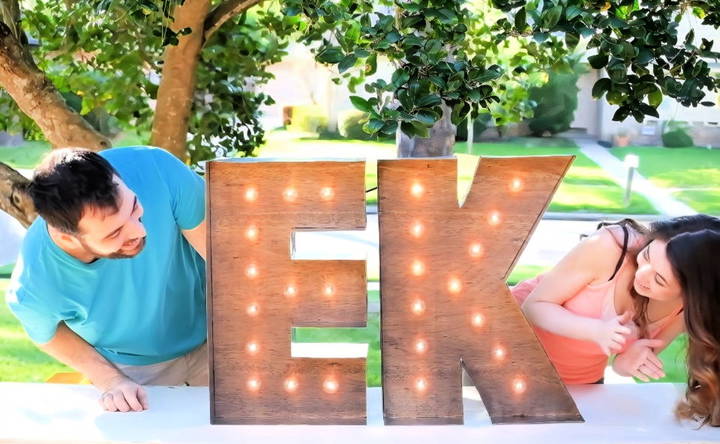
If you're looking for a fun, creative project to add some unique decor to your home or for a special event, making your own metal and wood marquee letters is a fantastic option. This DIY marquee letters project is not only a great way to personalize your space, but it's also a sentimental one for many.

In fact, it was the first DIY project we tackled for our wedding, and we've received a lot of questions about how we did it. Here, I'll guide you through the steps we followed, share some insights, and hopefully make it easier for you to replicate.
Materials and Tools You'll Need
Before we dive in, here's a breakdown of the materials and tools you'll need to get started. It's important to gather everything beforehand so you can work smoothly through the process.
Materials:
- 3/4-inch plywood: This will form the base of your letters.
- 6-inch flashing: Thin sheets of metal used to wrap around the letters.
- Stain: I used Minwax dark walnut stain, but you can choose any color that suits your taste.
- Nails and super glue: For attaching the flashing to the plywood.
- Scrap wood: Used to build guides for an easier build.
- Globe string lights: These will bring your marquee letters to life.
Tools:
- Jigsaw: To cut out the letters from the plywood.
- Drill and spade bit: The spade bit should be slightly larger than your light socket to build holes for the bulbs.
- Nailgun or hammer: Depending on what you have available, both will work for attaching the flashing.
- Sanding sponge and sandpaper: For smoothing out the rough edges of your letters.
- Metal snips: To cut the flashing to size.
- Putty knife: A thick one will help with bending the flashing.
- Yardstick: For precise measurements.
Step by Step Instructions
Build incredible DIY marquee letters with our step-by-step guide. From shapes to lights, follow each stage for a perfect finish. Ideal for events and decor.
Preparing for the Build
One thing we learned from our first attempt at these marquee letters was that preparation is key. To avoid frustration later, take some time to make a few guides using your scrap wood.
Step 1: Make Height Guides
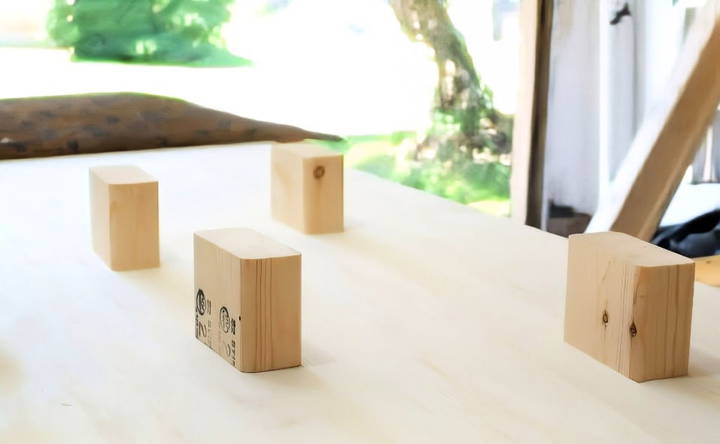
You'll need to cut small blocks from your scrap 2x4s. These blocks, which should be 2 and 5/8 inches tall, will help keep your letters at the correct height while you attach the flashing. Additionally, cut another piece of scrap wood to 3 and 3/8 inches high. This guide will show you exactly where to nail into the flashing and plywood, making the build much easier.
Cutting and Shaping the Letters
Once you have your guides ready, it's time to move on to the main event: cutting the letters.
Step 2: Print and Trace Your Letters
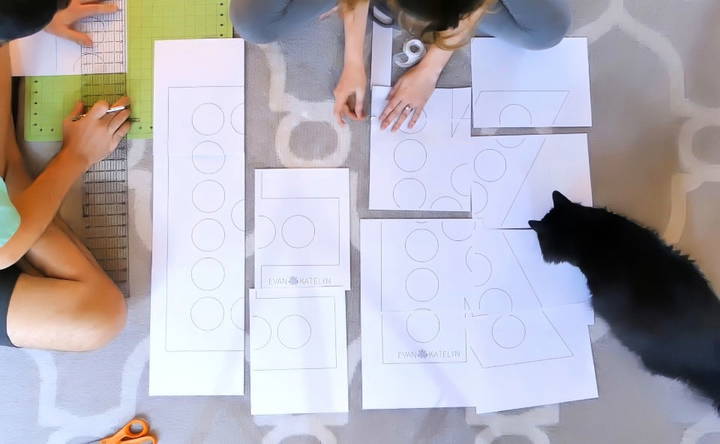
We made printable templates for each letter and taped them together. After that, we taped the templates onto the plywood and traced them carefully.
Step 3: Mark Holes for the Lights
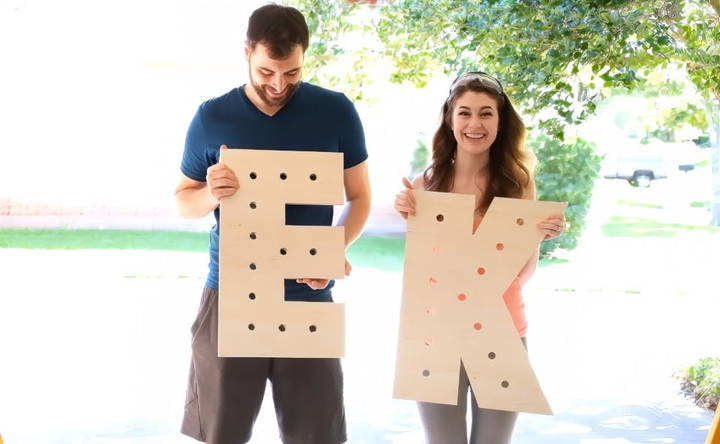
Before removing the template, mark the center of each hole where your lights will go. You can use a nail or a center punch for this. Once you've marked the centers, use a drill with a spade bit to make the holes. A helpful tip: drilling from the front helps avoid damage to the wood as you drill through.
Step 4: Cut Out the Letters
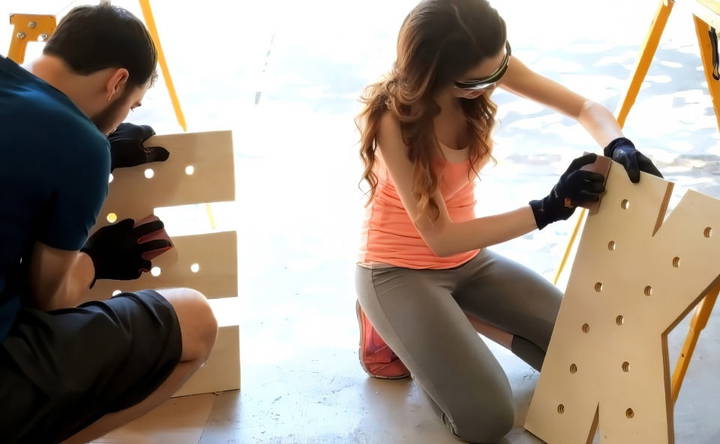
Now it's time to cut! Using a jigsaw, carefully cut along the outlines of your letters. Some letters, like “E,” might require you to drill a starting hole to help you access the tight spaces. Once you've cut them out, give the letters a quick sand to smooth the edges. You don't need to worry about making them perfect since they'll be covered later by the flashing.
Staining the Wood
Staining the wood is an optional step, but it adds a professional and polished look to your marquee letters. We used a dark walnut stain for ours, which gave the wood a rich, warm tone that contrasted beautifully with the metal flashing.
Step 5: Apply the Stain
To apply the stain, use a clean cloth or a brush and work the stain into the wood. Let it dry completely before moving on to the next step. We recommend doing this in a well-ventilated area and using gloves to avoid any mess.
Attaching the Flashing
Here's where the guides you made earlier will come in handy. Attaching the metal flashing can be tricky without them, but with the right tools and techniques, this step becomes much easier.
Step 6: Measure and Bend the Flashing
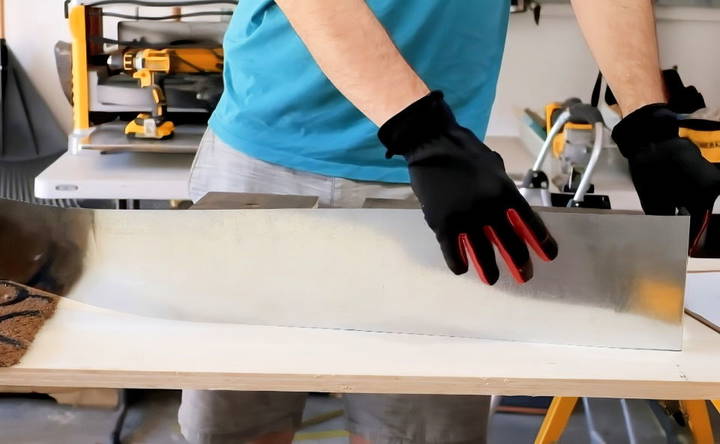
Start by measuring the segments of each letter where the flashing will go. Mark where you need to make bends in the metal. Be sure to wear gloves when handling flashing—it's sharp!
Place the metal flashing on a soft surface, align a thick putty knife with your mark, and tap with a hammer to build an indentation. This will help you bend the metal cleanly. Test each bend before moving on to the next to ensure you're on track.
Step 7: Attach the Flashing to the Letters
Once you've shaped the flashing to fit your letters, use the blocks you made earlier to hold the letters at the correct height while you attach the metal. You can use a nailgun to secure the flashing, but if you don't have one, a hammer and finishing nails will do the job just fine.
We placed a nail every 1.5 inches to ensure the flashing was securely attached. In places where a nailgun wouldn't fit, we used a little bit of super glue to hold things in place.
Adding the Lights
Finally, it's time for the most satisfying part of the project: adding the lights!
Step 8: Install the Lightbulbs
Insert your globe string lights through the holes you drilled earlier. A quick tip: if you're having trouble fitting the lights, start by doing every other hole, then go back and fill in the empty ones. This makes the process smoother and reduces the risk of breaking any bulbs.
Customization Ideas
Customizing your DIY marquee letters can make them unique and personal. Here are some creative ideas to help you add a special touch to your project:
1. Paint and Colors
- Bold Colors: Use bright, bold colors to make your letters stand out. Consider using spray paint for an even finish.
- Metallics: Add a touch of glamour with metallic paints like gold, silver, or bronze.
- Ombre Effect: Make a gradient effect by blending two or more colors. This can add depth and interest to your letters.
2. Lighting Options
- Fairy Lights: Use fairy lights for a soft, twinkling effect. They are easy to work with and can be battery-operated.
- LED Strips: For a modern look, use LED strip lights. They are bright, energy-efficient, and come in various colors.
- Vintage Bulbs: For a classic marquee look, use vintage-style bulbs. They add a nostalgic feel to your letters.
3. Decorative Elements
- Glitter and Sequins: Add sparkle with glitter or sequins. Apply a layer of glue and sprinkle glitter over it for a dazzling effect.
- Fabric and Textiles: Cover your letters with fabric for a textured look. You can use felt, burlap, or even patterned fabric.
- Stencils and Patterns: Use stencils to add patterns or designs. This can include polka dots, stripes, or even floral designs.
4. Themes and Occasions
- Seasonal Themes: Customize your letters for different seasons. For example, use pastel colors for spring or red and green for Christmas.
- Events and Parties: Tailor your letters to match the theme of an event. For a wedding, you might use white and gold, while for a birthday party, you could use the person's favorite colors.
- Personal Messages: Add personal messages or names to your letters. This makes them perfect for gifts or special occasions.
5. Mounting and Display
- Wall Mounting: Attach hooks or brackets to the back of your letters for easy wall mounting.
- Freestanding: Make your letters freestanding by adding a sturdy base. This is great for table displays or floor decorations.
- Hanging: Use string or wire to hang your letters from the ceiling or a backdrop. This can build a floating effect.
6. Interactive Elements
- Chalkboard Paint: Use chalkboard paint so you can write and erase messages on your letters.
- Magnetic Paint: Apply magnetic paint to make your letters interactive. You can then attach small magnets or notes.
Use these customization ideas to make unique, visually appealing marquee letters. Experiment with materials and techniques for your perfect look.

Common Mistakes to Avoid
Making DIY marquee letters can be a fun and rewarding project, but there are some common mistakes that can make the process more challenging. Here are some pitfalls to watch out for and tips on how to avoid them:
1. Incorrect Measurements
- Mistake: Not measuring your materials accurately can lead to uneven or mismatched letters.
- Solution: Double-check all measurements before cutting. Use a ruler or measuring tape to ensure precision.
2. Poor Lighting Choices
- Mistake: Choosing the wrong type of lights can affect the overall look and functionality of your marquee letters.
- Solution: Select lights that suit your design and purpose. For a soft glow, use fairy lights. For a brighter effect, opt for LED strips or vintage bulbs.
3. Weak Structure
- Mistake: Using flimsy materials can result in letters that are not sturdy and may collapse.
- Solution: Use strong, durable materials like thick cardboard, plywood, or foam board. Reinforce the structure with additional supports if necessary.
4. Messy Paint Job
- Mistake: Applying paint unevenly or using the wrong type of paint can make your letters look unprofessional.
- Solution: Use spray paint for an even coat. Apply multiple thin layers rather than one thick layer. Allow each layer to dry completely before applying the next.
5. Inadequate Adhesive
- Mistake: Using the wrong type of glue can cause parts of your letters to come apart.
- Solution: Choose a strong adhesive suitable for the materials you are using. Hot glue guns work well for most DIY projects.
6. Ignoring Safety Precautions
- Mistake: Not taking safety measures can lead to accidents or injuries.
- Solution: Always wear protective gear like gloves and safety glasses. Work in a well-ventilated area, especially when using paints and adhesives.
7. Skipping the Planning Stage
- Mistake: Jumping straight into the project without a clear plan can lead to mistakes and wasted materials.
- Solution: Sketch out your design and plan each step before you start. This will help you stay organized and avoid errors.
8. Overlooking Electrical Safety
- Mistake: Improperly wiring the lights can be a fire hazard.
- Solution: Follow the manufacturer's instructions for wiring. If you're unsure, seek help from someone with electrical experience.
9. Not Testing Lights Before Assembly
- Mistake: Assembling the letters without testing the lights can result in having to disassemble if the lights don't work.
- Solution: Test all lights before attaching them to your letters to ensure they are functioning properly.
10. Inconsistent Letter Sizes
- Mistake: Making letters of different sizes can make your marquee look unbalanced.
- Solution: Use templates or stencils to ensure all letters are the same size and shape.
By being aware of these common mistakes and taking steps to avoid them, you can ensure your DIY marquee letters turn out beautifully and last for a long time.
FAQs About DIY Marquee Letters
Discover answers to common questions about DIY marquee letters, including materials, assembly tips, and creative ideas for your next project.
DIY marquee letters are large, illuminated letters that you can make yourself. They are often used for events like weddings, parties, or home decor. They add a personalized and festive touch to any setting.
Yes, you can paint your marquee letters to match your decor. Use acrylic paint for foam board letters and wood stain or paint for plywood letters. Make sure the paint is completely dry before adding the lights.
The time it takes can vary depending on the size and complexity of your letters. On average, it might take a few hours to a day to complete one letter, including cutting, painting, and adding lights.
DIY marquee letters are versatile and can be used in many settings. They are great for weddings, birthday parties, graduation celebrations, and home decor. They can be placed indoors or outdoors, depending on the materials and lights used.
Yes, battery-operated lights are a great option if you don't have access to an electrical outlet. They are also safer for outdoor use and can be easily turned on and off without needing to plug and unplug.
Final Thoughts and Personal Tips
Looking back, the hardest part of this project was figuring out how to keep the plywood aligned with the flashing while nailing it in place. But once we buildd those guides, everything fell into place much more easily. So, if I were to do this DIY marquee letters project again, I'd emphasize the importance of preparation—it's what makes the difference between a smooth process and a frustrating one.
I also learned that working with flashing can be intimidating because of how sharp the edges are, but with the right tools and a little patience, it's manageable. Don't be afraid to take your time with this step, and if you mess up a bend, just flatten it out and try again.
Whether you're making these marquee letters for a wedding, a party, or just as home decor, the end result is always stunning and unique. Plus, there's something extra special about making it yourself. So, gather your materials, put on your gloves, and get started! You'll be amazed at how beautiful your DIY marquee letters turn out.


