Making a DIY marshmallow shooter is a simple and enjoyable activity for kids. This craft involves making a marshmallow gun using everyday items, providing an exciting way to engage children's creativity. By following clear instructions, children can have fun while learning basic building skills. The project is not only engaging but also a perfect opportunity for indoor or outdoor play.
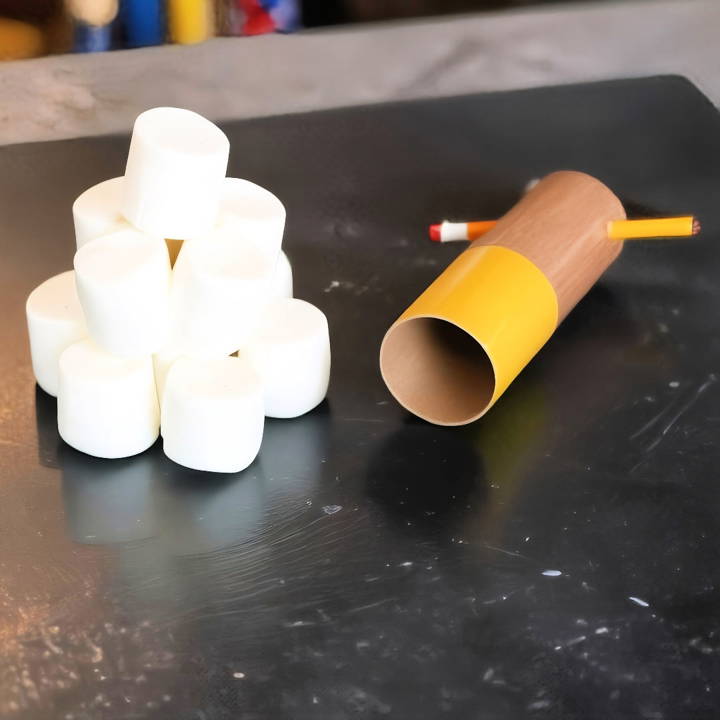
To get started on this fun marshmallow shooter project, you'll need some basic materials and a little patience. The step-by-step guide will help in making the marshmallow gun quickly and efficiently. As kids craft their shooters, they will enjoy both the process and the playful outcome.
Ready to learn how to make a marshmallow gun? Let's dive into the details in the next section.
What You'll Need
Before jumping into the creation process, let's talk about what materials you'll need and why each is crucial:
- Two Toilet Paper Rolls: These will form the main body of your blaster. Toilet paper rolls are easily available and perfect in size.
- A Pencil: This will be used as the axle for the firing mechanism. Any standard pencil will do.
- Two Rubber Bands: Essential for making the tension needed to launch marshmallows. Make sure they're sturdy!
- Large Marshmallows: Your ammunition. Large ones work best as they fit snugly in the tube.
- Tape: For securing and decorating your blaster. Duct tape or any strong tape can serve both purposes.
- Scissors: For cutting the toilet paper rolls.
Step by Step Instructions
Learn how to make a fun and easy DIY marshmallow shooter with our step-by-step guide. Perfect craft activity for kids to enjoy at home!
Step 1: Preparing the Tube
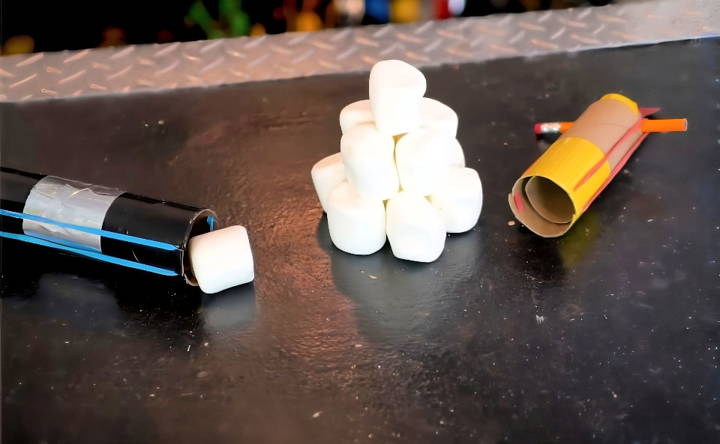
The first step is to modify one of the toilet paper rolls. Cut it lengthwise, then roll it slightly tighter so a marshmallow can't slip through. Secure this adjustment with tape along the seam. Strengthen the tube by adding tape on the inside at both ends.
Step 2: Making the Launcher Mechanism
After tweaking the tube's size, punch or cut two holes opposite each other, sized just right to let a pencil pass through. Adjust the length of the pencil so it fits snugly through the holes without extending too much on either side. This adjustment is key because it will significantly influence how well your shooter performs.
Step 3: Building the Firing Mechanism
Take the second toilet paper roll to construct the part of the blaster that will hold your rubber bands. Strengthen the top of the roll with a strip of tape, then make two small notches on opposite sides. These notches will hold the rubber bands in place. Slide this tube over the first, attach the rubber bands to the pencil using the notches, and your firing mechanism is ready.
Step 4: Perfecting Your Blaster
Initially, I found it awkward to launch marshmallows due to the uneven pressure applied when pulling back the pencil. To solve this, I devised a simple pull tab using tape. I secured a strip of tape to the middle of the pencil inside the tube, ensuring equal force application when pulling back. This small tweak made a significant improvement in the blaster's usability.
Beyond the Basics: Upgrades
Happy with the basic design, I couldn't resist experimenting with upgrades. Swapping toilet paper rolls for longer paper towel tubes and using longer rubber bands, I crafted a sniper version for improved range and accuracy. Adding a small piece of pencil wrapped with tape maked a comfortable, easy-to-grip pull tab, enhancing the overall shooting experience.
The Fun Part: Testing
With the marshmallow blaster assembled, the real fun began. Setting up targets around the house provided a delightful afternoon of entertainment. The upgraded sniper version proved impressive, knocking over objects from a distance with surprising accuracy.
Customization Ideas for Marshmallow Shooters
Customizing your marshmallow shooter can be as much fun as using it. Here are some ideas to make your shooter uniquely yours:
Choose Your Materials
Start by selecting materials that reflect your style. You can use PVC pipes, bamboo, or even recycled materials like paper towel tubes for the body of the shooter. For the mouthpiece, consider using a balloon or rubber tubing that's comfortable and easy to blow into.
Design and Decor
Think about the look of your shooter. Do you want it to be sleek and modern or funky and colorful? Use paints, stickers, markers, or duct tape to make patterns, designs, or characters. Just make sure whatever you add doesn't interfere with the functionality.
Functional Add-Ons
Consider adding features that enhance the performance or usability of your shooter. A sight made from a paper clip or a small piece of plastic can help with aim. A handle or shoulder stock can make it easier to hold and shoot accurately.
Comfort Adjustments
Make sure your marshmallow shooter is comfortable to use. Add padding where your mouth or hands touch the shooter. If you're using PVC pipes, you can add foam insulation as a grip to prevent slipping.
Storage Solutions
Make a carrying strap from an old lanyard or a piece of cloth so you can take your shooter on the go. You can also design a holster or a storage box decorated to match your shooter.
Personal Flair
Finally, add a personal touch. This could be your name, a nickname, or a logo. You can carve it, draw it, or use stick-on letters to make it stand out.
The key to great customization is that it reflects your personality and improves your experience without compromising safety or functionality.
Educational Angle: Understanding the Science Behind Marshmallow Shooters
Exploring the science behind marshmallow shooters can be a delightful and educational experience for people of all ages. Let's dive into the basic physics principles that make these fun gadgets work.
The Role of Air Pressure
Air pressure is the unseen hero in the operation of a marshmallow shooter. When you blow into the shooter, you're increasing the air pressure inside the tube. This higher pressure behind the marshmallow pushes it out of the tube and into the air. It's the same principle that allows you to blow up a balloon—the air from your lungs makes pressure that fills and expands the balloon.
Force and Motion
The force you apply by blowing into the shooter affects how far the marshmallow will travel. The more forceful your breath, the more speed—or velocity—the marshmallow will have as it exits the shooter. This is a practical demonstration of Newton's second law of motion, which states that the acceleration of an object is dependent upon two variables: the net force acting upon the object and the mass of the object.
Trajectory and Gravity
Once the marshmallow is airborne, it follows a path called a trajectory. Gravity, the force that pulls objects toward the Earth, acts on the marshmallow, making a curved path. The angle at which you aim the shooter can affect the trajectory, determining how high and how far the marshmallow will go.
Experimenting with Variables
You can turn marshmallow shooting into a scientific experiment by changing variables and observing the results. Try altering the amount of force you use, the angle of the shooter, or the size of the marshmallow. What happens if you use a mini marshmallow versus a larger one? How does changing the length of the tube affect the distance the marshmallow travels? These experiments can teach you about hypotheses, trials, and drawing conclusions based on observable data.
Real-World Applications
The principles at play in marshmallow shooters are the same ones that govern real-world applications like launching rockets or using a fire extinguisher. By understanding the basics of air pressure, force, and motion, you can gain a greater appreciation for the complex physics involved in everyday life.
Adding this to your post makes it engaging and educational. Use simple language and clear explanations so all ages can enjoy and learn.
Safety First: Ensuring Secure Fun with Marshmallow Shooters
When it comes to marshmallow shooters, safety is paramount. These playful devices are meant for light-hearted fun, but it's important to use them responsibly to prevent accidents. Here's a guide to help you enjoy your marshmallow shooter safely.
Use Soft Projectiles
Always use soft, unmodified marshmallows as ammunition. Avoid using hard objects or frozen marshmallows, which can cause injury.
Eye Protection
Encourage everyone involved in marshmallow shooter activities to wear eye protection. Safety goggles or glasses can help prevent eye injuries.
Shooter Inspection
Before use, inspect your marshmallow shooter for any sharp edges or broken parts that could cause cuts or other injuries. Smooth out any rough areas and repair or replace damaged parts.
Supervise Young Children
If young children are participating, adult supervision is necessary. Teach them how to use the shooter properly and ensure they understand not to aim at people's faces or animals.
Clear Play Area
Use marshmallow shooters in an open area where there's no risk of damaging fragile items or hurting bystanders. Indoors, remove breakables and valuables from the play zone.
Mouthpiece Caution
If your shooter uses a mouthpiece, make sure it's clean and not shared between users to maintain hygiene. Consider having individual mouthpieces for each person.
Responsible Use
Set ground rules for using the marshmallow shooter. This includes not shooting at people who aren't participating, animals, or property that could be damaged.
By following these safety tips, you can ensure that using your marshmallow shooter is a fun and secure experience for everyone involved.
FAQs About How to Make Marshmallow Shooters
Discover quick answers to FAQs about how to make marshmallow shooters! Perfect for fun DIY projects and entertaining kids.
You can cut the PVC pipe into sections using a pipe cutter or hacksaw. For a simple design, you might need:
Five 3-inch pieces
One 5-inch piece
One 7-inch piece Ensure the cuts are straight and smooth for easy assembly.
After cutting the PVC pipe into sections, follow these steps:
Lay out the pieces in the shape of the gun.
Connect the pipes using the elbow and T-joints.
Cap the ends with the PVC caps.
Make sure all pieces fit snugly without gaps.
To use the shooter:
Place a marshmallow inside the top tube.
Aim the shooter away from people and fragile objects.
Give a firm blow through the mouthpiece to launch the marshmallow.
Yes, safety is important:
Always point the shooter away from faces and animals.
Do not modify the shooter to increase power or range as it may cause injury.
Use only soft, miniature marshmallows as ammunition.
Supervise children during play to ensure safe use.
Absolutely! Customizing your marshmallow shooter can be a blast. Here are some ideas:
Paint it: Use non-toxic spray paint to give your shooter a personalized look.
Stickers: Decorate with stickers for extra flair.
Longer barrel: Increase the length of the barrel for potentially further shots.
Sights: Add makeshift sights on top for better aiming.
Handles: Experiment with different handle designs for comfort.
Closing Thoughts
Wrapping up, making a DIY marshmallow shooter is a fantastic way to engage kids in a fun and easy project. Following this simple marshmallow gun plan will provide hours of entertainment and creativity. Remember, the key to a successful DIY marshmallow shooter is safety and supervision, ensuring kids enjoy their new toy responsibly. So, gather your materials and get started on this enjoyable activity now!


