Learning how to vacuum seal Mason jars is an essential skill for anyone looking to extend the shelf life of their food. This method locks in freshness, keeps out moisture, and prevents spoilage, making it ideal for preserving a variety of items. From fruits and vegetables to dry goods and even meals, understanding the right techniques can make all the difference.
In this guide, we will walk you through 8 step-by-step methods to secure your food safely inside Mason jars using a vacuum sealer. Whether it involves using a jar attachment or a freeze dryer, we have you covered with clear, practical advice. Perfect for those aiming to reduce food waste and save money on groceries, get ready to explore efficient ways to preserve your favorite foods. Let's dive into how you can protect your edibles effectively and maintain their quality for longer.
Why Vacuum Seal Mason Jars?
Vacuum sealing Mason jars isn’t just a trendy kitchen hack; it's a practical, cost-effective way to preserve the quality and longevity of your foods. Here’s why you should consider this method:
- Extended Shelf Life: By removing air, vacuum sealing drastically reduces oxidation and moisture. This means your dry goods, like nuts, seeds, and spices, stay fresh for much longer compared to traditional storage methods.
- Protection Against Pests: Airtight seals keep out pests like weevils and moths, ensuring your pantry staples remain uncontaminated and safe to consume.
- Saves Money: Vacuum sealing helps prevent food waste, allowing you to buy in bulk and store for extended periods. This means fewer trips to the grocery store and better budget management.
- Maintains Flavor and Nutrient Quality: Reducing exposure to air preserves the flavor, aroma, and nutrients of your food, ensuring they remain as close to their original state as possible.
- Organization and Convenience: Sealed jars are easy to label, stack, and store, making pantry organization a breeze. Plus, vacuum-sealed foods are ready to use, saving you preparation time in the kitchen.
- Eco-Friendly: Mason jars are reusable, reducing the need for single-use plastics and contributing to a more sustainable lifestyle.
Incorporating vacuum-sealed Mason jars into your food preservation routine is a smart move. It’s about making the most of your food purchases, ensuring they last longer, and minimizing waste—all while keeping your pantry organized and your meals tasting great.
How to Vacuum Seal Mason Jars
Vacuum sealing your jars is a fantastic way to extend the shelf life of your food and make the most out of your glass jars. Glass jars are not just eco-friendly but also the best for ensuring your food stays fresh longer. Here's a simple guide on how you can vacuum seal nearly any jar using a vacuum canister, helping you reduce waste and save money by reusing jars from store-bought products.
Step 1: Gather Your Supplies
You will need:
- A vacuum seal canister with a hose attachment.
- Glass jars with lids (the lids should have a rubber seal for best results).
- Dry goods for storage.
Step 2: Prepare Your Jars
Clean the jars and lids thoroughly to ensure they are free from any food residue. Dry them completely before use. Choose jars without any cracks or chips for optimal sealing.
Step 3: Fill Your Jars
Fill your jars with the dry goods you wish to store. Be careful not to overfill; leave a little space at the top to ensure a tight seal.
Step 4: Place the Lid on the Jar
Tightly screw the lid onto your jar. If you're using a one-piece lid from a store-bought product (like a pasta sauce jar), ensure the rubber ring inside the lid is in good condition. This rubber ring is crucial for making an airtight seal.
Step 5: Place the Jar in the Vacuum Canister
Insert the jar into your vacuum seal canister. Make sure the canister is taller than your jar to ensure it fits properly and can make an effective vacuum seal.
Step 6: Vacuum Seal the Jar
Attach the hose from your vacuum sealer to the nozzle on the canister. Turn on your vacuum sealer and press the button for sealing canisters. Your machine will begin to remove the air from the canister. Once the machine stops, indicating the air has been fully extracted, you can turn off the sealer.
Step 7: Remove the Jar
Carefully remove the lid of the vacuum canister and take out your sealed jar. You should hear a pop sound if you're opening a previously sealed jar, indicating the vacuum process was successful.
Repeat the Process
Repeat the process for all the jars you wish to seal. Some jars might require more than one vacuum cycle to ensure all the air has been removed effectively.
Things to Remember
- Ensure the canister is taller than the jar you are trying to seal.
- Some jars may require multiple vacuum cycles to completely remove all air.
Video Tutorial
For a step-by-step video tutorial on how to vacuum seal almost any jar, watch this useful guide: Vacuum Seal Almost Any Jar - Recycle Glass Jars for Food Storage.
It pairs well with this written guide, offering visual support to the techniques we've discussed here in a manner that's straightforward and simple to follow.
By following these steps, you not only make the most out of your glass jars but also contribute to a more sustainable lifestyle by minimizing waste. Happy sealing!
FAQs on Vacuum Sealing Mason Jars
We've compiled a list of frequently asked questions to guide you through the process of vacuum-sealing Mason jars. This section is designed to provide clear and concise answers to common queries, making your food preservation efforts more effective and hassle-free.
What is vacuum sealing?
Vacuum sealing is a method of packaging that removes air from the container before sealing it. This process can significantly extend the shelf life of food by reducing oxidation and preventing the growth of bacteria and mold.
Can you vacuum seal any type of food in Mason jars?
- Dry Goods: Yes, items like nuts, seeds, dried fruits, flour, and spices are ideal for vacuum sealing in Mason jars.
- Moist Foods: Be cautious. Foods with higher moisture content can be preserved, but they might require refrigeration and have a shorter shelf life compared to dry goods.
- Liquids: It's possible but challenging. Special techniques are needed, and it's often better to freeze liquids before sealing.
Do I need a special vacuum sealer to seal Mason jars?
No, not necessarily. While there are vacuum sealers with attachments specifically designed for Mason jars, there are also manual methods and hacks (like using a brake bleeder) that can effectively seal jars without the need for specialized equipment.
How long can vacuum-sealed foods last in Mason jars?
The shelf life can vary significantly based on the type of food, storage conditions, and how well the vacuum seal is maintained. Generally, dry goods can last several years when vacuum-sealed and stored in a cool, dark place.
Can vacuum sealing prevent food spoilage entirely?
No method can completely stop food spoilage, but vacuum sealing significantly slows down the process by reducing air exposure. It's crucial to start with fresh, high-quality foods and maintain proper storage conditions to maximize shelf life.
Is it necessary to sterilize Mason jars before vacuum sealing?
For long-term storage of dry goods, it's a good practice to sterilize the jars to eliminate any bacteria or fungi spores that might be present. This can be done by washing the jars in hot, soapy water and then drying them in an oven or boiling them in water for 10 minutes.
Can I reuse lids for vacuum sealing?
Yes, but with caution. If the lid is in good condition without any dents or rust and the sealant ring on the underside is intact, it can be reused for vacuum sealing. However, for canning purposes, where the food is processed in a water bath or pressure canner, it's recommended to use new lids each time to ensure a safe seal.
How do I know if my Mason jar is properly sealed?
After the vacuum sealing process, the lid should not flex when pressed in the center, and you might hear a popping sound as the vacuum seal forms while the jar cools. If the lid flexes up and down, the seal is not secure.
What should I do if my vacuum-sealed jar loses its seal?
Inspect the jar and lid for any damage. If everything looks fine, you can try to reseal the jar. However, if the jar has been stored for a while and the seal breaks, it's best to check the contents for spoilage before consuming.
Vacuum sealing Mason jars is a versatile and efficient method to extend the shelf life of your food. By understanding the process and adhering to best practices, you can ensure your food stays fresh and delicious for as long as possible.
How to Vacuum Seal Mason Jars (8 Ways Step By Step)
Learn how to vacuum seal Mason jars with these 8 easy step-by-step methods. Keep your food fresh and safe longer with this helpful guide.
1. How to Vacuum Seal a Mason Jar - Step by Step
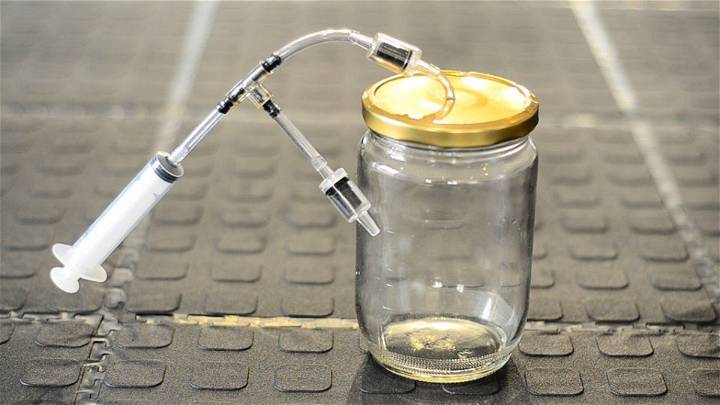
Discover the art of preserving with a modern twist! Learn how to vacuum seal mason jars to keep your foods fresher and longer. This simple, step-by-step guide on Instructables walks you through the process, making it easy for anyone to follow. Perfect for pantry organization, meal prep, or extending the shelf life of your favorite goods. Get started today and make the most out of every jar!
2. How to Vacuum Seal Mason Jars in Seconds
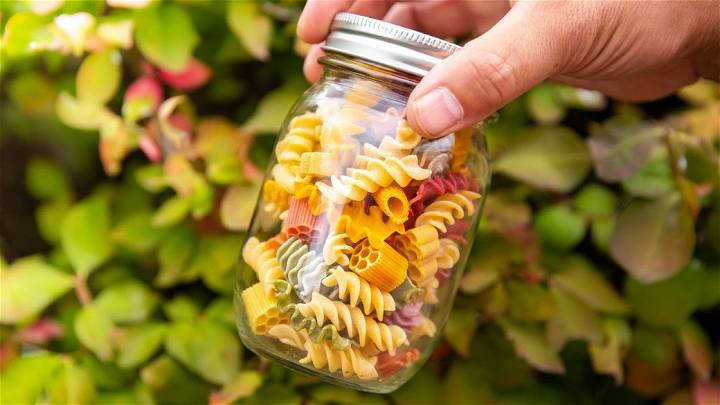
Discover the quick and efficient way to vacuum seal mason jars with Avid Armor's USB 32 chamber sealer. Perfect for sealing dry goods, this method involves lightly screwing the lid on "fingertip tight," placing the jar in the chamber, and starting the vacuum and seal cycle. Once done, simply tighten the lid fully for a perfectly sealed jar. For liquids or those without a chamber sealer, learn alternative methods suitable for quart-sized jars. For a step-by-step guide, click here.
3. DIY Vacuum Seal Dry Goods in Mason Jars for Storage
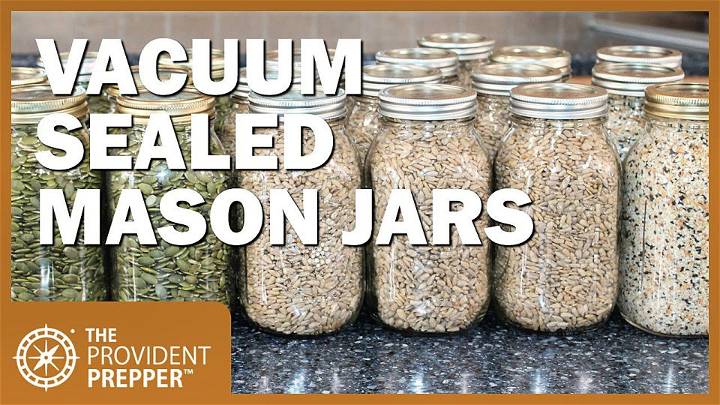
Maximize your dry goods' shelf life with a vacuum seal! Learn easy steps to preserve nuts, seeds, and other perishables using Mason jars, ensuring freshness and saving money. Say goodbye to rancidity and hello to prolonged storage. For a detailed how-to, click here: The Provident Prepper. Store smart, save big, and keep your pantry stocked efficiently.
4. How to Vacuum Seal Dry Food in Mason Jars
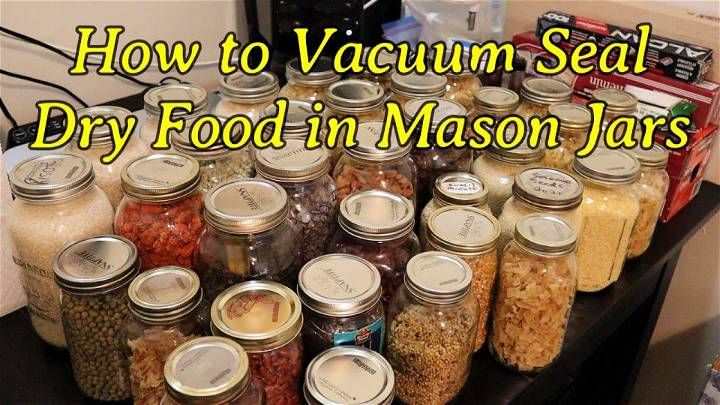
Learn the simple yet effective method of vacuum sealing dry foods in Mason jars with this helpful tutorial. Whether it's dehydrated potatoes, rice, tea, or nuts, learn to maximize the shelf life of your pantry staples. This guide walks you through the process, from selecting the right jars to using a FoodSaver jar sealer. Ideal for those looking to tidy up their pantry and ensure their dried goods are well-preserved for future use. Follow along for a streamlined approach to organizing and securing your food storage.
5. Homemade Mason Jar Vacuum Sealer
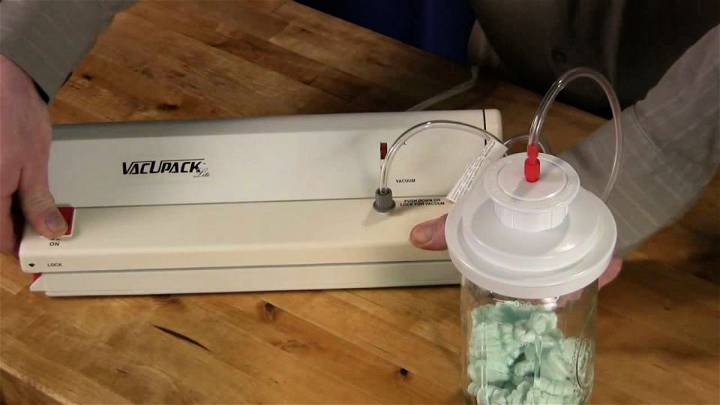
Unlock the secrets to preserving your food with ease using the VacUpack Lite Vacuum Packer. Learn to vacuum seal jars effectively, extending the shelf life of your goods. Perfect for wide-mouth mason jars, this method is straightforward and efficient. Simply attach the hose to the jar sealer port, utilize flat lids available at any retail store or through our website, and turn the machine on. A green gauge signals a perfect seal. This process is ideal for those seeking a reliable solution to food storage.
6. Vacuum Seal Mason Jars for Under $30
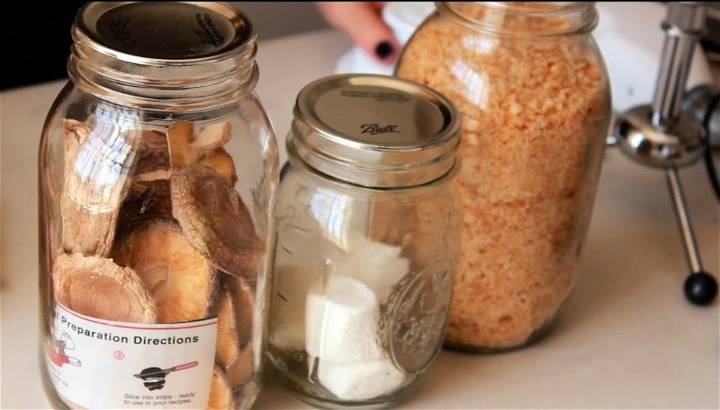
Discover a budget-friendly way to extend the shelf life of your foods by vacuum-sealing mason jars for under $30! This method uses a simple $10 food-saver jar sealer and a $20 vacuum sealer, making it ideal for both dried and dehydrated foods. Perfect for storing homemade breadcrumbs, dried mushrooms, and more. Learn this efficient technique and witness its magic with a marshmallow demonstration. For a detailed guide, click here. Keep your pantry organized and your food fresh longer!
6. How to Vacuum Seal Mason Jars
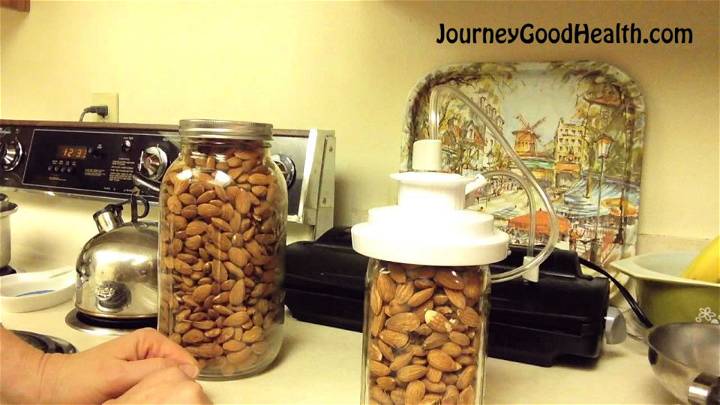
Learn the simple steps to vacuum seal mason jars with ease, a vital skill for preserving the freshness of bulk purchases like almonds. In a concise guide, discover how filling jars to the correct level and using the right tools can extend the shelf life of your favorite foods for years. Perfect for home preservation enthusiasts, this technique is brilliantly unpacked in a short video tutorial. For a deeper dive into maintaining good health through smart storage, visit JourneyGoodHealth.
7. Non-Electric Vacuum Sealing Mason Jars
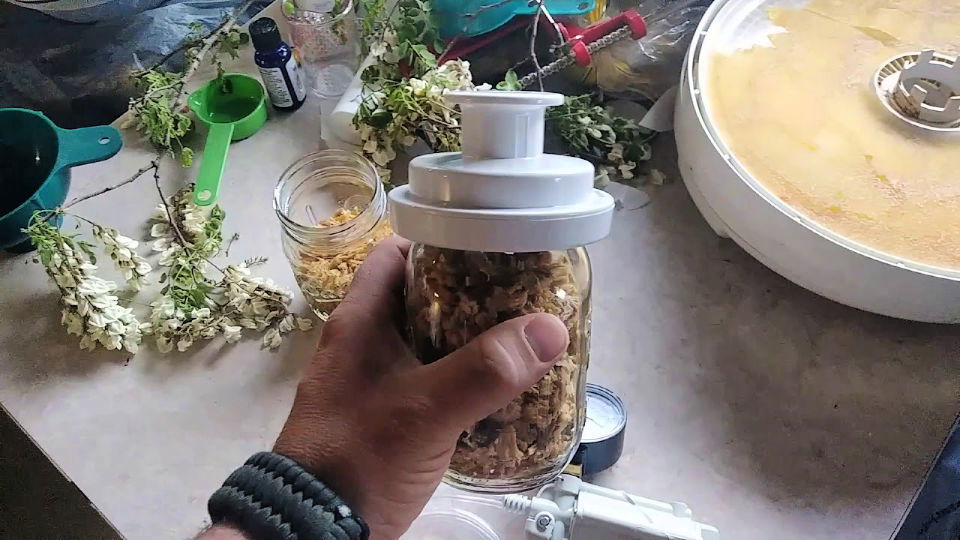
Discover the simplicity of sealing mason jars without electricity, perfect for preserving your dehydrated foods. Using a non-electric vacuum gun, this method seals jars effortlessly, ensuring your contents remain dry and fresh. It’s an innovative approach that leverages basic tools to achieve a tight seal, ideal for items like dehydrated chicken or tuna. Learn the step-by-step process by checking out the tutorial on Buckeye Bushcraft. It’s quick, effective, and eco-friendly, making it a must-try for sustainable home preservation.
8. How to Store Oatmeal in Mason Jars with Vacuum Sealer
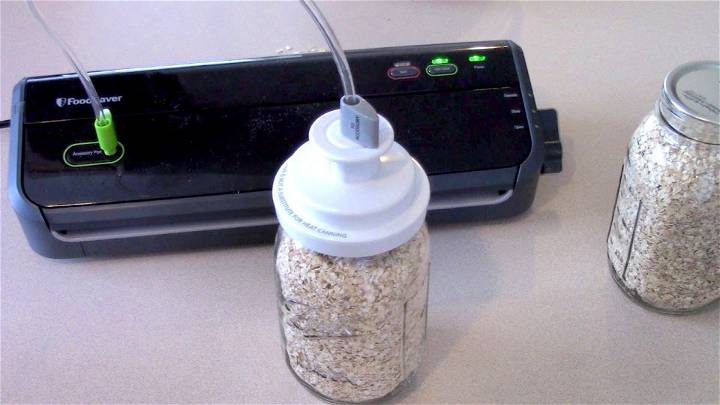
Looking to extend the shelf life of your oatmeal? Discover an efficient method by storing your oats in Mason jars using a vacuum sealer. Start by freezing your grains for three days to kill any potential weevil eggs, ensuring your oatmeal remains pest-free.
Fill your Mason jars with oats, then use a vacuum sealer with a jar attachment to extract the air, securing your food's longevity. For a detailed, step-by-step guide, watch this informative tutorial on Great Lakes Prepping. It’s a simple, foolproof way to keep your oatmeal fresh and ready for your next hearty breakfast.
Conclusion:
In conclusion, mastering how to vacuum seal mason jars involves understanding the right techniques and gathering the necessary supplies for a successful sealing process. This guide has walked you through 8 step-by-step methods to ensure your foods are preserved efficiently, extending their shelf life remarkably.
From using a vacuum sealer with a jar attachment to trying out a freeze dryer, these methods cater to a variety of needs and preferences. Remember, successful vacuum sealing not only depends on the method chosen but also on adhering to best practices such as sterilizing jars and ensuring lids are in good condition. By adopting these techniques, you'll be well on your way to maximizing the freshness and longevity of your stored goods, contributing significantly to your food preservation efforts.


