Starting this project was the best decision I made. I had always wanted a personalized experience with my typing, so I decided to build my own mechanical keyboard. The idea of crafting something functional and unique was exciting. Researching the best switches, keycaps, and cases made me realize how customizable and enjoyable this process can be.
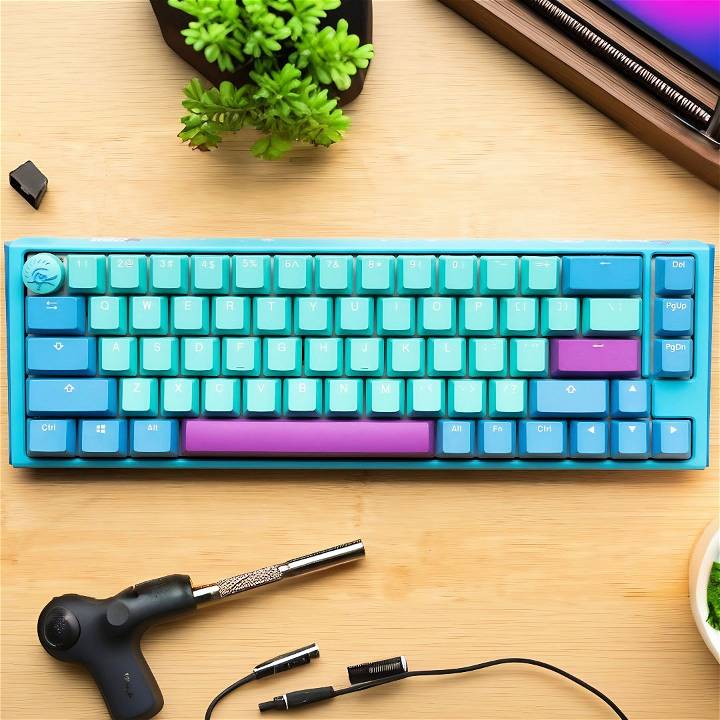
I got my parts and started assembling. It was easier than I thought. Following guides and using online resources helped a lot. Putting the switches together and hearing the clicks was satisfying. Building a DIY mechanical keyboard was not just about the end result but the journey. Now, every time I type, I feel accomplished and connected to my creation.
I'm helping with this: Taking on this project can give you a custom keyboard that fits both your style and typing needs.
Introduction to Mechanical Keyboards
Mechanical keyboards are a popular choice for many computer users due to their durability, tactile feedback, and customizable options. Unlike regular membrane keyboards, which use a layer of rubber or silicone to register key presses, mechanical keyboards use individual mechanical switches under each keycap. This design provides a distinct and satisfying “click” with each keystroke, which many users find more responsive and enjoyable to type on.
Why Choose a Mechanical Keyboard?
- Durability: Mechanical keyboards are built to last. Each switch can withstand millions of keystrokes, making them a long-term investment for your typing needs.
- Customization: One of the most appealing aspects of mechanical keyboards is the ability to customize them. You can choose from a variety of switch types, each with different actuation forces and feedback levels, to suit your personal preference. Additionally, you can swap out keycaps for different colors, materials, and designs to build a keyboard that's uniquely yours.
- Performance: Many users find that mechanical keyboards offer superior performance. The precise actuation of mechanical switches can improve typing speed and accuracy, which is especially beneficial for gamers, programmers, and writers.
The Basics of Mechanical Switches
At the heart of every mechanical keyboard are the switches. There are several types of switches, but they generally fall into three categories:
- Linear: These switches have a smooth keystroke with consistent resistance from top to bottom. They are often preferred by gamers for their quick, precise movements.
- Tactile: Tactile switches provide a noticeable bump in the middle of the keystroke, offering feedback to indicate a successful key press without the need for a full press down.
- Clicky: Clicky switches combine a tactile bump with an audible click sound, providing both physical and auditory feedback.
Getting Started with DIY Mechanical Keyboards
Building your own mechanical keyboard can be a rewarding project. It allows you to understand the inner workings of your keyboard and tailor it to your exact specifications. Here's what you need to get started:
- Keyboard Kit: This includes the case, PCB (printed circuit board), and stabilizers.
- Switches: Choose switches based on your preferred typing experience.
- Keycaps: Select keycaps that fit your aesthetic and typing preferences.
- Tools: You'll need a soldering iron if your PCB is not hot-swappable, as well as a keycap puller and switch puller.
Build your own mechanical keyboard for a perfect fit and personal satisfaction. Follow our detailed guides and happy building!
Materials You'll Need and Why
For my build, I opted for the Tofu 65 2.0 keyboard kit from KBDFans – a notable jump from their earlier models, offering a more refined building experience with multiple mounting options.
- Keyboard Kit: The heart of the build. It usually includes the case, PCB, and stabilizers. I chose this for its quality and compatibility with a wide range of customizations.
- Switches: These are key. They define the feel and sound of your keyboard. I went for hot-swappable sockets for ease of experimentation.
- Keycaps: The face of your board. Their material and design contribute significantly to the aesthetics and typing experience.
- Stabilizers: Essential for larger keys, ensuring smooth and stable key presses.
- Tools: Screwdrivers, tweezers, and a switch opener. Necessary for assembly and potential modifications.
Understanding the purpose of each component will facilitate a smoother building process and ensure you get the most out of your custom keyboard.
Step by Step Instructions
Learn how to build your own custom DIY mechanical keyboard with our easy, step-by-step instructions. Perfect guide for beginners and enthusiasts!
Deciding on Layout and Parts
I began by selecting a 65% layout – a sweet spot between functionality and compactness. Deciding on your layout first is crucial as it influences your keycap choices and overall design vision.
Assembling the PCB and Stabilizers
Before anything else, testing the PCB ensures that all keys register correctly, saving headaches later. Then, assembling and lubing the stabilizers are next. A properly lubed stabilizer can make or break the sound and feel of your keyboard. I recommend using dielectric grease for the bars and a thin layer of Krytox 205g0 for the housing.
The Switches
Switch selection is deeply personal. I chose tactile switches for their satisfying bump and sound. If you decide to lube your switches, remember that patience is key. The process can be meditative and profoundly affects the final feel.
The Build
The actual assembly begins with placing the stabilizers onto the PCB, followed by the switches. For my board, I chose a polycarbonate plate for its balance of rigidity and flex. The hot-swap capability of the PCB made placing switches a breeze, requiring no soldering.
Mounting and Casing
I opted for a silicone gasket mount for a softer, more forgiving typing experience. The process involved delicately placing silicone strips around the plate, building a cushion between the PCB and the case. This step can significantly affect the acoustics of your keyboard, providing a more muted, satisfying sound.
Keycaps
The final personal touch. Keycaps come in various profiles and materials, affecting both aesthetics and typing feel. I went for PBT keycaps for their durability and resistance to shining.
Personal Reflections and Tips
- Experiment: Don't be afraid to try different switches and keycaps. The beauty of a custom build is in its customization.
- Research: Spend time understanding each component's role and how they interact. This understanding will guide your selections and modifications.
- Patience: Some steps, like lubing switches or stabilizers, can be tedious but are often the most rewarding.
Customization Options
Customizing a mechanical keyboard is one of the most enjoyable parts of the DIY process. It's where you can express your personality and tailor the keyboard to your specific needs. Here's how you can make your mechanical keyboard truly one-of-a-kind:
Choosing Your Switches
The switches are the soul of your keyboard. They determine the feel and sound of your typing experience. Here are the most common types:
- Linear: Smooth and quiet, great for offices.
- Tactile: Have a bump in the middle, offering feedback without noise.
- Clicky: Provide a tactile bump and a distinct click sound, favored by typing enthusiasts.
Keycaps Galore
Keycaps are the face of your keyboard. They come in various materials, profiles, and designs:
- ABS: Lightweight and more affordable but can wear down over time.
- PBT: More durable and resistant to shine from prolonged use.
- Artisan Keycaps: Handcrafted and often thematic, these are perfect for adding a unique touch.
Lighting It Up
Backlighting can add flair and functionality to your keyboard:
- Single-color LED: For a consistent and understated look.
- RGB Lighting: Offers a spectrum of colors for a dynamic effect.
- Underglow: Lights up the area around your keyboard for an ambient effect.
Programmability
A programmable keyboard allows you to assign functions to keys as you see fit:
- Remapping Keys: Change the layout to suit your typing habits.
- Macros: Program sequences of actions to a single key for efficiency.
Sound Dampening
Modify the sound of your keystrokes with:
- O-rings: Reduce the sound of the keycap hitting the switch.
- Lubrication: Apply lubricant to switches for a smoother and quieter operation.
Final Touches
Add personal flair with:
- Custom Cables: Choose cables with different colors and materials.
- Keyboard Stands: Elevate your keyboard at an angle for comfort and style.
Customize your mechanical keyboard to look, feel, and sound just the way you want. Dive into the process and build a keyboard that's uniquely yours.
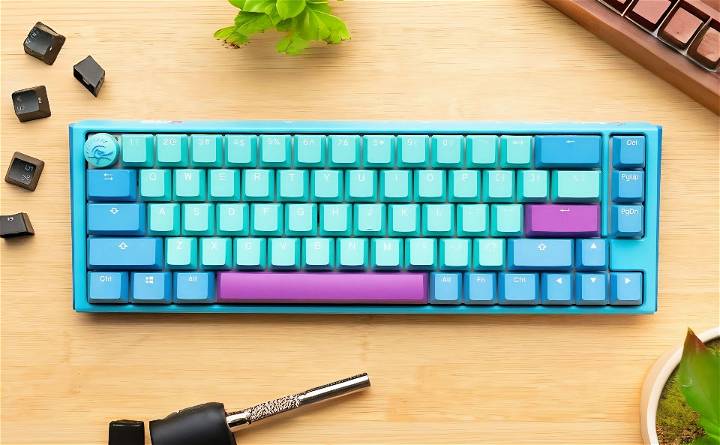
Future of Mechanical Keyboards
The future of mechanical keyboards is shaping up to be an exciting blend of innovation, personalization, and enhanced user experience. As we look ahead, several key trends are emerging that promise to redefine what mechanical keyboards can offer.
Embracing Cutting-Edge Technology
The year 2024 has seen significant advancements in mechanical keyboard technology. Innovations such as hot-swappable switches allow users to easily change switch types without soldering, catering to a variety of typing preferences. Optical switches, using light for actuation, and magnetic switches, offering instantaneous response, are on the rise, providing faster and more precise keystrokes.
Materials and Build Quality
High-grade materials like aluminum and magnesium alloys are becoming more common, giving keyboards a sturdy, premium feel. Keycaps made from PBT plastic and crafted using double-shot injection molding ensure durability and resistance to wear.
Wireless Connectivity
Wireless mechanical keyboards are gaining popularity due to their convenience and improved battery life. Advanced wireless protocols are being developed to minimize interference, ensuring a stable connection. The ability to seamlessly switch between multiple devices enhances multitasking and productivity.
Customization at the Forefront
Personalization continues to be a major focus. Users can express themselves with artisan keycaps made from various materials, including resin, metal, and wood, each providing a unique aesthetic and feel. The trend towards customization is not just about looks; it's about building a keyboard that fits the individual's typing habits and lifestyle.
Environmental Considerations
As sustainability becomes more important, the mechanical keyboard industry is looking at ways to reduce its environmental impact. This includes using recyclable materials and designing keyboards that are easier to disassemble for recycling.
Looking Ahead
The mechanical keyboard market is poised for growth, driven by the demand for high-quality typing experiences, gaming performance, and personal expression. As we move forward, we can expect to see continued innovation in switch technology, materials, design, and connectivity.
Stay informed about trends to make smart mechanical keyboard choices, ensuring your device meets your needs and is technologically advanced.
Troubleshooting
When it comes to mechanical keyboards, encountering issues is not uncommon. However, most problems are easily fixable with a bit of know-how. Here's a guide to troubleshooting some common mechanical keyboard issues:
Unresponsive Keys
If a key isn't working:
- Check for physical obstructions: Remove the keycap and ensure there's no debris or dust.
- Test the switch: Use a key tester or gently press the switch with a tool to see if it actuates.
- Inspect for damage: Look for visible signs of wear or damage to the switch.
Key Chatter
When a single key press registers multiple times:
- Firmware update: Ensure your keyboard's firmware is up to date.
- Switch cleaning: Sometimes, dust can cause key chatter. Clean the switch with compressed air.
- Replace if necessary: If cleaning doesn't help, the switch may need to be replaced.
Sticky Keys
Keys that don't come back up after pressing:
- Clean the keycap and switch: Spills can cause stickiness. Clean with isopropyl alcohol and a cotton swab.
- Check the spring: Make sure the spring inside the switch is not bent or broken.
Connectivity Issues
For wireless keyboards:
- Check the battery: Replace or recharge the keyboard's battery.
- Interference: Ensure there's no interference from other wireless devices.
- Re-pair the device: Sometimes, re-pairing the keyboard with your computer can resolve connectivity issues.
Software Problems
If the keyboard isn't behaving as expected:
- Driver update: Make sure the latest drivers are installed for your keyboard.
- Check software settings: Verify that the keyboard settings in your operating system or keyboard software are correct.
Check each area systematically to identify and solve most keyboard issues. Gentle handling and regular maintenance can prevent many problems.
FAQs About DIY Mechanical Keyboard
Discover answers to common questions about DIY mechanical keyboards. Get insights on parts, assembly, and customization for your own keyboard.
A DIY mechanical keyboard is a custom-built keyboard where you select and assemble the individual components according to your preferences. Unlike pre-built keyboards, DIY keyboards offer a personalized typing experience with choices in size, switches, keycaps, and more.
Building your own mechanical keyboard allows you to tailor every aspect of your typing experience. You can choose the size, layout, switches, keycaps, and even the sound of your keyboard. It’s a rewarding project that results in a unique and customized peripheral that reflects your needs and style.
Switches are crucial for the feel and sound of your keyboard. They come in three main types:
Linear: Smooth and consistent keystroke with no tactile bump.
Tactile: A noticeable bump in the middle of the keystroke, providing feedback.
Clicky: Similar to tactile, but with an added click sound for feedback. Consider what you’ll use the keyboard for and your preference for typing feel and noise level when choosing switches.
Yes, you can! Building a mechanical keyboard doesn’t require advanced technical skills. Many resources and guides are available to help beginners through the process step-by-step. It’s a fun learning experience that introduces you to the basics of keyboard technology and customization.
Maintaining your DIY mechanical keyboard is important to ensure its longevity and optimal performance. Here are some tips for maintenance:
Clean Regularly: Dust and debris can accumulate between the keys. Use a keycap puller to remove keycaps and clean the keyboard with compressed air or a soft brush.
Lubricate Switches: Over time, switches may become less smooth. You can apply a small amount of switch lubricant to maintain a consistent feel.
Update Firmware: Keep the keyboard's firmware up-to-date for the best performance and compatibility with your computer.
Tighten Screws: Occasionally check if the screws holding the case together are tight to prevent any wobble or noise.
Inspect Components: Look for signs of wear or damage in cables, connectors, and the PCB, and replace parts as necessary.
Conclusion
In conclusion, building your DIY mechanical keyboard is a fulfilling and personalized project. It allows you to build your own mechanical keyboard tailored to your preferences. From choosing the right switches to customizing keycaps, every detail matters. Enjoy the process and the unique typing experience you'll achieve.


