If you're an athlete, a hobbyist, or simply someone who loves collecting medals, you've probably faced the challenge of finding the perfect way to display them proudly. Instead of letting your hard-earned medals collect dust in a drawer or remain scattered around your room, why not build a DIY medal display? This project is not only practical but also serves as a fun and rewarding woodworking challenge—perfect for beginners and seasoned woodworkers alike.
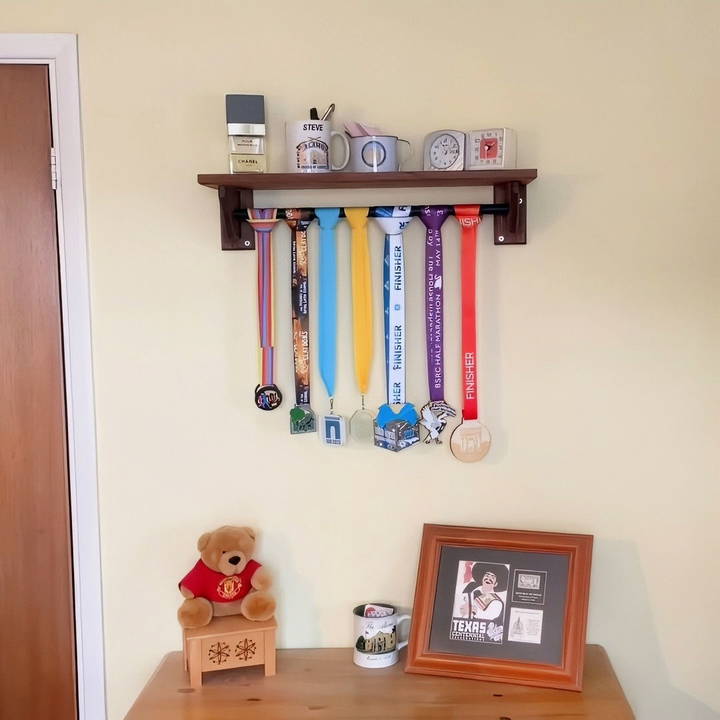
You deserve to celebrate your accomplishments, and a handmade medal display is a great way to add a personal touch to your collection—while keeping your medals organized and on full display for everyone to admire. Let's get started and turn those hidden treasures into a stunning showcase piece!
Materials Needed
Before diving into the actual building process, it's important to gather the materials required for this project. Based on the transcript of the video, here's what you'll need:
- Scrap wood (for the shelf and brackets)
- Metal pole (for hanging the medals)
- Wood glue
- Clamps
- Planer (to smooth and prepare the wood)
- Table saw (or a hand saw for cutting wood)
- Drill and drill bits (19 mm bit for drilling holes in the brackets)
- Sandpaper (in various grits: 80, 120, 240)
- Stain or oil for finishing the wood
- Screws and wall plugs (for mounting)
- Spirit level
- Measuring tape and pencil
Optional Tools:
- Forstner bit (19 mm diameter, for drilling the hole where the pole will sit)
- Thickness planer (for adjusting wood thickness)
Now that you've got your tools and materials, let's get into the fun part: building the shelf.
Step by Step Instructions
Learn how to make a DIY medal display with our step-by-step guide. From cutting wood to installing, build a custom display for your achievements.
Step 1: Preparing the Wood
Start with your scrap wood. If you don't have any lying around, you can purchase some affordable pieces from a local lumber yard or online marketplace. You will need enough wood to make both the shelf and the brackets that will support it.
Cutting the Shelf
First, cut the wood for the shelf itself. Aim for a width of approximately 4.4 inches (11.2 cm) and a length that fits the number of medals you plan to display. You can adjust the length based on your available space and number of trophies or medals. Once you've measured and marked the wood, use a table saw or hand saw to cut it to the desired dimensions.
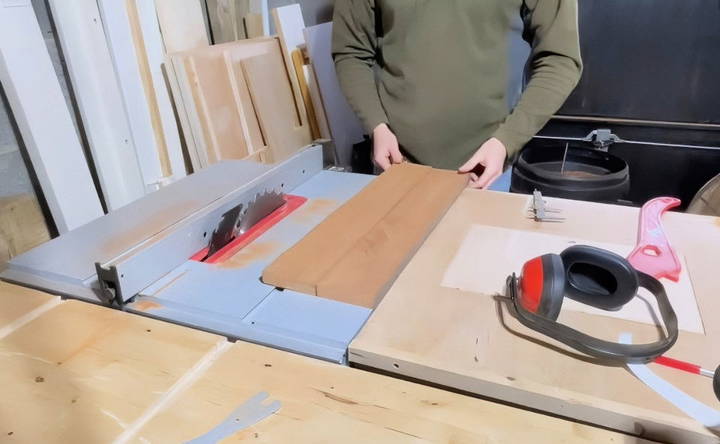
If you're using a planer, run the wood through to ensure it's perfectly smooth and even on all sides. For DIY enthusiasts who don't own a planer, sanding it down will suffice. Just be sure the surface is smooth and free of rough patches.
Gluing the Pieces Together
If your shelf is being made from multiple pieces of wood, now is the time to glue them together. Apply wood glue evenly between the boards and clamp them tightly to ensure a firm bond. Allow the glue to dry completely before moving on to the next step. Drying times can vary, but it's usually safe to wait at least an hour or two.
Step 2: Cutting and Preparing the Brackets
Learn how to build and prepare brackets with precise cutting and drilling techniques. Perfect your pole installation with our step-by-step guide.
Building the Brackets
Next, it's time to build the brackets. The brackets will support the shelf and hold the metal pole that will display your medals. Cut a block of wood to the same width as your shelf, then cut them into two equal pieces.
In this project, the designer aimed for pieces around 17.5 cm in width, but this is flexible based on the size of your display. The key is that both brackets must be the same size to ensure stability and symmetry.
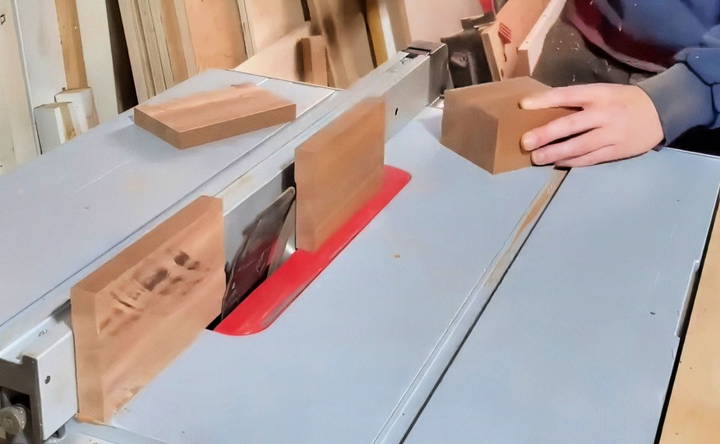
If you want to add a decorative touch, consider shaping the front edge of the brackets with a 45° bevel. This adds an aesthetic finish to your display, giving it a clean and professional look.
Drilling the Holes for the Pole
To hang your medals, you'll need a sturdy pole running between the two brackets. In this case, a 19 mm diameter black metal pole was used.
Mark the center of each bracket and use a Forstner bit to drill a hole large enough for the pole to slide through. If you don't have a Forstner bit, any appropriate-sized drill bit will work, but a Forstner bit helps ensure clean, accurate holes.
Take your time with this step. The holes should be perfectly aligned on both brackets to ensure the pole fits snugly and evenly. If you are uncertain, measure multiple times before drilling.
Step 3: Assembling the Shelf and Brackets
Once the shelf and brackets are prepared, it's time to assemble everything.
Attaching the Brackets to the Shelf
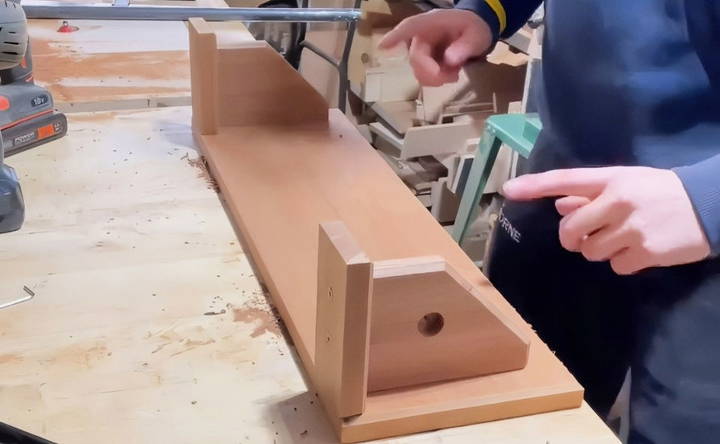
First, position the brackets under the shelf where you'd like them to be. Use wood glue and clamps to attach the brackets to the underside of the shelf. Be sure to allow for proper drying time, and make sure the brackets are square and level.
For added strength, consider driving screws through the shelf into the brackets once the glue has dried. Pre-drill small pilot holes to avoid splitting the wood, and use screws long enough to secure the pieces without coming through the top of the shelf.
Step 4: Sanding and Finishing the Shelf
Now that your shelf is fully assembled, it's time to sand it down for a smooth finish. Start with 80-grit sandpaper to remove any rough spots or marks, then progress to 120-grit and finally 240-grit for a silky smooth surface.
Once the sanding is done, apply a wood stain or oil finish to protect the wood and enhance its appearance. There are many finishes to choose from, depending on your preference for color and sheen. Be sure to apply it evenly with a clean cloth, following the wood grain. Let the finish dry completely before handling the shelf further.
Preparing for the Metal Pole
Before you glue everything together, remember that the finish needs to be applied before final assembly. However, avoid applying finish in areas where you'll be gluing, as this can prevent a strong bond. Mark these areas with a pencil and use painter's tape to block them off before applying the stain.
Step 5: Installing the Shelf
Learn how to install a shelf by attaching it to the wall and inserting a metal pole. Step-by-step guide for a secure installation.
Attaching the Shelf to the Wall
Once the shelf is finished and dry, you're ready to install it on the wall. Start by marking the location where you want to hang the shelf. Use a spirit level to ensure it will be straight.
Pre-drill holes into the wall where you will insert the wall plugs. Insert the plugs into the holes, then line up the brackets with the plugs. Drive screws through the brackets into the wall, ensuring everything is securely attached.
If you're mounting the shelf on a drywall surface, ensure you're using the correct type of wall plugs for maximum support.
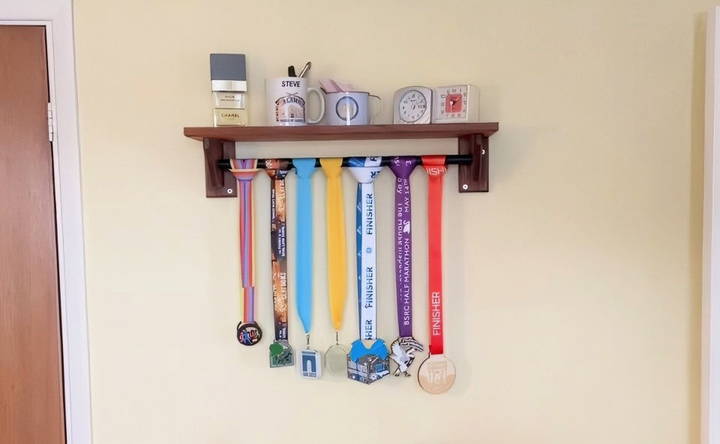
Inserting the Metal Pole
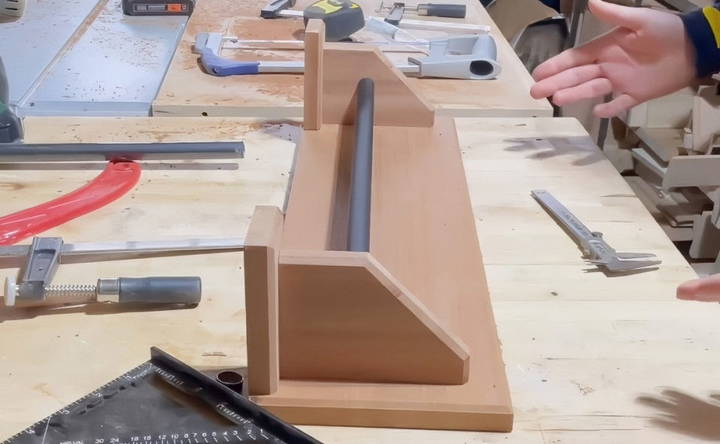
With the shelf securely mounted, slide the metal pole through the holes in the brackets. If needed, cut the pole to length using a hacksaw. Make sure it sits evenly in the brackets without wobbling.
Now you can start hanging your medals on the pole and placing any trophies on the shelf above.
Step 6: Final Touches
With everything assembled and mounted, take a step back and admire your new medal display! If you notice any areas that need additional sanding or finishing, now's the time to touch them up.
Additional Customization Ideas
If you want to take your DIY medal display shelf to the next level, here are some extra ideas for customization:
- Personalization: Add your name, event dates, or other engravings to the wood for a personal touch.
- Hooks for Additional Items: You could add small hooks under the shelf to hang ribbons, name badges, or other memorabilia.
- Lighting: Install small LED strip lights to illuminate the medals and trophies, making your achievements shine even more.
- Different Finishes: Experiment with different stains, paints, or varnishes to match the shelf with the decor of the room.
Conclusion
Building your own DIY medal display shelf is a rewarding and practical woodworking project that you can customize to fit your style and needs. With just a few materials and tools, you can build a beautiful display for your hard-earned medals and trophies.
By following this step-by-step guide, you'll not only save money by making something yourself but also gain the satisfaction of building something truly unique to showcase your accomplishments. Whether you're a seasoned woodworker or just starting out, this project is perfect for anyone who wants to turn their medals into a proud display piece.
FAQs About DIY Medal Display
Explore common questions and answers about DIY medal displays, focusing on materials, design tips, and hanging methods to showcase your achievements.
If your cuts are uneven or your wood has minor defects, use a planer or hand-sanding to even out surfaces. For larger mistakes, such as deep saw marks, remeasure and re-cut to fix the issue. You can also fill minor gaps with wood filler before sanding.
If the pole feels loose, you can wrap the ends of the pole with a thin layer of tape until it fits snugly. Alternatively, re-drill the holes with a slightly smaller drill bit for a tighter fit.
If you don't have a drill, you can use strong adhesive wall mounts designed for heavy-duty support, or pre-existing wall hooks. However, drilling into the wall provides the most secure and stable option for holding the shelf and the medals.
If you experience tool malfunction, such as a broken table saw, pause the project and troubleshoot the tool. Consult the user manual for repairs, or consider using alternative cutting tools, like a hand saw, to complete the project until the broken tool is fixed.
Yes, you can use different types of wood based on your preference. Softwoods like pine are easier to work with for beginners, while hardwoods like oak provide more durability and a polished finish. Just ensure the wood is thick and sturdy enough to hold the weight of medals and trophies.
To keep your display shelf looking good, dust it regularly and avoid placing it in areas with high humidity, which can warp the wood. For additional protection, reapply wood stain or oil annually to maintain its finish and protect against wear.
If the pole starts to sag, you can either replace it with a stronger metal rod or add an additional bracket in the middle for extra support. Be sure to distribute the medals evenly across the pole to minimize strain.


