Starting a DIY media console project was an exciting challenge for me. I wanted to build something unique for my living room. I gathered all my tools, wood, and supplies. With step-by-step plans and careful measurements, my vision began to take shape. Building a DIY TV console gave me the chance to customize every aspect, from the size to the design elements.
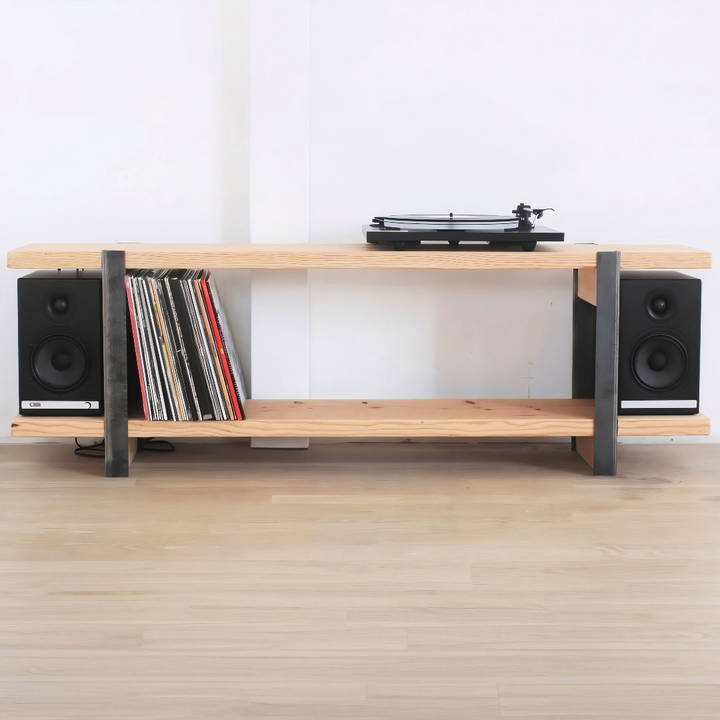
Completing my DIY TV cabinet provided a sense of achievement I hadn't felt in a long time. Not only did it enhance my space, but it also saved me money. Seeing the finished product made all the effort worth it.
With this journey, I'm encouraging you to try it too. I'm confident that these tips can help you succeed in your project.
Materials Needed and Their Importance
- 2-inch Angle Iron: The skeleton of our media console's legs, providing stability and a modern look.
- Jigsaw with a Metal Cutting Blade: Essential for cutting the angle iron to the desired length.
- Orbital Sander: Smoothens out the wood surfaces, ensuring a clean finish.
- Drill with Various Bits: Used for drilling holes in angle iron and wood, allowing screws to secure the structure.
- 2x12 Lumber: Forms the shelves of the console, offering ample space for your media devices and decorative items.
- 2x4 Lumber: Supports the shelves and attaches to the angle iron legs.
- Mineral Spirits: Cleans the angle iron, ensuring it's free from grease and other residues.
- Danish Oil: Protects and enhances the wood's natural beauty.
- Screws, Clamps, and Measuring Tools: For assembly and ensuring precision in your cuts and alignments.
Step by Step Instructions
Learn how to build a DIY media console with our step-by-step guide. Cut, sand, assemble, and finish like a pro for a stunning result.
Cutting and Sanding The Pieces
I started with cutting my 2-inch angle iron into four legs using the jigsaw. Patience is key here; ensure each cut is straight and clean. Next up, I sanded down the rough edges of the cut angle iron - an important step for safety and aesthetics.
For the wood, I measured and cut two pieces of 2x12 to serve as my shelves and four pieces of 2x4 to support them. Ensuring accuracy in these measurements is crucial for the overall stability of the console.
Preparing the Angle Iron and Wood
Drilling holes in the angle iron for attachment to the wood was my next step. I marked the drill points carefully, started with a smaller bit for the pilot holes, and then switched to a larger bit. This is where the screws will eventually connect the iron to the wood, allowing for a sturdy frame.
Sanding the wooden pieces followed. I paid extra attention to smoothing the edges and surfaces which would later be treated with Danish oil to enhance their natural grain and provide a protective finish.
Assembling the Console
Notches needed to be cut into the 2x12 shelves to accommodate the angle iron legs. This required precise measurements and a steady hand with the circular saw. Testing the fit as I went along ensured a flush fit against the angle irons.
Assembling began with the top shelf upside down, inserting the angle iron legs into their notches, and securing them with screws. The process was then repeated for the second shelf, using clamps to hold everything in place tightly.
Adding the Finishing Touches
The final step involved applying Danish oil to the wood, providing a vibrant finish and protection. Once the oil dried, I flipped the console to its upright position, marveling at the sturdy and stylish outcome.
Practical Tips and Thoughts
- Always Measure Twice: Accuracy is key to ensuring all parts fit together seamlessly.
- Safety First: Wear protective gear, especially when cutting metal and sanding.
- Customization: Feel free to adjust dimensions to fit your space or add extra shelves depending on your needs.
Customization Options for Your DIY Media Console
When it comes to building a DIY media console, one of the most exciting aspects is the ability to tailor it to your personal style and needs. Here are some customization options that can help you make your media console truly your own:
Design Variations
- Size Adjustments: Measure the space where you plan to place your media console. Consider the size of your TV and other devices to ensure everything fits perfectly. You can scale the dimensions up or down to build a snug fit.
- Shape Alterations: Go beyond the traditional rectangular shape. Think about L-shaped designs for corner spaces or a multi-level console for a dynamic look.
Color and Finish
- Paint: Choose a color that complements your room's decor. Matte, gloss, or satin finishes can dramatically change the appearance.
- Stain: If you're using wood, staining can highlight the natural grain. Test different stains on scrap pieces to find the perfect shade.
Functional Add-Ons
- Cable Management: Incorporate built-in cable channels or clips to keep wires neatly organized and out of sight.
- Ventilation: Ensure proper airflow by adding vent holes or a fan to keep your electronics cool.
Decorative Touches
- Hardware: Select knobs or handles that add character. Mix and match styles for an eclectic look.
- Lighting: Install LED strips or puck lights inside shelves or under the console for ambient lighting.
Eco-Friendly Materials
- Reclaimed Wood: Use salvaged wood for a rustic appeal and an environmentally friendly choice.
- Bamboo: Opt for bamboo as a durable, renewable alternative to traditional wood.
Personalization
- Engravings: Carve your initials, a special date, or a design into the wood for a personal touch.
- Fabric Panels: Add fabric-covered panels to doors for a soft, textured look that can also hide speakers.
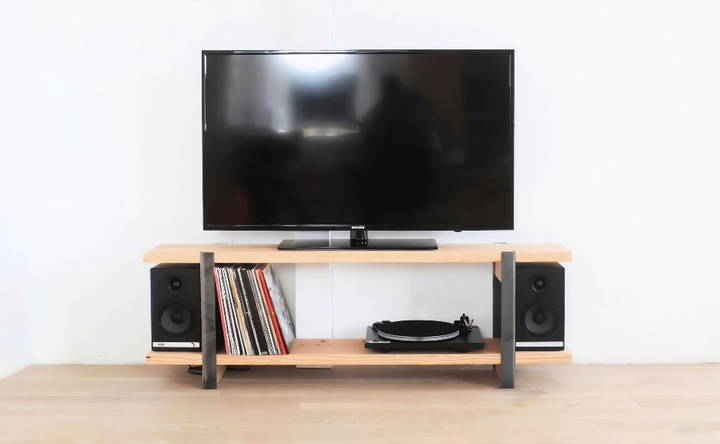
Customizing lets you build a media console that serves its purpose and reflects your style, enhancing your space. Plan well by sketching ideas and making thoughtful choices for a piece you'll be proud of.
Troubleshooting Common Issues
Building a DIY media console can be a rewarding project, but sometimes you might encounter a few hiccups along the way. Here's a guide to troubleshooting some common issues you may face:
Wood Pieces Don't Fit Together
- Solution: Double-check your measurements and cuts. If there's a small discrepancy, you can sand the edges for a better fit. For larger issues, you may need to recut the piece.
Uneven Stain or Paint
- Solution: Apply a pre-stain conditioner to ensure even absorption of the stain. For paint, use a primer before applying your color coats, and sand between layers for a smooth finish.
Wobbly Structure
- Solution: Ensure all connections are tight. Use wood glue in conjunction with screws for a more stable build. Check if the floor is level; if not, adjust the legs of your console accordingly.
Scratches or Dents in Wood
- Solution: For minor scratches, a bit of wood filler or a color-matched crayon can work wonders. Deeper dents may require wood putty and a touch-up with stain or paint.
Doors or Drawers Not Aligning
- Solution: Adjust the hinges on doors or the sliders on drawers. It's often a matter of loosening and retightening the hardware after making small adjustments.
Missing Hardware or Materials
- Solution: Keep a detailed checklist of materials and hardware. If something is missing, most hardware stores will carry what you need, or you can order online.
Difficulty with Cable Management
- Solution: Plan your cable management before assembling the console. Use cable ties and clips to secure wires, and consider adding a power strip inside the console for easy access.
By anticipating these issues and knowing how to address them, you'll be better prepared to handle any challenges that arise during your DIY media console project.
FAQs About DIY Media Console
Discover key insights and answers in our FAQs About DIY Media Console, covering materials, tools, design tips, and assembly steps.
The size of your media console should be based on the size of your TV and the dimensions of your room. A good rule of thumb is to make the console at least as wide as your TV, but not so large that it overwhelms the space. Consider the height and depth to ensure it’s functional for your equipment and comfortable for viewing.
Absolutely! You can customize your media console by choosing different types of wood, finishes, and hardware. Adding doors, drawers, or open shelves can also help tailor the console to your specific storage needs and aesthetic preferences.
Common tools for a DIY media console project include a circular saw, miter saw, drill, nail gun, and various jigs for precise cutting and joining. If you’re new to DIY, there are guides available that can help you achieve accurate cuts and assembly.
Safety is paramount when working on any DIY project. Always wear protective gear such as safety glasses and gloves. Work in a well-ventilated area, especially when using adhesives or finishes. Follow all tool instructions carefully, and never rush the process. If you're unsure about a step, seek guidance or assistance.
To ensure your DIY media console is sturdy and durable, focus on the quality of materials and the assembly process. Use thicker plywood for the main structure and consider adding additional supports or braces if the console is large. Joinery techniques like dowels, biscuits, or pocket holes can add strength to the connections. Always pre-drill holes to prevent wood from splitting and use wood glue along with screws or nails for a more secure bond.
In Conclusion
Wrapping up, building a DIY media console is both rewarding and practical. By following this guide, you can craft a customized DIY tv console that fits your style and space perfectly. Enjoy your new, functional piece!


