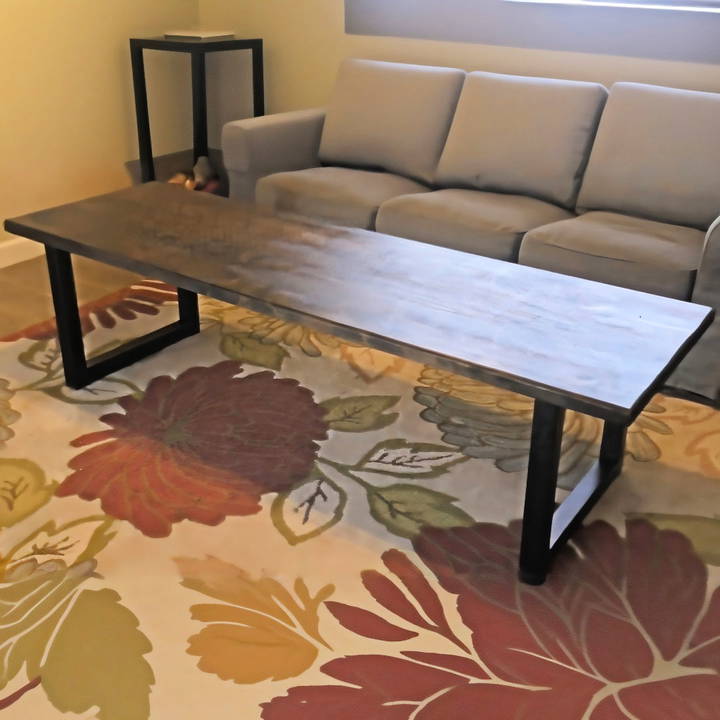
Building your own DIY metal table legs can be a satisfying DIY project, especially if you're looking to add a custom, modern touch to your furniture. In this guide, I'll walk you through the process of making simple metal legs for a coffee table, inspired by a project I worked on for a friend. This process uses basic tools and materials, making it accessible to most DIY enthusiasts. Whether you're an experienced welder or a beginner, this guide will cover everything you need to know about crafting your own sturdy and stylish metal table legs.
Tools and Materials You'll Need
Before getting started, it's essential to gather all the necessary tools and materials. Having the right equipment will ensure that the project runs smoothly and safely.
Tools:
- Evolution Chop Saw or any metal-cutting saw: Essential for cutting metal to precise lengths.
- Welder: A MIG or TIG welder will work well for this project.
- Grinder with buffing pad: Used to smooth out rough edges and clean up welds.
- Drill and drill bits: For making holes to secure the legs to the table.
- Clamps: To hold pieces in place while welding.
- Rubber mallet: Used to install plastic feet for the legs.
- Measuring tape and square: For accurate measurements and ensuring everything is aligned correctly.
Materials:
- 2” x 2” square tubing (0.065” thickness): This will form the main structure of the legs.
- 2” x 1/8” flat bar: Used to build the base that attaches the legs to the table.
- Press-fit plastic feet: These are optional but give a nice finished look to the legs and protect floors from scratches.
- Spray paint: If you want to add a coat of paint for aesthetics and rust protection, choose a durable spray paint in the color of your choice.
- Lag screws: To secure the legs to the tabletop.
Step by Step Instructions
Learn how to frame DIY metal table legs with easy step-by-step instructions. Perfect your project from measuring to finishing touches and avoid common mistakes.
Step 1: Measure and Cut the Metal Tubing
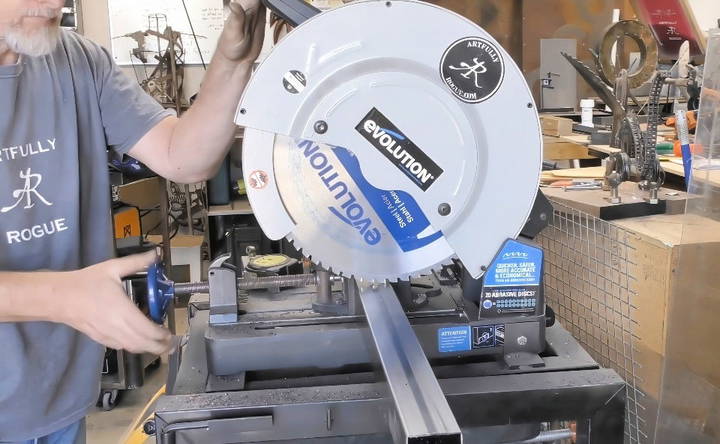
Start by determining the height of the table legs. For this particular project, the desired table height was 20 inches. Since the tabletop itself was 1.5 inches thick, the upright pieces of the legs were cut to 18.5 inches to account for the thickness of the tabletop.
Using a metal-cutting saw (in this case, an Evolution Chop Saw), cut four pieces of 2” x 2” square tubing to the appropriate length for the legs. Accuracy is essential here, as uneven legs will make the table wobble.
For the crossbars that connect the legs, the width of the table plays a crucial role. For a table that is 26 inches wide, subtract one inch from each side for the setback, and subtract the combined width of the legs (6 inches in total). The result will be the length of the crossbars, which in this case was 20 inches.
Step 2: Assemble and Tack Weld the Legs
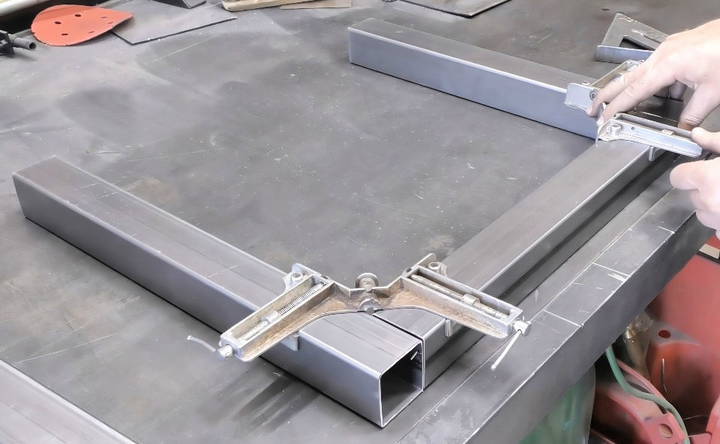
Once you have all the pieces cut to size, it's time to assemble them. Position the crossbars between two upright legs and ensure everything is squared up using a measuring square.
Before fully welding, tack weld the joints in place. Tack welding involves making small welds to hold the pieces together, ensuring they stay in position while you make any necessary adjustments. Once you're satisfied that everything is aligned correctly and squared, you can go ahead and fill in all the welds.
Step 3: Grind and Clean Up the Welds
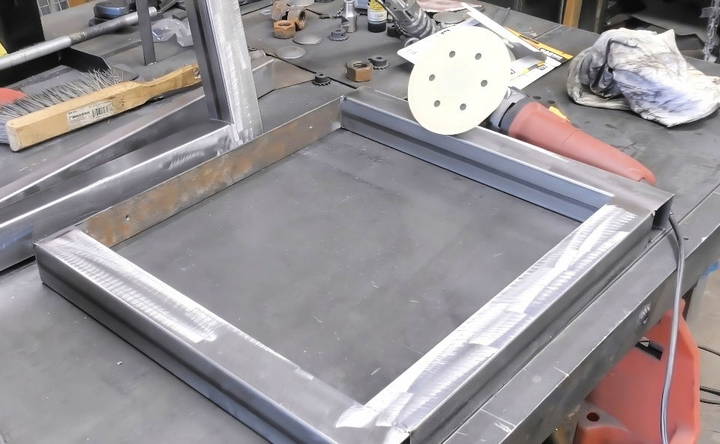
After the welds have cooled, use a grinder to clean up the welds. The goal here is to make the welds smooth and even, giving the legs a professional finish. A buffing pad with 120-grit sandpaper works well for achieving a consistent surface.
This is also the time to decide whether you want to leave the legs as raw steel or apply a clear coat to protect them from rusting. If you're keeping the raw steel look, a clear coat will help preserve the natural appearance while offering some protection from moisture and oxidation.
Step 4: Attach the Flat Bar to the Legs
To attach the legs to the tabletop, you'll need a 2” x 1/8” flat bar. Cut two pieces, one for each leg assembly. These flat bars will be attached to the top of each leg assembly and then screwed into the underside of the tabletop.
First, position the flat bar on top of the leg assembly and ensure it fits snugly. Use a clamp to hold the flat bar in place while you tack weld it to the legs. As with the legs, you'll want to go back and fully weld the flat bar once you're confident everything is square and aligned.
Step 5: Drill Holes for Attaching the Legs
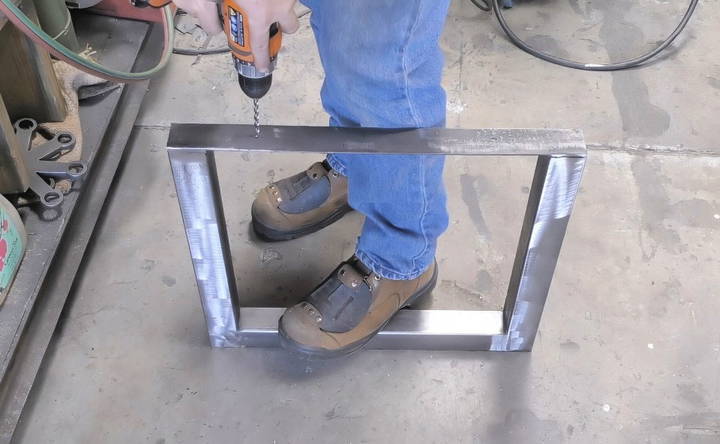
Once the flat bars are welded to the legs, it's time to drill holes that will allow the legs to be secured to the tabletop. A couple of lag screws should be sufficient to hold each leg assembly in place.
Using a drill, make evenly-spaced holes through the flat bar. The holes should be large enough to accommodate the screws you'll be using but not so large that they cause the screws to sit loosely.
Step 6: Apply the Finish
At this stage, you can choose to leave the legs as raw steel or paint them for a more polished look. For this project, a black spray paint was applied to the legs. Here are some tips for achieving a smooth and even finish:
- Don't try to cover everything in one coat. Start with a light base coat, and allow it to dry before applying additional coats.
- Start spraying off the piece and stop spraying after you pass the piece to avoid drips and uneven coverage.
- It may take three or four coats to get full coverage, so be patient and allow each coat to dry properly before applying the next.
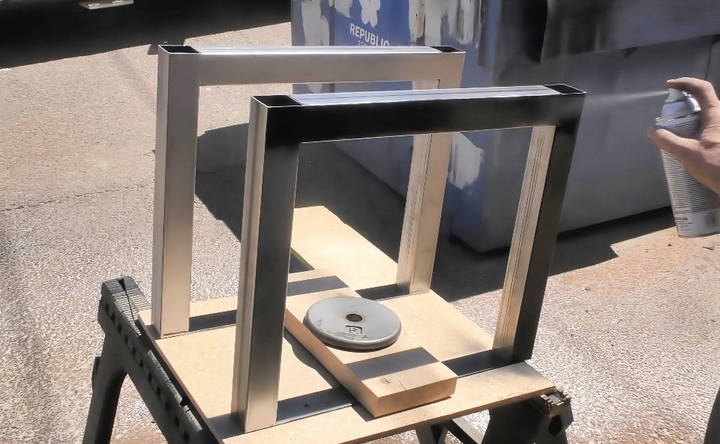
If you're using plastic feet to finish the legs, now is the time to install them. Simply tap them into place using a rubber mallet.
Step 7: Attach the Legs to the Tabletop
Once the paint has fully dried and the plastic feet are in place, you can attach the legs to the table. Align the legs with the underside of the tabletop and secure them in place using lag screws.
Make sure the screws are tight, but avoid over-tightening, as this could cause the wood to crack or split.
Finishing Touches and Customization
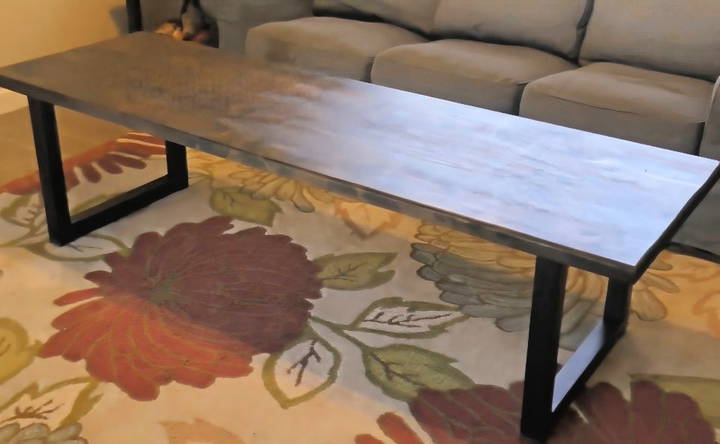
Congratulations! You've now buildd your own metal table legs. At this point, you can step back and admire your work. The beauty of DIY projects like this is the ability to customize every aspect of the design. Here are a few ideas for personalizing your table legs:
- Finish options: Instead of black paint, you could experiment with different finishes, such as brushed steel, powder coating, or a bright, bold color.
- Custom designs: Add a decorative center brace between the legs for additional support and a unique design element.
- Tabletop customization: Pair your new legs with a custom tabletop made from wood, glass, or even stone, depending on your personal style and the look you want to achieve.
Common Mistakes and How to Avoid Them
Even simple projects like this can come with their challenges. Here are a few common pitfalls and how to avoid them:
- Incorrect measurements: Double-check all your measurements before cutting. Even a small error can result in uneven legs.
- Welding issues: Tack welding is your friend! Always tack weld first to ensure everything stays in place before committing to full welds.
- Paint imperfections: Take your time when painting and apply several light coats rather than one thick coat to avoid drips and uneven coverage.
Conclusion
Making DIY metal table legs is a rewarding project that can elevate the look of any table. With just a few basic tools and materials, you can make a set of custom, sturdy legs that will last for years. Whether you're making a coffee table, dining table, or desk, these steps will guide you through the process and help you avoid common mistakes. Remember to take your time, be patient with the details, and enjoy the process of building something with your own hands.
Now that you've seen how easy it is, why not give it a try yourself? With practice, you'll be able to build not just table legs but a variety of custom metal furniture pieces.
FAQs About DIY Metal Table Legs
Discover the top FAQs about DIY metal table legs, including installation tips, styles, and materials to build your perfect table.
For this project, 2" x 2" square tubing with a .065" wall thickness was used. This provides enough strength and stability for a coffee or dining table.
If you are new to welding, consider using a 110v flux core welder. This is a budget-friendly option, and it doesn’t require gas, making it easier for beginners.
Ensure you use a larger or wider mounting plate and place the screws in an offset pattern rather than a straight line. This increases stability and prevents wobbling.
Yes, but consider adding a cross brace for additional stability. Larger or heavier tables may require more structural support to prevent swaying.
Use rubber or plastic insert pads on the bottom of the table legs to protect floors from scratches. These pads fit snugly into the ends of the square tubing.
If you like the raw steel look, apply a clear coat to protect the metal from rust. Otherwise, spray paint in the color of your choice can add both protection and aesthetics.
For most projects, wood expansion shouldn’t be an issue, especially if the table has lag screws and isn’t surrounded by metal. However, if your project involves a metal frame, consider slotted holes to allow for expansion.
Attaching metal legs to granite or stone requires special adhesives or brackets specifically designed for stone. Avoid drilling directly into the stone, as it may crack.
While handling the legs normally won't cause scratches, sharp objects or rough handling may chip the paint. To maintain the finish, apply multiple coats of spray paint and consider a protective clear coat for added durability.
Yes, the method is sturdy enough for a dining table, but if the table is particularly heavy, adding cross braces or using more lag screws can provide extra support.


