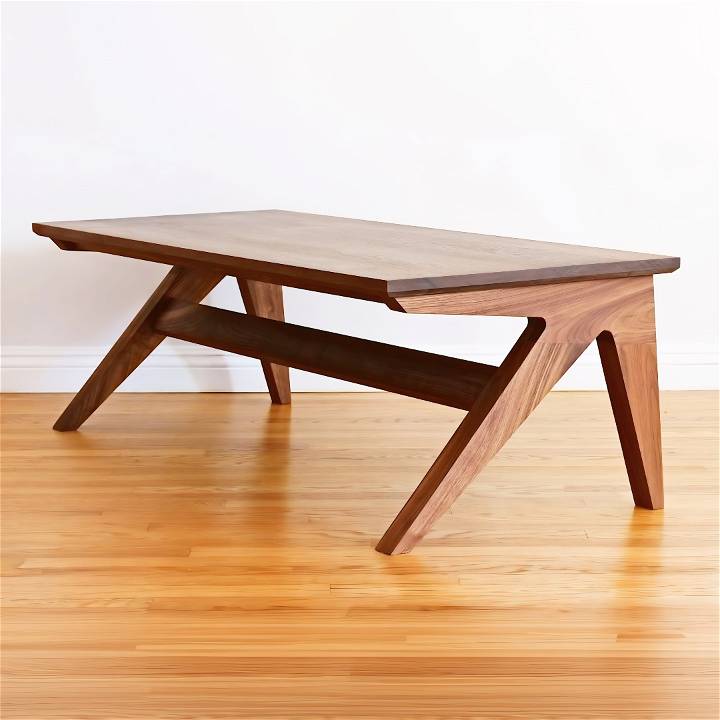
A few years ago, I stumbled upon a design that caught my eye - a Mid-Century Modern AF coffee table. The sleek lines, beautiful walnut finish, and that unmistakable vintage flair sparked something in me. I knew I had to build it. My journey wasn't without its trials and errors, but through this experience, I've gathered invaluable insights and practical advice that I'm excited to share with you. So, whether you're a seasoned woodworker or picking up a router for the first time, my story and guide will help you navigate the creation of your very own Mid-Century Modern coffee table.
Materials Needed and Why
- Eight-Quarter Walnut: The heart of our project. Walnut's rich tones and strength make it ideal for making a sturdy and visually striking coffee table.
- Half-Inch MDF (Medium Density Fiberboard): For making accurate templates. It's easily shaped and sands smoothly, perfect for precise, repeatable cuts.
- Router and Bits: Essential for shaping the walnut pieces according to our MDF templates. Offers clean, precise cuts for both detailed and straightforward profiles.
- Bandsaw or Jigsaw: For initial rough cuts. These tools allow for rapid removal of excess material, closely following our template outlines.
- Sanders: For refining shapes and smoothing edges. Achieving a smooth finish on walnut is critical for the final aesthetic of the table.
- Domino Joiner or Biscuit Joiner: For making strong, hidden joints. These joinery methods provide the structural integrity required for a functional coffee table.
- Clamps and Glue: The linchpin of any woodworking project. Proper clamping ensures tight joints, while quality wood glue bonds them for a lifetime.
Choosing the right materials and understanding their purpose is the foundation for a successful project. With these tools and materials at the ready, let's dive into the process.
Step by Step Instructions
Learn how to build a DIY mid century modern coffee table step-by-step, from building templates to sanding and finishing for a sleek look.
Building the Templates
The first and perhaps most critical step involved making templates from half-inch MDF based on the coffee table's design. Accuracy in this phase is paramount. The templates serve as a guide for cutting the walnut, ensuring consistency and precision across all pieces.
Rough Cutting the Walnut
Next, I rough cut the walnut into manageable pieces using a bandsaw. This step was about removing excess material, getting closer to the final shape without worrying about perfect edges.
Refining with a Router
Using the templates, I refined the shapes with a router. This tool, equipped with various bits, allowed me to replicate the templates' curves and angles on the walnut precisely. It's worth mentioning that patience is key here; rushing could lead to mistakes that are hard to rectify.
The Sled: A Surprising Savior
When it came time to tackle the end grain, I built a simple sled. This makeshift solution helped me manage trickier cuts safely and accurately, proving that sometimes, innovation trumps any store-bought tool.
Gluing and Clamping: The Moment of Truth
With all pieces cut to their final shape, the assembly began. Using dominoes (or biscuits) and wood glue, I carefully joined each piece, paying special attention to alignment. Clamping ensured a tight bond, turning separate pieces into a cohesive whole.
Final Touches: Sanding and Finishing
Sanding was, perhaps, the most tedious yet rewarding part. Starting with coarser grits and working my way to fine, I achieved a smooth, even surface that felt soft to the touch. The final step, applying a finish, brought out the walnut's natural beauty and provided protection.
Lessons Learned
In hindsight, there were steps I could have streamlined. For instance, I realized only afterward that I could have reduced the number of templates by integrating multiple shapes into a single template. Additionally, allowing more material on certain cuts could have simplified the assembly process.
The Essence of Mid-Century Modern Design
Understanding the historical context and design significance of mid-century modern style can enrich your DIY project, connecting it to a broader narrative of design history.
A Brief History
Mid-century modern design emerged in the mid-20th century, around the 1940s to the 1960s. It's characterized by clean lines, organic forms, and minimal fuss. This style reflects the post-war era's optimism and the belief in progress and the future.
Design Significance
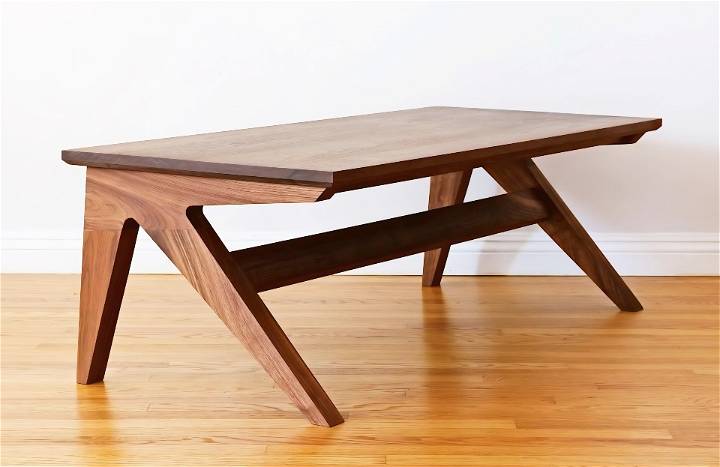
The mid-century modern coffee table is not just a piece of furniture; it's a symbol of a design revolution that embraced simplicity and functionality. The style often includes tapered legs, natural wood grains, and a sleek, low profile.
Your DIY Project
When making your DIY mid-century modern coffee table, consider these design elements:
- Tapered Legs: They are a hallmark of the style. Ensure they are splayed slightly outward for that authentic look.
- Natural Wood: Choose wood with a beautiful grain pattern and give it a finish that highlights its natural beauty.
- Functional Simplicity: The design should be practical, avoiding unnecessary decorations.
By adding these elements, your coffee table becomes both functional and a conversation piece about mid-century modern design.
FAQs About DIY Mid-Century Modern Coffee Table
Discover everything you need to know about DIY mid century modern coffee tables in this comprehensive FAQ guide. Get expert tips and step-by-step instructions.
What type of wood is best for a DIY mid-century modern coffee table?
Hardwoods such as walnut, teak, and oak are ideal for a mid-century modern coffee table. They offer durability and a beautiful grain that is characteristic of the style. However, if you're on a budget, plywood or MDF with a veneer finish can be good alternatives.
How can I achieve the tapered leg look?
To build tapered legs, you can either purchase pre-made legs or make them yourself. If you're DIY-ing, use a table saw or a tapering jig to cut the wood at an angle. The key is to ensure the legs taper inward towards the bottom, giving that distinctive mid-century modern silhouette.
What tools will I need for this project?
The essential tools for this project include a saw (hand saw or power saw), drill, screwdriver, sandpaper, and clamps. Having a measuring tape and pencil for accurate measurements is also crucial.
Can I customize the design of my coffee table?
Absolutely! Feel free to add personal touches to your coffee table. This could be through the choice of wood stain, the addition of a glass top, or even incorporating drawers or shelves for extra functionality.
How do I protect my coffee table from water rings and scratches?
Use coasters to prevent water rings and apply a protective finish, like polyurethane or furniture wax, to shield the wood from scratches and everyday wear and tear. Regular maintenance will keep your coffee table looking great for years to come.
Conclusion
The journey of building a DIY mid-century modern coffee table from scratch was both challenging and deeply satisfying. Through trial and error, I discovered techniques and shortcuts that improved not just the outcome but the process itself. I hope my experience inspires you to embark on your woodworking project, armed with a little more knowledge and confidence. Remember, the beauty of crafting something with your hands goes beyond the finished product; it's about the creativity, the learning, and the sheer joy of making.


