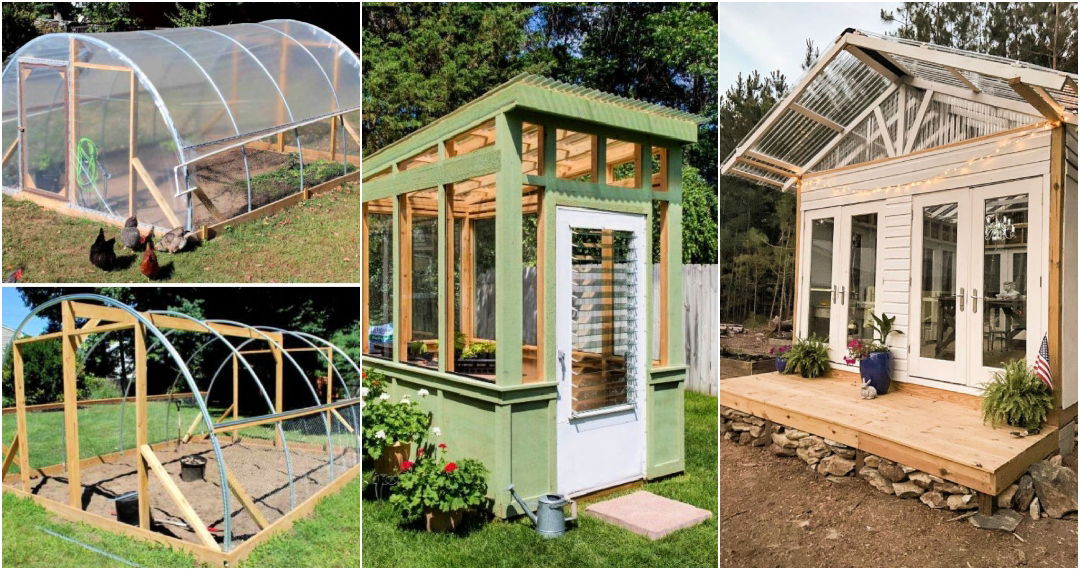
Building my own mini greenhouse was a great project. One sunny Saturday morning, I decided to turn our backyard into a small green paradise. My friend and I gathered old windows and plastic sheets. We also used wooden frames lying around. In just a few hours, our DIY mini greenhouse started taking shape.
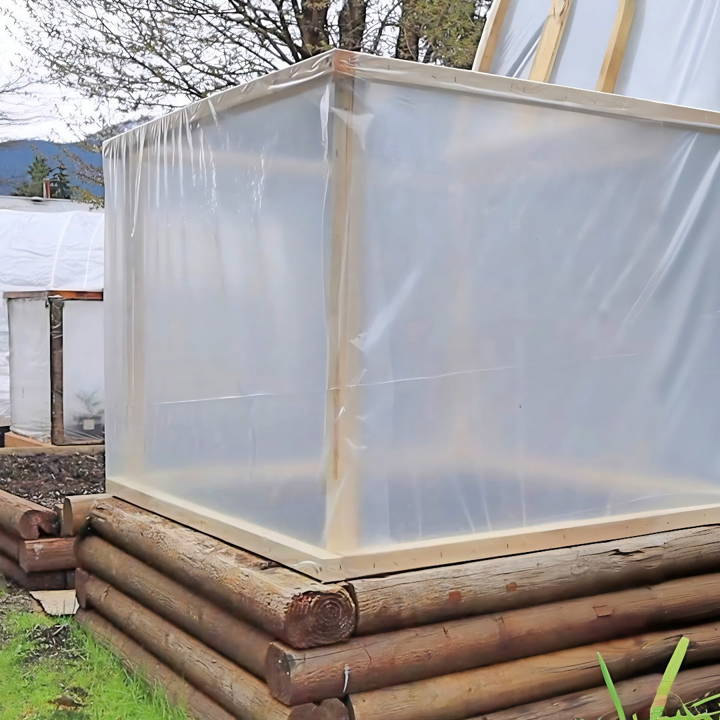
This project was not only fun but also extremely rewarding. Our little greenhouse now helps us grow fresh herbs and vegetables. It's perfect for anyone wanting to grow plants without much space. Give it a try; you're sure to love it.
I'm helping with this guide, and I hope it inspires you to start your own DIY small greenhouse today.
Understand the Why: The Importance of Warmth
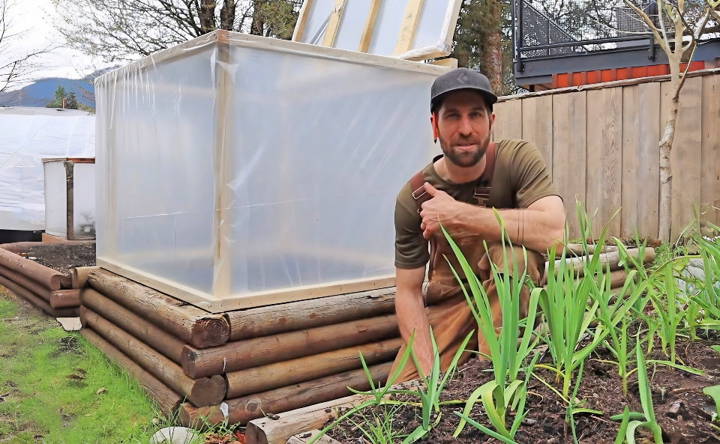
My mini DIY greenhouse journey began on a frosty April morning. I realized warmth is key for plant growth, but it was lacking outdoors. Determined to protect my transplants, I built a mini greenhouse to trap warmth, letting the sun keep my plants cozy day and night.
Materials You'll Need:
The beauty of building a DIY greenhouse is that it requires basic materials, most of which are readily available. Here's what you need:
- Wood: To build the frame. Choose sizes based on your garden bed.
- Poly: Acts as the barrier, trapping warmth inside.
- Staples and Screws: For assembling various parts.
- Hinges: To allow easy opening of the top section.
Each material plays a crucial role. Wood forms the robust frame built to withstand various weather conditions, while the poly acts as a clear barrier, maximizing sunlight exposure and warmth trapping. Staples and screws ensure the structure is secure, and hinges add functionality, making it easy to tend to the plants.
Step by Step Instructions
Follow our easy step-by-step instructions on how to make a DIY small greenhouse to build your own garden haven. Perfect for beginners and hobbyists alike!
Constructing the Base
- Frame Assembly: Start by connecting two 48-inch pieces of wood with two 36-inch pieces to form a rectangular base. Use screws for a solid structure.
- Adding Stability: Incorporate four 32-inch pieces of wood evenly spaced along the frame for additional support.
Wrapping It in Poly
- Measure and Cut: Drape the poly over the frame, ensuring it's large enough to cover all sides.
- Stapling: Start stapling one side, pull it tight across to the opposite side, and staple again. Repeat for all four sides, ensuring the poly is tight and secure.
Constructing the Top
- Framework: Similar to the base, connect two 48-inch pieces of wood with two 34-inch pieces.
- Adding Support Strips: Attach three extra strips across the top to prevent water pooling.
Final Assembly
- Attaching the Top: Secure the top frame to the base with hinges at the back, allowing it to open and close easily.
- Cutting Excess Poly: Trim the extra poly, leaving about six inches to roll over and staple to the inside for a neat finish.
Alternative Simplified Version
For those seeking an even simpler solution, a clear storage tote with drilled aeration holes can serve as an effective mini greenhouse. It's quick, cost-effective, and can be set up in under 30 minutes. However, this version lacks the ability to easily adjust temperature by opening the top, so monitoring heat levels is crucial.
Climate Control Techniques
Maintaining the right climate inside your small greenhouse is crucial for the health and growth of your plants. Here are some techniques to help you manage temperature and humidity effectively:
- Ventilation: Open vents or windows daily to allow fresh air to circulate. This helps to regulate temperature and prevents the buildup of humidity that can lead to plant diseases.
- Shading: During the hottest part of the day, use shade cloths or blinds to protect your plants from intense sunlight. This can prevent overheating and ensure that your plants don't get scorched.
- Heating: On cooler days, a small heater can keep the temperature stable. Be sure to monitor the temperature closely to avoid overheating.
- Cooling: Evaporative coolers or fans can help to lower the temperature on very hot days. They work by evaporating water, which cools the air as it circulates through the greenhouse.
- Humidity Trays: Place trays filled with water and pebbles beneath your plants. As the water evaporates, it increases the humidity around the plants, which is especially beneficial during the dry winter months.
- Monitoring: Use a thermometer and hygrometer to keep track of the temperature and humidity levels. Some devices can alert you if the conditions deviate from the ideal range for your plants.
- Insulation: During the colder months, insulating the walls of your greenhouse can help retain heat. Bubble wrap is an inexpensive option that can be easily applied and removed as needed.
- Watering Techniques: Water your plants in the early morning or late afternoon to reduce water loss due to evaporation. This helps maintain the moisture level without increasing humidity too much.
Use these techniques to maintain a stable environment for your plants year-round. Regularly monitor conditions and adjust methods to keep your greenhouse thriving.
Pest Management Solutions
Keeping your greenhouse free from pests is essential for the health of your plants. Here's a straightforward guide to managing pests in your small greenhouse:
- Know Your Pests: Identify the pests troubling your plants. Common greenhouse pests include aphids, whiteflies, and spider mites. Each pest requires a different approach, so knowing what you're dealing with is the first step.
- Cleanliness is Key: Regularly clean your greenhouse. Remove plant debris and disinfect surfaces to prevent pests from settling in. A tidy greenhouse is less inviting to pests.
- Natural Predators: Introduce beneficial insects like ladybugs and lacewings. They feed on harmful pests and help maintain a natural balance in your greenhouse.
- Barrier Methods: Use physical barriers such as insect netting or floating row covers to protect your plants from pests.
- Homemade Sprays: Build natural sprays using ingredients like neem oil, soap, and water. These can deter pests without harming your plants or beneficial insects.
- Companion Planting: Grow plants that naturally repel pests. For example, marigolds can deter nematodes, and basil can keep thrips at bay.
- Monitor and Respond: Regularly inspect your plants for signs of pests. If you spot an infestation, act quickly to control it using the most appropriate method.
- Avoid Overwatering: Too much water can build a breeding ground for pests. Water your plants appropriately to avoid excess moisture.
Manage pests effectively and keep your greenhouse thriving by following these steps. Prevention is better than cure, so be proactive.
Technological Innovations
In the realm of small greenhouses, technological advancements are making waves of change, making it easier for gardeners and farmers to optimize growth conditions and manage their green spaces efficiently. Here's a look at some of the latest innovations:
- Automated Monitoring Systems: Sensors and smart devices can now monitor everything from temperature to soil moisture levels. This data is sent directly to your smartphone or computer, allowing you to make adjustments in real-time.
- LED Lighting: LED lights have revolutionized greenhouse lighting by providing a spectrum of light that can be tailored to the specific needs of plants, promoting growth while saving energy.
- Robotic Assistants: Robots are being developed to help with tasks like planting, weeding, and harvesting. They can work around the clock, increasing efficiency and reducing the need for manual labor.
- Water Recycling Systems: Innovative water systems are now able to recycle and purify water from the greenhouse, reducing waste and ensuring plants receive the optimal amount of hydration.
- Climate Control Software: Advanced software can now predict and adjust the climate inside the greenhouse, taking into account external weather conditions to maintain the perfect growing environment.
- Solar Power Integration: Greenhouses are increasingly using solar panels to generate clean energy, reducing reliance on fossil fuels and lowering operational costs.
- Dye-Sensitized Solar Cells: These cells can be integrated into the glass coverings of greenhouses, capturing sunlight for energy while still allowing light to pass through for plant growth.
- Soilless Cultivation Technologies: Hydroponics and aeroponics systems are becoming more sophisticated, allowing for soil-free growing, which can save space and reduce pest issues.
Embrace tech to make your greenhouse smarter, sustainable, and productive, boosting yields and conserving resources for eco-friendlier gardening.
FAQs About DIY Small Greenhouse
Discover essential faqs about DIY small greenhouse projects, including setup tips, materials needed, and maintenance advice to boost your gardening success.
The ideal location for your small greenhouse is a spot that receives ample sunlight, preferably with southern or southeastern exposure. Ensure it's protected from strong winds and has access to water. Most plants require at least 6 hours of direct sunlight, so choose a location accordingly.
Absolutely! You can build a greenhouse on a budget by upcycling materials like old windows, picture frames, or plastic bottles. Look for materials that can be repurposed to create the structure and covering of your greenhouse. This not only saves money but also benefits the environment.
A small greenhouse can extend your growing season, protect plants from harsh weather, and build an ideal environment for starting seeds. It allows you to grow a wider variety of plants, including those that may not typically survive in your climate.
To maintain the right temperature and humidity, use ventilation, such as opening windows or installing vents. On hot days, shade cloths can prevent overheating. In colder climates, you may need a heater. Use a thermometer and hygrometer to monitor conditions and adjust as needed.
Proper ventilation is crucial for preventing overheating and providing fresh air for your plants. You can ensure adequate ventilation by installing adjustable roof vents or side vents that can be opened or closed depending on the weather. Additionally, consider using automatic vent openers that operate based on temperature changes. For a budget-friendly option, simply prop open a door or window during the day to allow air circulation.
Final Thoughts:
Building a DIY mini greenhouse was a simple yet fulfilling task. With minimal effort, you can enjoy the joy of growing your own plants. Get started on your greenhouse today, and see how it transforms your gardening experience.


