Making a DIY mirror wall can transform any room, adding light and the illusion of more space. This guide simplifies the process, providing clear steps to help you install your own mirror wall. You'll learn about choosing the right materials and tools, as well as tips for positioning and securing your mirrors. By the end of this guide, you'll be ready to enhance your home's ambiance with a stylish mirror wall design.
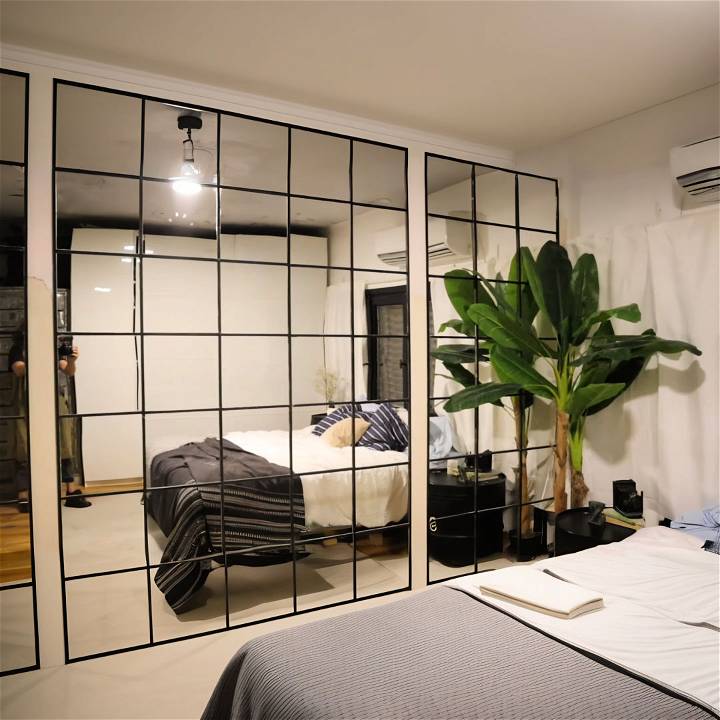
Whether planning a small accent or a full mirror wall design, this guide breaks down the project into manageable steps. You’ll discover how to measure your space, select the perfect mirrors, and safely mount them. This straightforward approach ensures that your DIY project will be both successful and satisfying.
Continue to the next section for detailed instructions and helpful tips to bring your DIY mirror wall vision to life.
Materials Needed and Their Purpose
- IKEA LOTS Mirrors: These affordable square mirrors are the foundation of our project.
- Spray Paint: This is used to color the wooden sticks to match the industrial look.
- Wooden Sticks: To build a sleek frame around the mirrors and enhance the industrial vibe.
- Double-sided tape and Silicone: Essential for securely attaching the mirrors and wooden sticks to the wall.
- Measuring Tape, Level, and Saw: Tools to ensure accurate placement and fitting.
Choosing these materials was critical to achieving a high-end look without breaking the bank.
Step by Step Instructions
Master DIY mirror wall with our step-by-step guide: planning, preparing mirrors, mounting, and framing for a stunning finish!
Step 1: Planning and Preparations
Firstly, clear the area. Measure your wall carefully to determine how many mirrors you'll need. I decided to cover a single column in the middle of my wall, dividing it into three sections for simplicity.
Step 2: Preparing the Mirrors
Open your IKEA LOTS mirrors and apply the included double-sided stickers, but keep in mind that you might need additional double-sided tape or silicone if your wall is uneven. This ensures the mirrors stay secure.
Step 3: Mounting the Mirrors
Begin at the top. Use a wooden stick as a guideline to ensure the mirrors are aligned straight and evenly spaced. The trick of placing a stick between each mirror as you go saves time and guarantees consistent spacing—a simple yet effective method I discovered while tackling the project.
Step 4: Making the Frame
After all the mirrors are up, it's time to focus on the wooden sticks. Measure and cut the sticks to fit the spaces between your mirrors. Remember to spray paint your sticks before installing them—unless you prefer the natural wood look. I chose black paint for an authentic industrial appearance.
From my experience, attaching the vertical sticks first, then the horizontal ones at the top and bottom of the mirrors looks cleaner. It’s repetitive but easy. My tip? Apply silicone carefully to avoid mess. My first attempt was messy, but I perfected it by applying silicone in the gap before inserting the stick.
Final Reflections and Tips
- Patience is Key: This project doesn't require rushing. Spread it out over a couple of days if needed.
- Quality Materials: Opt for strong double-sided tape and durable silicone to ensure longevity.
- Personal Touch: Feel free to adjust the spacing between mirrors or stick colors based on your preference and the room's decor.
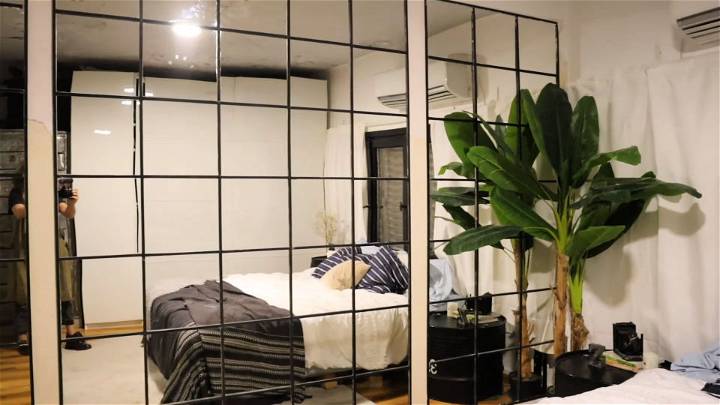
After following these steps, my bedroom transformed completely. It appears spacious, inviting, and infinitely more interesting. The mirrors reflect light beautifully, making the room brighter and feel larger.
Customization Tips for Your DIY Mirror Wall
Making a DIY mirror wall is not just about adding a functional piece to your room; it’s also an opportunity to express your personal style and creativity. Here are some tips to help you customize your mirror wall to make it uniquely yours:
- Choose Your Style: Start by deciding on the overall look you want to achieve. Do you prefer a sleek and modern look, or are you more inclined towards a classic or rustic feel? Your style choice will guide the type of mirrors and layout you select.
- Selecting Mirrors: When it comes to mirrors, there’s a wide variety to choose from. Consider different shapes like round, square, or hexagonal. You can also mix and match sizes for a more eclectic look.
- Layout Planning: Before you start hanging the mirrors, plan your layout on the floor. This will give you a visual idea of how the mirrors will look on the wall and allow you to make adjustments without committing to a permanent placement.
- Frames and Edges: Frames can add character to your mirrors. Choose frames that complement your room’s decor. If you’re going for a frameless look, ensure the edges of the mirrors are polished to avoid any sharpness.
- Adhesive Options: Use reliable adhesives that are designed for mirrors. They should be strong enough to hold the weight but also be wall-friendly in case you decide to remove them in the future.
- Lighting Considerations: Proper lighting can enhance the effect of your mirror wall. Position the mirrors to reflect natural light or install ambient lighting to build a warm glow in the room.
- Safety First: Always prioritize safety, especially if you’re placing mirrors in high-traffic areas or in a home with children. Ensure the mirrors are securely attached to the wall and check them periodically.
- Personal Touches: Add personal touches like photos or small artworks between the mirrors. This will break the monotony and add a unique element to your mirror wall.
- Maintenance: Keep your mirror wall clean and sparkling. Regular cleaning with appropriate glass cleaners will keep fingerprints and dust at bay.
Enjoy your DIY project, and let your creativity flow. Your mirror wall should brighten your space and reflect your personality. Follow these tips to build a beautiful, customized mirror wall.
Common Mistakes to Avoid in DIY Mirror Wall Projects
When embarking on a DIY mirror wall project, it’s easy to get caught up in the excitement and overlook some critical aspects. To ensure your project is successful and safe, here are some common mistakes to avoid:
- Ignoring Wall Conditions: Before you start, assess the condition of your wall. Look for any signs of damage or unevenness. Mirrors need a stable and flat surface to adhere properly.
- Skipping Measurements: Measure your space accurately. This will help you buy the right amount of materials and avoid unnecessary cuts or adjustments later on.
- Overlooking Safety: When handling mirrors, use the correct tools and safety gear. Always wear gloves and eye protection to prevent injuries.
- Choosing the Wrong Adhesive: Not all adhesives are suitable for mirrors. Select one that is specifically designed for mirrors to prevent damage and ensure a strong bond.
- Forgetting to Clean: Clean the wall and the back of the mirrors before installation. Dust and debris can weaken the adhesive’s grip.
- Rushing the Process: Take your time with each step. Rushing can lead to misalignment or improper adhesion, which might cause the mirrors to fall.
- Neglecting the Weight: Consider the weight of the mirrors and ensure your wall can support them. Heavy mirrors may require additional support, such as clips or brackets.
- Lack of Planning: Plan your design beforehand. A spontaneous approach might result in a chaotic look or wasted materials.
- Forgetting About Maintenance: Think about how you will clean and maintain the mirrors. Position them in a way that allows for easy access for cleaning.
By avoiding these mistakes, you’ll be on your way to making a stunning and secure DIY mirror wall. Preparation and attention to detail are key to a successful DIY project.
Maintenance and Care for Your DIY Mirror Wall
Keeping your DIY mirror wall clean and well-maintained is crucial for preserving its beauty and reflective quality. Here’s how you can take care of your mirror wall with ease:
- Regular Cleaning: Dust and clean your mirrors regularly to maintain their shine. Use a soft, lint-free cloth or a microfiber towel to avoid scratches.
- Gentle Cleaners: Opt for gentle glass cleaners or a homemade solution of vinegar and water. Spray the cleaner on the cloth rather than directly on the mirror to prevent drips that could damage the backing.
- Avoid Harsh Chemicals: Steer clear of cleaners with ammonia or bleach. These substances can corrode the mirror’s coating over time.
- Spot Cleaning: For fingerprints or smudges, spot clean with a damp cloth followed by a dry cloth to avoid streaks.
- Protect the Edges: The edges of mirrors are most susceptible to damage. Be careful not to let moisture sit on the edges as it can lead to “black edge,” a deterioration of the mirror’s reflective coating.
- Check the Support: Periodically check the adhesives and supports holding your mirrors in place. Make sure they remain secure and make adjustments if necessary.
- Mind the Climate: If you live in a humid area, consider using a dehumidifier to protect your mirrors from moisture-related damage.
- Safe Removal: If you need to remove a mirror, use a heat source like a hairdryer to soften the adhesive, making it easier and safer to take down.
By following these simple maintenance and care tips, your DIY mirror wall will continue to be a stunning feature in your home for years to come.
FAQs About DIY Mirror Wall
Discover answers to all your faqs about DIY mirror wall projects, including tips, tools, and techniques for a stunning home decor transformation.
For attaching mirrors:
Apply double-sided tape to the corners of the mirror for immediate hold.
Use an adhesive like Liquid Nails on the rest of the mirror back for a permanent bond.
Press the mirror against the wall, using a level to ensure it’s straight.
Repeat for each mirror, using spacer blocks for consistent gaps between them.
Yes, you can build a mirror wall on most wall types, including drywall, plaster, or tiled surfaces. Ensure you select the right type of adhesive and mounting hardware that’s suitable for your wall material and the weight of the mirrors.
To maintain and clean your mirror wall:
Dust regularly with a soft, dry cloth to avoid buildup.
For smudges or fingerprints, use a glass cleaner and a lint-free cloth.
Avoid harsh chemicals or abrasive tools that could damage the mirror surface.
To ensure even spacing and alignment:
Decide on the spacing between mirrors; commonly, 1/2 inch is used.
Use a level to mark horizontal and vertical lines on the wall where the mirrors will go.
Place spacer blocks or a measured template between mirrors as you install them.
Check with a level after placing each mirror to maintain alignment.
If a mirror breaks:
Clear the area and carefully remove any large pieces of glass.
Wear gloves to protect your hands from sharp edges.
Use a broom and dustpan—not your hands—to clean up smaller pieces.
Dispose of the broken glass safely, wrapped in newspaper or cardboard.
Replace the broken mirror with a new one, following the same installation steps.
Wrapping Up
Wrapping up, making a DIY mirror wall can be a fulfilling and stylish addition to any space. Following this beginner's guide ensures you can craft your mirror wall design with confidence and ease. Start your project today and experience the transformative effects of a custom DIY mirror wall. Happy decorating!


