Making a DIY money bouquet is both a creative and thoughtful way to gift cash. Instead of handing over a simple envelope, why not transform those bills into stunning money flowers? This guide will give you the know-how to make a variety of flowers, from classic to lotus, lily, and tulip styles, turning your cash into a beautiful floral arrangement. From selecting the right materials to folding each bill with precision, we'll walk you through each step to ensure your bouquet looks amazing.
Alongside detailed instructions for each folding style, we also offer a video tutorial to clarify the process further. Plus, we don't just stop at folding. Our guide delves into tips and tricks for choosing bills, securing them effectively, and arranging your blooms for maximum impact. We also explore variations to personalize your bouquet, like using different bill denominations or incorporating decorative elements for that special touch.
So, continue on to discover how simple and rewarding crafting your own money flower bouquet can be.
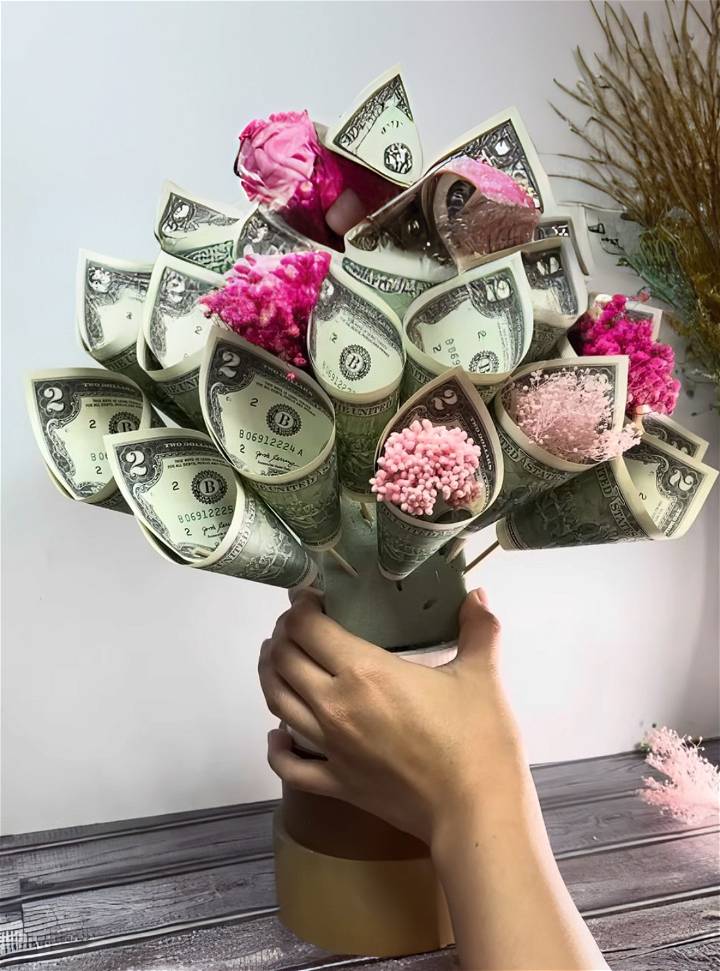
Materials Needed
- Scotch tape (KK House recommends this brand for reliability)
- Bamboo sticks
Step by Step Instructions
Learn how to make a stunning money flower bouquet with our DIY guide below:
Step 1: Classic Folding Style
- Start by folding your bill in half lengthwise.
- Fold the two ends towards the center, making a smaller rectangle.
- Attach the bamboo stick to the back of the folded bill with scotch tape.
- Round the bill around the stick to form a classic petal shape and tape to secure.
This style is versatile and can be arranged in numerous designs, including a round shape, which is very popular.
Step 2: Lotus Style
- Similarly, fold and tape the bamboo stick to the bill as in the classic style.
- Adjust the two corners of the bill by pulling one over the other to make a layered effect.
- Secure the desired shape by taping both the back and front of the bill.
- The Lotus style should have two even top corners for a symmetrical look.
Step 3: Lily Style
- Attach the bamboo stick to the bill with tape as before.
- Bring the two top corners of the bill together to make a square-like shape with pointy petals.
- Secure both the back and the front with tape to maintain this compact style.
The Lily style is compact, making it ideal for smaller projects where space is limited.
Step 4: Tulip Style
- This style starts differently by placing the bamboo stick at a 45-degree angle from the top corner of the bill and securing it with tape.
- Wrap a longer piece of tape from the front to the back of the bill.
- Take the bottom right corner of the bill, pull it behind the bottom left corner, and tape it to secure it.
The Tulip design is slightly more complex but adds a stunning effect to your bouquet.
Video Tutorial
For a more detailed understanding, watch the step-by-step video tutorial on How to Fold Bills for a DIY Money Bouquet by KK House.
It pairs well with this written guide, enriching your learning experience with visual demonstrations of each technique.
Making a money bouquet shows creativity and personal touch. By following these steps, you can craft a meaningful gift appreciated by all.
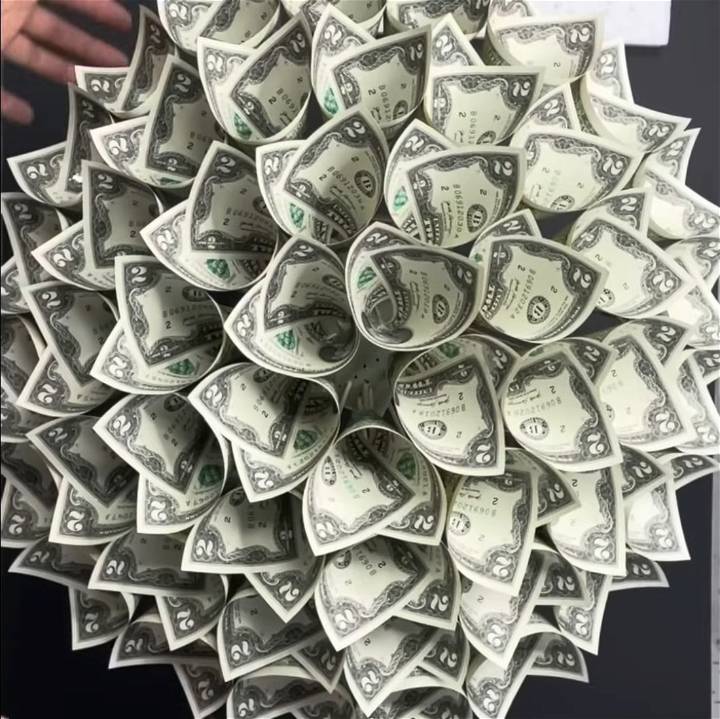
Tips and Tricks for Making a Stunning Money Bouquet
Making a money bouquet can be a fun and creative way to give a gift. Here are some tips and tricks to help you make a stunning money bouquet that will surely impress.
Choosing the Right Bills
The first step in making a DIY money bouquet is choosing the right bills. While you can use any denomination, using a mix of denominations can make your bouquet more visually interesting. Consider using crisp, new bills as they are easier to fold and hold their shape better.
Folding the Bills
When it comes to folding the bills, there are many different methods you can use. One popular method is the accordion fold, where you fold the bill back and forth until it resembles an accordion. This makes a fan-like effect that can be quite striking. Another option is the flower fold, where you fold the bill into a shape that resembles a flower. This requires a bit more skill, but the result can be quite impressive.
Securing the Bills
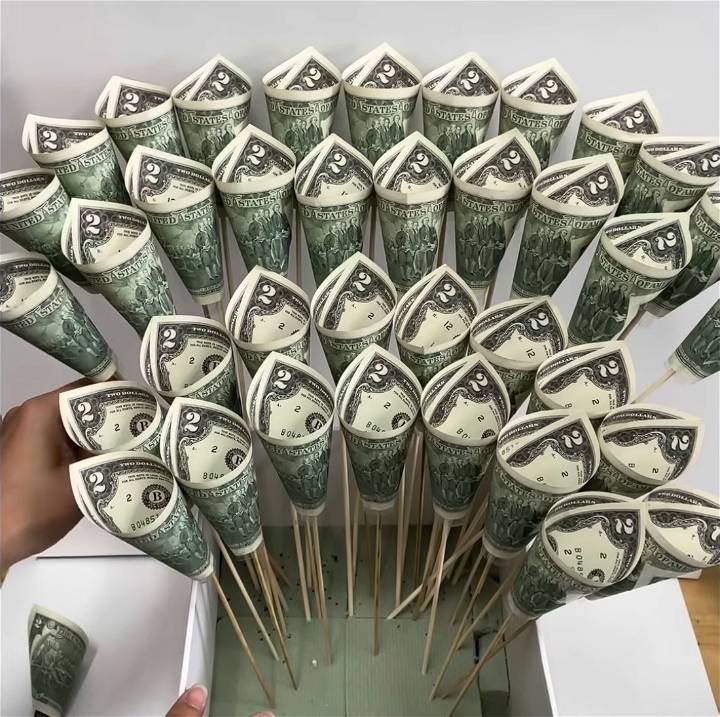
Once you've folded your bills, you'll need to secure them to the skewers. You can do this using clear tape or a hot glue gun. Be sure to attach the bills securely so they don't fall off, but also be careful not to damage the bills in the process.
Arranging the Bouquet
When arranging the bouquet, consider varying the heights of the bills to make a more dynamic look. You can also add decorative elements such as ribbon, fake leaves, or even glitter to make your bouquet stand out.
The most important thing is to have fun and let your creativity shine. With these tips and tricks, you're well on your way to making a stunning DIY money bouquet.
Variations on the Basic Money Bouquet
Making a money bouquet is a fun and creative way to give a gift. But who says you have to stick to the traditional design? Here are some variations on the basic money bouquet that can add a unique twist to your gift.
Different Bill Denominations
One simple way to vary your DIY money bouquet is to use different bill denominations. This not only adds visual interest to your bouquet, but it also allows you to customize the value of your gift. For example, you could use $1, $5, and $10 bills to make a varied and visually interesting bouquet.
Adding Decorative Elements
Another way to add a unique twist to your money bouquet is to include decorative elements. This could be anything from colorful ribbons to sparkling glitter or even fake leaves. These elements can add color and texture to your bouquet, making it even more eye-catching and memorable.
Themed Bouquets
Consider making a themed money bouquet. For example, if the recipient is a travel enthusiast, you could make a travel-themed bouquet with bills from different countries. Or if they're a fan of a particular color, you could use ribbons and decorations in that color to make a color-themed bouquet.
Personalized Messages
Adding personalized messages to your money bouquet can make it even more special. You could write a message on each bill or attach small notes to the skewers. This is a great way to add a personal touch to your gift and make the recipient feel extra special.
The most important thing is to have fun and let your creativity shine. With these variations, you're sure to make a money bouquet that's as unique and special as the person you're giving it to.
Frequently Asked Questions About Making Money Bouquets
When it comes to making money bouquets, there are often a few common questions that come up. Here are some of the most frequently asked questions and their answers.
1. What Type of Paper Bills Can I Use?
You can use any type of paper bills to make a money bouquet. This includes different currencies and denominations. Just remember, the larger the bill, the bigger the flower will be.
2. How Many Bills Do I Need?
The number of bills you need depends on the size of the bouquet you want to make. A small bouquet might only require 10-15 bills, while a larger bouquet could require 30 or more.
3. Can I Use Coins in My Money Bouquet?
While it's possible to use coins in your money bouquet, they can be difficult to secure and may make the bouquet heavy. It's generally easier to stick with paper bills.
4. How Do I Secure the Bills to the Stems?
You can secure the bills to the stems using clear tape or a hot glue gun. Just be careful not to damage the bills in the process.
5. Can I Add Other Elements to My Bouquet?
Absolutely! Feel free to add other elements to your bouquet, such as ribbons, fake flowers, or glitter. This can add a personal touch and make your bouquet even more special.
6. How Long Does It Take to Make a Money Bouquet?
The time it takes to make a money bouquet can vary depending on the complexity of the design and your skill level. However, most money bouquets can be made in a few hours.
7. Can I Make a Money Bouquet with Foreign Currency?
Yes, you can make a money bouquet with foreign currency. This can be a fun way to give a gift to someone who loves to travel.
8. How Can I Make My Money Bouquet More Personal?
Consider adding a personal note or card to the bouquet. You could also choose bills that have a special significance, such as the recipient's birth year or lucky number.
9. Can I Use Old or Damaged Bills?
While you can use old or damaged bills, crisp new bills will give your bouquet a cleaner and more professional look.
10. Is It Legal to Use Money in This Way?
Yes, it is legal to use money to make a money bouquet. However, it is illegal to deface or destroy money, so be careful not to damage the bills when making your bouquet.
The most important thing is to have fun and let your creativity shine. There's no right or wrong way to make a money bouquet, so feel free to experiment and make it your own.
Conclusion:
In conclusion, a DIY money bouquet presents a unique and thoughtful gift idea that combines creativity with a touch of practicality. From choosing the right bills to mastering various folding styles like the classic lotus, lily, and tulip, each step allows you to inject personal flair into your creation.
With our comprehensive guide on how to make a money flower bouquet, including materials needed, detailed instructions, and additional video tutorials, you have everything at your fingertips to craft a stunning centerpiece. Plus, our tips and tricks ensure your bouquet not only looks beautiful but lasts. Whether adding themed elements or personalized messages, this guide empowers you to make an unforgettable present that's sure to make an impact.


