Making your own monotub is an accessible and efficient way to cultivate mushrooms indoors. Whether you're interested in medicinal, edible, or gourmet mushrooms, a DIY monotub setup is budget-friendly, easy to build, and doesn't require extensive infrastructure. In this guide, we'll cover every step from setting up the tub to inoculating and caring for your mushroom culture, ensuring a fruitful first harvest.
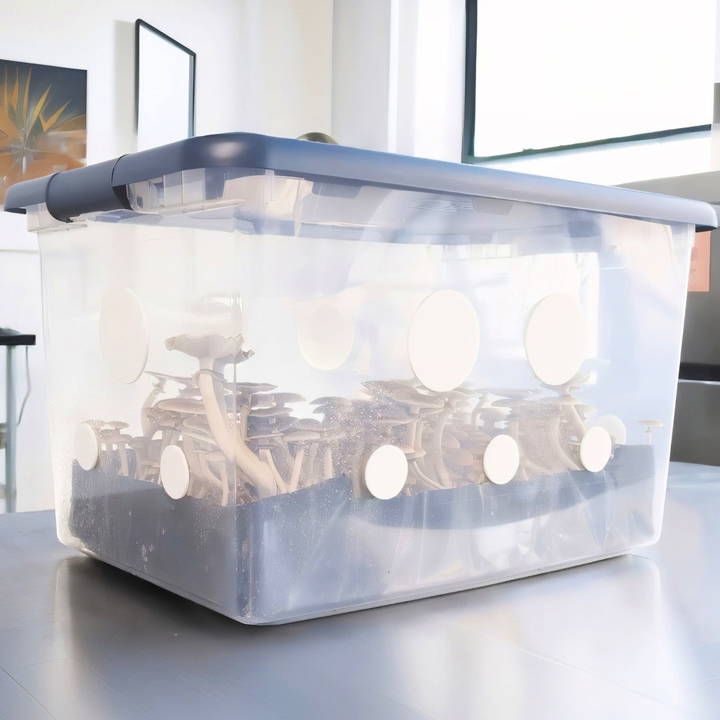
What is a Monotub?
A monotub is a self-contained growing chamber for mushrooms, made from a simple plastic tub modified with ventilation ports and filters. Initially popularized on online mushroom forums like Shroomery.org, monotubs have since become a staple for indoor mushroom cultivators. The method offers several benefits:
- Simplicity: The design requires minimal equipment and space.
- Low Cost: All essential materials are affordable, making it accessible for beginners.
- Efficiency: Monotubs allow for high-yield mushroom cultivation by maintaining an ideal growth environment.
This guide will lead you through building your own monotub, preparing mushroom spawn, and cultivating a successful first flush.
Step by Step Instructions
Learn how to grow mushrooms with step-by-step DIY monotub instructions. From building and inoculating to harvesting and storing for optimal results.
Step 1: Materials Needed for a DIY Monotub
To start, you'll need the following materials:
- Plastic Tub (64-Quart Size): Sterilite brand tubs are popular for their durability.
- Adhesive Filters (1- and 2-inch): These filters cover the ventilation holes to maintain airflow and control humidity.
- Power Drill and Hole Saw Bits (1- and 2-inch): Necessary for making holes in the tub for ventilation.
- X-Acto Knife: Useful for smoothing out any rough edges around drilled holes.
- Measuring Tape and Marker: For precise placement of ventilation holes.
- Liner Material (optional): A 3.5 mil plastic liner can help reduce side pinning and simplify cleaning.
Preparing Your Work Area
Before starting, clean and sanitize your workspace to prevent contamination. You'll be working with spores and cultures, which require a relatively clean environment for optimal growth.
Step 2: Building Your Monotub
Learn how to efficiently set up your monotub with steps on marking drill points, drilling holes, applying filters, and installing an optional liner.
Mark the Drill Points
- On each long side of the tub, measure 8.5 inches from the base and mark two drill points for the 2-inch holes. Each short side will have one 2-inch hole, spaced evenly from the base.
- Measure 4.5 inches up from the base to mark the drill points for the 1-inch holes, spaced about 5 inches apart along the sides.
Drilling the Holes
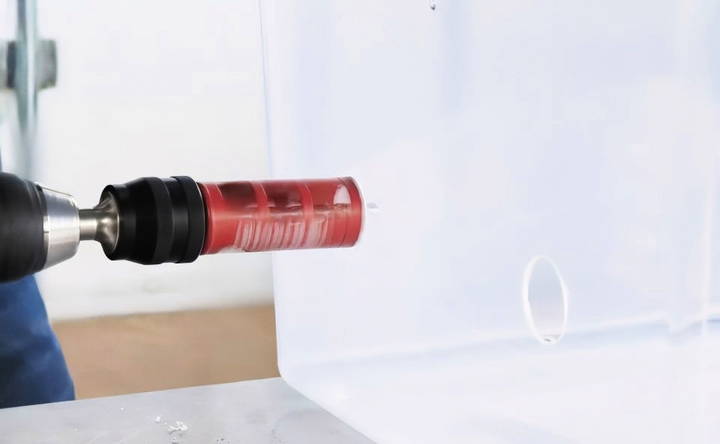
- Attach the 1-inch hole saw bit and drill holes at the marked points. Drill in reverse to reduce cracking, which can be common with standard forward drilling.
- Switch to the 2-inch bit for the larger holes, again drilling in reverse for a cleaner finish.
- Smooth out any rough edges with an X-Acto knife.
Applying Filters
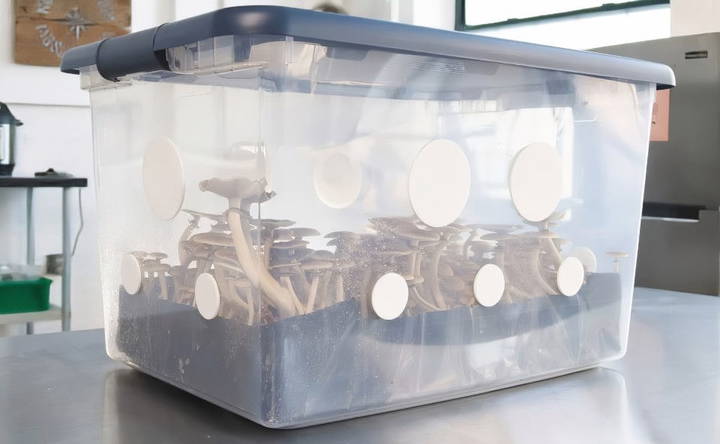
- Once the holes are drilled, apply the adhesive filters over them. These filters allow for fresh air exchange while maintaining humidity, a crucial factor for mushroom growth.
Installing the Liner (Optional)
- If you opt to use a liner, cut a square of plastic sheeting, leaving a few inches of overhang on each side.
- Place the liner inside the tub, folding and securing each corner with duct tape. This will help to contain the substrate and prevent mushrooms from fruiting along the sides.
Step 3: Preparing the Mushroom Spawn
To grow mushrooms in a monotub, you'll need mushroom spawn, which acts as the base for mycelium growth. There are two main options:
- Liquid Culture Syringe: Contains live mycelium in a nutrient-rich solution, offering faster colonization and predictable results.
- Spore Syringe: Contains mushroom spores, which need to germinate and grow into mycelium. The results may vary as the spores combine genetic material randomly.
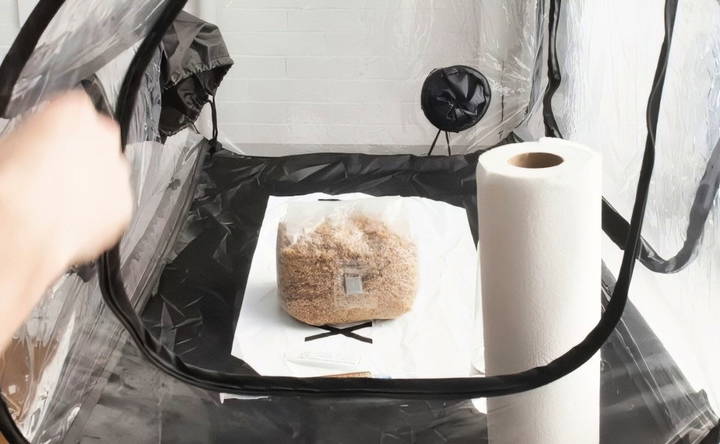
Using liquid culture syringes tends to be more reliable for beginners because of its controlled genetic traits, such as colonization speed and potency.
Making Grain Spawn from Liquid Culture
Learn how to make grain spawn from liquid culture. Sanitize your space, inject liquid culture into grain, and incubate for optimal results.
Sanitize Your Environment
- Sterilize your hands, tools, and work surfaces with 70% isopropyl alcohol to reduce the risk of contamination.
Inject Liquid Culture into a Grain Bag
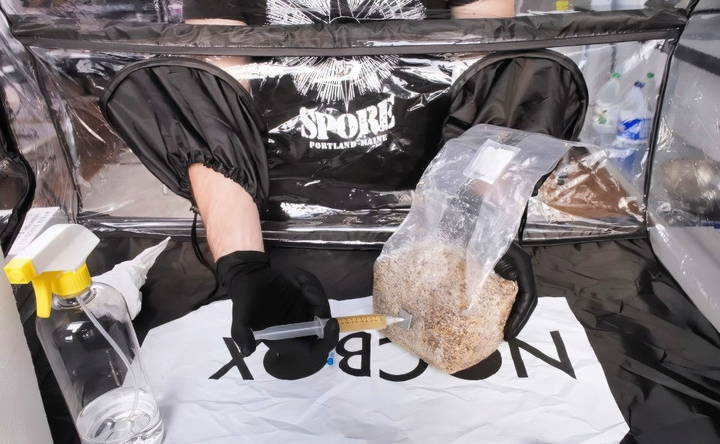
- Using a fresh needle, inject 2.5 to 5 cc of liquid culture into a sterilized grain bag. For a 3-pound bag, this amount will encourage healthy colonization.
- Once inoculated, shake the grain bag gently to distribute the culture evenly.
Incubate the Grain Bag
- Store the inoculated grain bag in a dark, temperature-controlled space (65-75°F). The mycelium will take about two to three weeks to fully colonize the grains, making a network ready for transfer into the monotub.
Step 4: Preparing the Monotub for Inoculation
After the grain spawn has colonized, it's time to prepare the monotub for inoculation.
Prepare the Substrate
- Mushrooms require a nutrient-rich substrate to grow. Options include manure-based substrates like North Spore's BoomrBag or wood-based substrates like WoodLvr, depending on the mushroom species.
- Place about 5 pounds of your substrate in the tub, ensuring it's loose for easy mixing with the spawn.
Mix the Spawn and Substrate
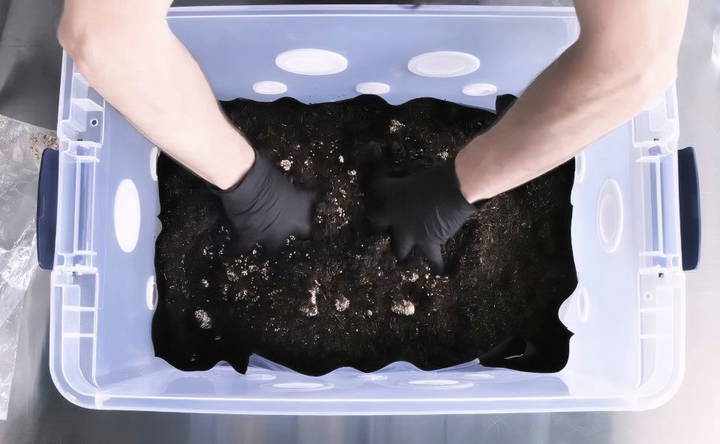
- Once the substrate is in the monotub, add the colonized grain spawn. Break up any clumps of grain to allow for even distribution throughout the substrate.
- Gently mix and flatten the spawn and substrate layer, aiming for a uniform layer. This helps promote even colonization and reduces the risk of “side pinning,” where mushrooms fruit along the sides instead of the surface.
Pack Down the Mixture
- Lightly pack down the substrate to eliminate large air pockets, which can contribute to side pinning. A compact, level surface will support healthy mycelium growth across the entire layer.
Seal and Incubate the Monotub
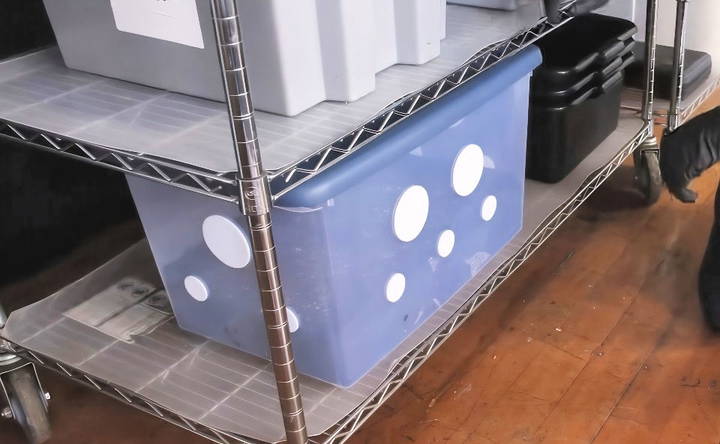
- Close the lid and store the monotub in a controlled environment (65-75°F). Like with the grain bag, avoid direct sunlight but ensure some ambient light, as mushrooms use light to orient their growth.
Step 5: Managing Humidity and Light for Fruiting
Humidity and light play a critical role in the successful fruiting of mushrooms. While mycelium thrives in moist conditions, excessive humidity or inadequate airflow can encourage contamination.
- Monitoring Humidity: The condensation inside the tub's lid and along the substrate surface signals proper hydration. If you notice the substrate drying out, a light misting may be needed.
- Light Requirements: Place the monotub in an area with indirect, ambient light. Although mushrooms do not need direct sunlight, some light helps stimulate fruiting and the production of natural pigments in certain mushroom species.
Step 6: Adding a Casing Layer for Fruiting
The casing layer, made from materials like coco coir, peat moss, or vermiculite, imitates the natural forest floor. This layer protects the mycelium and provides the ideal environment for pinning mushrooms, where initial growth begins.
- Prepare the Casing Layer: Hydrate the casing material by bringing water to a boil and pouring it over the dry coir. Let it cool, then squeeze out any excess moisture to reach “field capacity,” where it's moist but not dripping.
- Apply the Casing Layer: Spread about an inch of the casing layer evenly across the surface of the substrate. The casing helps retain moisture and promotes even fruiting across the tub.
If conditions are optimal, mushrooms should begin to pin and fruit within two to three weeks. If there are no visible pins by this time, consider adjusting moisture levels or lowering the room's temperature slightly to stimulate growth.
Step 7: Harvesting Your Mushrooms
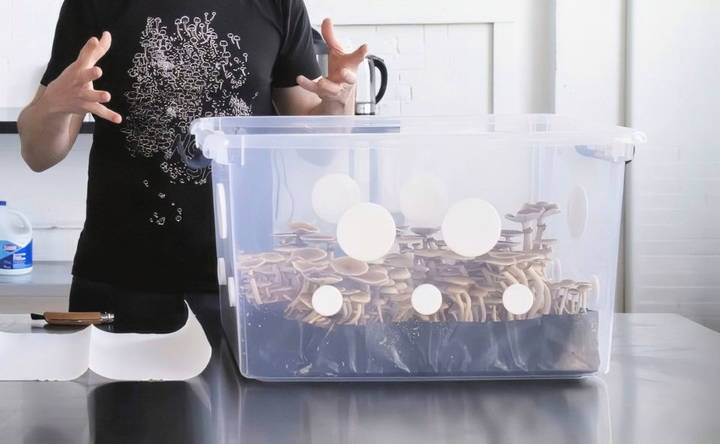
When mushrooms reach the appropriate maturity, it's time to harvest. The best time to pick them is just before the caps flatten out and start releasing spores. This keeps the mushrooms firm and dense, which enhances their texture and extends shelf life. Here's how to ensure an optimal harvest:
Inspect the Mushrooms for Harvest Readiness
- Look for clusters where the caps are still somewhat domed but fully formed. The goal is to harvest them before they release spores, which can cause mushrooms to lose some quality.
Use a Clean Knife
- A good-quality knife, like an Opinel knife, is useful for cleanly cutting mushrooms at their base. This helps reduce substrate disturbance and keeps everything tidy.
- Cut at the base of each mushroom or cluster, trimming away any excess substrate that may be attached.
Weigh and Store the Harvested Mushrooms
- Weighing your mushrooms post-harvest allows you to track yield and gauge the productivity of your monotube setup.
- Store fresh mushrooms in a paper bag in the refrigerator, which will maintain their freshness for several days. Alternatively, for long-term storage, drying the mushrooms can preserve them for months.
Step 8: Drying and Storing Mushrooms for Long-Term Use
Mushrooms are composed of about 90% water, so drying is an effective way to extend their shelf life while preserving their potency and flavor. There are several methods for drying mushrooms, but a dehydrator is the most effective.
Using a Dehydrator
- Arrange the mushrooms in a single layer on the dehydrator tray and set it to a low temperature, usually around 110°F. Drying can take several hours depending on the size and thickness of the mushrooms.
Alternative Drying Methods
- You can also dry mushrooms using an oven set to the lowest temperature, though it's essential to keep an eye on them to prevent over-drying.
- If you live in a dry climate, air drying on a rack or in a well-ventilated area can also work, though it may take longer.
Storing Dried Mushrooms
- Once fully dried, store mushrooms in a cool, dark place in an airtight container with desiccant packets. Mason jars work well for this purpose.
- Properly dried mushrooms stored in this way can last for over a year without losing potency or quality.
Step 9: Preparing for Additional Flushes
Mushrooms in a monotub can produce multiple flushes, or harvests, before the substrate is depleted. With each flush, however, the yield tends to decrease. To encourage more flushes, follow these steps:
Rehydrate the Substrate
- After each flush, lightly mist the surface of the substrate. For a deeper rehydration, pour a small amount of water around the edges of the substrate to allow it to absorb moisture.
Dunking the Substrate (Optional)
- Some cultivators prefer to “dunk” the substrate by adding water until it partially submerges, allowing the substrate to absorb more moisture. This can take several hours. Just ensure that no standing water is left in the tub afterward to prevent mold growth.
Monitor Conditions for Ideal Growth
- Recheck the tub's ventilation and light conditions. Subsequent flushes may require additional misting to maintain humidity.
Step 10: Troubleshooting Common Issues
Indoor mushroom cultivation can come with a few challenges. Here's how to handle some of the most common problems you might encounter with a monotub setup.
Side Pinning
- Side pinning happens when mushrooms begin fruiting along the tub walls rather than on the substrate surface. It often occurs if the substrate pulls away from the sides as it dries, making an ideal microenvironment for pinning.
- Using a liner and maintaining consistent humidity can help prevent side pinning. A properly mixed substrate and casing layer also contribute to even fruiting.
Contamination
- Mold or bacteria can invade the tub if the environment isn't clean. Common contaminants include green or black mold, which can compete with the mycelium and ruin the batch.
- To reduce contamination risk, keep tools and hands sanitized, and work in a clean area. Should contamination appear, it's best to remove affected sections or start a new tub if contamination is widespread.
Slow or Stalled Growth
- If mycelium colonization or mushroom pinning slows, it may be due to low temperatures, lack of moisture, or inadequate airflow.
- Ensure the tub is stored in an area within the 65-75°F range and mist regularly to keep humidity levels stable.
Tips for a Successful Monotub Setup
- Choose the Right Mushroom Species: While nanotubes are versatile and can accommodate various mushroom species, some perform better in monotube environments than others. Species like Psilocybe cubensis (for those legally able to grow it), Oyster mushrooms, and Lion's Mane are all excellent choices for a beginner setup.
- Maintain Consistent Hygiene: Maintaining a sterile environment from start to finish is essential to prevent contamination. Regularly disinfect tools, hands, and workspace surfaces with 70% isopropyl alcohol.
- Be Patient with the Process: Indoor mushroom cultivation requires time and patience. It can take several weeks for the mycelium to colonize the substrate fully and an additional few weeks before the first flush of mushrooms appears.
Expanding Your Monotub Setup
Once you're comfortable with the basics, you can experiment with more advanced monotub setups that include automated humidity and air exchange systems. Automated systems can help optimize conditions for a broader variety of mushroom species and potentially increase yield.
Automating Humidity and Air Exchange
- Advanced monotubs like North Spore's BoomrBin feature modular systems for automated humidity and ventilation, allowing you to grow species with specific environmental needs.
- Automated setups can simplify care for beginners and experienced growers alike, making it easier to maintain optimal conditions without daily monitoring.
Using Supplemented Substrates
- For increased yields, consider enriching your substrate with supplements like coffee grounds or gypsum. These added nutrients can promote faster colonization and larger fruit bodies.
- Note that supplementation may also increase contamination risk, so maintaining clean practices is essential.
Conclusion: Growing Mushrooms with a DIY Monotub
Building and maintaining a monotub is an approachable and cost-effective way to cultivate mushrooms indoors. With a few simple materials and a bit of care, you can enjoy multiple flushes of fresh mushrooms in your own home. From selecting the right spawn to harvesting and storing your yield, each step in the process contributes to a rewarding experience that combines science and nature.
Whether you're a beginner trying your hand at mushroom cultivation or an experienced grower looking to experiment with indoor methods, the monotub provides a versatile platform to explore mycology. As you gain experience, you'll be able to refine your technique, experiment with new species, and even automate your setup for consistent, high-quality harvests.
FAQs About DIY Monotub for Mushroom Cultivation
Discover essential FAQs about DIY monotub for mushroom cultivation, covering setup, maintenance, and common issues for successful home growing.
If self-adhesive filters are unavailable, try alternatives like micropore tape or poly-fil (synthetic pillow stuffing) taped over the holes. Both options can work effectively for air filtration in monotubs.
Yes, you can use a ready-to-grow fruiting block directly in the monotub. This eliminates the need for additional substrate mixing but may reduce yield compared to using a specific substrate.
If your substrate is properly hydrated, misting is unnecessary during colonization, as it can increase contamination risk. Misting is more beneficial once fruiting begins to maintain humidity.
For optimal results, cover the monotub’s holes with filters or plugs during colonization to maintain higher CO₂ levels. This minimizes contamination risks by reducing air exchange, which is especially important in the early stages.
If pins develop before adding a casing layer, don’t worry. A casing layer isn’t always necessary and can be skipped if the mushrooms are fruiting well. Simply monitor the environment to maintain humidity.
Yes, smaller tubs work fine and can follow the same principles of airflow and humidity control. Just adjust hole placement to maintain similar airflow for the size of the tub.
Use a thin, unscented plastic liner, such as a tall kitchen bag, which will cling to the substrate as it shrinks. Thick liners are less flexible, making spaces for side pinning.
Yes, after each grow, clean and sanitize the tub thoroughly to remove any residues or contaminants. Some growers even tape over the holes to retain higher CO₂ levels for the next colonization phase.
Generally, monotubs don't pose an air quality risk unless you're growing large quantities. If concerned, place the tub in a well-ventilated space or away from main living areas to limit spore exposure.
Work in a clean space, sterilize tools with alcohol, and avoid open-air inoculation to reduce contamination. A still-air box or “NocBox” can further protect the spawn from airborne contaminants.


