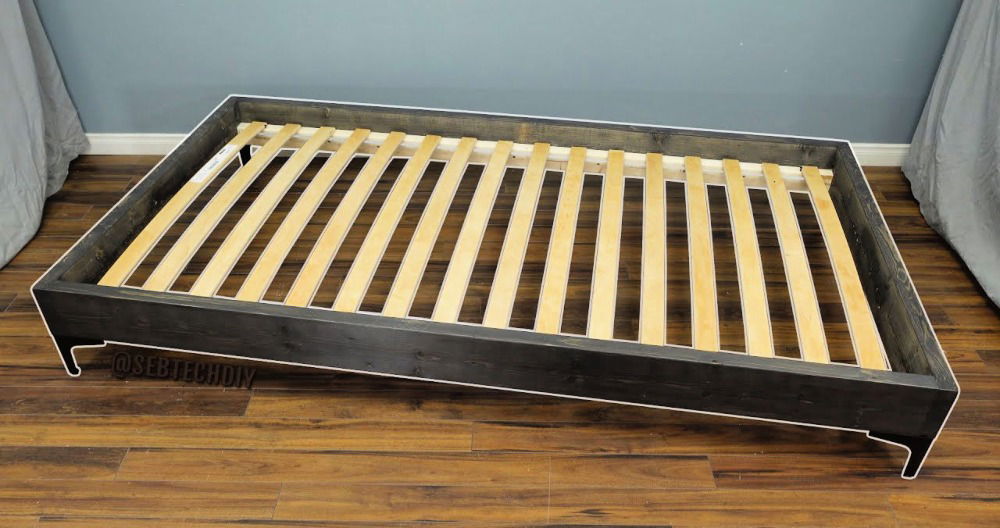
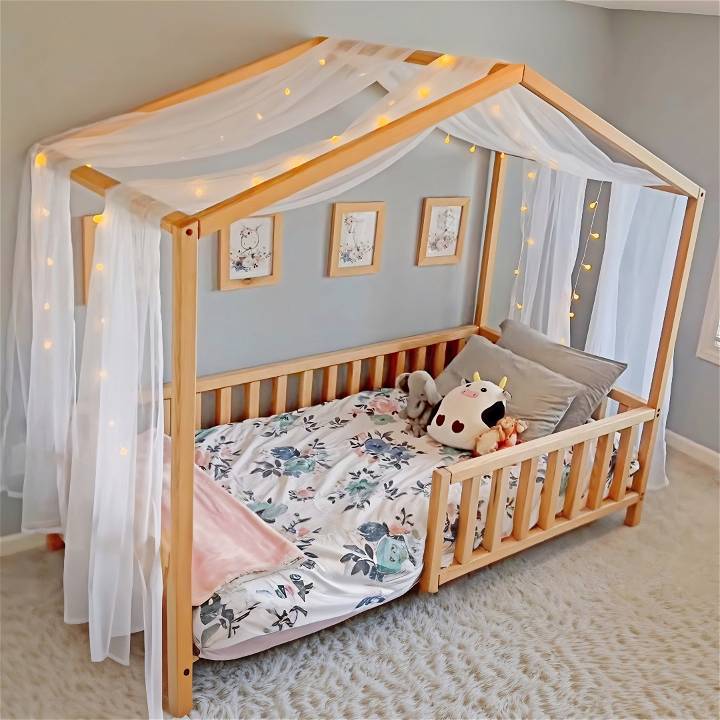
I have always been passionate about making unique spaces for my family, particularly when it comes to my children's bedrooms. When my daughter transitioned from her crib, I wanted to craft a special toddler bed that not only fit our family's aesthetic but also adhered to the Montessori principles we value. This led me on a journey to build a DIY Montessori Bed, a process I'm excited to share with you.
Choosing the Materials
The choice of white oak as the material for this project was deliberate. Its durability and beautiful grain were key factors in ensuring the bed would be both sturdy and appealing. While I initially aimed for 2x2-inch lumber, I settled on gluing two 1-inch pieces together. This approach reduced the tension typically found in thicker boards and resulted in a more stable and reliable stock.
Step-by-Step Guide to Building Your Montessori Bed
Learn how to build a Montessori bed for your child with our step-by-step guide. Build a safe and independent sleep space with ease.
Gathering Tools and Materials
Firstly, you'll need to source your materials. For this project, white oak was selected for its strength and aesthetics. Depending on availability, you may adapt by using other hardwoods or even softwoods if on a budget. Besides lumber, gather clamps, a miter saw, a jointer, and a planer for milling. Additionally, a table saw, doweling jig or pocket-hole jig, and sanding tools are required.
Milling the Lumber
Milling is the process of taking rough lumber and getting it to the dimensions you need for your project. If you don't have access to milling equipment, purchasing pre-milled 2x2s or adjusting with 2x4s could work. Ensure all pieces are cut to the precise lengths according to the plans provided.
Gluing and Clamping
Gluing two 1-inch boards together to achieve the desired thickness was a crucial step. Ensure you have enough clamps to hold the boards tightly together until the glue sets. This part of the process requires patience but is necessary for the structural integrity of the bed.
Cutting to Length and Angle
Using the miter saw and table saw, cut your lumber to the project's specifications. The angles, especially for the canopy part of the bed, need attention to detail. A crosscut sled could be particularly useful here for accuracy.
Assembly
Joints can be made using a doweling jig, pocket-hole jig, or even a Domino joiner if you have access to one. The choice largely depends on your budget and the tools at your disposal. Each connection point in the frame and canopy should be measured precisely to ensure the bed assembles correctly.
Sanding and Finishing
Sanding is critical, especially for a child's bed. Ensure all edges are rounded and smooth to the touch to prevent splinters. I chose boiled linseed oil for a finish because it enhances the wood's natural beauty, but a polyurethane finish could be more practical for easier cleaning and durability.
Choosing the Right Mattress for Your Montessori Bed
When it comes to making a cozy and functional Montessori bed, choosing the right mattress is essential. A quality mattress not only ensures comfort but also supports your child's overall well-being. Let's dive into the key considerations for selecting the perfect mattress for your toddler's floor bed.
1. Firmness Matters
- Avoid overly soft mattresses: For infants, opt for a firm mattress that provides adequate support for their developing spine and neck. As your child transitions to a toddler bed, a medium-firm mattress strikes the right balance between comfort and stability.
2. Correct Size and Fit
- Match the mattress to your bed frame: Ensure that the mattress fits snugly within the Montessori bed frame. Measure the frame dimensions and choose a mattress accordingly. Remember, you can always compare exact measurements to find the perfect fit.
3. Thickness Considerations
- Thicker isn't always better: While thicker mattresses are popular for floor beds, thinner ones work equally well. If you opt for a thinner mattress, consider placing a carpet or an insulation pad underneath. Thinner mattresses also keep your child closer to the floor, ensuring safety even if they roll off during sleep.
4. Hypoallergenic and Breathable
- Prioritize hypoallergenic materials: Most modern mattresses are designed to be hypoallergenic, minimizing the risk of allergies or sensitivities.
- Breathability matters: Look for a mattress that allows air circulation. Proper ventilation ensures a fresh and comfortable sleep environment.
Common Children's Mattress Sizes for Montessori Beds
- Crib Size (52 inches x 28 inches): Ideal for infants transitioning to a floor bed.
- Twin Size (75 inches x 39 inches): Suitable for toddlers and older children.
- Full Size (75 inches x 54 inches): Many Montessori parents prefer this size for consistency and ample space during sleep.
Recommended Mattress:
- Graco Premium Foam Mattress (Crib Size)
- Firmness: Firm
- Thickness: 5 inches
- This mattress provides excellent support and fits perfectly in Montessori bed frames.
A Montessori bed is more than just a wooden frame—it's a cozy haven where your child can explore, rest, and grow. Prioritize comfort, safety, and quality when choosing the mattress, and watch your little one thrive in their Montessori sleep space!
Building a Sensory-Friendly Environment for Your Montessori Bed
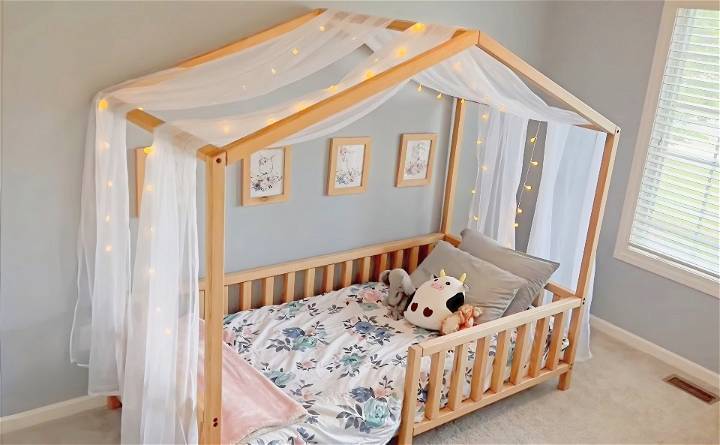
A Montessori bedroom isn't just a place to sleep—it's a sanctuary where your child's senses come alive. By thoughtfully designing the space, you can build a sensory-rich environment that nurtures their development and fosters a sense of calm. Let's explore how to make your child's Montessori bed area a sensory haven:
1. Natural Materials and Textures
- Soft Rugs and Blankets: Lay down a soft rug or blanket near the bed. Natural fibers like cotton or wool provide tactile comfort and warmth. Opt for soothing colors that invite relaxation.
- Wooden Elements: Choose sturdy, non-toxic wooden furniture for the room. Smooth wooden surfaces engage the sense of touch and build a warm ambiance.
2. Light and Darkness Balance
- Natural Light: Maximize natural light during the day. Position the bed near a window to allow sunlight to filter in. Sunlight not only supports circadian rhythms but also enhances mood.
- Darkened Naps: For daytime naps, build a cozy nook by using blackout curtains or blinds. A darkened environment encourages restful sleep.
3. Temperature Comfort
- Warm and Cozy: Maintain a comfortably warm room temperature. Consider adding lightweight blankets or quilts for extra coziness during cooler months.
4. Sensory Play Area
- Playmat or Soft Rug: Provide a designated play area near the bed. A soft playmat or rug allows your child to explore toys comfortably.
- Low Toy Shelves: Arrange toys on low shelves within reach. Limit the number of toys to avoid overwhelm. Consider toy rotation to keep things fresh and engaging.
Remember, a Montessori bedroom is a canvas for sensory exploration. Keep safety in mind, eliminate potential hazards, and let your child's senses guide the design.
FAQs About DIY Montessori Beds
Discover all you need to know about DIY Montessori beds in this comprehensive guide. Get answers to all your FAQs and start building your own today!
1. What Is a Montessori Bed, and Why Choose One?
A Montessori bed is a low-to-the-ground bed designed for toddlers and young children. Inspired by the Montessori educational philosophy, these beds promote independence, freedom of movement, and a sense of ownership for the child. They encourage exploration and self-care.
2. How Low Should a Montessori Bed Be?
Ideally, a Montessori bed should be low enough for the child to climb in and out independently. Most designs place the mattress directly on the floor or use a low bed frame (typically around 6-8 inches high). The goal is to eliminate barriers and allow the child to access their bed effortlessly.
3. Is a Montessori Bed Safe for Toddlers?
When built and used correctly, Montessori beds are safe. Follow safety guidelines:
- Secure Fastenings: Ensure all screws and joints are tight.
- Rounded Edges: Sand down any sharp edges.
- Non-Toxic Finishes: Use child-safe paints or finishes.
- No Gaps: Eliminate gaps where little fingers could get stuck.
4. How Can I Build a Calming Sleep Environment?
Consider:
- Soft Textiles: Use soft rugs, blankets, and pillows.
- Dim Lighting: Install blackout curtains for daytime naps.
- Natural Colors: Choose calming, neutral colors.
5. When Should I Transition from a Crib to a Montessori Bed?
Around 18 months to 3 years old is a common transition period. Observe your child's readiness—when they show interest in climbing out of the crib or seeking independence, it's time to make the switch.
Remember, a Montessori bed isn't just furniture; it's a space where your child learns, grows, and feels empowered.
For more insights, explore these helpful resources:
- Montessori Up
- Autonomous Kids
- Play Skills Toys
Final Thoughts
Building this bed was not only a test of my woodworking skills but also a labor of love. Seeing the joy on my daughter's face when she first laid eyes on her new bed made all the effort worthwhile. I learned a few key lessons throughout this project, such as the importance of precise measurements and the value of patience when it comes to glue-ups and finishing.
I hope this guide empowers you to tackle your own DIY Montessori Bed project. It's a fulfilling endeavor that not only gives you a unique piece of furniture but also contributes to making a nurturing and beautiful space for your child to grow. Remember, the key to a successful project lies in careful planning, patience, and a bit of creativity.


