Making a DIY Morse Code bracelet is an exceptionally joyful and fulfilling endeavor. I embarked on this craft journey one weekend, and I was amazed at how such a personal and expressive piece of jewelry could be handmade with a few simple tools and materials.
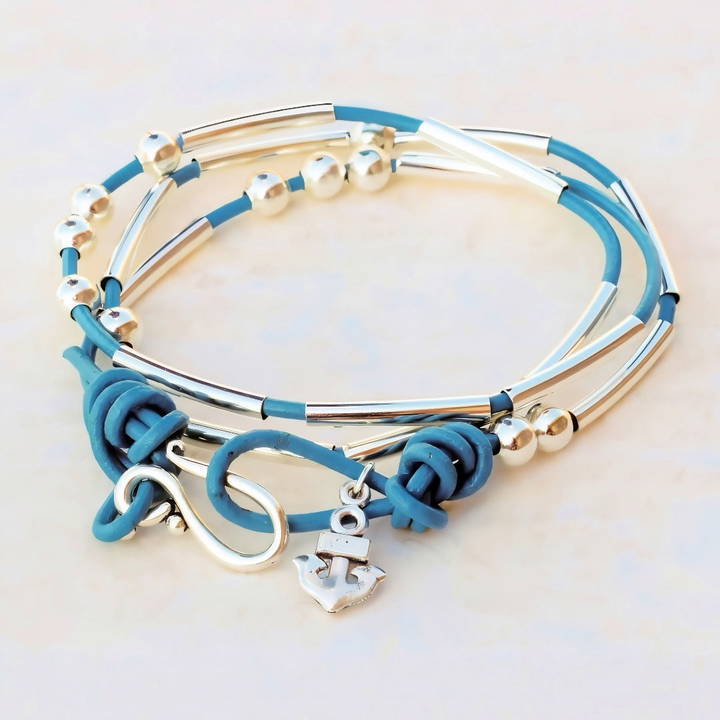
Let me guide you through each step of making your own Morse Code bracelet, which will uniquely convey a message close to your heart. This bracelet uses beads to spell out a message in Morse code—a secret language just for you!
Materials You'll Need
Before we start crafting, let's gather the essential materials. Each of these plays a significant role in making your bracelet both pleasing to the eye and durable.
- Leather Cording: A 39-inch piece of teal leather cording, 2 millimeters in diameter, is ideal. Its durability and flexibility make it perfect for jewelry.
- Round Beads (Dots): These beads are six millimeters in diameter with a two and a half millimeter hole. They represent dots in Morse code and add a delicate touch to the bracelet.
- Curved Tube Beads (Dashes): These measure 20 millimeters long with a three millimeter hole. Representing the dashes, they provide an elegant contrast to the round beads.
- S-Hook Clasp: A 20-millimeter silver clasp to secure your bracelet, ensuring it stays beautifully wrapped around your wrist.
- Anchor Charm and Jump Ring: The silver anchor charm adds a nautical theme to our bracelet, while the five-millimeter jump ring allows it to dangle freely and securely.
- Tools (Jewelry Pliers and Scissors): Two pairs of jewelry pliers will help in assembling the bracelet, and scissors will aid in cleanly trimming the leather cording.
- Silver Paint Pen: A fun tool for adding finishing touches, giving your bracelet a polished look.
Why These Materials?
Each material is carefully chosen for its functionality and aesthetic appeal. The leather cording provides a sturdy base with a unique texture. Silver beads are selected for their elegance, making an alluring shine against the teal cording. The S-hook clasp and jump ring ensure a secure and flexible fit, while the silver paint pen offers a seamless finish.
Step by Step Instructions
Learn to make a DIY Morse code bracelet. Follow detailed instructions from knotting to polishing for a perfect finish.
Step 1: Preparing Your Leather Cord
Begin by taking the leather cord and sliding it through the smaller loop of the S-hook clasp. Ensure you pull about five inches through, then bend it back to prepare for knotting.
Tying the Initial Knot
To securely attach the clasp, tie a double overhand knot. Begin by making a simple loop, passing the end of the cord under and then over, tightening it into a classic knot. For added security, loop the cord through one more time, forming the double overhand knot. This knot not only secures but adds a decorative touch to your bracelet.

Step 2: Planning Your Morse Code Message
Before stringing the beads, decide on a meaningful message. For my bracelet, I chose "Bon Voyage," symbolizing life's adventurous journey.
Making a Morse Code Cheat Sheet
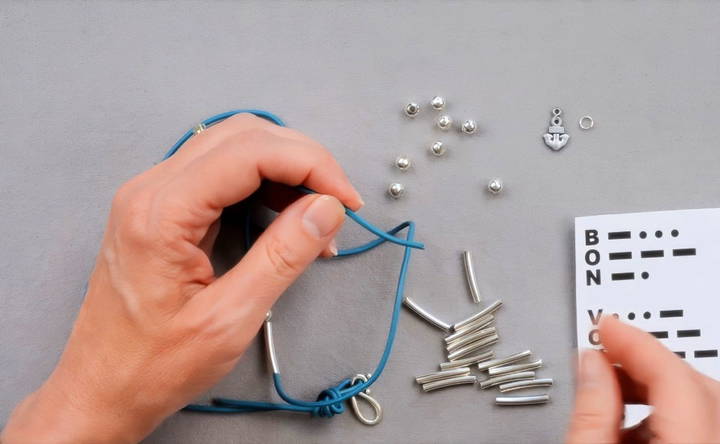
Print or sketch a cheat sheet mapping out each letter's Morse code sequence. This helps you accurately slide the beads in the right order. For example, 'B' in Morse code is dash-dot-dot-dot, meaning you'll start with one tube bead, followed by three round beads.
Step 3: Stringing the Beads
With your cheat sheet handy, start by stringing the beads on the leather cord. Use the tube beads for dashes and the round ones for dots, carefully following the Morse code sequence for your chosen message.
Tips for Stringing
- Ease of Threading: If threading becomes tricky, snip the cord's end at an angle to make a finer point for easier bead sliding.
- Pattern Check: Continuously check the bead pattern against your cheat sheet to ensure accuracy.
Step 4: Attaching the Anchor Charm
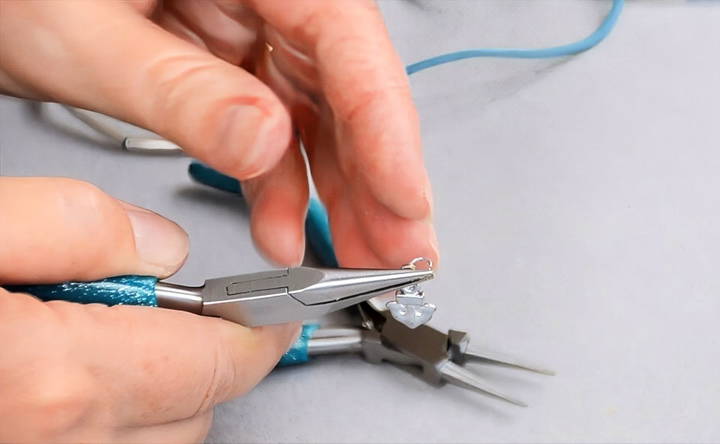
Once the beads are strung, it's time to adorn your bracelet with the anchor charm using the jump ring.
Opening the Jump Ring
Securely anchor the charm by opening the jump ring with two pliers. Hold the ring across from the cut, twist one side down (like opening a gate), slip on the anchor charm, and gently twist back to close, maintaining the round shape of the jump ring.
Step 5: Sizing Your Bracelet
It's vital to ensure your bracelet wraps around your wrist comfortably. Before making the final knot, wrap the bracelet around your wrist two or three times, marking the desired length.
Adjusting the Length
Remember, the knot will use some of the cording length, so mark an extra two inches from your desired fit. This will ensure the complete bracelet length accommodates the charm and clasp.
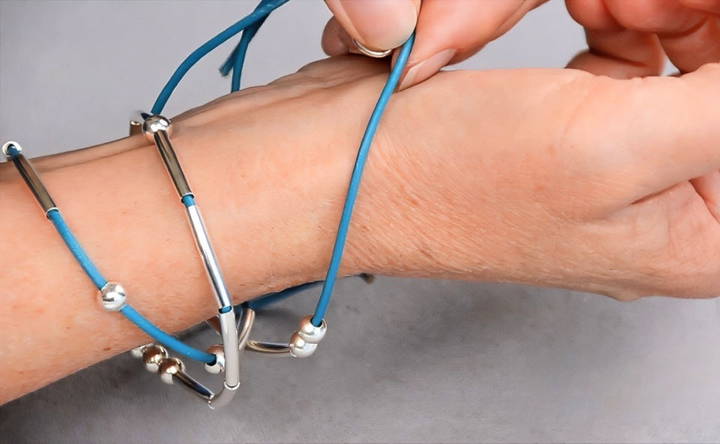
Step 6: Securing the Bracelet's Other End
With your desired length marked, attach the clasp on the other end by making another double overhand knot. Position the knot an inch away from where the charm lies on the cord to ensure a balanced aesthetic.
Finalizing the Knot
As before, make a loop, pass the leather around and through twice, and pull tight to secure, ensuring both ends are neat and symmetrical.
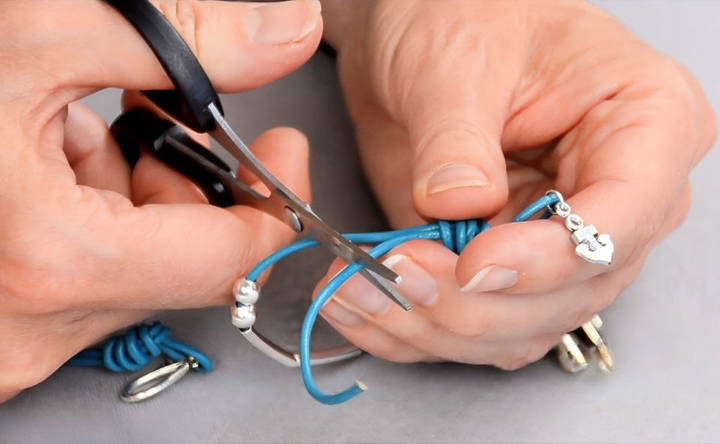
Step 7: Trimming and Polishing
Ready your scissors to trim excess cording, ensuring the ends hang equally and at the desired length. Then, touch up the ends using the silver paint pen to hide the natural leather color, offering a consistent silver finish.
Drying and Clasping
Allow the painted ends to dry fully to prevent smudging, and then feed the loop through the clasp for finished wear. Admire your craftsmanship!
Customization Ideas
Customizing your Morse code bracelet can make it unique and personal. Here are some easy and creative ideas to help you customize your bracelet:
Color Schemes
- Choosing Colors: Select colors that have special meaning to you. For example, you can use your favorite colors or the colors of your country's flag.
- Color Patterns: Make patterns with your beads. You can alternate colors or make a gradient effect by using shades of the same color.
Personal Messages
- Names and Initials: Encode your name or initials in Morse code. This makes the bracelet a personal accessory.
- Special Dates: Use Morse code to represent important dates, like birthdays or anniversaries. This adds sentimental value to your bracelet.
- Inspirational Words: Choose words that inspire you, such as “hope,” “love,” or “strength.” Encode these words in Morse code to carry a positive message with you.
Adding Charms
- Symbolic Charms: Add charms that have special meaning to you. For example, a heart charm for love or a star charm for guidance.
- DIY Charms: Make your own charms using clay or other materials. This adds a personal touch to your bracelet.
Different Styles
- Bead Types: Experiment with different types of beads, such as glass, wood, or metal. Each type of bead can give your bracelet a different look and feel.
- Thread Choices: Use different types of thread, like leather, nylon, or silk. The type of thread can change the bracelet's style and durability.
Inspirational Gallery
- Showcase Your Work: Share photos of your customized bracelets. This can inspire others and give them new ideas for their own creations.
- Social Media: Use a specific hashtag when sharing your bracelet on social media. This helps make a community of people who share the same interest.
By using these customization ideas, you can make a Morse code bracelet that is truly unique and meaningful.
Advanced Techniques
Taking your Morse code bracelet to the next level can be both fun and rewarding. Here are some advanced techniques to help you make a more intricate and personalized bracelet:
Adding Charms
- Symbolic Charms: Incorporate charms that hold special meaning to you. For example, a heart charm can symbolize love, while a star charm can represent guidance. Attach these charms between beads or at the ends of the bracelet.
- DIY Charms: Make your own charms using polymer clay or resin. Shape them into symbols or initials and bake or cure them according to the material's instructions. This adds a unique, handmade touch to your bracelet.
Different Bead Types
- Glass Beads: Use glass beads for a shiny, elegant look. They come in various colors and can add a touch of sophistication to your bracelet.
- Wooden Beads: For a more natural, rustic feel, opt for wooden beads. They are lightweight and can be painted or stained to match your desired color scheme.
- Metal Beads: Metal beads can give your bracelet a modern, industrial look. They are durable and can be found in various finishes, such as silver, gold, or bronze.
Thread Choices
- Leather Cord: Use leather cord for a sturdy and stylish bracelet. It adds a rugged look and is perfect for a more masculine design.
- Nylon Thread: Nylon thread is strong and comes in many colors. It is ideal for making intricate patterns and designs.
- Silk Thread: For a luxurious feel, use silk thread. It is soft and smooth, making it comfortable to wear.
Multi-Strand Bracelets
- Layering: Make a multi-strand bracelet by combining several single-strand bracelets. Use different bead types and colors for each strand to make a layered, textured look.
- Braiding: Braid multiple strands together for a more complex design. You can mix and match different threads and beads to make a unique pattern.
Incorporating Different Knots
- Sliding Knot: Use a sliding knot to make your bracelet adjustable. This is especially useful if you are making the bracelet as a gift and are unsure of the recipient's wrist size.
- Macramé Knots: Incorporate macramé knots for added texture and design. There are many tutorials available online to help you learn different macramé techniques.
Personalizing with Engraving
- Engraved Beads: Use engraved beads to add a personal touch. You can have names, dates, or special messages engraved on metal beads.
- Engraved Charms: Similar to engraved beads, you can also have charms engraved with meaningful symbols or words.
Adding Color with Paint
- Acrylic Paint: Use acrylic paint to add color to wooden or metal beads. This allows you to customize the beads to match your desired color scheme.
- Sealant: After painting, apply a clear sealant to protect the paint and make it more durable.
By incorporating these advanced techniques, you can make a Morse code bracelet that is not only beautiful but also deeply personal and unique.
Troubleshooting Tips
Making a Morse code bracelet can be a fun and rewarding project, but sometimes things don't go as planned. Here are some common issues you might encounter and how to fix them:
Common Mistakes
- Incorrect Morse Code Translation: Double-check your Morse code translation before you start beading. Use a reliable Morse code chart to ensure accuracy.
- Uneven Bead Spacing: If your beads are not evenly spaced, your bracelet might look messy. To fix this, use a ruler or a bead board to measure and space your beads evenly.
- Loose Knots: Loose knots can cause your bracelet to fall apart. Make sure to tie your knots tightly and securely. You can also add a drop of clear nail polish or glue to secure the knots.
Fixing Errors
- Wrong Bead Placement: If you realize you've placed a bead incorrectly, don't worry. Carefully unthread the beads until you reach the mistake, then correct it and re-thread the beads.
- Broken Thread: If your thread breaks while you're working, tie a secure knot to join the ends together. Make sure the knot is small and tight so it doesn't affect the bracelet's appearance.
- Bead Slippage: If your beads keep slipping out of place, try using a thicker thread or adding a small knot between each bead to hold them in place.
Preventing Future Issues
- Quality Materials: Use high-quality beads and thread to prevent breakage and wear. Cheap materials are more likely to cause problems.
- Practice Makes Perfect: If you're new to making bracelets, practice on a few trial pieces before starting your final project. This will help you get comfortable with the process and reduce mistakes.
- Work in a Clean Space: A clean, organized workspace can help prevent mistakes and make it easier to find and fix any issues that arise.
Additional Tips
- Use Bead Stoppers: Bead stoppers can help keep your beads in place while you're working. These small tools clamp onto your thread and prevent beads from sliding off.
- Check Your Work Regularly: Periodically check your work as you go. This will help you catch and fix mistakes early, before they become bigger problems.
- Ask for Help: If you're stuck on a problem, don't hesitate to ask for help. Online forums, craft groups, and tutorials can provide valuable advice and solutions.
By following these troubleshooting tips, you can overcome common challenges and make a beautiful, well-made Morse code bracelet.
FAQs About DIY Morse Code Bracelets
Discover answers to FAQs about DIY Morse code bracelets, including materials, techniques, and creative designs. Perfect for crafting enthusiasts.
First, decide on the message you want to encode. It could be a name, date, or meaningful word. Write down the Morse code equivalent of your message. Keep it short to maintain the bracelet’s aesthetic and wearability. Use a Morse code chart to help with this.
Here are some tips:
Contrast: Choose beads that are easily distinguishable from each other.
Bead size and shape: Smaller beads make a delicate bracelet, while larger beads make a statement piece.
Durability: Use good quality elastic cord to withstand wear and tear.
Personalization: Add colors or charms to make the bracelet more personal.
Yes, making a Morse code bracelet can be a fun and educational activity for children. Use larger beads to make it easier for small hands to handle. Supervise them with scissors and small parts to ensure safety. It's a great way to teach them about Morse code and creativity.
To keep your Morse code bracelet in good condition:
Avoid water: Remove the bracelet before swimming, showering, or washing hands.
Store properly: Keep it in a jewelry box or pouch to prevent tangling and damage.
Clean gently: Use a soft cloth to wipe the beads and cord. Avoid harsh chemicals.
Check for wear: Regularly inspect the bracelet for any signs of wear and tear, especially the knots and clasp.
Absolutely! You can use various types of beads such as:
Glass beads: For a shiny and colorful look.
Wooden beads: For a natural and rustic feel.
Metal beads: For a sleek and modern appearance.
Gemstone beads: For a more luxurious and personalized touch. Mix and match different bead types to make a unique and stylish Morse code bracelet.
Embracing the Finished Product
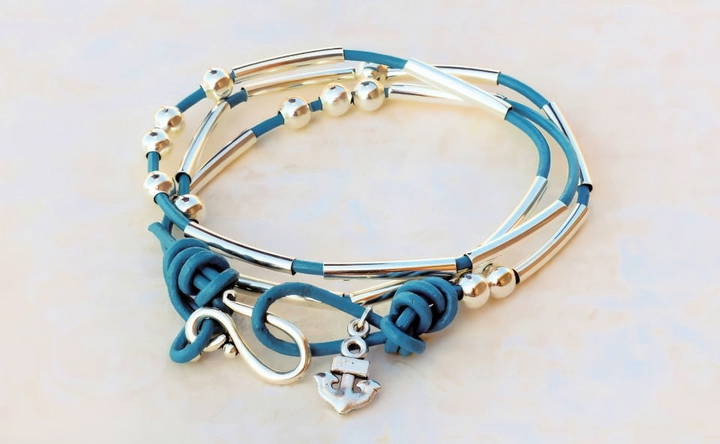
Congratulations! You've successfully crafted a DIY Morse Code bracelet rich with personal meaning and style. As you wear it wrapped around your wrist, feel pride in your creation—a silent language only you and those with the code understand. Whether it brings positive affirmations or celebrates an adventurous spirit, this bracelet serves as your unique personal talisman.
By following these steps, patience, and creativity, you've not only maked a meaningful piece of jewelry but also embraced an art that merges language, heritage, and personal expression. Whether gifting to a friend or keeping it as your secret charm, this bracelet will keep your message safe, snug on your wrist.
Now, you're not just wearing a bracelet; you're carrying your story and creativity with you wherever you go.


