Making a DIY mosaic mirror is a satisfying and creative way to turn broken mirrors, tiles, or even bits of old china into a stunning and unique decorative piece. If you're looking for a fun and artistic project that combines beauty with functionality, crafting a mosaic mirror is a perfect choice. With just a few supplies and a little patience, you can make a personalized piece of art that will enhance any room.
Here, we'll go over the process, tools, materials, and some valuable tips for making your own mosaic mirror. We'll also include expert tips to help you avoid common pitfalls and ensure your project turns out beautifully.
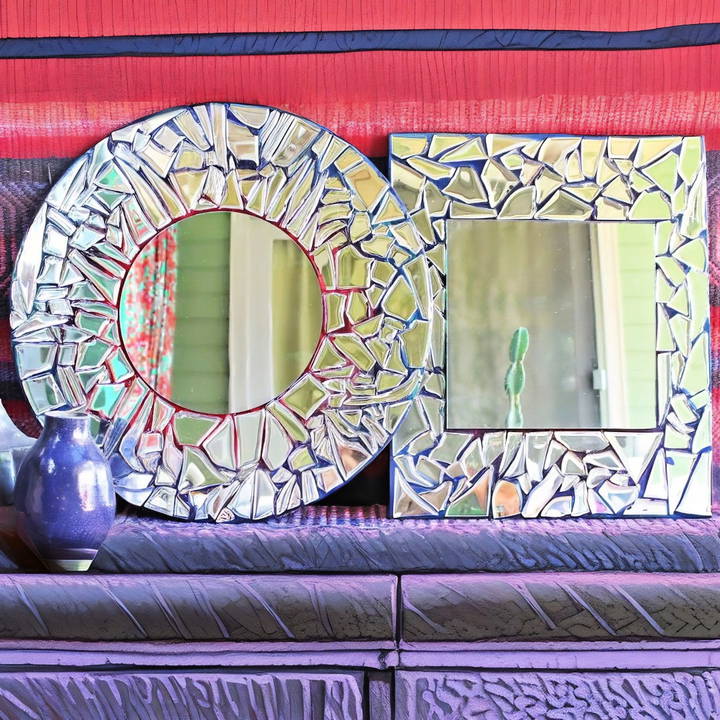
What Is a Mosaic Mirror?
A mosaic mirror is a mirror that has been decorated around its edges or across its entire surface using small, colorful pieces of glass, tile, or other materials. The individual pieces, often referred to as "tesserae," are arranged in patterns or images to make a visual effect that ranges from simple to highly intricate designs.
By using broken mirror pieces, this DIY project not only allows you to recycle and upcycle but also provides an outlet for creativity.
Materials and Tools You'll Need
Before you start, gather all the necessary materials and tools to make the process smoother. Here's a comprehensive list based on the steps outlined in the attached tutorial.
Materials:
- Broken mirror pieces (or any small tiles, ceramics, or glass pieces)
- Wooden or MDF board (as the base for your mirror)
- FamoWood Glaze Coat (or other epoxy resin, as suggested in the tutorial)
- Unicorn Spit gel stain (or any paint you prefer to color the background)
- Adhesive (to attach the mirror and tile pieces to the base)
- Grout (optional if you prefer a traditional mosaic look)
- Protective gloves (for handling sharp mirror pieces and resin)
Tools:
- Safety glasses and gloves (for protection from sharp edges)
- A pair of tile nippers or a hammer (to break larger pieces into smaller ones)
- Sponge (to wipe excess grout, if used)
- Small paintbrush (for applying color to the background)
- Spatula (for spreading the adhesive)
- Measuring tape or ruler (to measure your mirror and base)
- Soft cloth (for cleaning the surface once completed)
Optional:
- Acrylic sealer (to protect your finished piece)
- Rubbing alcohol (to clean the mirror and tiles)
Step by Step Instructions
Learn how to make stunning DIY mosaic mirrors with our easy step-by-step guide. Perfect for adding a personal touch to your decor!
1. Prepare Your Base
Choose a wooden or MDF board that will serve as the base for your mirror. This will need to be a size larger than your mirror so you have space for your mosaic pieces to surround it.
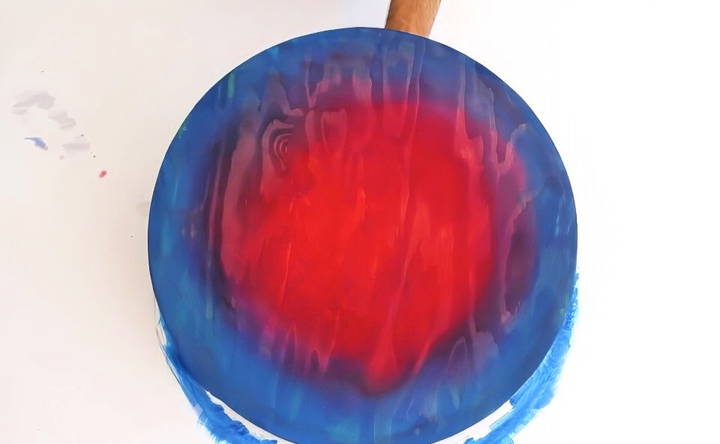
If the wood is raw, consider priming it with a base coat of paint. You can even add some color using Unicorn Spit gel stain, as mentioned in the tutorial, to make a vibrant background for your mosaic.
2. Cut and Arrange the Mirror Pieces
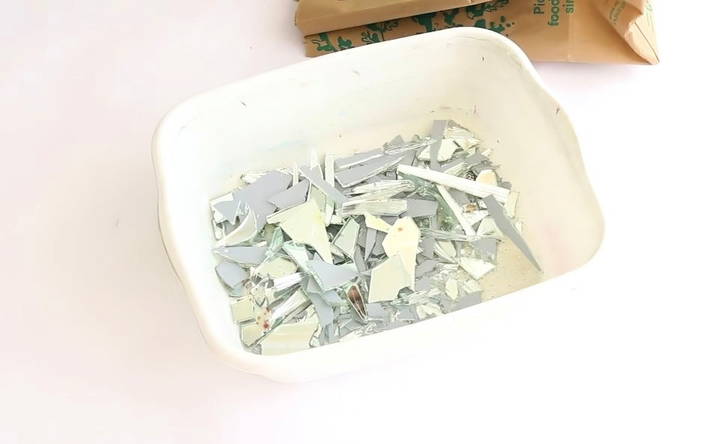
Use your hammer or tile nippers to carefully break the mirror into smaller pieces. Be sure to wear safety glasses and gloves to protect yourself from sharp shards. The pieces don't have to be uniform; part of the beauty of a mosaic is the irregularity of the fragments.
Lay out the pieces in a pattern that you like around the mirror. You can arrange them tightly for a more uniform look or leave gaps to make an abstract or fragmented design. As suggested in the tutorial, don't stress about the placement of the smaller pieces—you can always adjust the layout as you go.
3. Apply the Adhesive
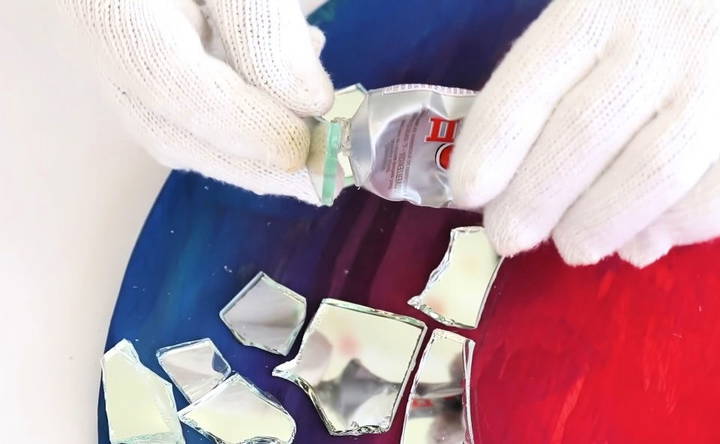
Once you're happy with the arrangement of your mirror pieces, it's time to glue them down. Using a strong adhesive, apply a small amount to the back of each piece, then press it firmly onto the board. Allow the adhesive to dry fully before moving on to the next step, usually for a few hours.
4. Fill in the Gaps (Optional)
If you prefer a traditional mosaic look, you can fill in the gaps between the mirror pieces with grout. Choose a grout color that complements the mirror and the design you want to achieve. Apply the grout with a spatula, pushing it into all the spaces between the pieces. Use a damp sponge to wipe away excess grout before it dries.
In the tutorial, instead of grout, the creator uses FamoWood Glaze Coat—a two-part epoxy resin. This gives the project a sleek, glossy finish and helps to smooth over any sharp edges left from the broken mirror. This is a fantastic alternative to traditional grout, especially if you're looking for a modern or high-gloss finish.
5. Seal and Smooth
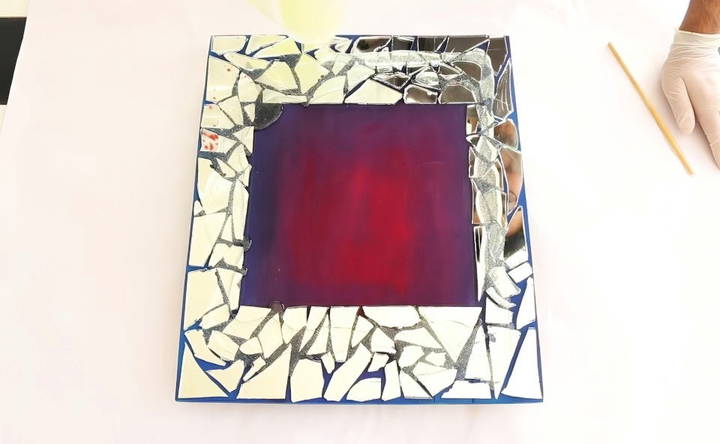
Once the adhesive and (optional) grout are dry, it's time to apply the epoxy resin. Mix the resin according to the instructions and pour it over the entire surface of your mosaic. Spread it evenly, ensuring that every mirror piece is covered and the surface is smooth.
Not only will this step give your project a professional-looking finish, but it will also help soften any sharp edges from the mirror pieces, making your DIY mirror safe to touch and handle. Let the resin cure overnight, keeping the piece covered to protect it from dust and debris while it dries.
6. Polish the Finished Product
Once the resin is fully cured, your mosaic mirror will have a beautiful, glossy finish. Clean any smudges or fingerprints from the mirror pieces using a soft cloth and rubbing alcohol. If you've used grout, this is the time to ensure all the tiles are wiped clean.
7. Display Your Masterpiece
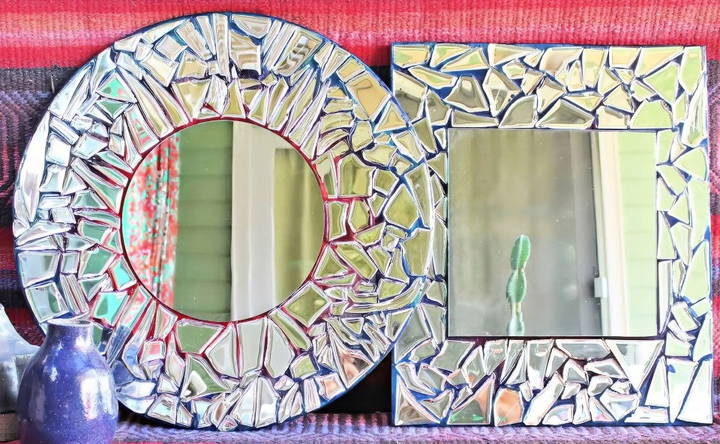
Your DIY mosaic mirror is now complete! Mount it on a wall, use it as a decorative tabletop accent, or even give it as a thoughtful handmade gift. The unique combination of mirror fragments and colorful tiles or glass pieces will reflect light beautifully, adding a touch of artistry to any space.
Design Tips and Variations
The beauty of a mosaic mirror is its versatility. Here are a few design tips and variations to consider:
- Color Coordination: When choosing tiles or glass pieces, think about the color scheme of the room where the mirror will be displayed. You can use colors that complement the existing decor or choose a contrasting palette to make the mirror a focal point.
- Mixed Materials: Don't limit yourself to broken mirrors and tiles! Incorporate different materials like seashells, beads, or old jewelry into your mosaic to make texture and visual interest. This eclectic mix of materials will add even more personality to your project.
- Shape Matters: Mosaic mirrors don't have to be rectangular or square. Try using a round or oval base for a softer, more organic look. If you're feeling particularly adventurous, make a custom shape using a jigsaw to cut your wooden base into something truly unique.
- Theme-Based Design: If you want to give your mosaic a specific theme, like a seaside or vintage look, choose tiles and colors that reflect that theme. For example, for a seaside-themed mirror, you could incorporate shells, blue and white tiles, and even small pebbles.
- Lighting Effects: Since mirrors reflect light, consider the lighting in the room when placing your mosaic mirror. A well-lit room will enhance the mirror's sparkle, making it a stunning decorative piece.
Conclusion
Crafting a DIY mosaic mirror is a creative and fulfilling project that allows you to upcycle broken materials into a stunning piece of art. With just a few tools and materials, you can make a one-of-a-kind mirror that reflects both light and your personal style. Whether you choose to keep it simple or go for a more intricate design, the process of making a mosaic mirror is both fun and rewarding.
Give it a try, and who knows—you might find yourself making more mosaic art for your home!
FAQs About DIY Mosaic Mirrors
Explore FAQs about DIY mosaic mirrors to find expert tips, materials needed, and step-by-step guides for a stunning home decor project.
A: It’s important to use an adhesive strong enough to hold heavy glass or ceramic pieces in place. A silicone-based adhesive or any product specifically designed for glass or tiles is best.
A: Resin gives the mirror a high-gloss, smooth finish, but you can skip this step if you prefer a matte look or want to use grout instead. Be aware that without resin, you’ll need to ensure all edges of the broken mirror pieces are smooth to avoid injury.
A: Yes! You can create a frameless mosaic mirror by arranging the mosaic pieces directly around a pre-cut mirror shape. Alternatively, use a frame and adhere the mosaic pieces directly onto it.
If you prefer not to use resin, traditional grout is an excellent option. It fills gaps between tiles or mirror pieces, though it can be a bit messier. Simply apply the grout, wipe off the excess, and allow it to dry. You’ll still achieve a mosaic look without the high-gloss finish that resin provides.
Yes! You can add materials like sea glass, broken jewelry, colored glass, or even old tiles. These elements add texture and color, giving your mosaic a unique, personalized touch.
To prevent resin from dripping off, tape the edges of your board and use a sponge brush to remove excess resin as you spread it. Keep the resin layer thin and manageable to minimize overflow.
Typically, adhesive materials like silicone won’t affect the mirror's backing. If used indoors, the mirror will likely last for many years. Outdoors, factors like exposure to weather can influence durability.
Yes, you can apply these techniques to a full-length mirror. Just make sure your base is strong enough to support the weight of the mirror pieces and any additional materials.
You can leave the wood as is, paint it, or stain it based on your preference. Adding color behind the mirror pieces enhances the depth of your design, but it's entirely optional.
Yes, but you'll need to be cautious. Tape off the edges of the mirror before pouring the resin to avoid damaging the center mirror. This technique ensures a neat finish without compromising the main reflective surface.
Using resin on vertical surfaces is tricky because it tends to run. For wall applications, stick to grout or tiles without resin to avoid drips. Resin is best used on flat, horizontal surfaces.


