If you've ever stumbled upon the enchanting world of cottagecore decor on Pinterest, you're probably familiar with moss mirrors—those rustic, fairy-tale-like pieces that instantly transport you to an old, forgotten forest. The first time I saw one, I was captivated. There’s just something magical about a mirror surrounded by vibrant, lush moss that speaks to the nature-loving cottagecore enthusiast in me. I couldn't resist the urge to create my own version.
Buying a pre-made moss mirror can be quite expensive, and frankly, where’s the fun in that? Crafting your own allows you to personalize every detail to suit your style, whether you lean more toward whimsical fairy core, cozy cabin core, or even a bit of spooky goblin core.
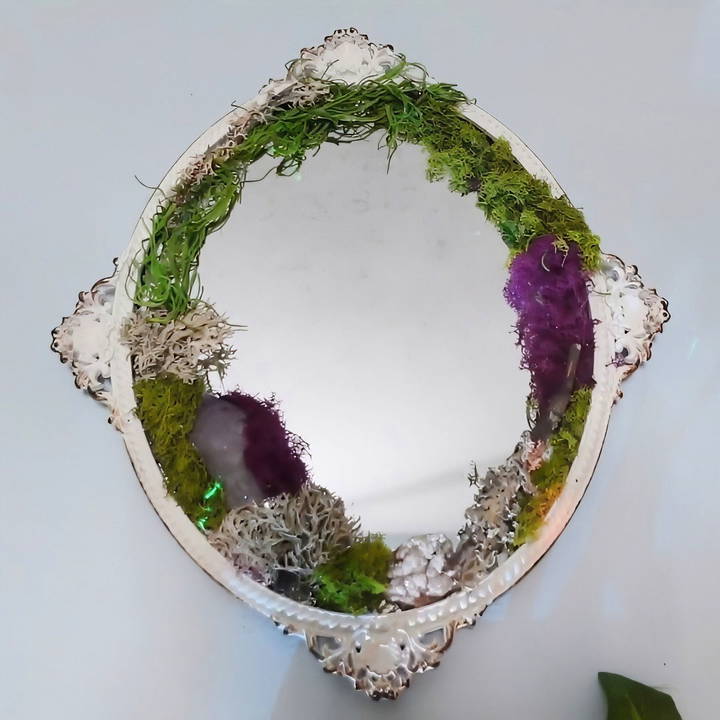
In this guide, I'll take you through the entire process of making your own DIY moss mirror, sharing my tips, tricks, and lessons learned along the way.
Materials You'll Need for Your Moss Mirror
Before diving into the crafting process, let's go over the materials you'll need and why they are essential:
- A Mirror: Choose a mirror with a frame that speaks to you. I opted for a vintage-style mirror I found on Amazon that had an antique, slightly worn look. The frame's aesthetic is crucial as it sets the tone for the final look—whether you're going for an enchanted forest vibe or an abandoned castle feel.
- Assorted Moss: The star of the show. I used a variety of real moss types, including sheet moss, reindeer moss, and Spanish moss. Real moss adds a more authentic, tactile feel to the mirror, but you could also use faux moss if you'd prefer something less messy and more durable. Each type of moss has a unique texture and color, providing depth and contrast.
- Hot Glue Gun and Glue Sticks: The trusty hot glue gun is essential for securing the moss to the mirror frame. It’s easy to work with, and the glue sets quickly, allowing you to build up layers of moss without having to wait around.
- Decorative Elements (Optional): Think about adding items like small crystals, fake mushrooms, or even something quirky like an old prosthetic eye for a goblin core twist. I chose an amethyst crystal for a bit of mystical flair, but in the end, decided against it. Sometimes, less is more.
- Scissors and Tweezers: These tools will help you trim the moss and place smaller pieces or delicate decorations exactly where you want them.
- Protective Surface: Things can get messy with loose bits of moss and hot glue strings. Lay down some newspaper or an old tablecloth to protect your workspace.
Step by Step Instructions
Learn how to make a stunning DIY moss mirror with our step-by-step instructions. Perfect for home decor enthusiasts looking for a unique touch.
Step 1: Prepare Your Workspace and Materials
Start by setting up a comfortable workspace where you have enough room to spread out all your materials. Trust me, you'll want easy access to everything because once you start, the creative process will have you reaching for this and that without much thought. Also, have a hot glue gun ready to go and warming up while you prep your materials.
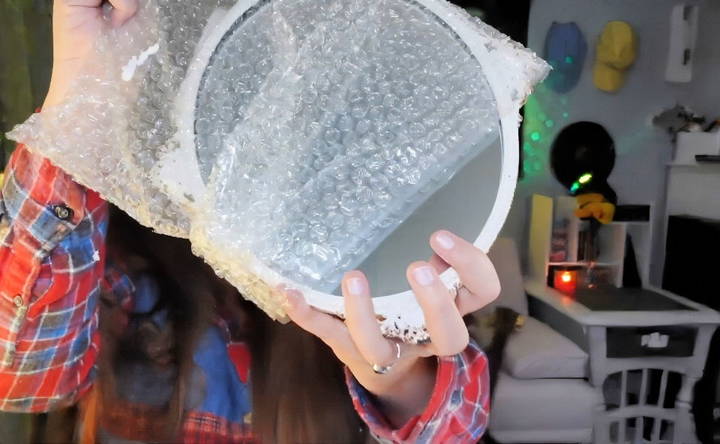
When I first unpacked the moss, I was surprised to find it was real. It brought a sense of authenticity to the project, but also a fair amount of messiness. Opening the bag cautiously is a good idea, as you don’t want tiny moss bits everywhere.
Step 2: Plan Your Design
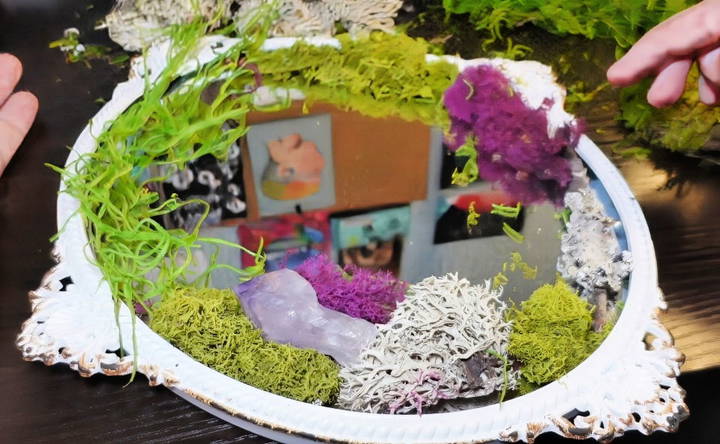
Before jumping in with the glue gun, lay out the moss around the mirror frame to visualize your design. This step is crucial. It allows you to play with different arrangements, layer textures, and determine where each type of moss looks best. I wanted a natural, "overgrown" effect as if the mirror had been sitting in an abandoned forest cabin for decades.
I found it helpful to take a picture of the layout once I was satisfied. This snapshot served as a reference, ensuring that when I started gluing, I could replicate the look I had envisioned.
Step 3: Start Gluing the Moss
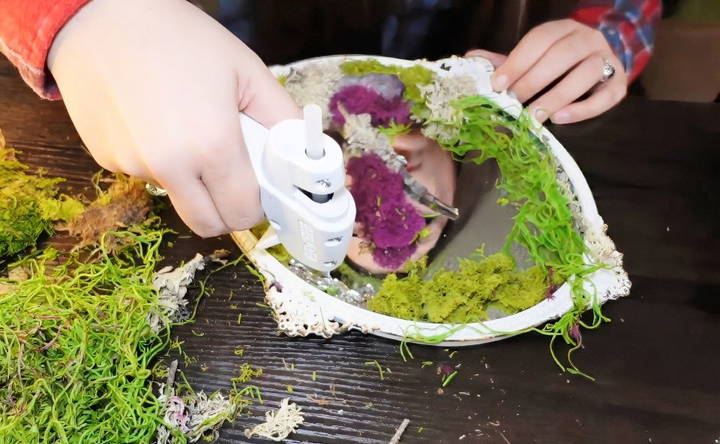
Begin gluing from one side of the mirror frame, working your way around. I started with the bulkier sheet moss as the base layer. You’ll want to apply a generous amount of hot glue to the frame and press the moss onto it, holding it for a few seconds until the glue sets. Be careful—the glue is hot, and I've burned my fingers more times than I'd like to admit!
After establishing a base with the sheet moss, I added in the more delicate reindeer and Spanish moss, tucking them into the nooks and crannies of the frame. This layering technique creates a more dynamic, natural look. The key is to vary the placement and not be too symmetrical—nature is wild and unpredictable, and your moss mirror should reflect that.
Step 4: Add Decorative Elements (Optional)
This step is where you can let your creativity run wild. Do you want your mirror to have a magical forest feel? Add small crystals or tiny fairy figurines. Feeling a bit dark and spooky? Consider incorporating an unusual object like a prosthetic eye, as I did. Though in the end, I opted not to use it, thinking it might be too much. Still, it’s an example of how far you can go with personalization. If you do add something unique, make sure it complements the moss and doesn't overpower it.
Step 5: Secure Everything and Test Stability
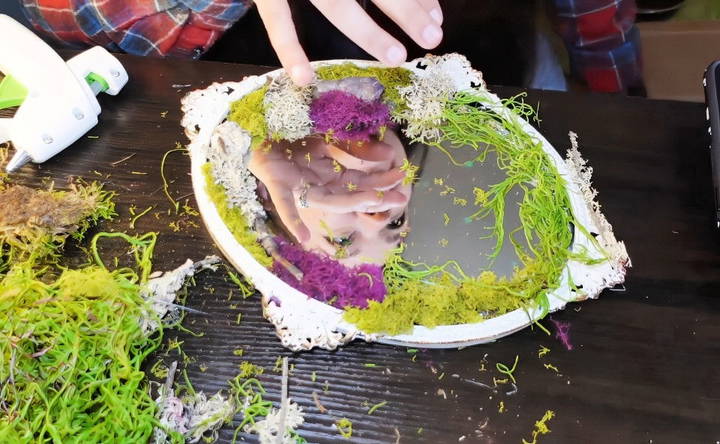
Once all your moss and any decorative elements are glued down, it’s time to test the stability of your work. I gently turned my mirror upside down to see if anything would fall off. This "flip test" is nerve-wracking, but it’s better to lose a piece now than later when it’s hanging on the wall. If any pieces are loose, reinforce them with more glue.
Step 6: Find the Perfect Spot to Display Your Moss Mirror
With your moss mirror complete, the next step is finding the perfect spot to display it. I initially hung mine by the door, but after some contemplation, I decided to move it above my dresser. It’s important to see how the mirror looks in different lighting and spaces in your room to get the full effect. Each environment will interact differently with the moss's texture and colors.
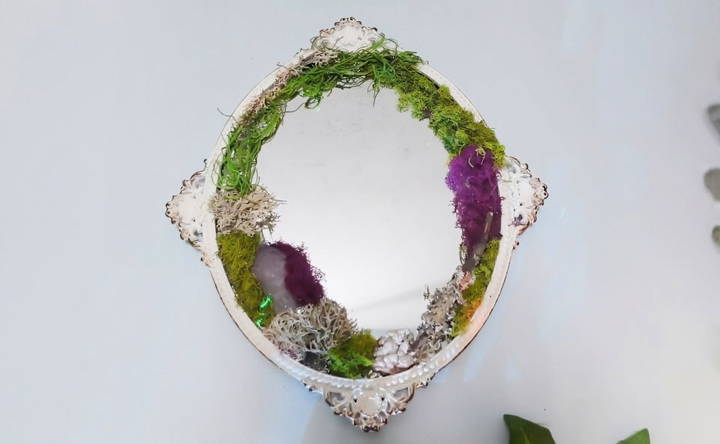
Step 7: Reflect and Enjoy
After hanging my moss mirror, I stood back and admired my work. It truly felt like a little piece of a forest had found its way into my room. There’s a unique satisfaction in creating something with your own hands, especially when it turns out better than expected. This project, like many others, reminded me that creativity is all about the process—experimenting, making mistakes, and discovering what works along the way.
If you’re feeling inspired to make your own moss mirror, I say go for it! Don’t worry if it doesn’t look perfect or professionally made. The beauty of DIY is in the imperfections, the quirks that make it uniquely yours.
Creative Variations
Adding creative variations to your DIY moss mirror can make it unique and personalized. Here are some ideas to inspire you:
Seasonal Themes
- Spring: Use bright green moss and add small faux flowers like daisies or tulips. This will give your mirror a fresh, vibrant look.
- Summer: Incorporate seashells, small starfish, and sand dollars along with the moss. This creates a beachy, summer vibe.
- Autumn: Mix in dried leaves, small pinecones, and twigs. Choose moss in darker shades of green and brown to reflect the fall season.
- Winter: Add faux snow, small pine branches, and tiny ornaments. This will give your mirror a festive, wintery feel.
Personalization
- Initials: Use moss to create your initials or a short word on the mirror. This adds a personal touch and makes it a great gift.
- Favorite Colors: Dye the moss in your favorite colors or use colored faux moss. This can make the mirror match your room’s decor.
- Themed Decorations: Add elements that reflect your interests or hobbies. For example, if you love butterflies, add small butterfly decorations.
Artistic Designs
- Patterns: Create patterns with the moss, such as spirals, waves, or geometric shapes. This adds an artistic element to your mirror.
- Mixed Media: Combine moss with other materials like fabric, beads, or small stones. This can create a textured, multi-dimensional look.
- Frames: Use different types of frames to change the look of your moss mirror. A rustic wooden frame gives a natural feel, while a sleek metal frame adds a modern touch.
Functional Additions
- Hooks and Shelves: Attach small hooks or shelves to the mirror frame. This makes it not only decorative but also functional for hanging keys or small items.
- Lighting: Add LED fairy lights around the frame. This can make the mirror stand out and add a cozy ambiance to your room.
Eco-Friendly Options
- Recycled Materials: Use recycled or upcycled materials for the frame and decorations. This is not only eco-friendly but also adds a unique, rustic charm.
- Natural Elements: Incorporate natural elements like stones, bark, or dried flowers. This enhances the natural look and feel of the moss mirror.
Explore creative variations to make your DIY moss mirror unique. Experiment with themes, colors, and materials to suit your style and space.
Common Mistakes and How to Avoid Them
Creating a DIY moss mirror can be a fun and rewarding project, but there are some common mistakes that can occur. Here’s how to avoid them:
Using the Wrong Type of Moss
- Mistake: Using moss that is not suitable for indoor use or that requires soil.
- Solution: Choose preserved moss or reindeer moss, which doesn’t need soil or water. These types are ideal for indoor projects and require minimal maintenance.
Improper Adhesion
- Mistake: The moss falls off because it wasn’t properly attached.
- Solution: Use a strong adhesive like hot glue or a high-quality craft glue. Ensure the mirror surface is clean and dry before applying the glue. Press the moss firmly onto the glue and hold it in place for a few seconds to ensure it sticks well.
Overwatering the Moss
- Mistake: Watering the moss, thinking it needs regular watering like a plant.
- Solution: Preserved moss does not need watering. If you use live moss, mist it lightly with water once a week. Avoid soaking it, as too much water can cause mold and damage the mirror.
Ignoring the Mirror’s Surface
- Mistake: Not preparing the mirror surface before attaching the moss.
- Solution: Clean the mirror thoroughly with a glass cleaner to remove any dust, grease, or fingerprints. This ensures the adhesive bonds well with the mirror surface.
Uneven Moss Application
- Mistake: Applying the moss unevenly, resulting in a patchy appearance.
- Solution: Plan your design before you start gluing. Lay out the moss pieces on the mirror to see how they fit together. Trim any excess moss to create a uniform look. Apply the moss in small sections to maintain control over the placement.
Not Sealing the Edges
- Mistake: The edges of the moss start to peel away over time.
- Solution: After attaching the moss, seal the edges with a clear craft sealant. This helps to secure the moss and prevent it from peeling off.
Lack of Proper Lighting
- Mistake: Placing the moss mirror in a dark area where it doesn’t get enough light.
- Solution: Place the mirror in a well-lit area. If using live moss, ensure it gets indirect sunlight. For preserved moss, lighting is less critical, but good lighting enhances the overall appearance of the mirror.
Neglecting Regular Maintenance
- Mistake: Forgetting to maintain the moss, leading to a dull and lifeless look.
- Solution: Dust the moss mirror regularly with a soft brush or a can of compressed air. For live moss, mist it lightly as needed. Check for any loose pieces and reattach them promptly.
By being aware of these common mistakes and following these tips, you can create a beautiful and lasting DIY moss mirror.
FAQs About DIY Moss Mirrors
Discover everything you need to know about DIY moss mirrors in our FAQs, from materials to step-by-step instructions and maintenance tips.
Before you start adding moss, clean the mirror thoroughly to remove any dust or smudges. This ensures the glue adheres well. Lay out your moss and decorations to plan your design before gluing anything down.
Use a hot glue gun to attach the moss to the mirror. Apply the glue in small sections and press the moss firmly into place. Be careful not to burn yourself. It’s best to start from the edges and work your way in, overlapping pieces for a natural look.
Yes, you can use real moss, but preserved moss is recommended. Preserved moss is treated to maintain its color and texture without needing water or sunlight. This makes it easier to maintain and ensures it lasts longer.
A moss mirror requires minimal maintenance. Keep it out of direct sunlight to prevent fading. If dust accumulates, gently brush it off with a soft brush. Avoid using water or cleaning products on the moss.
Absolutely! Customizing your moss mirror can make it even more unique and personal. Here are some ideas for additional decorations:
Faux flowers: Add a touch of color and variety.
Mushrooms: Create a whimsical, forest-like appearance.
Butterflies: Enhance the natural, enchanted look.
Fairy lights: Add a magical glow, especially in low-light settings.
Twigs and branches: For a more rustic, woodland feel.
Feel free to experiment with different elements to match your style and preferences.
Final Thoughts: Embracing Creativity Without Fear
Crafting is a wonderful way to express yourself, and I believe everyone has a creative spark within them. Don’t let the fear of not being “good enough” hold you back. Whether it’s a moss mirror, a painting, or any other project you’ve been dreaming of, the most important thing is to start. Learn, explore, and enjoy the journey of creation.
If there’s another craft or DIY moss mirror project you’d like to see me tackle, let me know! I’m always on the hunt for new creative adventures to share.


