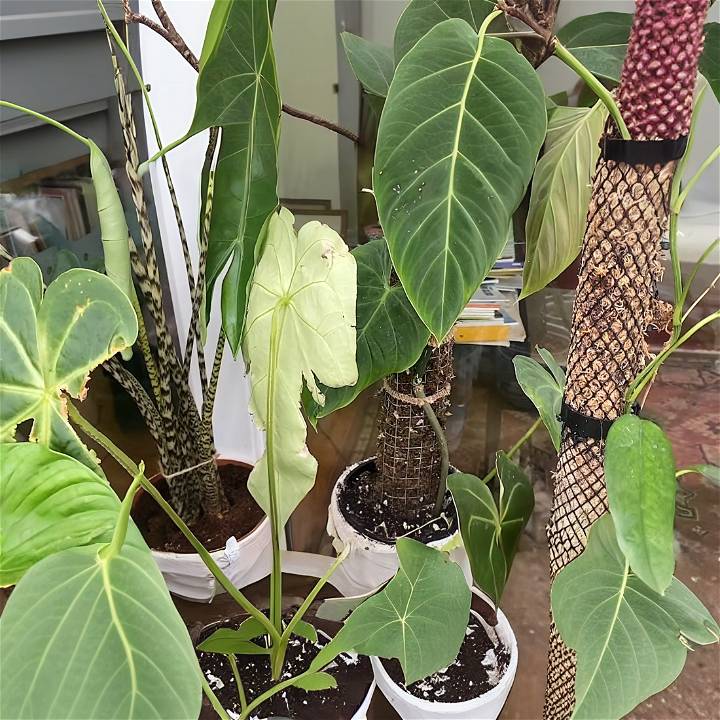
Moss poles, also known as moss sticks or moss totems, are a popular tool among indoor gardeners. They are typically used for climbing plants, providing them with a structure to latch onto and grow vertically. This not only helps to save space but also encourages the plant to grow larger and healthier.
Why Use Moss Poles?
Moss poles replicate the natural environment of many climbing plants. In the wild, these plants would use trees or other structures to support their growth. The moss pole mimics this by providing a surface for the plant's aerial roots to grip.
Using a moss pole can have several benefits:
- Supports Growth: Moss poles provide physical support for plants, allowing them to grow taller and stronger.
- Improves Health: They can improve the overall health of your plant by providing it with a more natural growing environment.
- Enhances Appearance: Moss poles can enhance the aesthetic appeal of your plants, giving them a more lush and full appearance.
Which Plants Benefit from Moss Poles?
Moss poles are particularly beneficial for climbing plants and those with aerial roots. Some common plants that benefit from using a moss pole include:
- Monstera Deliciosa: Also known as the Swiss Cheese Plant, this popular houseplant loves to climb and will benefit greatly from a moss pole.
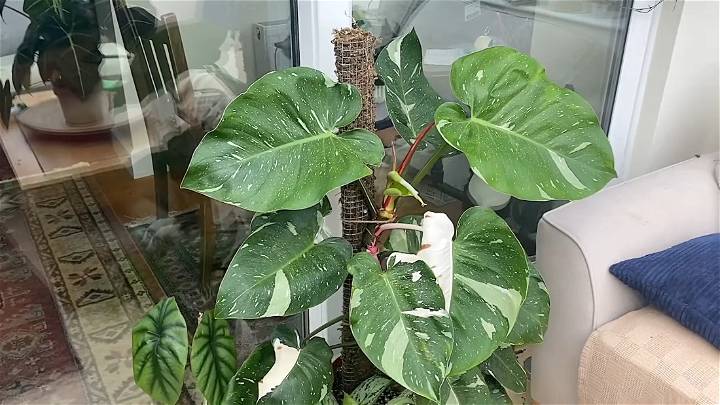
- Philodendron: Many varieties of Philodendron are climbers and will happily grow up a moss pole.
- Pothos: This easy-to-care-for plant is a vigorous grower and will quickly cover a moss pole.
The use of a moss pole is not limited to these plants. Any plant that likes to climb or has aerial roots can benefit from a moss pole.
How to Make a Moss Pole- Step by Step Guide
Making a DIY moss pole can drastically improve the growth and health of your climbing houseplants. A moss pole mimics the natural climbing environment for plants such as Philodendrons, allowing them to exhibit larger and healthier growth. This guide will take you through the steps to make your own moss pole with materials easily found at DIY stores.
Materials Needed
- Stainless steel mesh sheeting
- Wire cutters
- Cable ties
- Sphagnum moss (Alternatively, you may use a bamboo cane or a metal pole for reinforcement)
- Potting mix and a pot (for repotting, if necessary)
Step by Step Instructions
Learn how to make a DIY moss pole for your houseplants with this easy guide below:
Step 1: Cut Your Mesh to Size
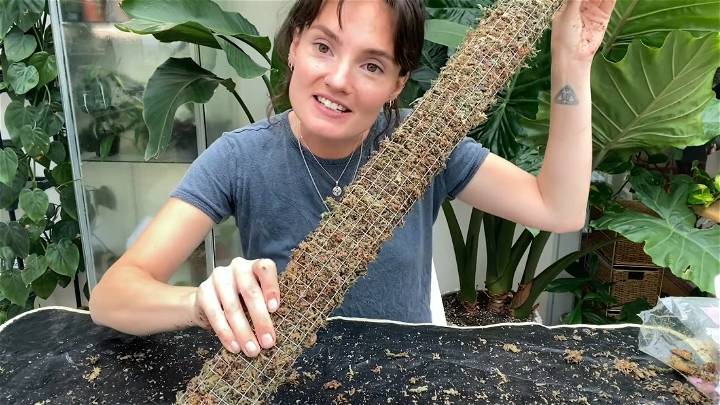
Using wire cutters, cut the stainless steel mesh sheeting to your desired size. The size of the mesh depends on your plant's size and how much you want it to climb. Ensure to handle the mesh carefully after cutting to avoid sharp edges.
Step 2: Shape the Mesh
Carefully bend the cut mesh sheeting into a cylindrical shape that will serve as the structure of the moss pole. The diameter of the cylinder should accommodate enough moss to benefit the plant.
Step 3: Fill With Moss
Before stuffing your moss pole, thoroughly hydrate your sphagnum moss. Next, carefully pack the moss within the cylindrical mesh, ensuring it's tightly packed to hold moisture effectively. The more densely packed, the better moisture retention will be.
Step 4: Secure the Structure
Use cable ties to secure the edges of the mesh, ensuring it doesn't unravel. If you're using a reinforcing core like a bamboo stick or metal pole, insert it before securing the mesh fully. Trim any excess from the cable ties for a neat finish.
Step 5: Repotting the Plant (Optional)
If your plant is outgrowing its current pot, consider repotting it along with installing the moss pole. Choose a pot that fits the moss pole and the plant comfortably. Place the moss pole in the center of the pot and then add your plant, ensuring its roots are well-covered with potting mix.
Step 6: Attach Your Plant
Tie your plant gently to the moss pole, guiding any aerial roots towards the moss. This encourages the roots to latch onto the pole, which provides additional support and nutrients to the plant.
Step 7: Watering Your Moss Pole
Keep your moss pole moist for the best results. Before watering, it can help to mist the pole with water to ensure the moss absorbs the water more effectively. Starting at the top and allowing water to trickle down ensures even moisture distribution.
Proper Care and Maintenance
Regularly mist your moss pole to maintain moisture, especially in drier environments. Monitor your plant's growth and attach new growth to the moss pole as needed to encourage climbing. As your plant grows, you may need to extend the moss pole by adding more mesh and moss.
Video Tutorial
For a step by step video tutorial on how to make an easy and effective moss pole for houseplants, watch this YouTube video: DIY Moss Pole for HUGE Growth.
It pairs well with this written guide, offering a visual complement to the instructions provided here, ensuring you can accurately follow along with both visual and textual guidance.
By following these steps, you can make a great environment for your houseplants, leading to better growth. Remember, patience and care are key for your plants' success. Nurture your green friends!
Safety Precautions
When making a moss pole, it's important to prioritize safety. Here are some safety precautions to keep in mind:
Handling Sphagnum Moss
Sphagnum moss, the primary material used in moss poles, can be a bit tricky to handle. It's often sold in a dried, compressed form that needs to be rehydrated before use.
- Wear Gloves: Always wear gloves when handling sphagnum moss. This not only keeps your hands clean but also protects them from any potential irritants.
- Avoid Inhalation: When rehydrating the moss, it can release small particles into the air. Avoid inhaling these by working in a well-ventilated area or consider wearing a mask.
Using Tools
You'll likely be using a variety of tools to make your moss pole, such as scissors or a knife to cut the moss and string, and possibly a drill if you're using a PVC pipe.
- Handle with Care: Always handle sharp tools with care. Keep them out of reach of children and store them safely when not in use.
- Use the Right Tool: Make sure you're using the right tool for the job. This not only makes the task easier but also reduces the risk of injury.
Working with Plants
Finally, remember to be gentle when attaching your plant to the moss pole.
- Be Gentle: Some plants can be quite delicate. Be gentle when attaching them to the moss pole to avoid damaging their stems or leaves.
- Monitor Plant Health: After attaching your plant to the moss pole, keep an eye on its health. If you notice any signs of stress or disease, take appropriate action.
Safety first! Now that we've covered the safety precautions let's move on to the step-by-step guide on how to make your own moss pole.
Common Mistakes to Avoid
When making and using a moss pole, there are some common mistakes that you should be aware of. Avoiding these can help ensure the success of your project and the health of your plants.
1. Not Soaking the Moss
One of the most common mistakes is not properly soaking the sphagnum moss before attaching it to the pole. Dry moss can be difficult to work with and may not provide the best support for your plants. Always remember to soak your moss in water for at least 20 minutes before using it.
2. Overpacking the Moss
While it's important to ensure that the moss is securely attached to the pole, overpacking it can lead to problems. Too much moss can restrict airflow and lead to overly wet conditions, which can promote the growth of mold or fungus. Aim for a balance - the moss should be secure but not overly dense.
3. Not Securing the Plant Properly
When attaching your plant to the moss pole, it's important to ensure that it's secure. However, be careful not to tie the plant too tightly, as this can damage the stems or leaves. Use a gentle touch and check regularly to make sure the plant is secure but not restricted.
4. Neglecting to Maintain the Moss Pole
Once your moss pole is set up and your plant is attached, it's important to maintain it properly. This includes keeping the moss moist and checking regularly for any signs of disease or pests. Neglecting to do so can lead to problems down the line.
Every plant and situation is unique, so what works for one might not work for another. Always monitor your plants closely and adjust your care routine as needed.
Care and Maintenance of Moss Poles
Once you've maked your moss pole and your plant is happily climbing, it's important to know how to properly care for and maintain your moss pole. Here are some tips to ensure your moss pole stays in top condition:
1. Keep the Moss Moist
The moss on your pole should be kept moist, but not soaking wet. This can be achieved by misting the moss with a spray bottle. The frequency of misting will depend on the humidity in your home, but a good rule of thumb is to mist it whenever the moss feels dry to the touch.
2. Monitor for Pests and Disease
Just like with any other part of your plant, it's important to regularly check your moss pole for signs of pests or disease. If you notice anything unusual, take action immediately to prevent further damage.
3. Replenish the Moss
Over time, the moss on your pole may start to break down or fall off. If this happens, simply add more moss to the pole. Remember to soak the new moss before adding it.
4. Support Your Plant
As your plant grows, it may need additional support. You can add more ties to secure your plant to the pole, but remember to be gentle and avoid damaging the plant.
5. Consider the Plant's Needs
Different plants have different needs. Some plants prefer a drier environment, while others prefer more humidity. Always consider the needs of your specific plant when caring for your moss pole.
A well-cared-for moss pole can support your plant for years to come.
FAQs About DIY Moss Pole
Get answers to all your DIY moss pole questions with this comprehensive FAQ guide. Learn how to make and maintain your own moss pole for your plants.
1. What is a Moss Pole?
A moss pole is a support structure used in gardening, particularly for climbing plants and those with aerial roots. It mimics the natural environment of these plants, providing a surface for them to grip and grow vertically.
2. Why Use a Moss Pole?
Moss poles provide physical support for plants, allowing them to grow taller and stronger. They also improve the overall health of your plant by providing it with a more natural growing environment.
3. How Do I Make a Moss Pole?
Making a moss pole involves wrapping sphagnum moss around a wooden dowel or PVC pipe and securing it with a string or fishing line. Always remember to soak your moss in water before using it.
4. Which Plants Benefit from Moss Poles?
Moss poles are particularly beneficial for climbing plants and those with aerial roots. Some common plants that benefit from using a moss pole include Monstera Deliciosa, Philodendron, and Pothos.
5. How Do I Attach My Plant to the Moss Pole?
You can attach your plant to the moss pole using plant ties or soft string. Be gentle when attaching your plant to avoid damaging its stems or leaves.
6. How Often Should I Mist My Moss Pole?
The frequency of misting will depend on the humidity in your home, but a good rule of thumb is to mist it whenever the moss feels dry to the touch.
7. What Do I Do If the Moss on My Pole Starts to Break Down?
If the moss on your pole starts to break down or fall off, simply add more moss to the pole. Remember to soak the new moss before adding it.
8. Can I Use a Moss Pole for Outdoor Plants?
While moss poles are most commonly used for indoor plants, they can also be used for outdoor plants that require support or like to climb.
9. How Long Does a Moss Pole Last?
The lifespan of a moss pole can vary depending on how well it's maintained. With proper care, a moss pole can support your plant for years.
10. Can I Buy a Pre-made Moss Pole?
Yes, pre-made moss poles are available for purchase at many garden centers and online. However, making your own can be a fun and rewarding DIY project.
Each plant and situation is unique, so what works for one may not work for another. Monitor your plants closely and adjust your care routine as needed.
Conclusion:
In conclusion, incorporating a DIY moss pole into your plant care routine can provide essential support for your climbing plants, promoting healthy growth and making a visually appealing display in your home or garden. Experiment with different materials and techniques to find what works best for your plants. Happy crafting!


